Category Archives: Projects

Making Rocket Components – The Capstone Experience

The entire educational experience in MECH and APSC is geared toward preparing for your capstone project. It feels like from the early MECH days, right up to and including capstone are focused on preparing us to work alongside a client to try and create something of value. For my capstone, I worked with UBC Rocket to help design the main parachute release mechanism for their sounding rocket. The things we missed out on by working with a UBC-specific client were quite quickly offset by the uniqueness of the experience itself.

A common method of triggering systems with high reliability is using pyrotechnic charges. I had never worked with explosives before or performed analyses regarding them, but more about that later! Capstone is a full eight-month project where we work with an actual client to figure out the scope and deliverables for the project. Fortunately, capstone is divided up into smaller segments to ensure that they are more manageable.

The early parts of the project were probably one of the most important phases of the project – figuring out the scope. A common trend I’ve seen with more open-ended problems is scope creep, which is when things get added to your to-do list that you didn’t initially agree to. To try and avoid this from happening to our team as well, we tried to meet with the client as often as we could during the earlier stages and kept them updated on every progress the team made over the first few weeks. Fortunately, we were able to avoid it through complete transparency with the client on what we can and cannot do along with recognizing what skillsets exist within them and which ones do not.

Now that we could work on the fun part of the project, it had two main functions- releasing successfully when signalled and carrying the weight of the rocket once it had been released. But as we started figuring out what concept alternatives we had, there was that all-familiar feeling that we are already weeks behind. Preliminary prototype testing results were due in about a week or so and we weren’t close to having a good set of concept alternatives, let alone having completed the WDM to make a proof of concept prototype of our leading concept. Once again we had to make sure rapid prototyping was rapid. We went on a team scavenger hunt to gather scrap materials for the prototype.
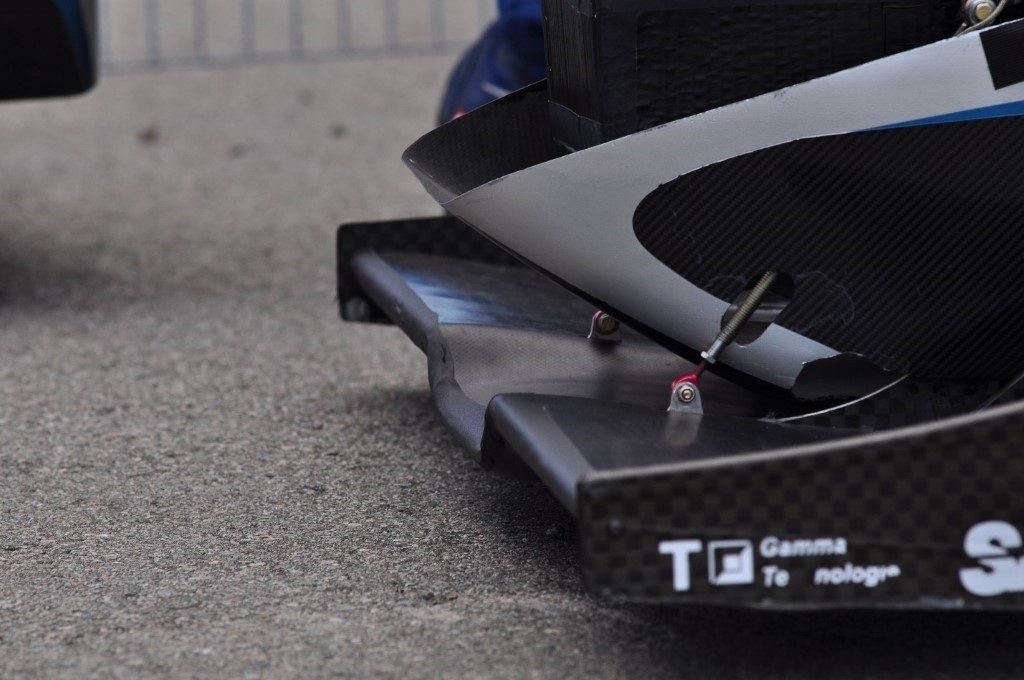
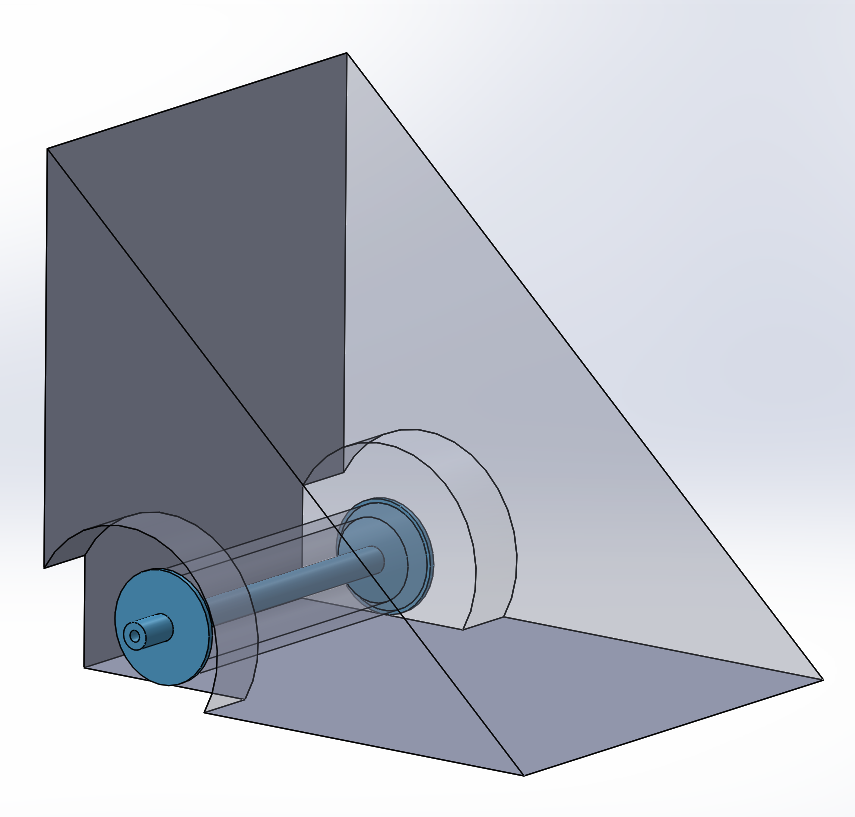
Prototype version 1

It was probably while machining the prototype for the first time did it the seriousness of our analysis hit me. We had chosen a type of machine called a tender descender while engaged using a small pyrotechnic explosion, so basically our very rapid prototype had to be structurally sound enough to contain a small explosion as intended to ensure that no one gets hurt. It was a weird feeling because I hadn’t worked with anything before that could potentially affect someone’s safety and well-being if my calculations were not done properly. It is an important thing to realize the impact our work sometimes has and not only on ourselves but also those who would be interacting with it at the end of the day. Well the prototype did end up working, but during testing the pressure seal on our concept was not satisfactory so we ended up using bubblegum to seal the pressure chamber.
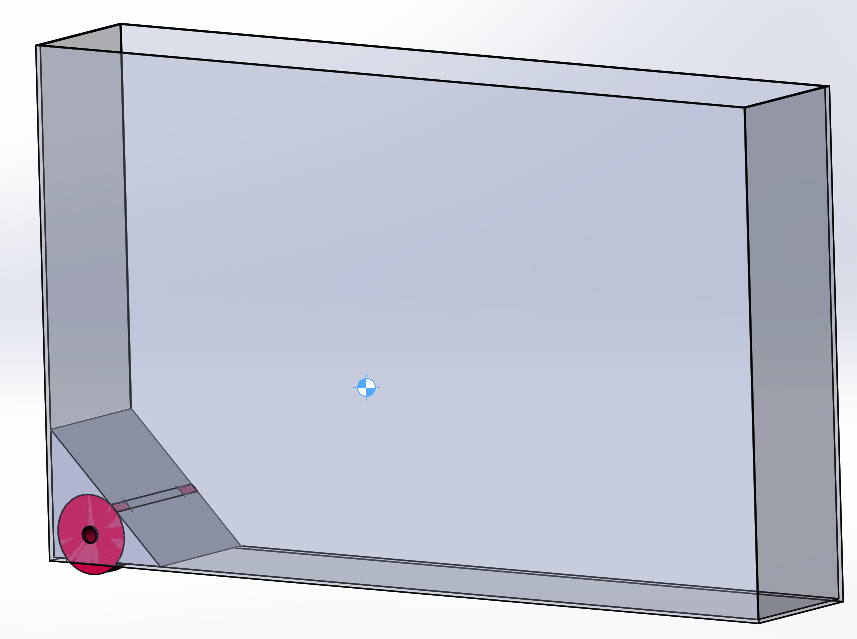
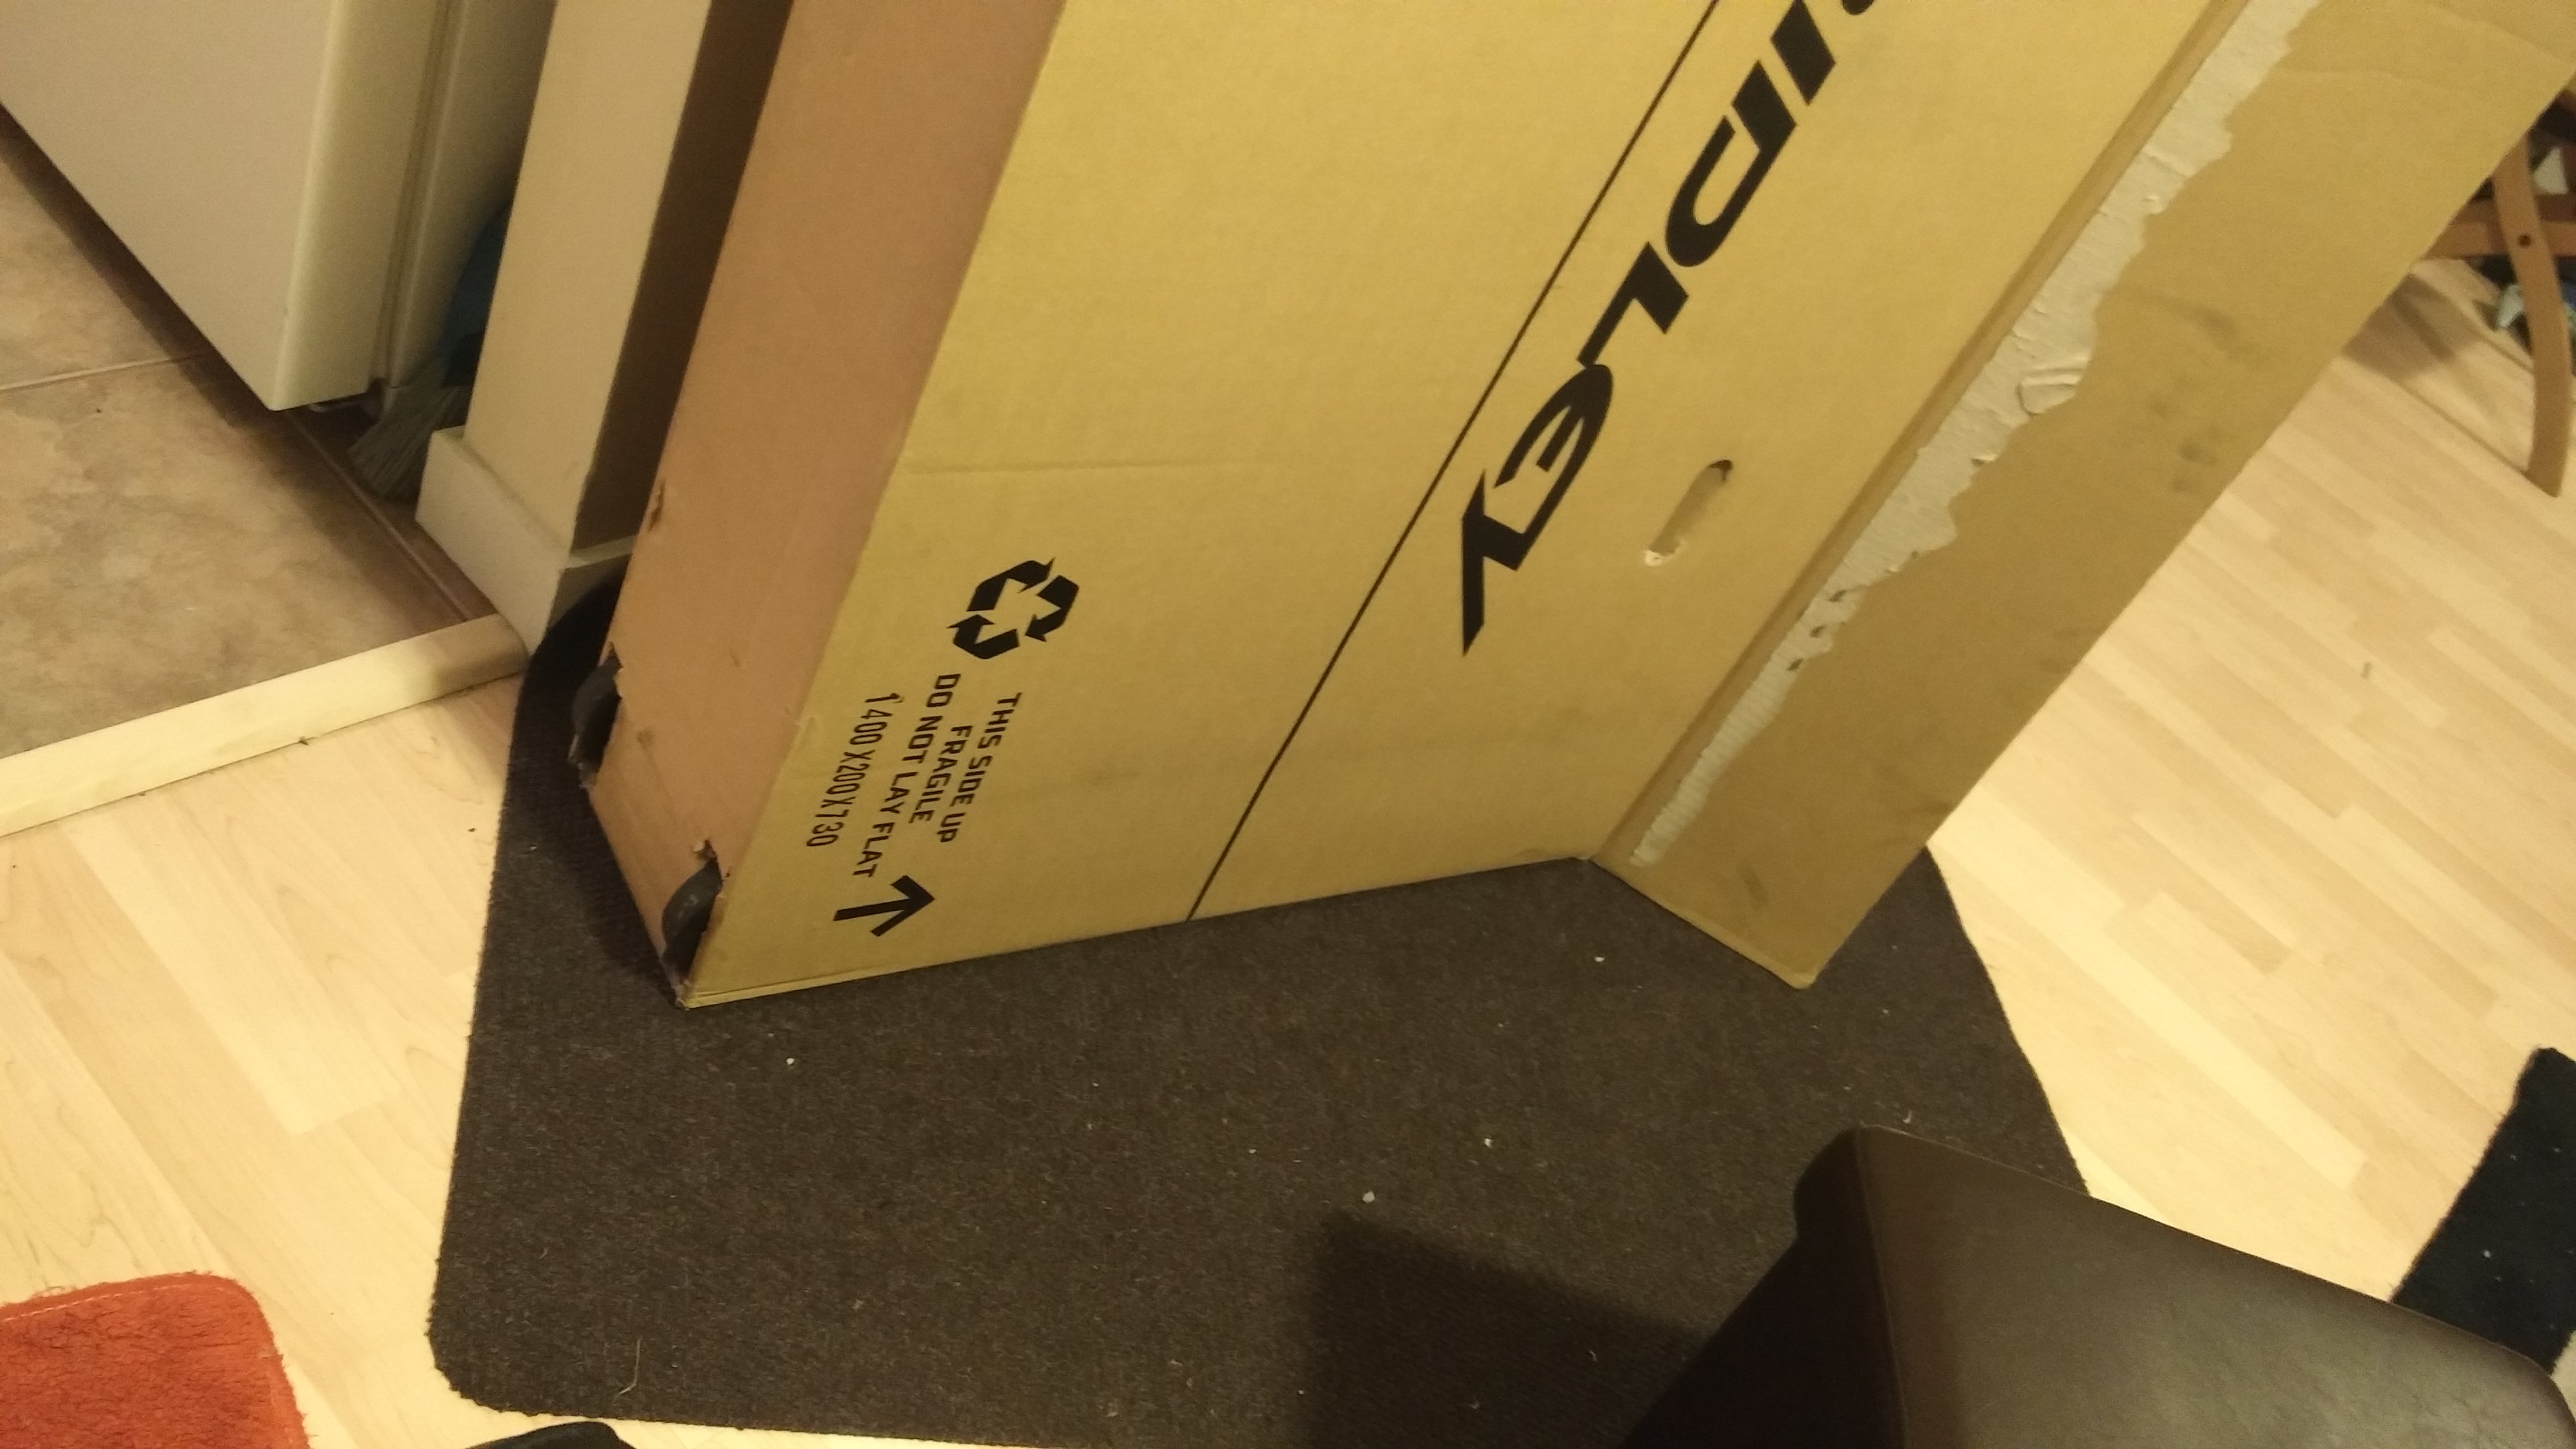
Prototype version 2

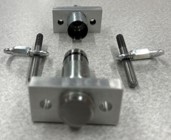
It would be somewhat ideal if the final concept that the client paid for didn’t use half-chewed bubblegum to work. So for the next few iterations, the design used two concentric cylinders to create the pressure chamber. Once we were confident the design was reliable and worked as intended, we began optimizing it for manufacturability, assembly and weight. We improved the ease of assembly by having symmetrical parts and reducing the number of components required; ease of manufacturability was also improved when we had symmetrical parts so multiple components could be made on the same setup. Weight was probably one of the harder things to reduce, since our concept was small to begin with, reducing a few grams would add up to a noticeable percentage. The most effective method of reducing weight was selecting the correct materials for each of the components; parts that did not need to be steel shouldn’t be steel was the basic idea and that itself helped reduce the overall weight by 40%.
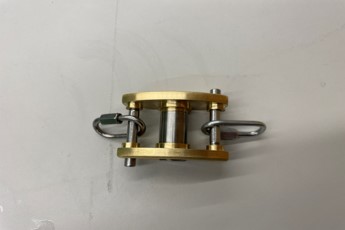
Prototype version 3

Testing the prototypes was so much fun! Filling them with black powder and arming them with an electronic match definitely did give me the chills but by the 20th test having no incidents or misfires we started to have some confidence in our loading procedure. So we completed three types of tests – a no load release test, a full load hold test and a full load release test. The tests were performed in order of increasing risk so failure modes could be detected early on and addressed to potentially mitigate the risk of a high-severity test failing unexpectedly.

For our no-load release test, we were testing to quantify the reliability of the prototypes and understand the limits for the minimum amount of black powder required in this system. The full load hold test was intended to verify the load-bearing capacity of the concept, as during flight it is expected to take the full weight of the rocket. For this test, we hung 75 kgs from the 60g concept for over 20 minutes. Finally, for the full load release test we tested to see if the prototype could hold over 50kgs and release successfully when signalled. This test would be the most representative of what would be seen in an actual rocket in terms of the sequence of actions performed and we used this as a final validation test for our prototype.

Overall it was an enriching experience, and as I wrap up the final few documents for the course, it really does feel like the end of a marathon. There were a few long weeks, but seeing our prototype evolve over the weeks truly made it all worth it. Each step along the way was an uncomfortable realization that we could have done things better and getting them done so we didn’t have regrets while handing the project over to our client. From getting our project brief in September to handing over the final concept, it has been one memorable journey!

MECH 423: Self-Balancing Robot

Hello new and old friends! Welcome back to the Mech Ambassadors Blog! I am very excited to share with you all a project I am currently working on for my Mechatronic Product Design course.

MECH 423 is centered around learning and applying firmware knowledge to integrate what you have learned within your undergrad to a complex final project of your choice. This specific course teaches firmware writing to communicate with motor drivers, accelerometers, and encoders. Rather than a final exam, we have 3 labs and 1 final project which build up our final course grade. After polishing our C# and C, developing firmware for a close loop control system, we design our own final project which includes 3 deliverables: a proposal, a video of the final product, and a final report due 2 days after the presentation.

The project is to be designed and presented on Dec.9th which is less than a month away. My lab partner and I just submitted our project proposal on Monday and are very excited to get a start on the robot. This final project comes with a multitude of challenges but we are aiming to integrate art and mechatronics in our device.

The objective of the project is to develop a self-balancing device using a dual motor control system. The device will take the appearance of a Pokeball, hiding all the hardware components within an enclosure and can open to show small figurines. The goal of the device is to balance the figurines contained within the device enclosure. The device will primarily function as an art form. There are many collectors who look for interesting workpieces, this self-balancing robot will be of great interest and act as a centerpiece! There is no circular self-balancing robot on the market at present, while there are designs for the Star Wars BB-8, as of this moment, there are no Pokeballs. We will be able to promote engagement in the STEM field by bringing to life a childhood cartoon object which will grasp the interest of students from kindergarten to grade 12.


Breaking down the project into 5 functions include:

  1. Gyroscope interface circuit
    • determine and measure the rate of angular motion of our device
  2. Filter with gyroscope and accelerometer
    • integrate gyroscope and accelerometer to create a complimentary filter for angular position
  3. Motor driver
    • operate 2 motors simultaneously and integrate the motors with the rest of the system
  4. Closed loop control
    • use PI/D control to integrate all the systems together in a closed loop for stability
  5. Design and build
    • Design the enclosure to mount the mechanical and electrical components.


We are waiting on approval before sourcing parts and starting on the design. Bookmark the blog and check back next week for updates!

May your gears always mesh!

Project Ideas for Curious Students (2020)

I get it. Since COVID hit, many of us have been trapped at home, wondering how to make the best of the excess time not available for socializing, travelling or just generally going outside.Or, maybe you are reading this post-pandemic, still wondering if there is more to engineering than equations and datasheets. Well, my dear reader, I empathize with you and would like to propose some of my own suggestions! 

First, a bit of background. I am a student in the Mechanical Engineering department here at UBC. The program itself is excellent; subjects are often well-integrated, and the faculty is aware of the need to tie theory with practice. Nonetheless, the allure of personal projects remains if you want to venture beyond the fundamentals taught in class, or to have total freedom regarding what you choose to create. 

There is one big challenge with mechanical projects: you may find yourself grappling with the financial burden of doing so or worried about the safety implications of your projectI say this because outside of my design team, I am often constrained by these limitationsThe goal of this blog series will be to highlight some of the resources available to students within the mechanical engineering department, and hopefully to give inspiration to those who are perhaps unsure of exactly what they want to create. 

See below for a list of all the blog posts in this series: 

Passion Projects 

Engineering Design Teams 

CAD and Simulation 

Software 

Project Ideas for Curious Students: Passion Projects

I have no shame in admitting that most of the ideas for my projects come into mind while I am bored of assignments. If I see value in a project and can afford to pursue it, I probably will. I do know people who take this to the extreme: a close friend of mine built a PID-controlled oven which can be pressurized or vacated of air, and thus used for manufacturing small, high-quality carbon fibre components.  

Depicted: my hydroponics system, for which I never hesitate to tell everybody about.

I actually think that there is value in pursuing projects in this manner. Ideas that get you excited are the ones that you should pay the most attention to; they are the most likely to keep you engaged, and will typically put you in a position where you learn much faster than if you were forced to do the work. When I started my hydroponics project, I did not expect to learn much more than I already knew about plants. Instead, I found myself learning about the mechanisms of nutrient uptake, and getting started with Arduino. As summarized by Marc Anthony, “if you do what you love, you’ll never work a day in your life.” I think that in some cases where there is a market for your idea or if it is applicable to what you want to do, you may end up opening new opportunities for yourself in the future. Perhaps you found a passion that you never realized you had, or maybe you will find that it was not as exciting as you originally thought.  

Still in need of inspiration? Here is a list of ideas that might help to get your brain moving:  

  • Remote-controlled vehicles  
  • Robotic arms  
  • Drones  
  • CNC machines  
  • Car modifications  
  • Anything that uses a 3D printer

Many of these suggestions are relatively expensive, however the resources necessary to complete them are generally quite accessible. While COVID-19 restrictions confine many of us to our rooms, projects related to robotics, as well as drones often have a plethora of components that “just work” once you assemble them, massively simplifying the design and assembly process.   

Whatever you decide to pursue, be sure to check local regulations, your tenancy agreement and to never skimp on safety research! I remember how one of my projects made use of LiPo batteries, which my friend and I found can carry an explosion risk if overcharged, excessively discharged or punctured. Safe to say that the additional safety equipment, including an explosion-proof case were worth the investment. We also learned that there are licensing regulations around flying drones above a threshold size (250 grams in our case). Similarly, making my own hydroponic nutrient solution meant that I had to be familiar with any of the safety risks related to the chemicals that I had in use. With any project, the importance safety and compliance with restrictions cannot be understated.  

Project Ideas for Curious Students: Engineering Design Teams

This year marks my fourth year on Formula UBC, one of many engineering design teams at UBC. I can unequivocally say that it has been the highlight of my university experience so far. When I joined, I was not sure what to expect. I knew that I wanted to learn more about aerodynamics and CFD, but I never expected that 2 years later, I would be leading the aerodynamics sub-team. Even more so, I never anticipated learning anything about machining, composites or even race cars (shocking, I know). I never imagined myself running track tests or figuring out how to manage people. And I certainly never saw myself driving the car.  

You will often hear that the value of engineering design teams is that they are an opportunity to apply concepts learned in class to a real project. In my experience, there is a stark difference between knowing something, and understanding it well enough to apply the concept to a real system. Moreover, you get to see the result of your design decisions on a working (or failing) system.  

Depicted: formula UBC front wing during test day. Test days are used to verify that the final product behaves as intended in its design.

It also gives you the opportunity to explore far beyond what is taught in class: for example, composites manufacture and fluid dynamics simulation, to the best of my knowledge, are only taught in a very limited capacity. Outside of the Mech 2 curriculum, design teams are also a great way to link concepts from seemingly disparate subjects. On Formula, large projects cannot be completed successfully without adequate communication with members from other subteams, since these systems will have to be able to work together on the car. In some cases, such as with the pneumatics, different subsystems will be competing for the same resources.  

Beyond technical skills, the one experience I feel is often overlooked is interpersonal skills. Learning to manage others, to deal with an occasionally political environment and how to work with sponsors can prove to be a very humbling experience. Interpersonal skills come with experience, and learning them in a fast-paced environment is excellent practice for the “real world.” Your sponsors are real stakeholders, who often want to see a return on their investment of potentially thousands of dollars into your project through representation and promotion of their brand. Over the past year, I have truly begun to appreciate the significance of the proverb “if you want to go fast, go alone…if you want to go far, go together.” What my team has been able to accomplish by creating a healthy, collaborative team environment has been nothing short of amazing.  

If you are considering whether not you should join a design team, my answer to you is an emphatic YES! 

Project Ideas for Curious Students: CAD and Simulation

Fortunately, engineering coursework typically requires a fair amount of CAE (computer-aided engineering) software, which can double as a creative tool whenever you have an idea that you would like to experiment with. I have found that a good combination of CAD, simulation software and some programming is sufficient for a significant portion of the design of low-risk projects.

To those who are not yet aware, UBC Engineering students have free access to several software licenses specific to the engineering department:

MATLAB 

Matlab is a programming language built specifically for technical work. Many scripting languages require the addition of libraries for tasks such as data visualization for example, which Matlab excels at. Well-integrated with this is Simulink, which allows you to model relatively complex systems in a more intuitive manner than explicitly writing code.

Your coursework will do a good job at teaching you the basics of Matlab, which you can choose to take further on your own. For all engineering-focussed math courses including linear algebra, ordinary and partial differential equations, vector calculus and multivariable calculus, my coursework has included a heavy Matlab component.

If you are in an engineering design team or have a project that warrants large amounts of computation on a problem for which you cannot find ready-made software, this is always a good option. Matlab is also used commonly in industry. If you have graduated and are looking for a free alternative, Octave is a good potential solution; with that said, depending on the task you may also feel that languages such as R could be of use. My personal pick would be Python. With an explosion of open-sourced libraries, I have found that Python – along with SciPy libraries – is just as capable as Matlab for most tasks. It is also free, very well-documented and extremely popular. Being a general-purpose language makes it a useful transferrable skill to have, and gives you tools to expand your projects far beyond what dedicated tools might allow.

SOLIDWORKS 

If you are in or entering the Mech department, SolidWorks will need no introduction. CAD (Computer-Aided Design) in general can be an invaluable tool when you want to get a good idea of how components will look when assembled, and to spot problems (such as interference) in the design before it becomes a problem. With inorganic geometry, it can also speed up the process of making technical drawings, if you were to communicate your design to a third party.

ANSYS 

I will admit, I am somewhat less familiar with the practical uses for Ansys. If you do have access to a full Ansys license, you will be able to simulate anything ranging from computational fluid dynamics and thermal simulations to load simulations. Ansys has a great graphical workflow for coupled simulations, if you are interested in simulating multiple physical phenomena concurrently.

From personal experience, I would encourage anybody pursuing technical projects to be wary of the computational cost and learning curve associated with simulations. Having used the UBC Star-CCM+ license for fluid simulations (computational fluid dynamics or “CFD”), I can confirm that it is worthwhile to consider the cost vs. benefit of complicated simulations. For simple simulations where rough estimates are acceptable (e.g. “how likely is it that this non-critical component fails?”), SolidWorks often has a perfectly acceptable solution for you.

Finally, I would recommend looking into a free SimScale community license, providing access to 3000 core-hours of cloud compute time (calculated as the product of the number of cores used and the amount of time using them) with up to 16 cores at a time. Their documentation is nothing short of excellent, and they have a great user interface. To the best of my knowledge, SimScale is built using open-source technologies such as OpenFOAM, which provides open-sourced CFD and simulation code.

So…why do I recommend CAD and simulation if it doesn’t involve creating something real? Just as I mentioned previously, mechanical design projects often become prohibitively expensive once manufacture begins. Software allows you to pursue a design project with minimal upfront cost, and pursue its manufacture at a later date when it is more feasible. This is exactly what I have been planning to do for one of my more ambitious projects, which is a small-scale axial flow turbojet engine. Chances are that it will fail miserably when I am done, and I’m looking forward to it.

Project Ideas for Curious Students: Software

If you have ever been in a position where you were thinking “I wish my computer could do this task for me” or “why isn’t there a calculator for this,” well, it probably can, and there is probably a library for it. With a bit of programming knowledge and some coffee, you might just have a solution to your problem. Maybe. 

Make no mistake: I am by no means a programming guru, but I still have a few suggestions for you to be able to pursue applicable projects with software. For those of us in mechanical engineering, software is typically a tool rather than the product itself. One suggestion that I like making to people who are mechanically inclined with an interest in software is simulation development. Simulations require interdisciplinary knowledge to implement, since they are nothing more than a mathematical model of some real-world phenomenon. As a tool, I have seen this used on numerous occasions: my engineering design team, for example, uses a student-builtMatlab vehicle dynamics simulator to estimate lap times for our car. If we change different aspects of our vehicle’s performance (for example, downforce), we can get an estimate for how our competition score will change. As I have mentioned, these can also be a product, meant to be used as a tool by engineers. These tools (products such as Star-CCM+) typically take a huge amount of resources and developers to create, although if making a contribution to open-sourced software is more your speed, there are always packages such as OpenFOAM.  

Don’t forget that there is always room for passion projects! Yet another one of my perpetually incomplete, overly ambitious projects has been to make a simple computational fluid dynamics (fluid dynamics simulation software, known as “CFD”) program from scratch using Python. I admit that it has no true practical application other than to help me to better understand the inner workings of CFD code. 

Although I acknowledge that I may not be the best person to speak about software development, a question that I often get is “how do I start”? My personal recommendation is to choose an application, then to just dive in. I promise you that there is no shortage of information on almost anything when it comes to programming. Just as with mechanical projects, you typically learn exactly what you need in the most efficient manner possible when you have something to apply your knowledge to. Failure will occur and iteration is a necessity, but this is all part of the learning process. Fairly recently I started to make a personal website and a web app, and I can safely say that I knew basically zero HTML when I started, let alone JavaScript or some of the common development libraries.   

Advocating for a World without Poverty

May 2018 was one of the most exciting months of any year in my entire life! You ask why?  In a single month, I was able to travel to 3 different cities to advocate for a world without poverty! Crazy,  right? (If you don’t think that’s cool then sorry we can’t be friends)

I have been an active member of Engineers without Borders (EWB) for 2+ years. I act as the Advocacy Representative for the University of British Columbia Chapter. My duties in this executive position are as follow:

  1. Educate Chapter Members about campaigns that help develop Canada’s International Development Portfolio
  2. Educate Members of the public about these campaigns
  3. Meet with Member of Parliaments to ask them to bring these matters to the Parliament

So I work on a wide variety of levels to help develop Canada’s International Development Portfolio.

Meeting with MP of Vancouver Quadra, Joyce Murray, about Innovative Financing

Every May, chapter members from all across Canada gather in Ottawa to meet with Members of Parliament to push for more international aid and financing. This year, on May 1st 60 EWBers met with about 90 Members of parliament to convince the government to invest more in small scale businesses in developing countries. In federal budget 2018, Canada allocated about $876 million to innovative financing and we at EWB want to make sure that a large portion of this money goes to small scale businesses and social enterprises especially those led by women. Innovative financing helps provide resources for developing economies while generating return for the investor nation. I met with 3 members of Parliament to discuss this. At the end, we had most of the MPs on board with this ask and our campaign was a success.  

After a fun filled weekend, I was back in Vancouver to start my job at MECH Student Services. About 3 days later I get an email from the Policy and Advocacy Director at EWB inviting me to Toronto to attend a week long workshop centered on effective leadership. About a week later I was on a flight to Toronto! (Huge thanks to MECH Student Services for giving me this time off). I attended this week long workshop where we explored leadership through a different lens. We defined effective leadership as the identification of your inner capabilities and the ability to recognize the inner qualities of the team you are leading. It’s safe to say, I learned loads and will be bringing this material into the meetings at our EWB chapter on campus.

At the Toronto 3D sign at Nathan Phillips Square

And here I was thinking that’s it. Now back to normal everyday life. A day later, I get an email from the United Nations HQ in New York inviting me to attend the Presidential General Assembly’s Youth Dialogue 2018 to represent Engineers without Borders, Canada.

3 days later I was on a flight to New York!

With the President of the General Assembly, Miroslav Lajčák

Over an entire day, I had the exciting opportunity to meet with advocates from all across the world and discuss how they thought we can achieve a world without poverty!

And with that I concluded the month of May! Nothing but adventure and learning!

On June 1st I was back in Vancouver. Working full time, completely sleep deprived and living off coffee. But it was all worth it!

Moving like an Engineering Student

This post is for you if you’re a globetrotting student that is crazy enough to bring their own specialized equipment across the world. Whether it’s instruments, bikes, or other gear, your education has provided the skills to get your life across the pond at minimal cost.

Here’s my personal example of “Things I didn’t need to bring but wanted to”. Most of these are items I figured would have high mark-ups in Zurich if I were to buy them locally (spoiler – turns out that includes pretty much everything):

  • Full road bike with touring accessories and tools
  • Touring panniers, helmet, shoes, cycling clothes
  • Soccer and Futsal boots
  • Fly fishing rod, reel, and tackle
  • Trekking essentials – boots, cooking kit, knife + field sharpener (invaluable, as it turned out),

I bought my itinerary through a travel site that I cannot recommend to anyone, despite being an absurdly low cost (~$350 CAD one way to Zurich). The journey was three separate flights with separate security checks at each airport, totalling 25 hours to get here. I had to call each of my three airlines to confirm maximum luggage sizes. On the plus side, I was somehow afforded a free checked bag on top of the one I purchased, so my limits were as follows:

1 checked bag at 20kg,
1 checked bag at 15kg,
1 carry-on and 1 personal item totalling 10kg for both

I’m guessing most people will be weight limited rather than volume limited unless you want to bring a sleeping bag or gigantic teddy bear. This posed a problem for me, as most commercial bike boxes were 10-15kg by themselves and priced at $500-$800.

Protip: As cycling season rolls in, some shops can provide double-corrugated cardboard shipping boxes for bicycles when needed. These boxes are within the dimensional limits of checked luggages for most major airlines, so you just need to figure out how to pack them effectively. They weigh in at ~4kg and are priced at $0 + numerous thank-yous.

My next problem was transportation through all my security gates. I didn’t want to drag the thing or be limited to those airport carts. The next idea was to install a set of lightweight wheels. UBC is a treasure trove of useful spare/scrap materials, from which I found a set of rubber cart wheels, structural PVC foam, and PVC pipe. The MECH machine shop had scrap rod stock and hardware to bolt it all together. Here’s the first mockup:

First box mockup for dimensioning and cutting templates, approx. center of gravity marked

I wanted the box handles to sit naturally at my hand when I walked, creating just enough tilt to get the wheels rolling. Placing the wheels on the corner allowed for less-squirrely control and more adhesive surface area to bond to the box walls. To minimize the risk of catching edges or creating problems for luggage personnel, I hid the whole assembly within the box (improved aerodynamics too, ya know).

My main concern was smooth load transfer between the axle and cardboard walls. Cardboard is fairly good for abrasion resistance but I’d be putting the structure under bending . The PVC foam was a good material for high bonding surface area, stiffness, and low density. It took a while to find an adhesive that could confidently bond PVC to cardboard. A larger-diameter PVC pipe was used to house the thin aluminum axle to reduce stress concentration from foam to wheels, with aluminum bushings bridging the space between the axle and pipe.


Foam insert with wheel axle; CAD versus quick-&-dirty assembly. I realized it’d be impossible to install the solid foam chunk so I split it.

Packing night, wheels installed, and obligatory decals

Wheels were screwed into the ends of the axle loosely, so they could rotate independently for better steering. I loaded the box with weight over the axle as much as possible to minimize bending loads. Spare hardware was brought along in case the whole thing fell apart but the journey went smoothly. Unfortunately and despite my extensive (read: sparse) napkin calculations, some yielding occurred by the end of the journey between the PVC pipe and foam. I never considered bump/impact loading through the foam and should have added adhesive to the PVC tube for full bonding with the foam, rather than just press-fitting it.

The box survived the various layovers and multiple TSA inspections. The idea is to keep it around and get other exchange students to leave notes and stupid comments on it for the trip home.

Now that Spring’s arrived, I’ve taken the bike a few hundred kilometres around Switzerland and Germany thus far. It really is one of the best ways to explore this country, so whether you bring your own or rent one here, I’d highly recommend cycling for any European exchange.

Classes, cultures, and travels for the next post. Ciao for now!
Jason

What It Has Been Like to Be Involved in Mech and Be The President of Club Mech

Last year, I decided to set goals to help me improve as a person and a professional. I knew that something that has always mattered to me is being able to help and contribute to my Mech community. As such, I decided to run for the position of UBC Mechanical Engineering Undergraduate Club President (Club Mech) and was elected. Since then, I have been trying really hard to improve the connections with the department, help out wherever I can to increase the sense of community within students, and represent our student body as best as I can. It has not been as easy task, as it requires a lot of time commitment in meetings to help resolve student concerns, and volunteer work to develop activities that help our students.

Some of this year’s activities included professional development events related to what Building Science is and how Mechanical Engineers could follow this path by doing a masters, fun parties to socialize, selling amazing merchandise, providing feedback to improve our academic curriculum, helping our graduates obtain their Iron Ring, and giving our professors fun socks to remember us by; what a great time it has been planning these activities with my team!

Despite the long hours, being the Club Mech president has been one of the most amazing and memorable experiences in my undergraduate career, especially because I had an amazing team who was supportive, kind, dedicated and caring. If it wasn’t for them, I would not have been able to push through the hard and stressful moments. I want to say to them that I am thankful for your hard work and I appreciate everything you did. Thank you UBC Mechanical Engineering Department for caring so much about your undergraduate students. You are committed to educating the future engineers of Canada and that shows every day.

If you have the chance, make sure to join Club Mech and continue developing good relationships with faculty, staff and students.

Feel free to ask me any questions any time at ambassadors@mech.ubc.ca.

Until next time!

Diana Nino