
Murphy’s law is in full effect here… My daily vehicle began leaking coolant between the left side of the had and the block. Since the coolant was only leaking form the cylinder head and not being burnt in the engine I knew I could limp the car to work and back for a while longer just by topping up the coolant every day. I spent about three weeks topping up the coolant every 50Km to find out that I had lost a consistent 250mL of coolant. After weeks of these shenanigans my oil pressure light began to flicker at idle once the engine was up to full operating temp. I knew the Prelude was on it’s last leg at this point. The next day I drove it to school only to make it off the highway into Langley and have the oil pressure light come on and stay on… meaning very low oil pressure. I parked the Prelude and order and a Honda head gasket and all other necessary parts to replace the top end.
My conclusion is that the oil light eventually came on because the cylinder head continued to warp and distort from driving it while leaking eventually leading to an oil passage between the block and the head springing a leak causing a drop in oil pressure.
The total job of removing the cylinder head, milling the head, setting the valve lash, and reinstalling totalled about 18 hours and $350 in parts. I disconnected and labelled all wiring, vacuum and coolant lines from the intake manifold and and head and removed both together with some helping hands. FWD cars sure don’t make it easy to access the area below the intake manifold towards the rear of the engine!
Upon removal the head gasket looked ok… I’ve seen worse…
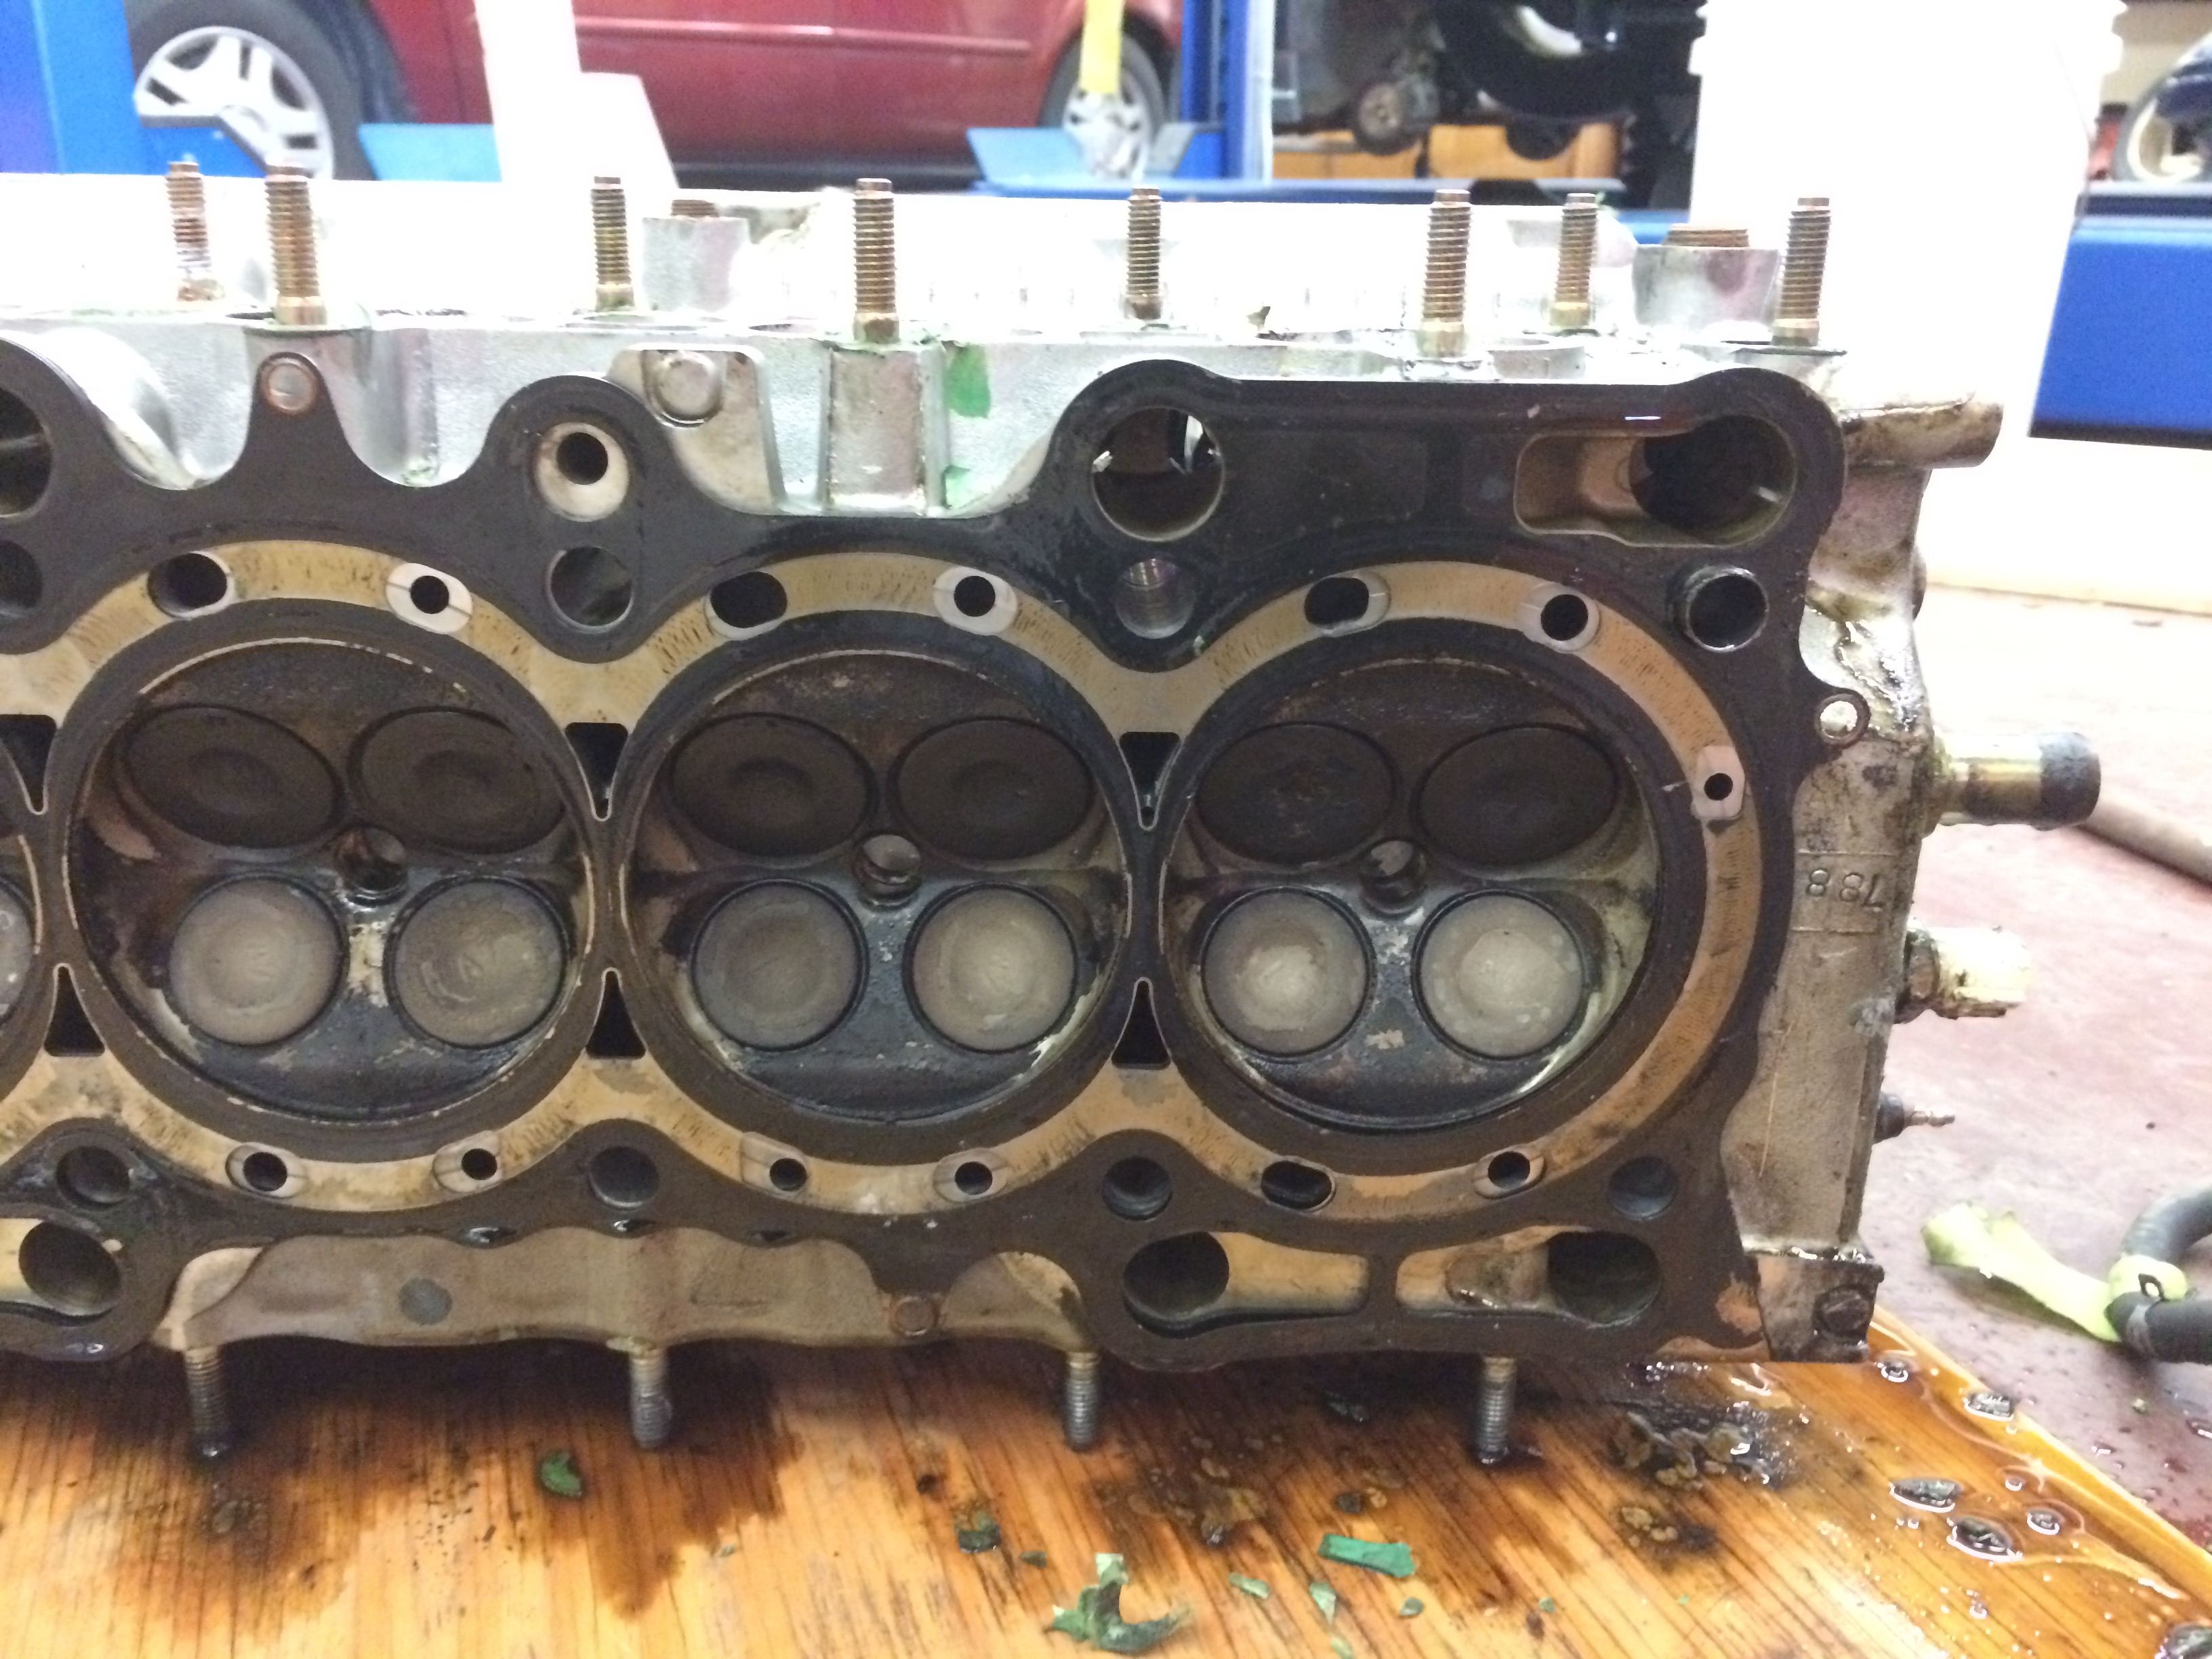
The head was milled and reported to be cut down 0.004″ to make flat again. The service limit for cylinder head warpage on this H22a is 0.002″. This made me confident in my diagnosis.
After the tedious process of setting the valve lash on the 16 solid lifters in this DOHC VTEC head the head was cleaned and reinstalled with a new intake manifold and cylinder head gasket. Original head bolts were used at stock torque spec plus 4 ft-lbs.
I wrenched away until it was done and held my breath hoping I had not messed up the cam timing or camshaft torque as I turned the key to hear it crank for the first time. I sounded normal. I cranked the engine over for about 45 seconds with the ignition disabled so the oil and fuel pressure could build. I reinstalled the ignition relay and the Prelude fired up like it had never been taken apart!
I set the ignition timing with a timing light, check for leaks, then took it for a spin. I didn’t get a block away from the school before I suspected something was wrong. I pulled over and found two pinhole coolant leaks coming from secondary coolant hoses going to the IABV and FITV. I purchases some fresh coolant hose with new hose clamps at Lordco, cut new hose to length, clamped down firming in place and enjoyed the new security found in replacing 18 year old coolant lines.
Since the head gasket replacement there have been zero engine problems. The engine no longer makes a clattering sound at cold idle because I corrected the valve lash and it pulls hard to red line. I couldn’t be happier. I’m back to my lovely daily from the late 90’s haha.
Here’s a picture of the Prelude resting in it’s happy place, under a row of cherry blossom trees while not leaking anything!

Mr. McCormack
At the start of this year I found a 5.3L Vortech 5300 V8 engine sitting in my shop storage. I offered an excellent price on the engine for anyone who would accept the challenge of swapping the Vortech 5300 with an appropriate transmission into their own car by the end of the year. The only stipulations were: the car used for the swap had to be an originally RWD car, this specific swap must be well documented on the internet by others who have done the swap before, and who ever takes on the challenge must have the finances up front to complete the swap without cutting corners.
The day after offering the challenge to my three Automotive classes I had a student approach me to ask if he could swap the Vortech 5300 into his first gen (NA) Mazda Miata. I said “That would be a great swap!” The swap has been done thousands of times before and the process, parts and cost is well documented and accessible.
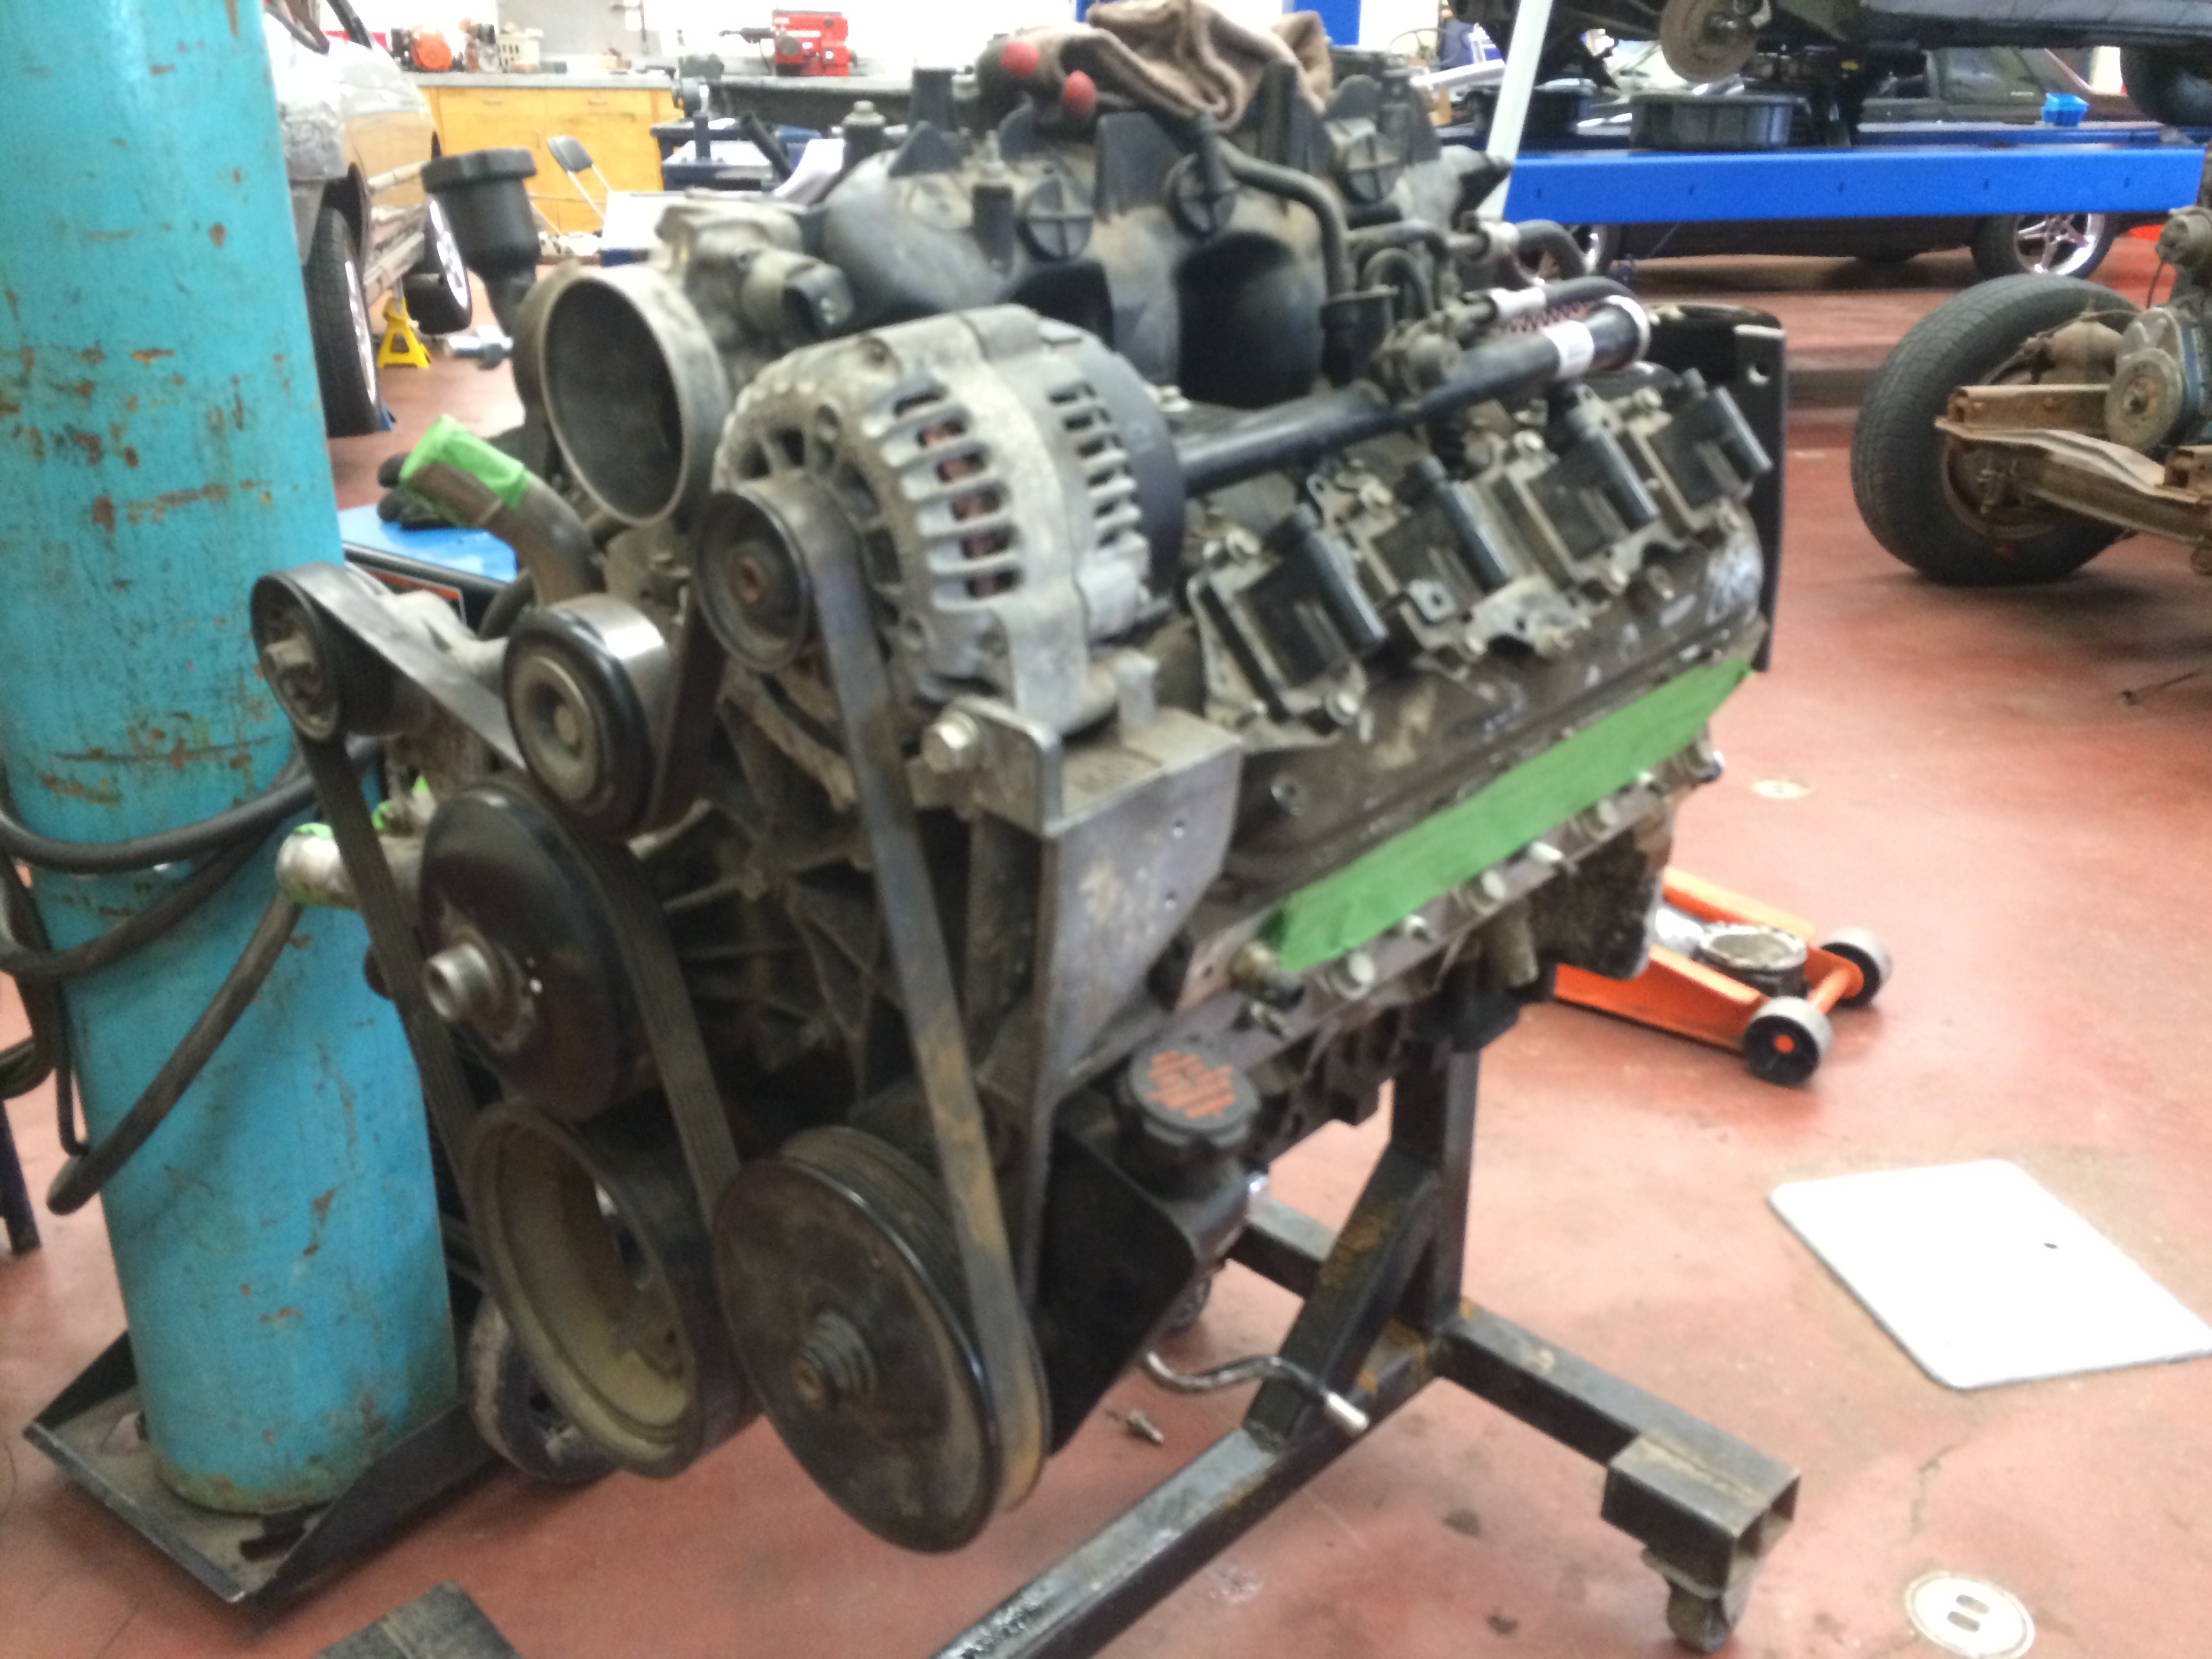
So begins the Vortech 5300 V8 Miata swap!
At the time of this picture: the engine is bolted to a stand, the exhaust headers, oil pan, and windage tray have been removed to be modified or replaced. The student is following downloadable PDFs written by companies that sell conversion parts for the swap. I have read many guides about the process and structural components of the car that must be replaced or improved upon to support the amount of power the V8 will produce over the stock inline four.
Stay tuned for updates!
Mr. McCormack
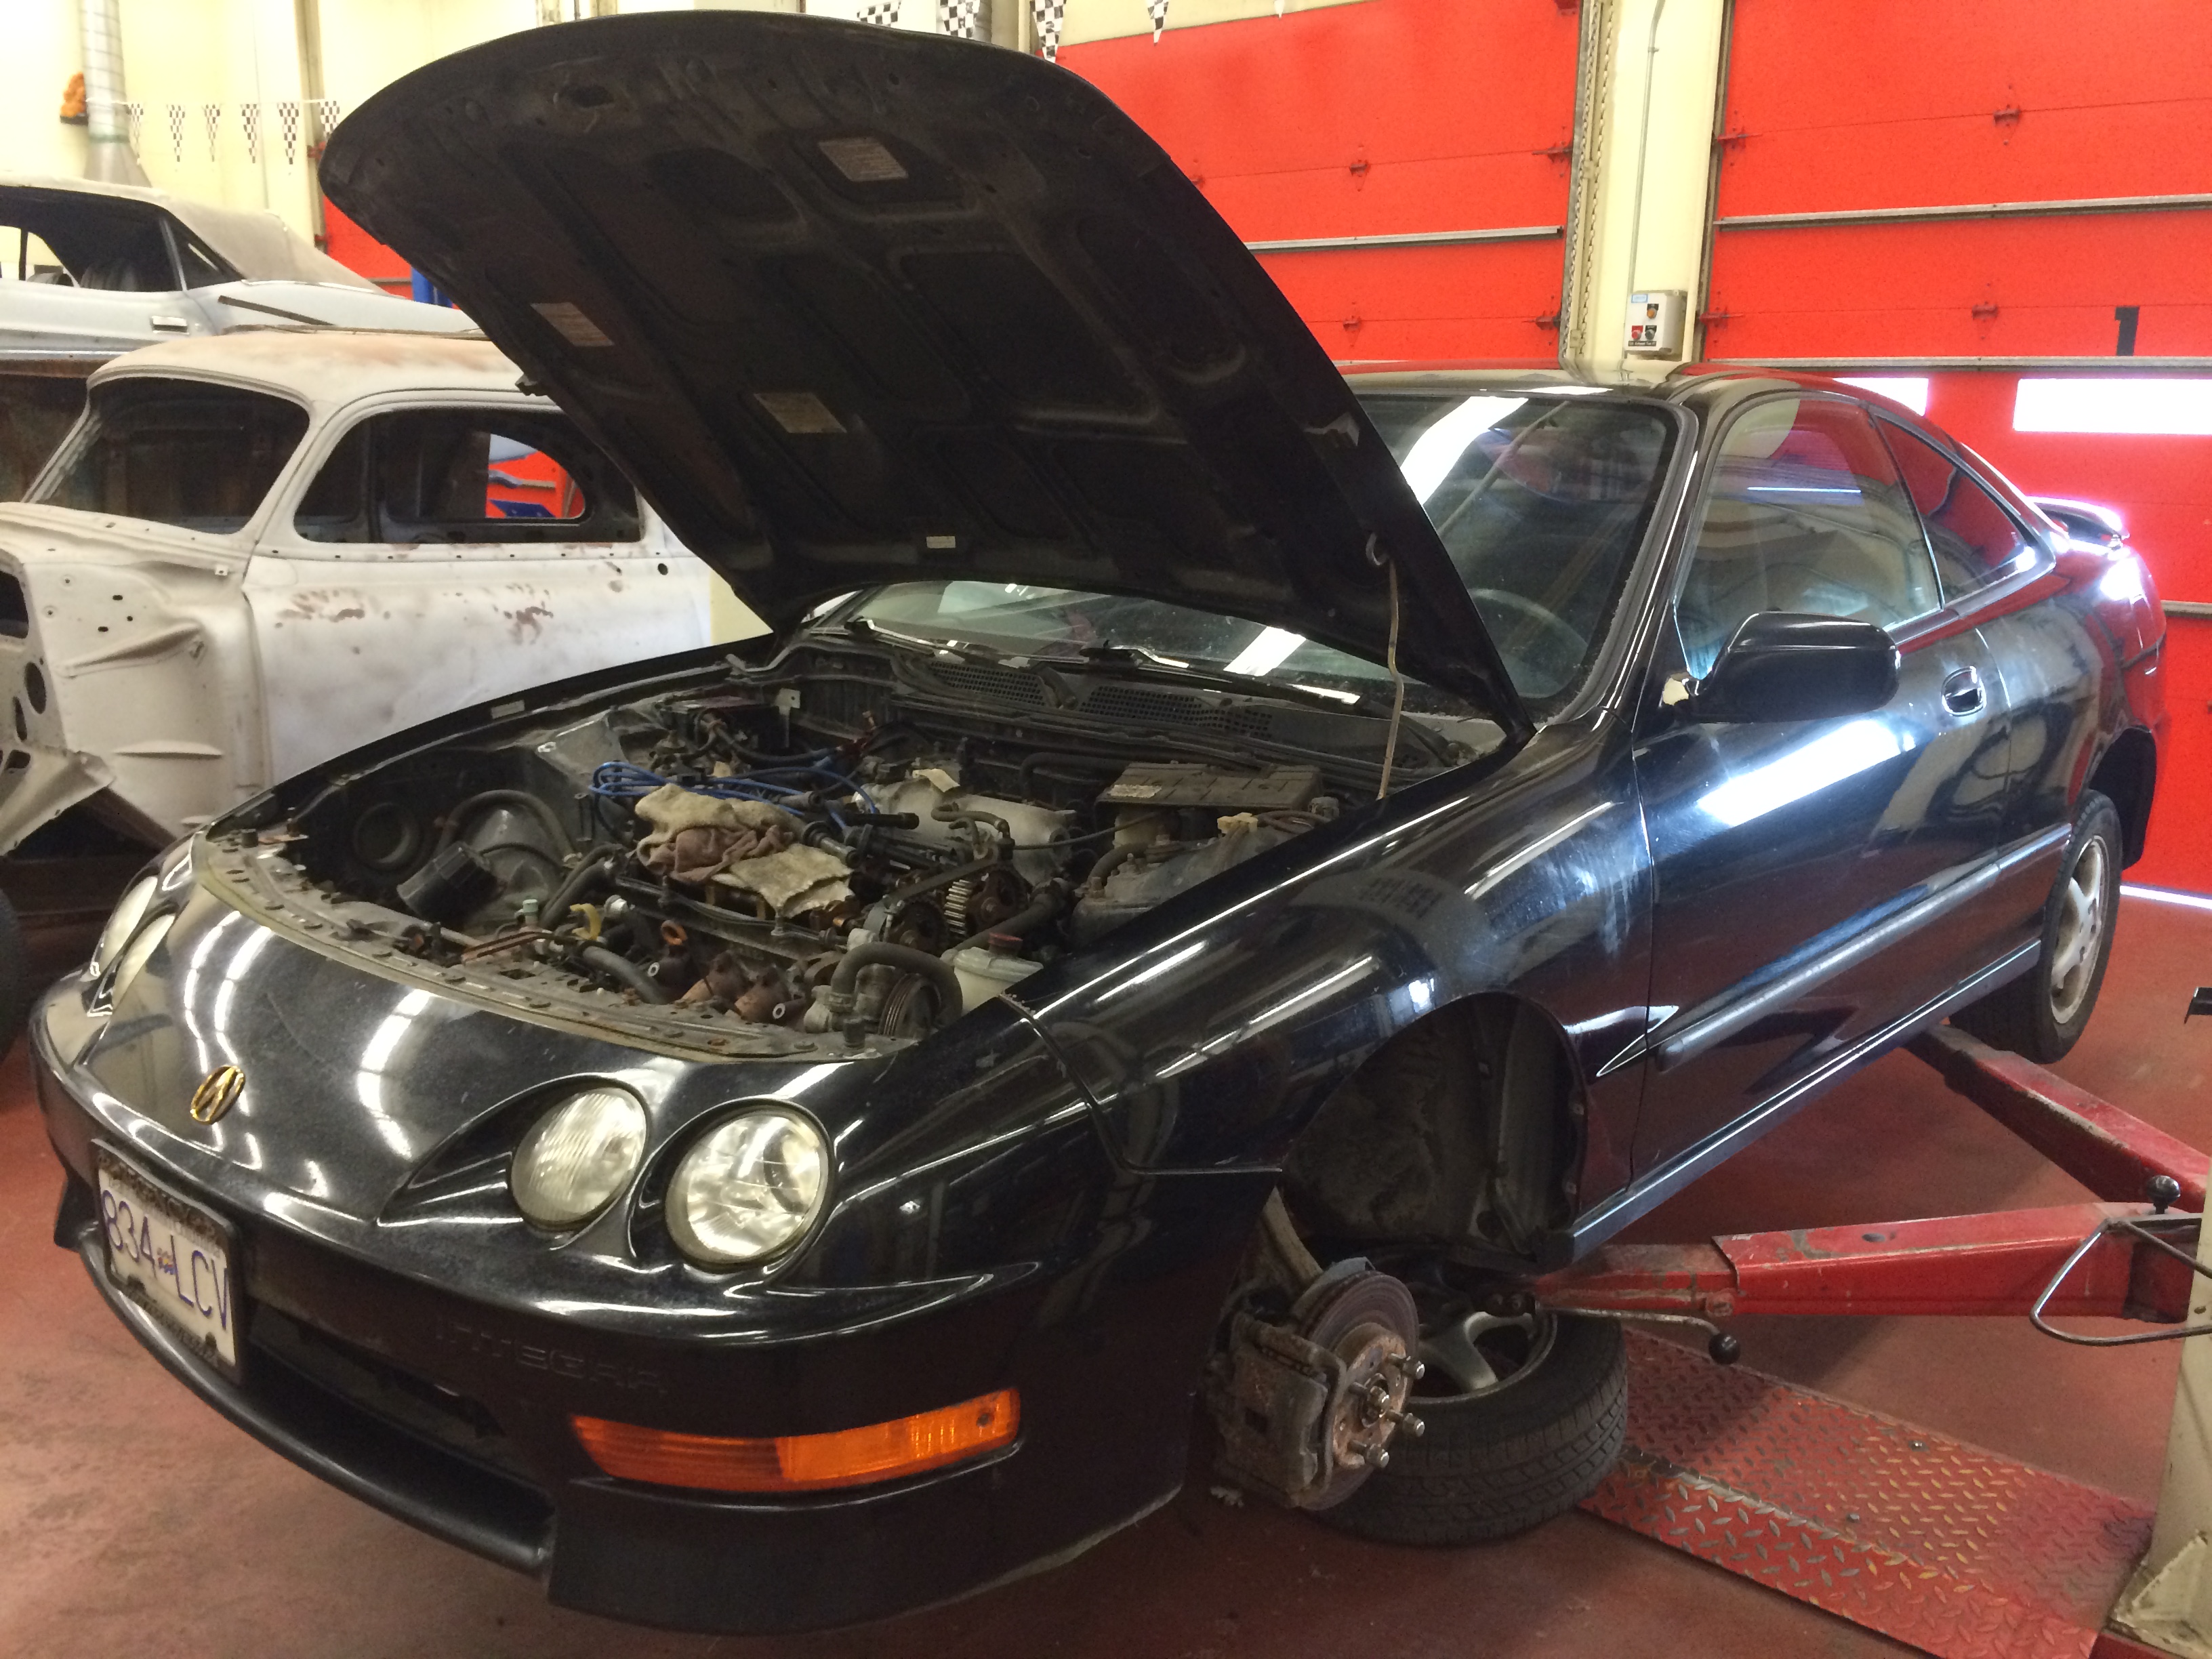
So begins a big project for my Automotive 11/12 students! I bought this broken 1999 Acura Integra for my senior automotive students to get experience working on a moderately old and high milage car that they have a good chance of owning in the future.
I am told by the previous owner that the “timing belt has skipped a tooth on one or both cam gears, causing the car to crank over but not start. The car was a daily driver before the incident”. Since this is an interference motor I can likely deduce that the engine has bent a couple valves causing a lack of compression in the cylinders, therefore prohibiting the car for running.
Besides the engine, the interior is is decent condition, and the exterior has a small amount of rust. I plan on removing all current rust and repainting the entire car to match stock colour, black.
At the time the picture below was taken, all engine accessories, driveshafts, wiring and plumbing is removed. All that is left is engine mounts the the transmission/engine combo will be removed for an entire long block rebuild!
Updates to come!
Mr. McCormack
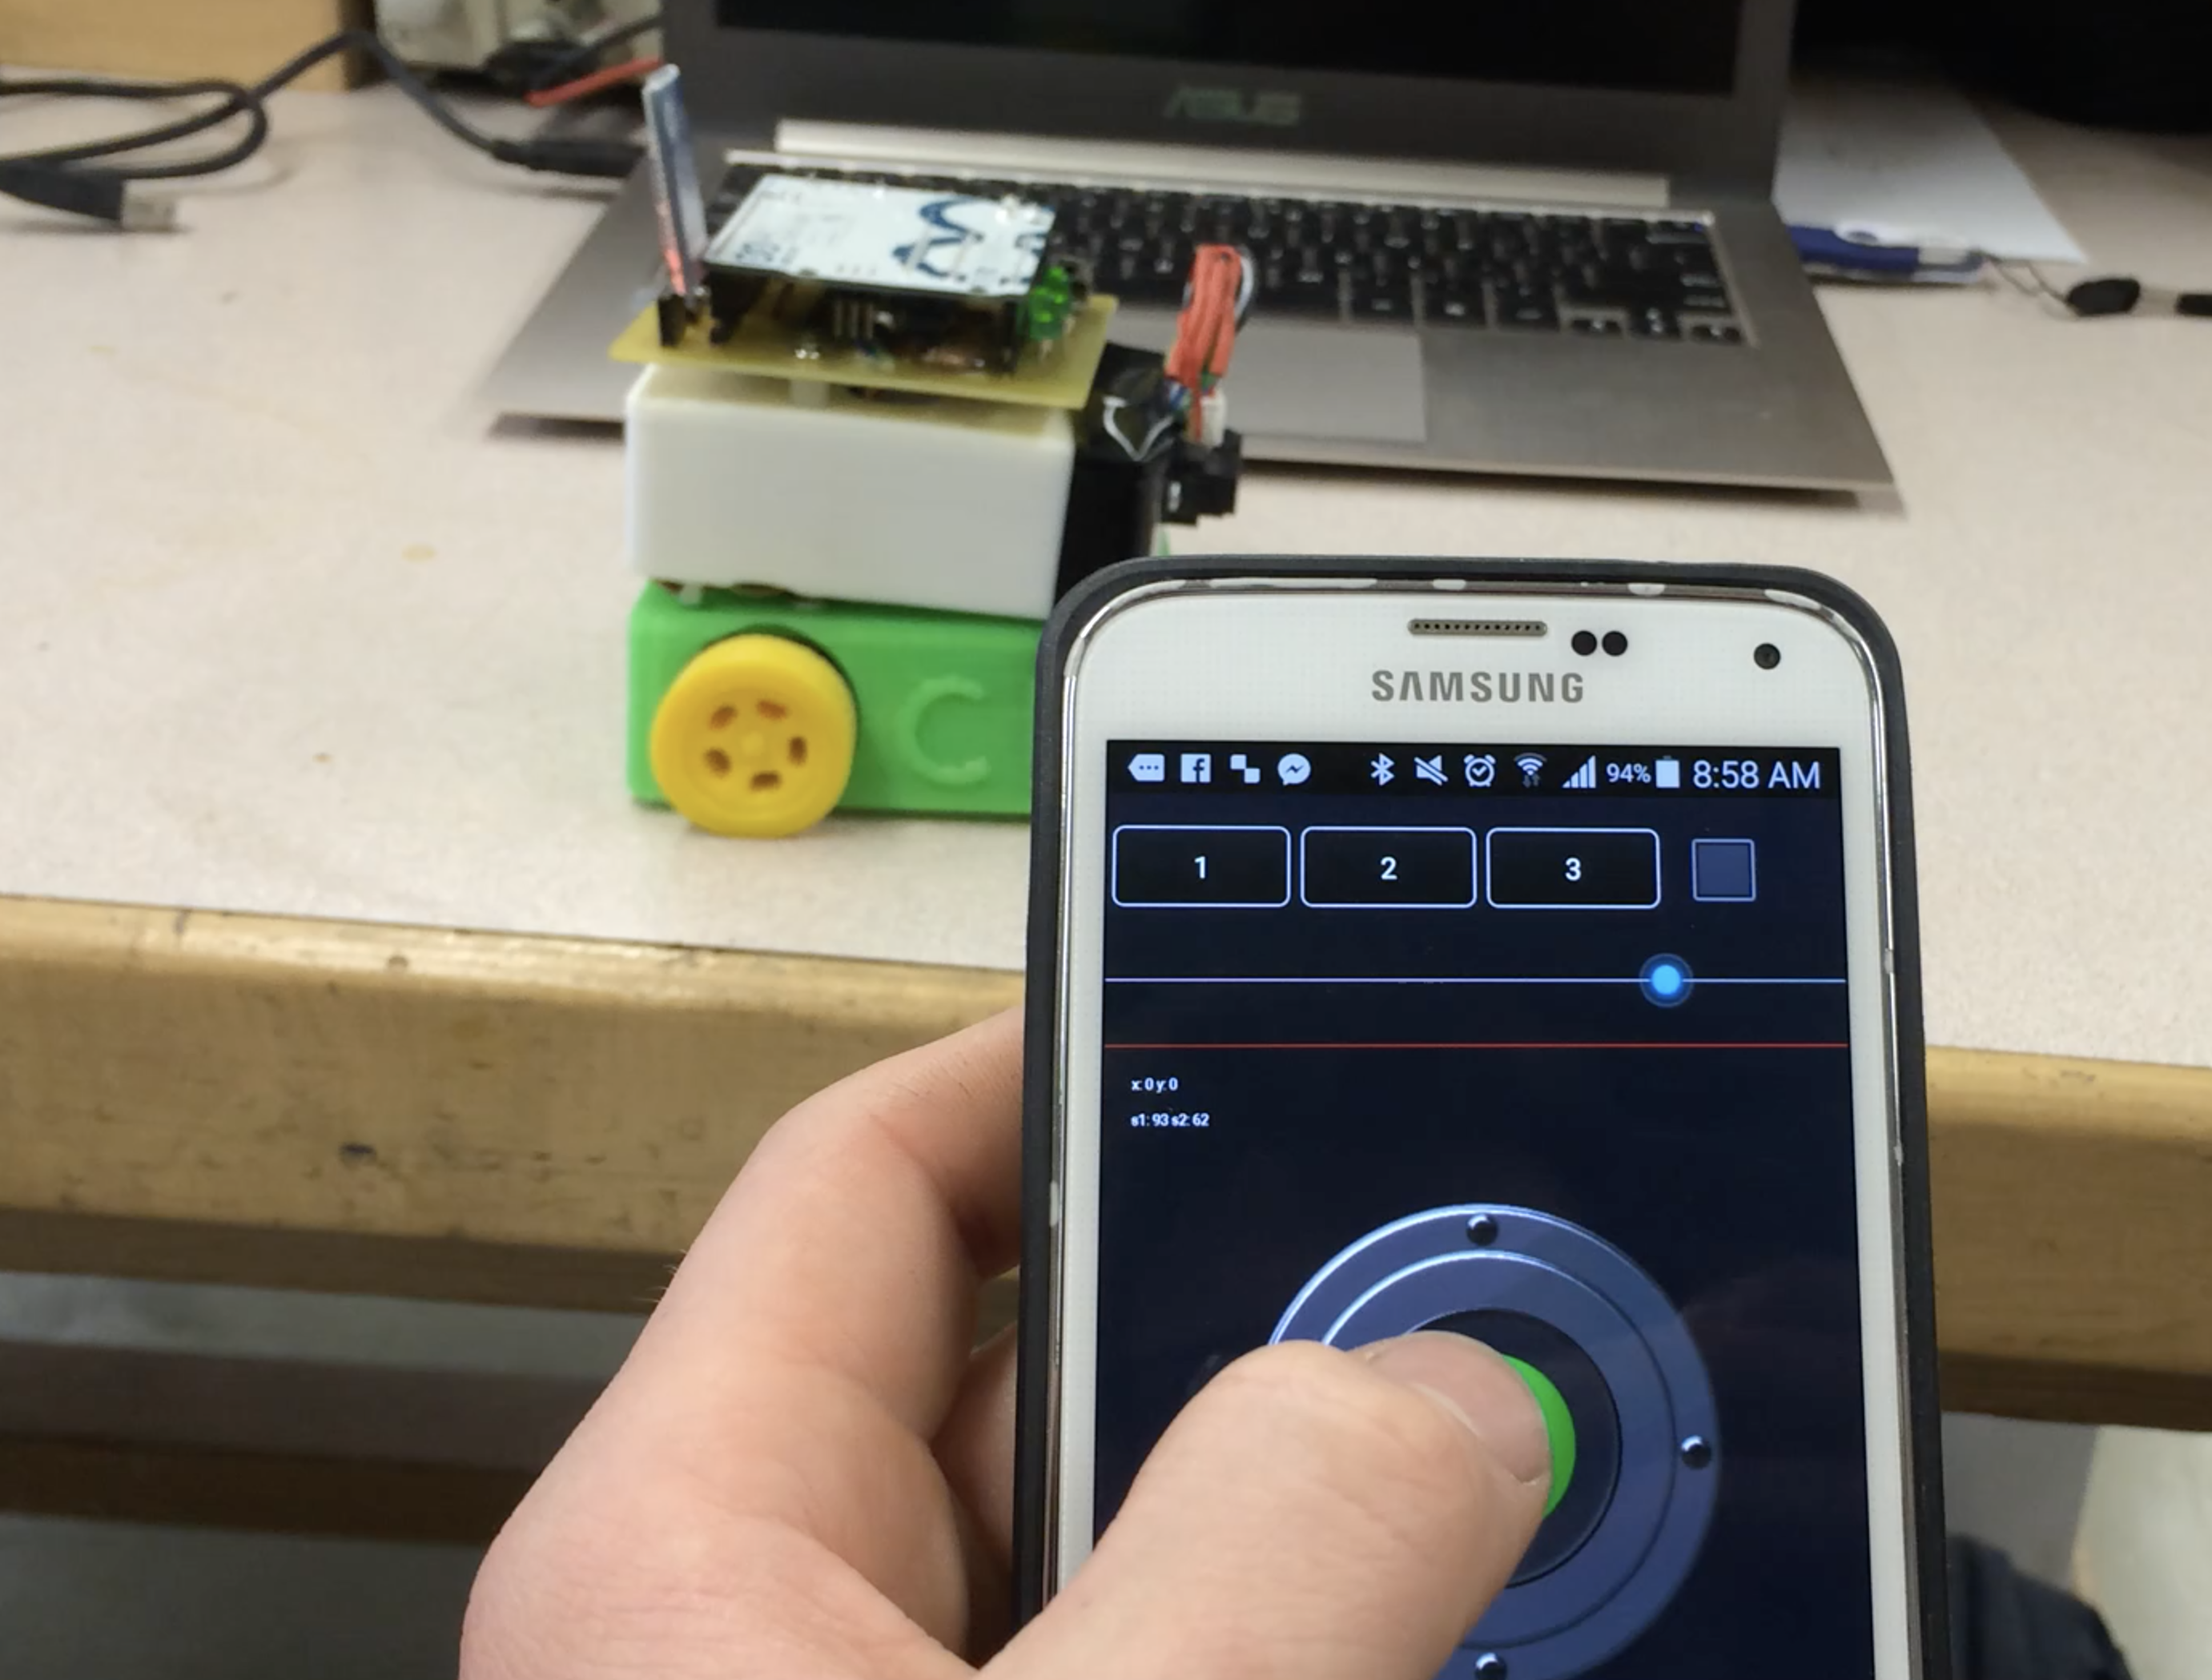
This is the future of wired connections… no wires! Here is the bluetooth controlled sumo robot I built while in the BCIT TTED program. The robot is working off code on the Arduino Uno which is working in tandem with a bluetooth receiver and dual motor gear box power by four AA batteries. This project would be best for advance/senior electronics students due to the complexity of coding the drive motion commands on the Arduino Uno as well as integrating the bluetooth connection.
Mr. McCormack
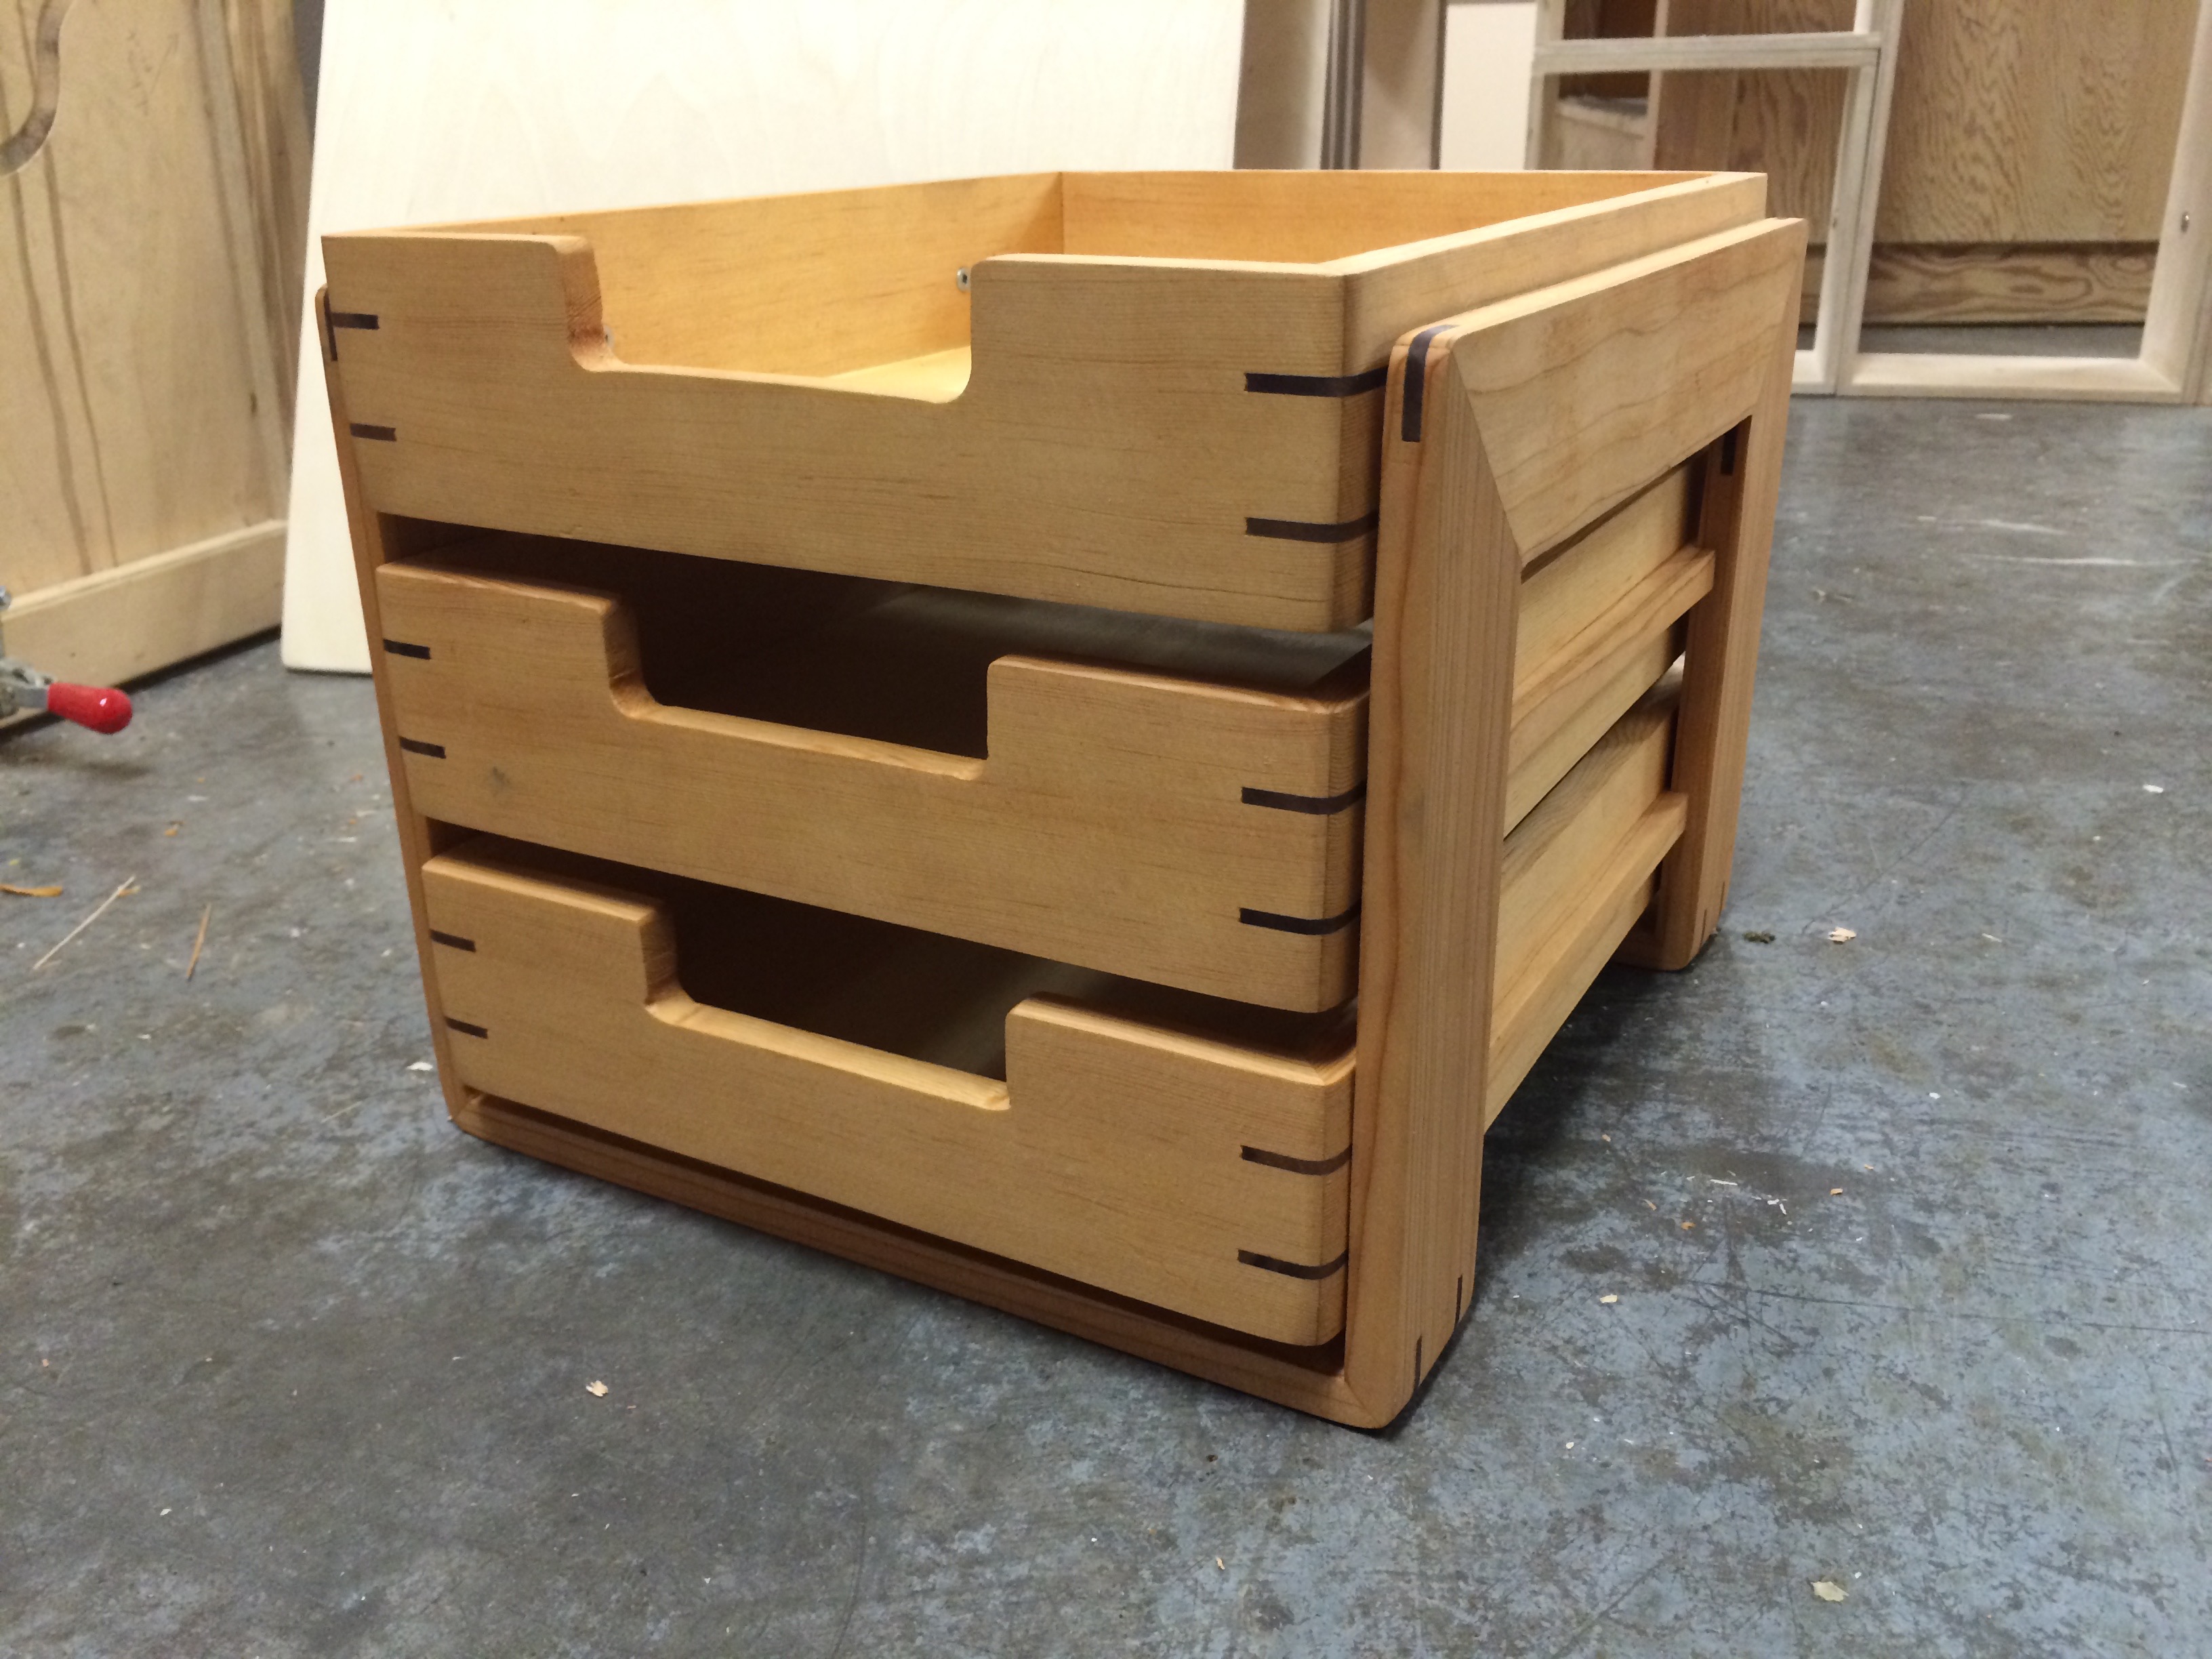
This project is excellent for honing fine detail skills of any woodworker. I competed this project at BCIT in the TTED program as an intermediate or level two woodworking project. The final product is three drawers, two that slide, that are sized to hold objects the size of an 81/2″x11″ or smaller. The project is great because it is inexpensive on materials (fir and dark walnut) and the dimensions of the material require a delicate construction and high attention to detail.
Mr. McCormack
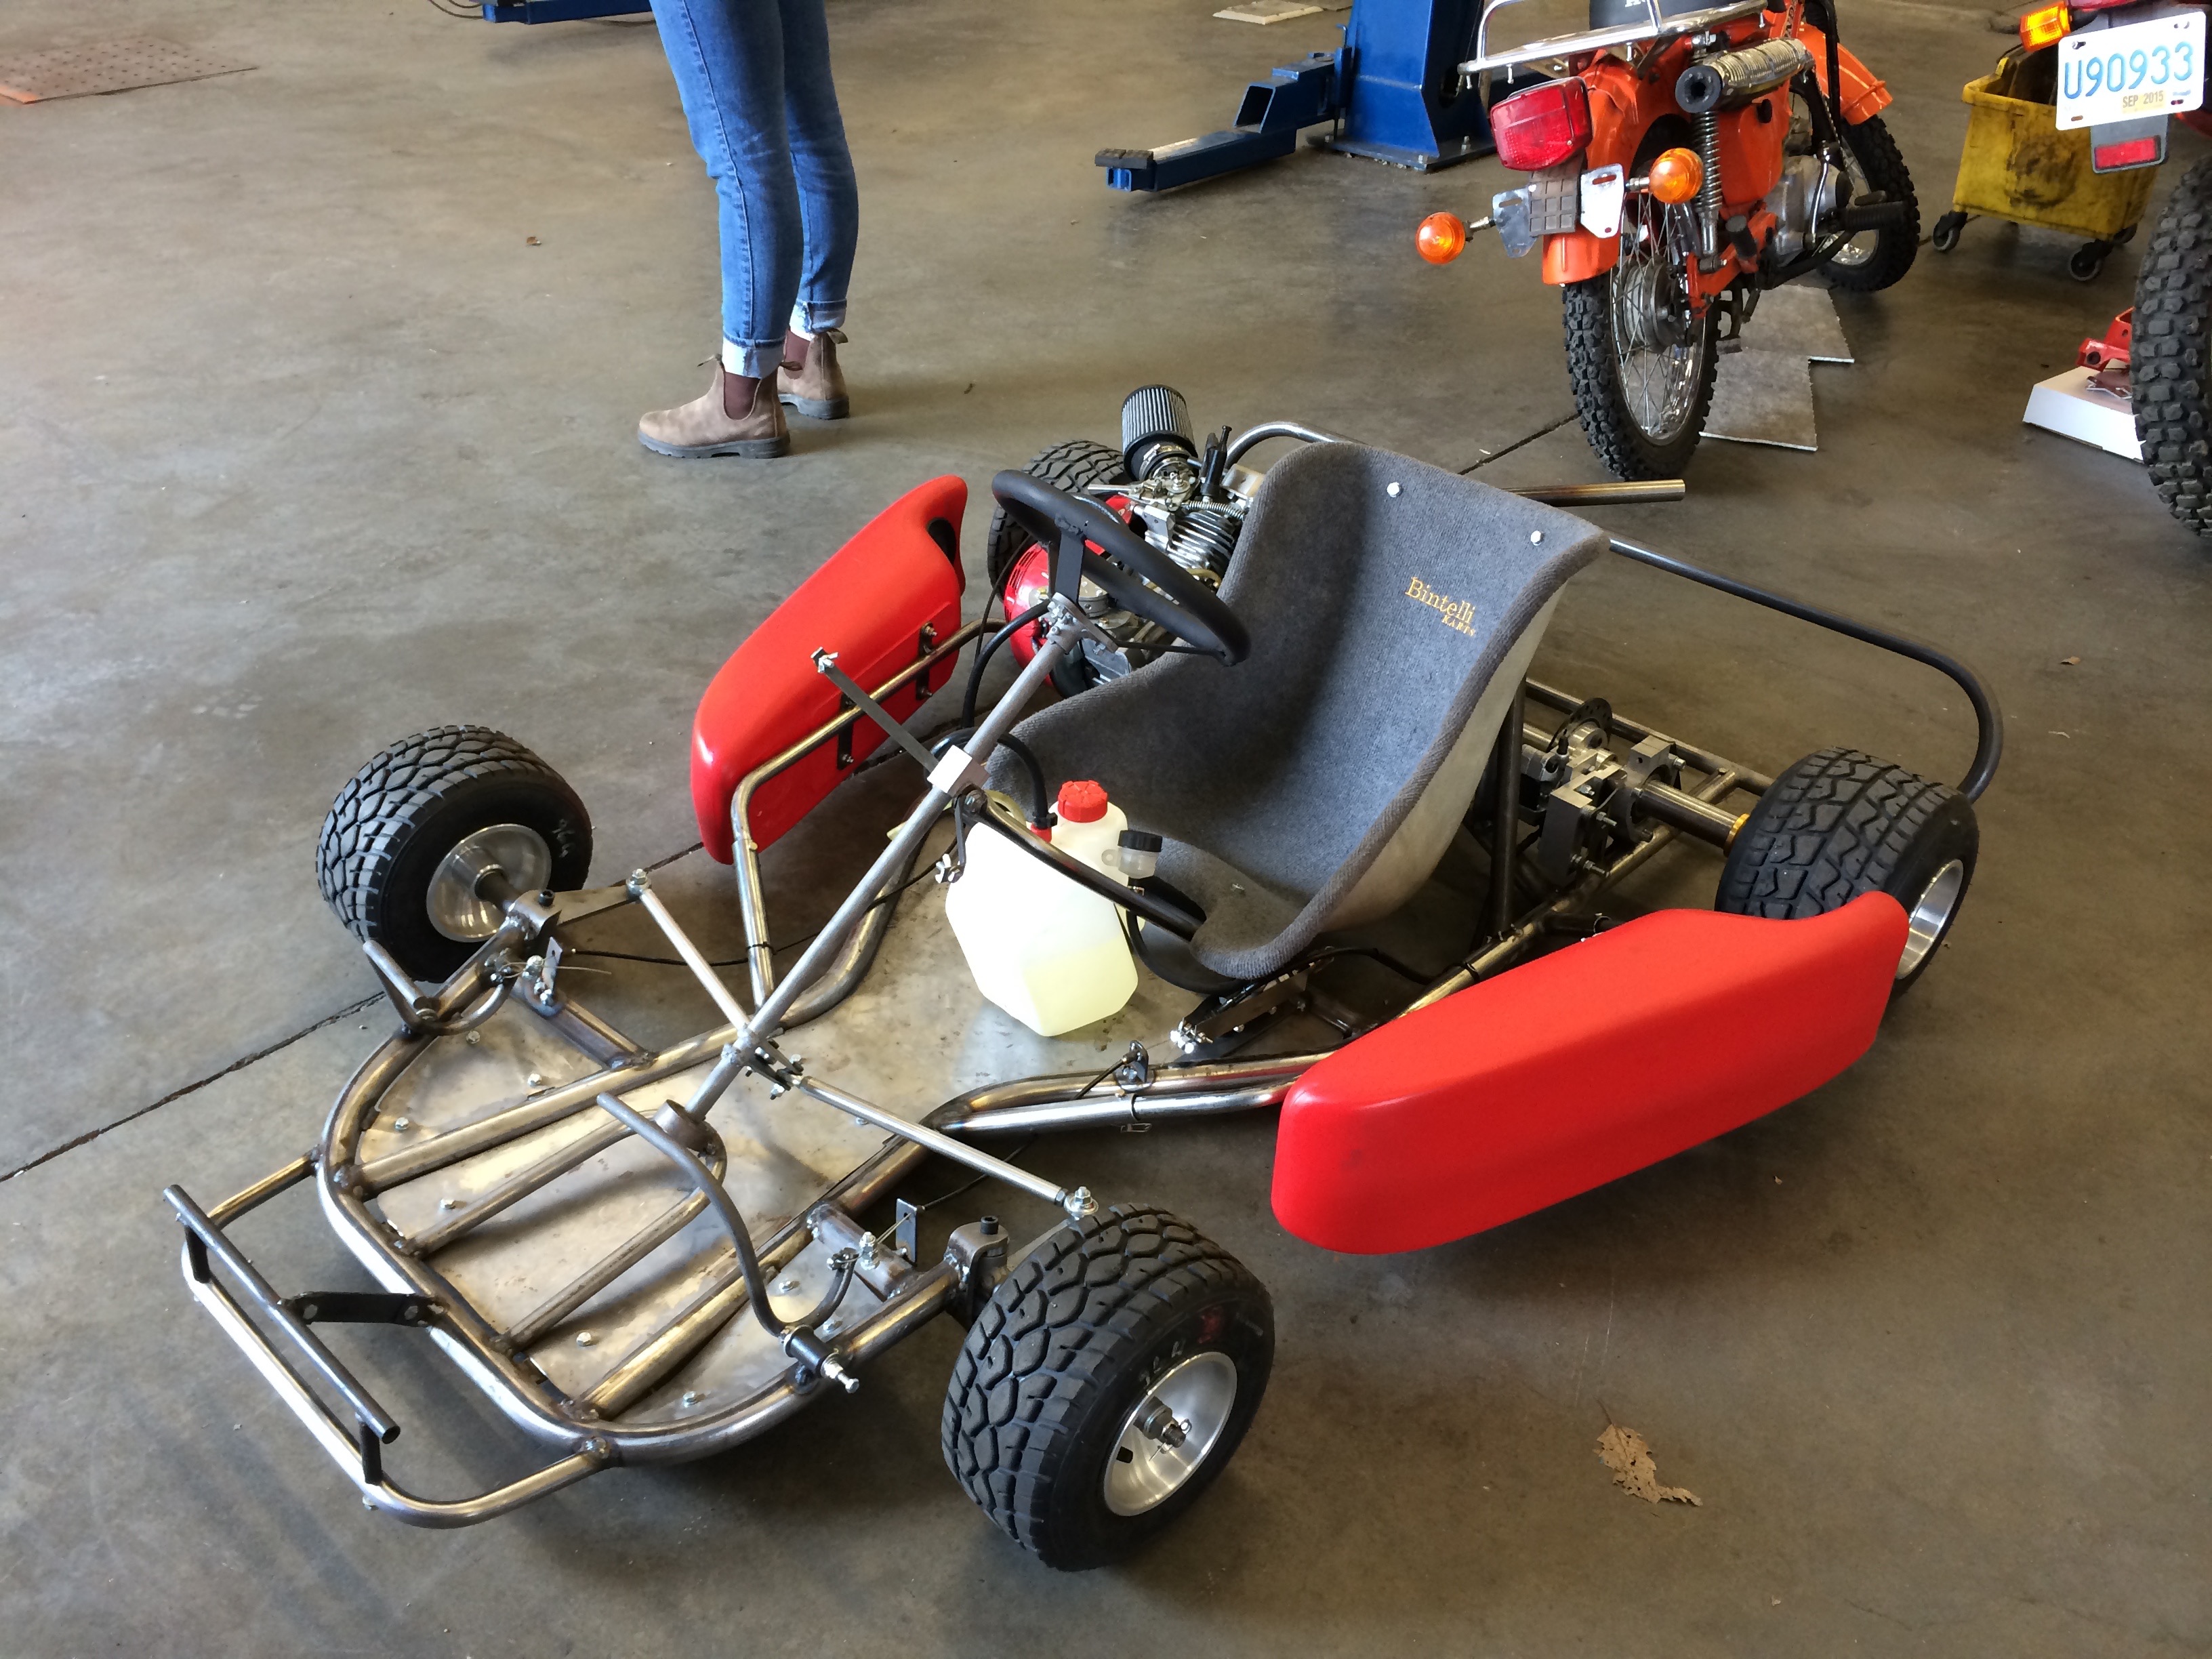
This go kart project is the largest creative fabrication project I have taken on to date. The objective of the project was to design and fabricate a grip driving go kart to ASN Karting Canada safety regulations so that the vehicle could complete in any karting event in Canada. With the guidance from Mr. Bartz, the metal and small engines instructor in the BCIT TTED program, myself and a close friend completed this kart to ASN safety regulations over approximately 450 man hours of work. This project required mostly custom fabrication to create the steering and braking systems. Jigs for the chassis and rear axel mounts were provided to us by Mr. Bartz. This project was a great success to me a brings me an immense amount of joy and pride every time I get the chance to take it out on the race track.
Picture shows kart before complete with paint and front fairings.
Mr. McCormack
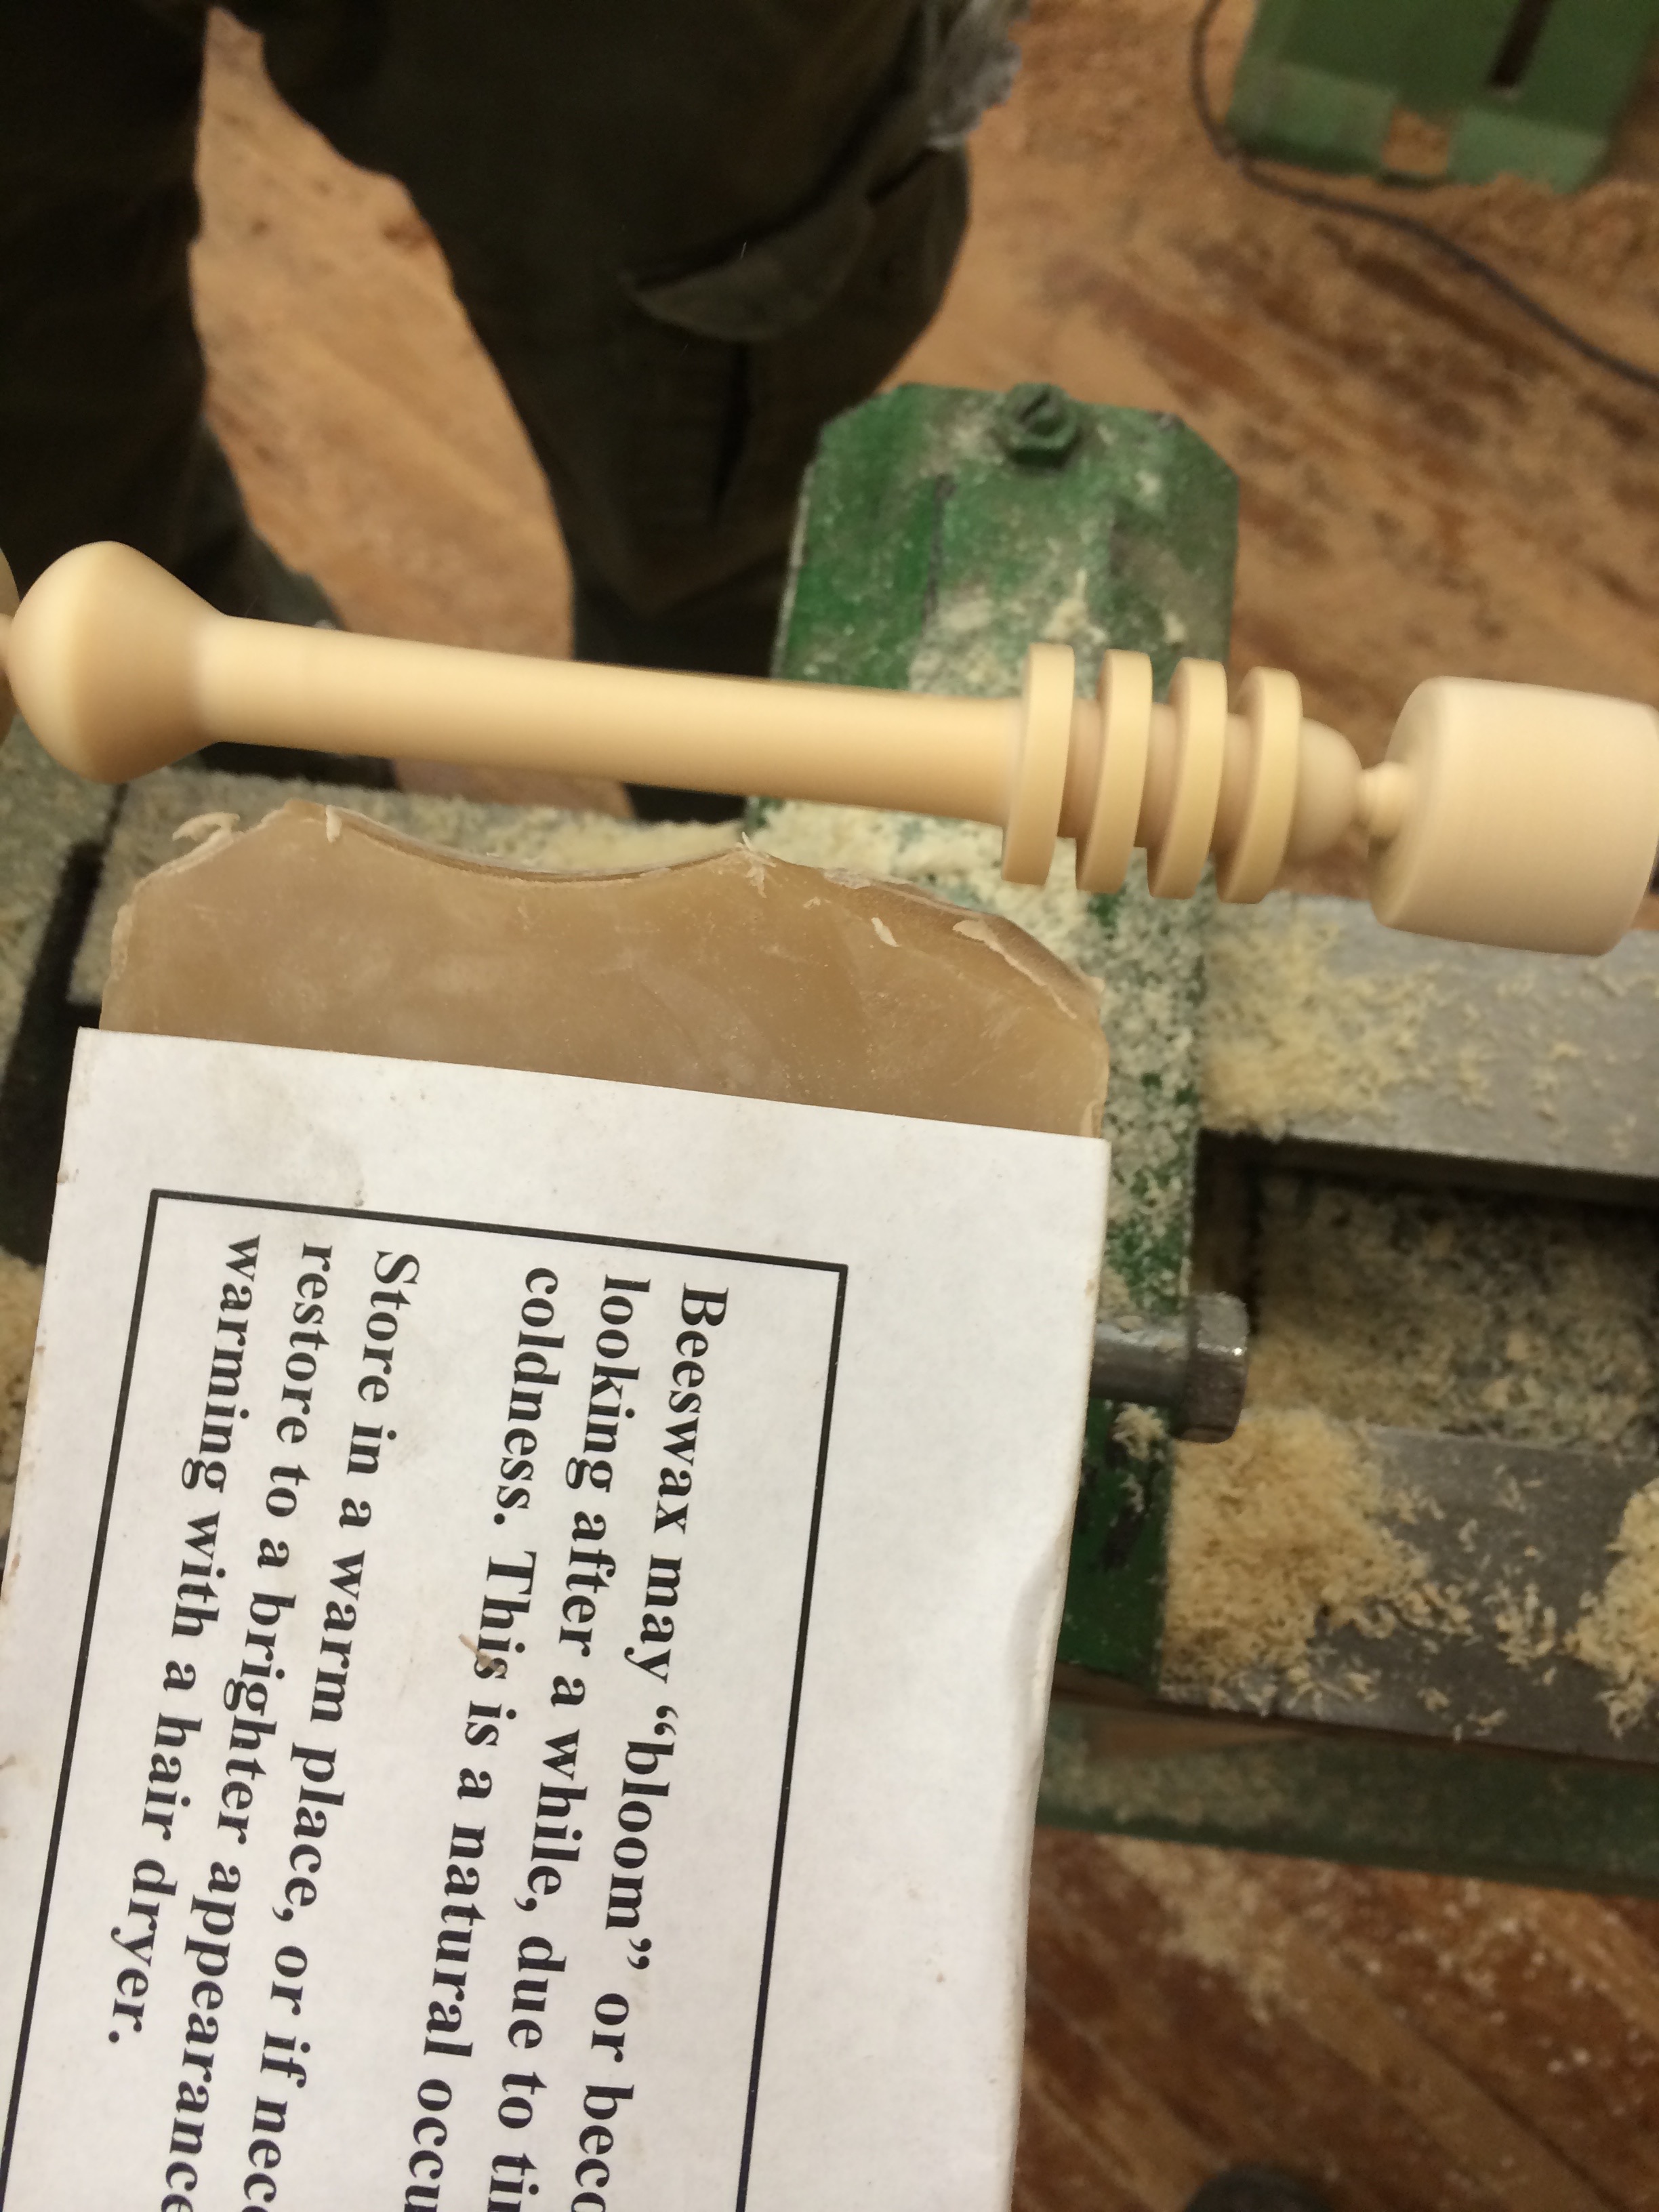
This project is a great lathe introductory experience for beginner or intermediate woodworkers. The final product is food safe waxed honey dipper. To begin stock break out dimensions are 1″x1″x8″. A honey dipper is easily completed within a single block by most. Makes for a great mother or father’s day gift!
Mr. McCormack
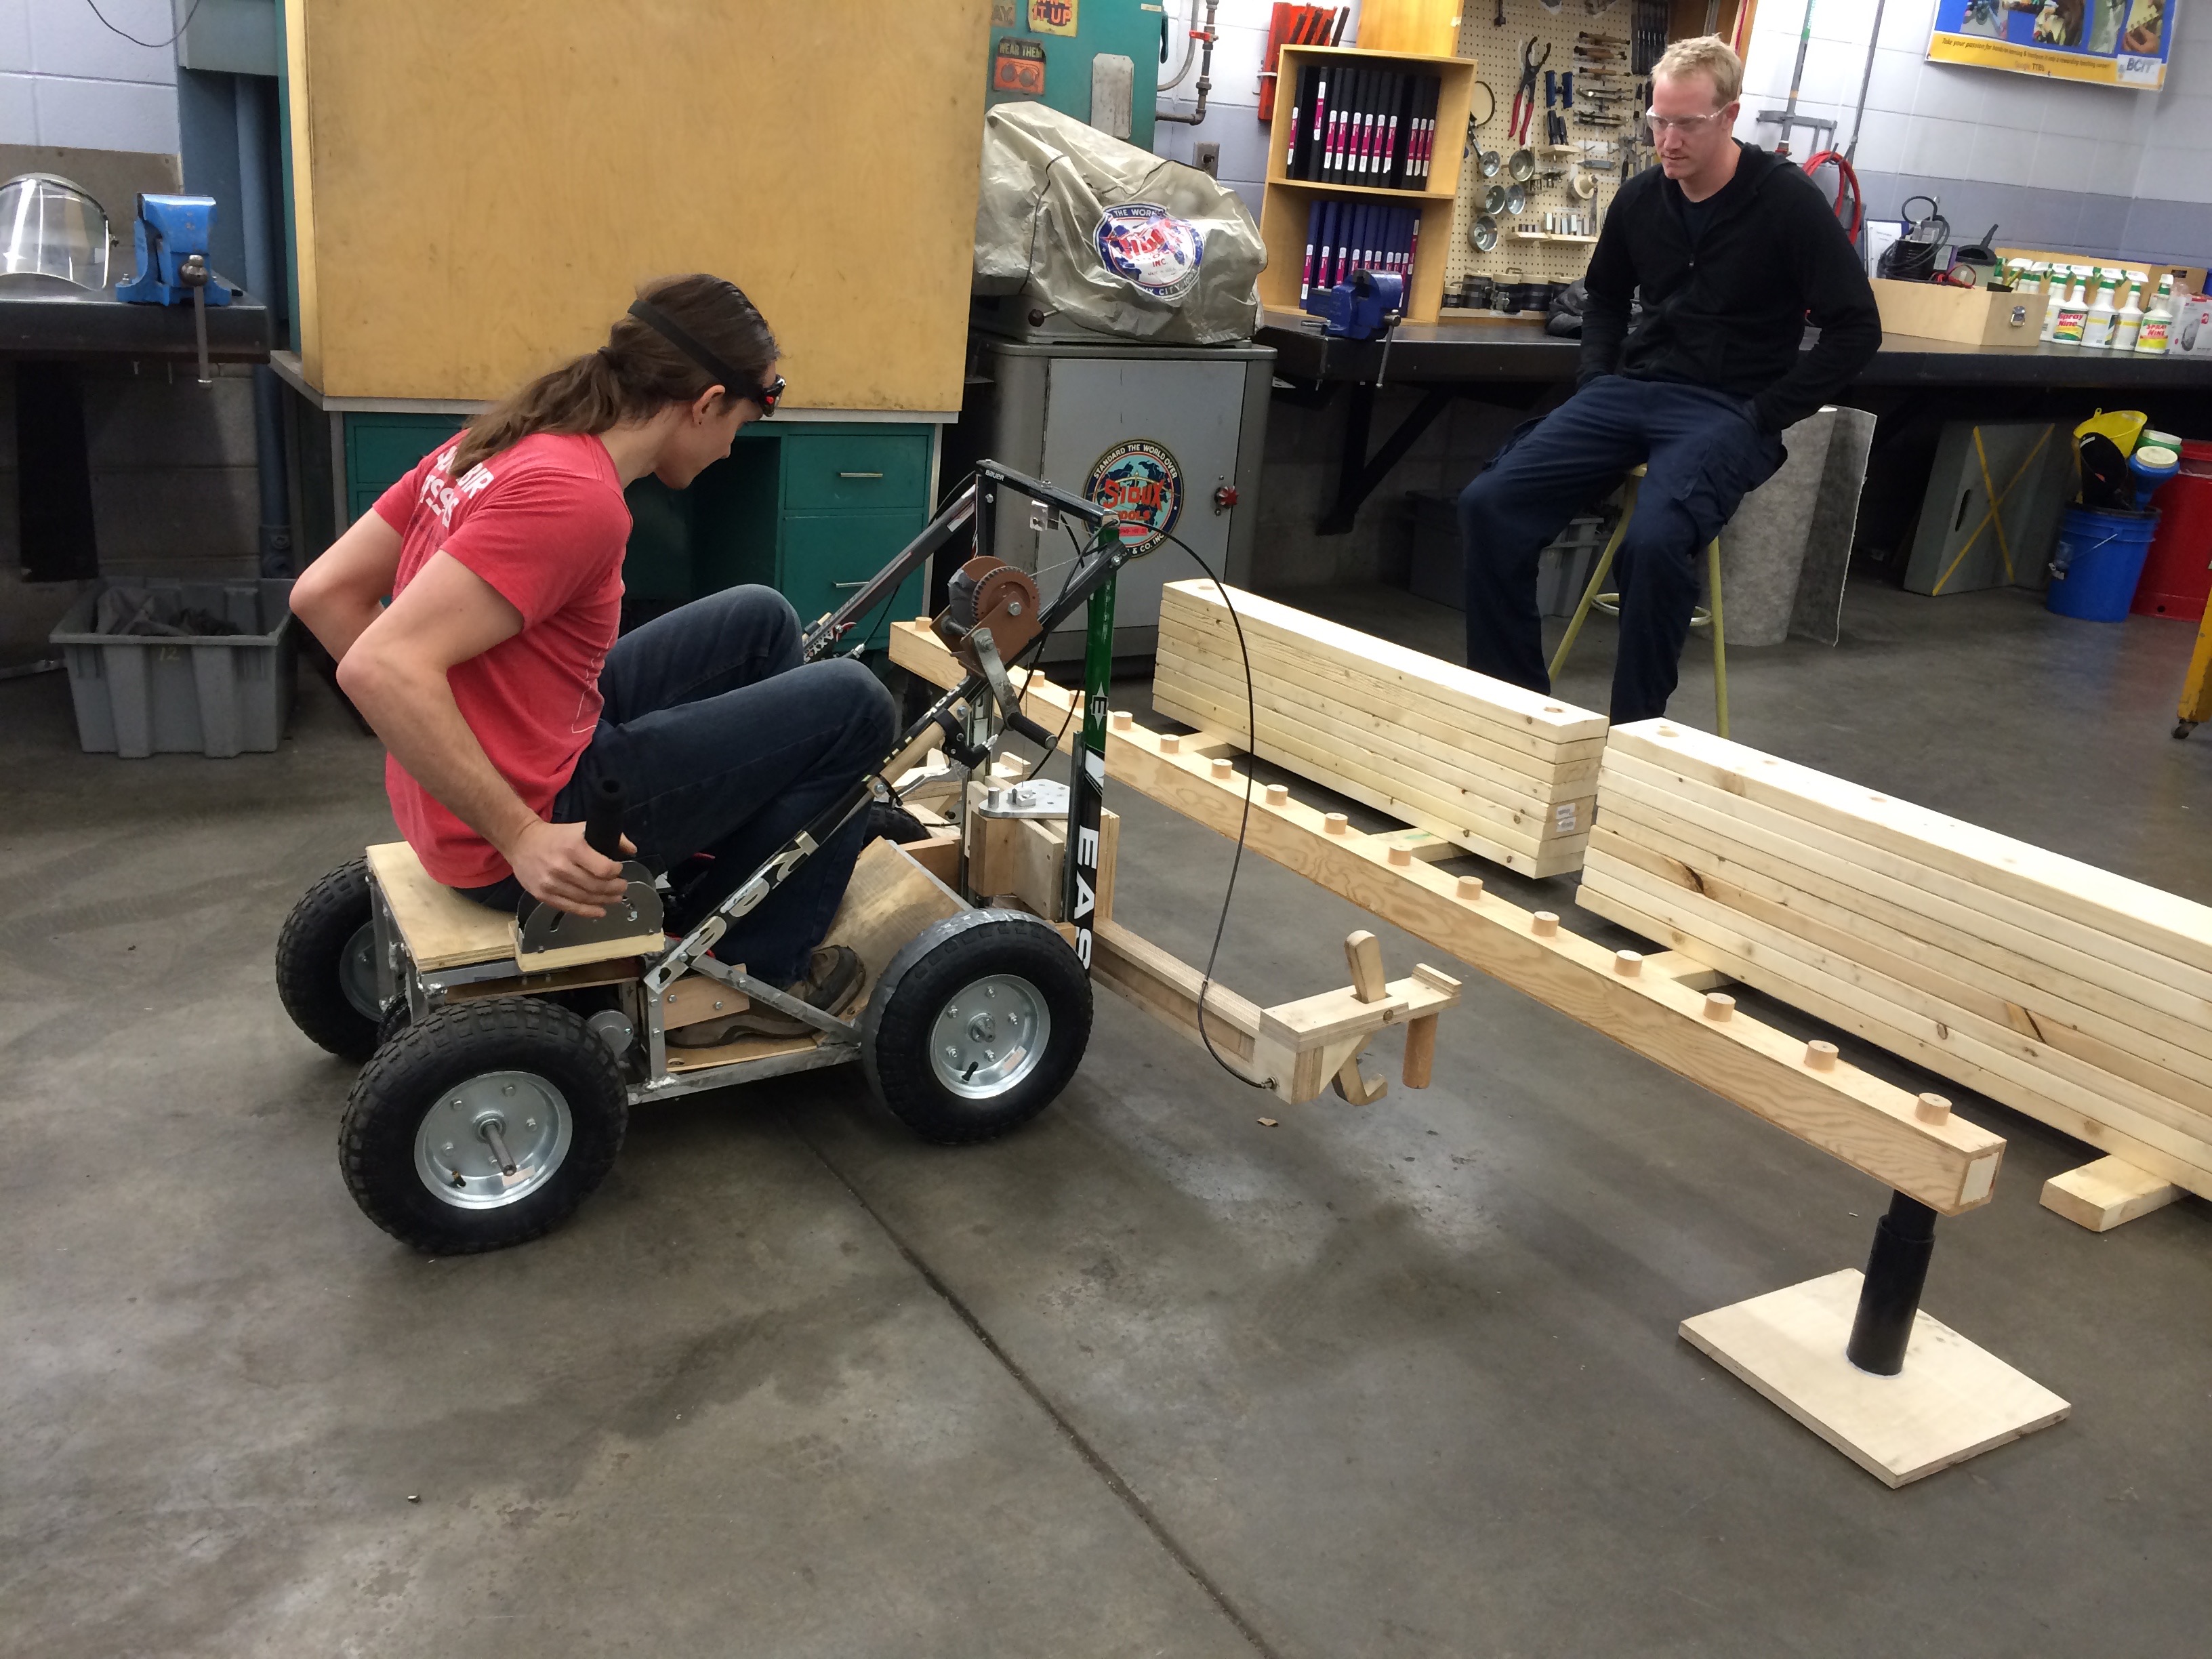
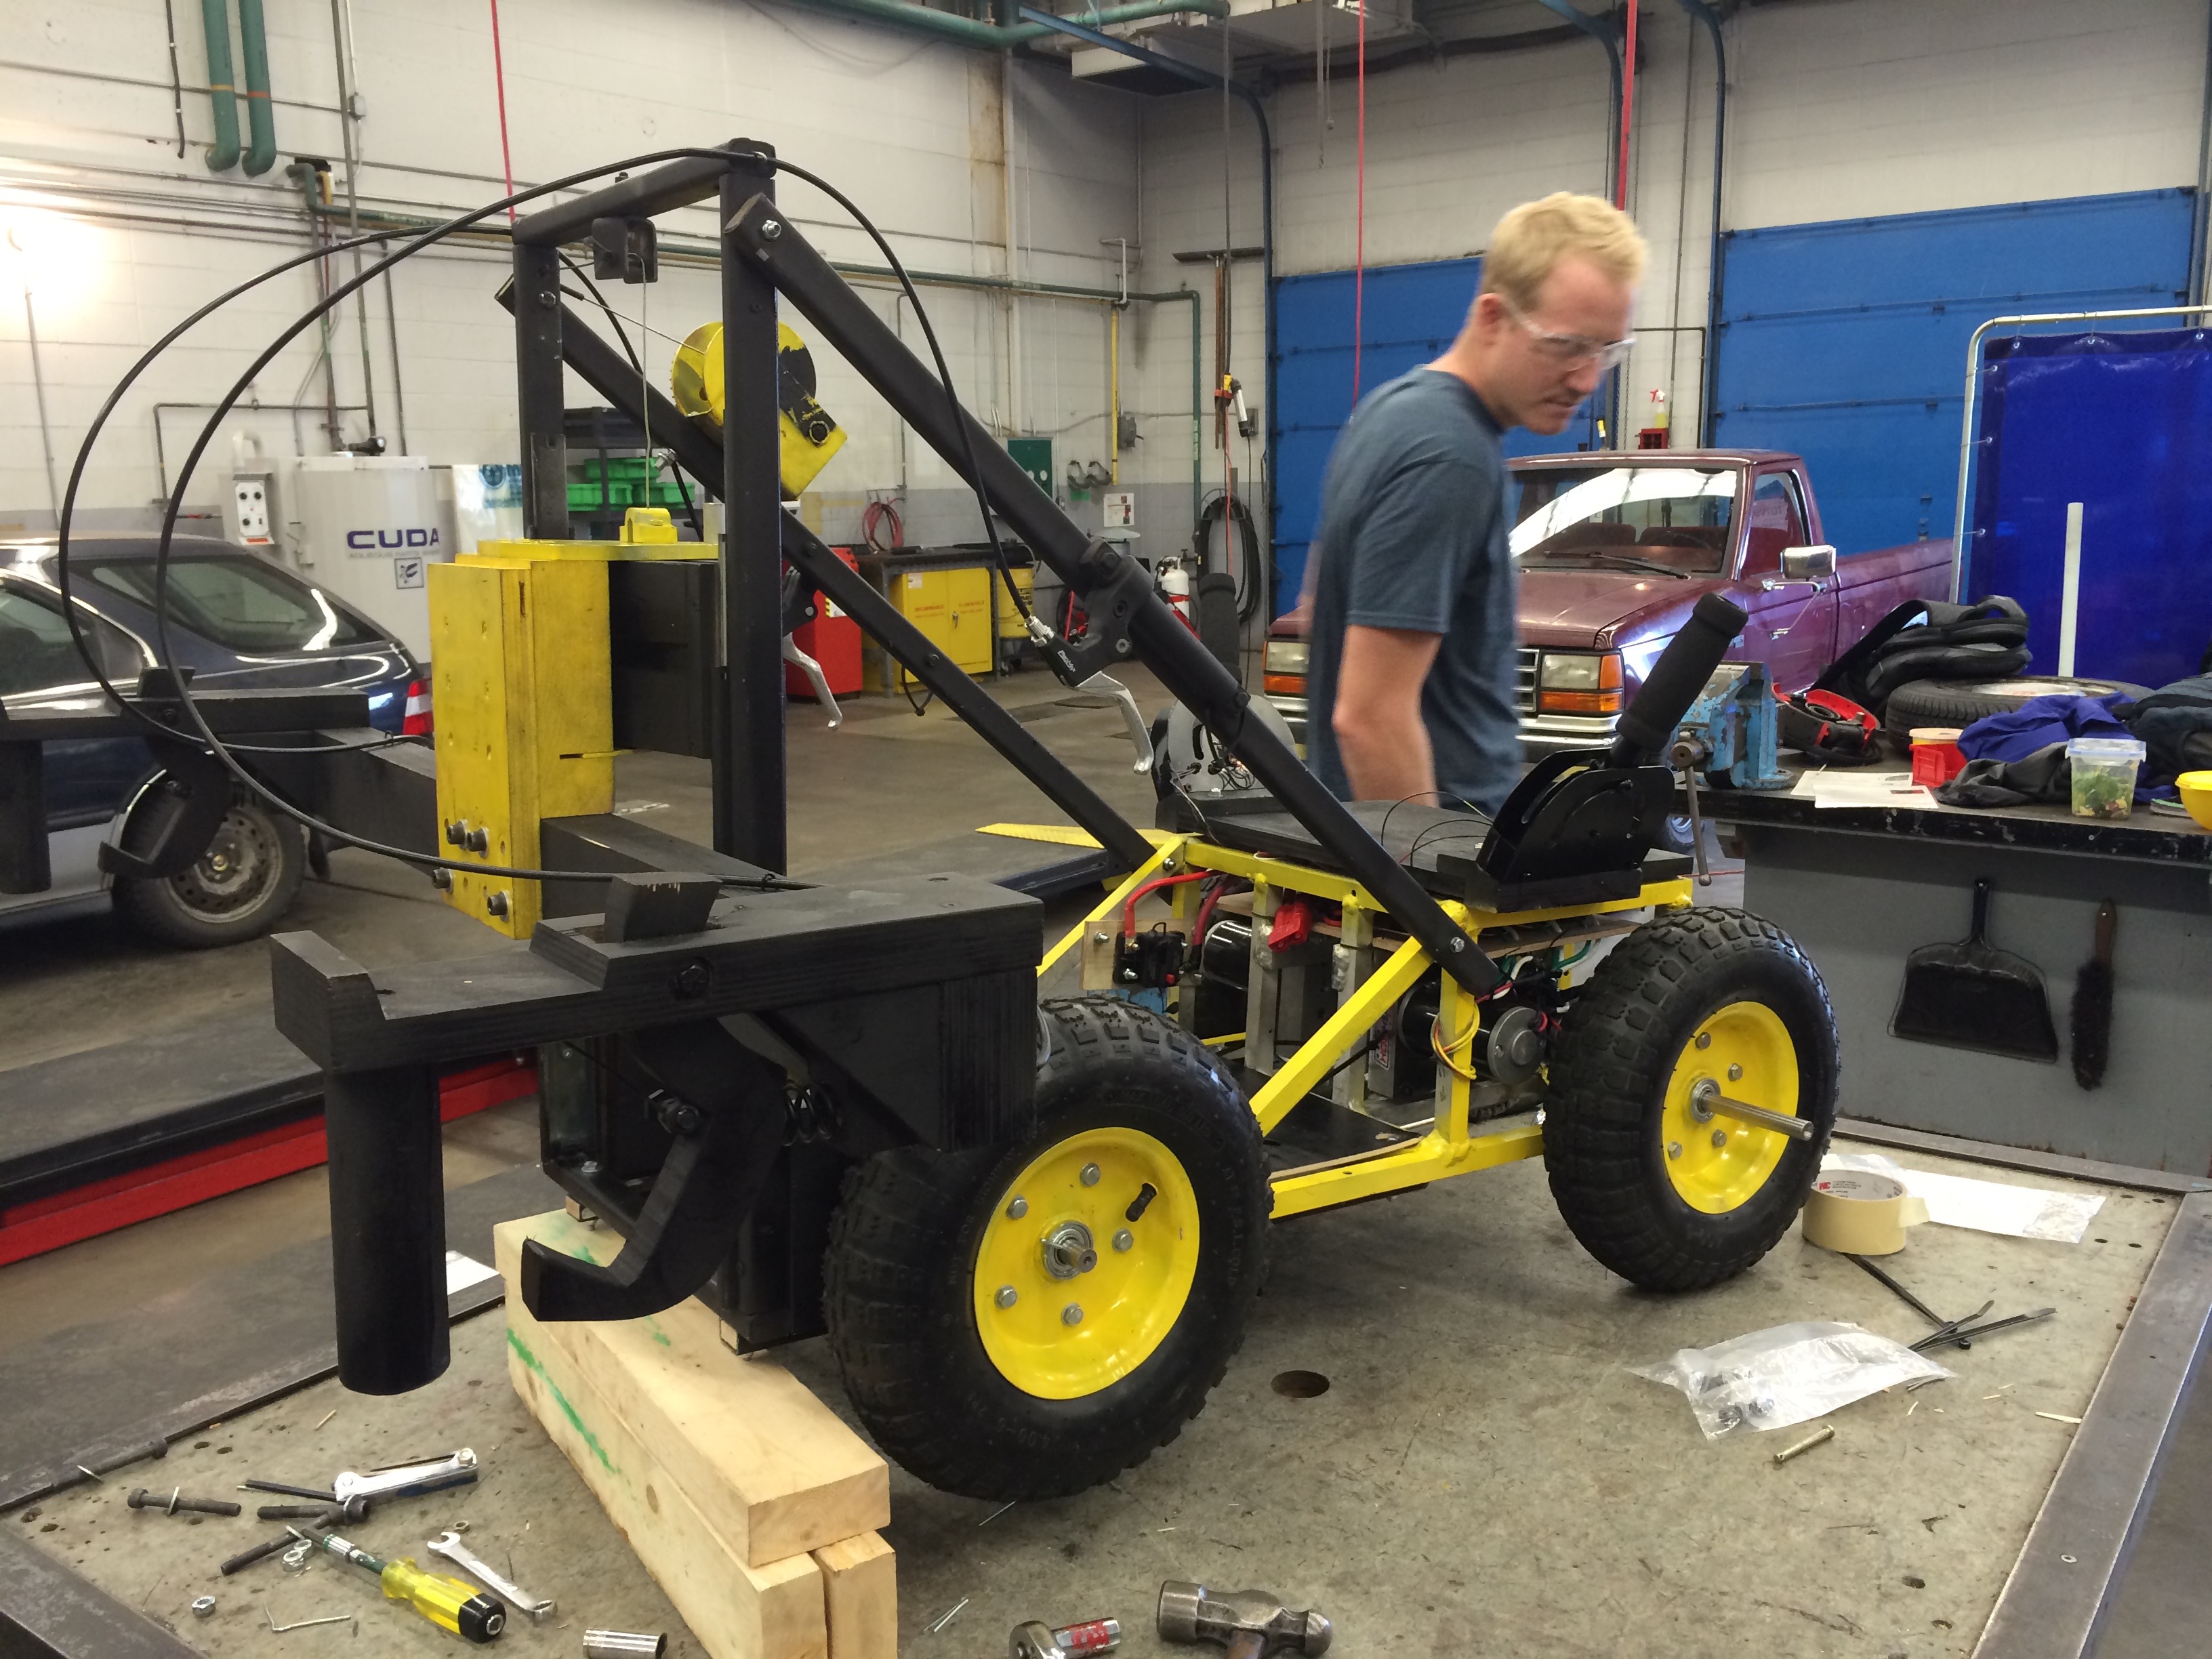
This was a group project undertaken during my final year and semester at BCIT in the TTED program. The project was called “Vehicle in a Box” due to its requirement of having to fit in a small box when deconstructed or “The 100 Hour Project” defining the amount of class time given to complete the project. Our challenge at the onset of the project was to build an electrical vehicle that could build a small foot bridge out of 4″x4″ and 2″x6″ sections of wood, then drive over that very same bridge. Our group designed a rear wheel drive, aluminum welded chassis, with skid steering, and a winch/claw like mechanism to manipulate the wooden beams. Our vehicle features a wide range of materials including, wood, aluminum, steel, and fibreglass. The project was a great success.
Mr. McCormack
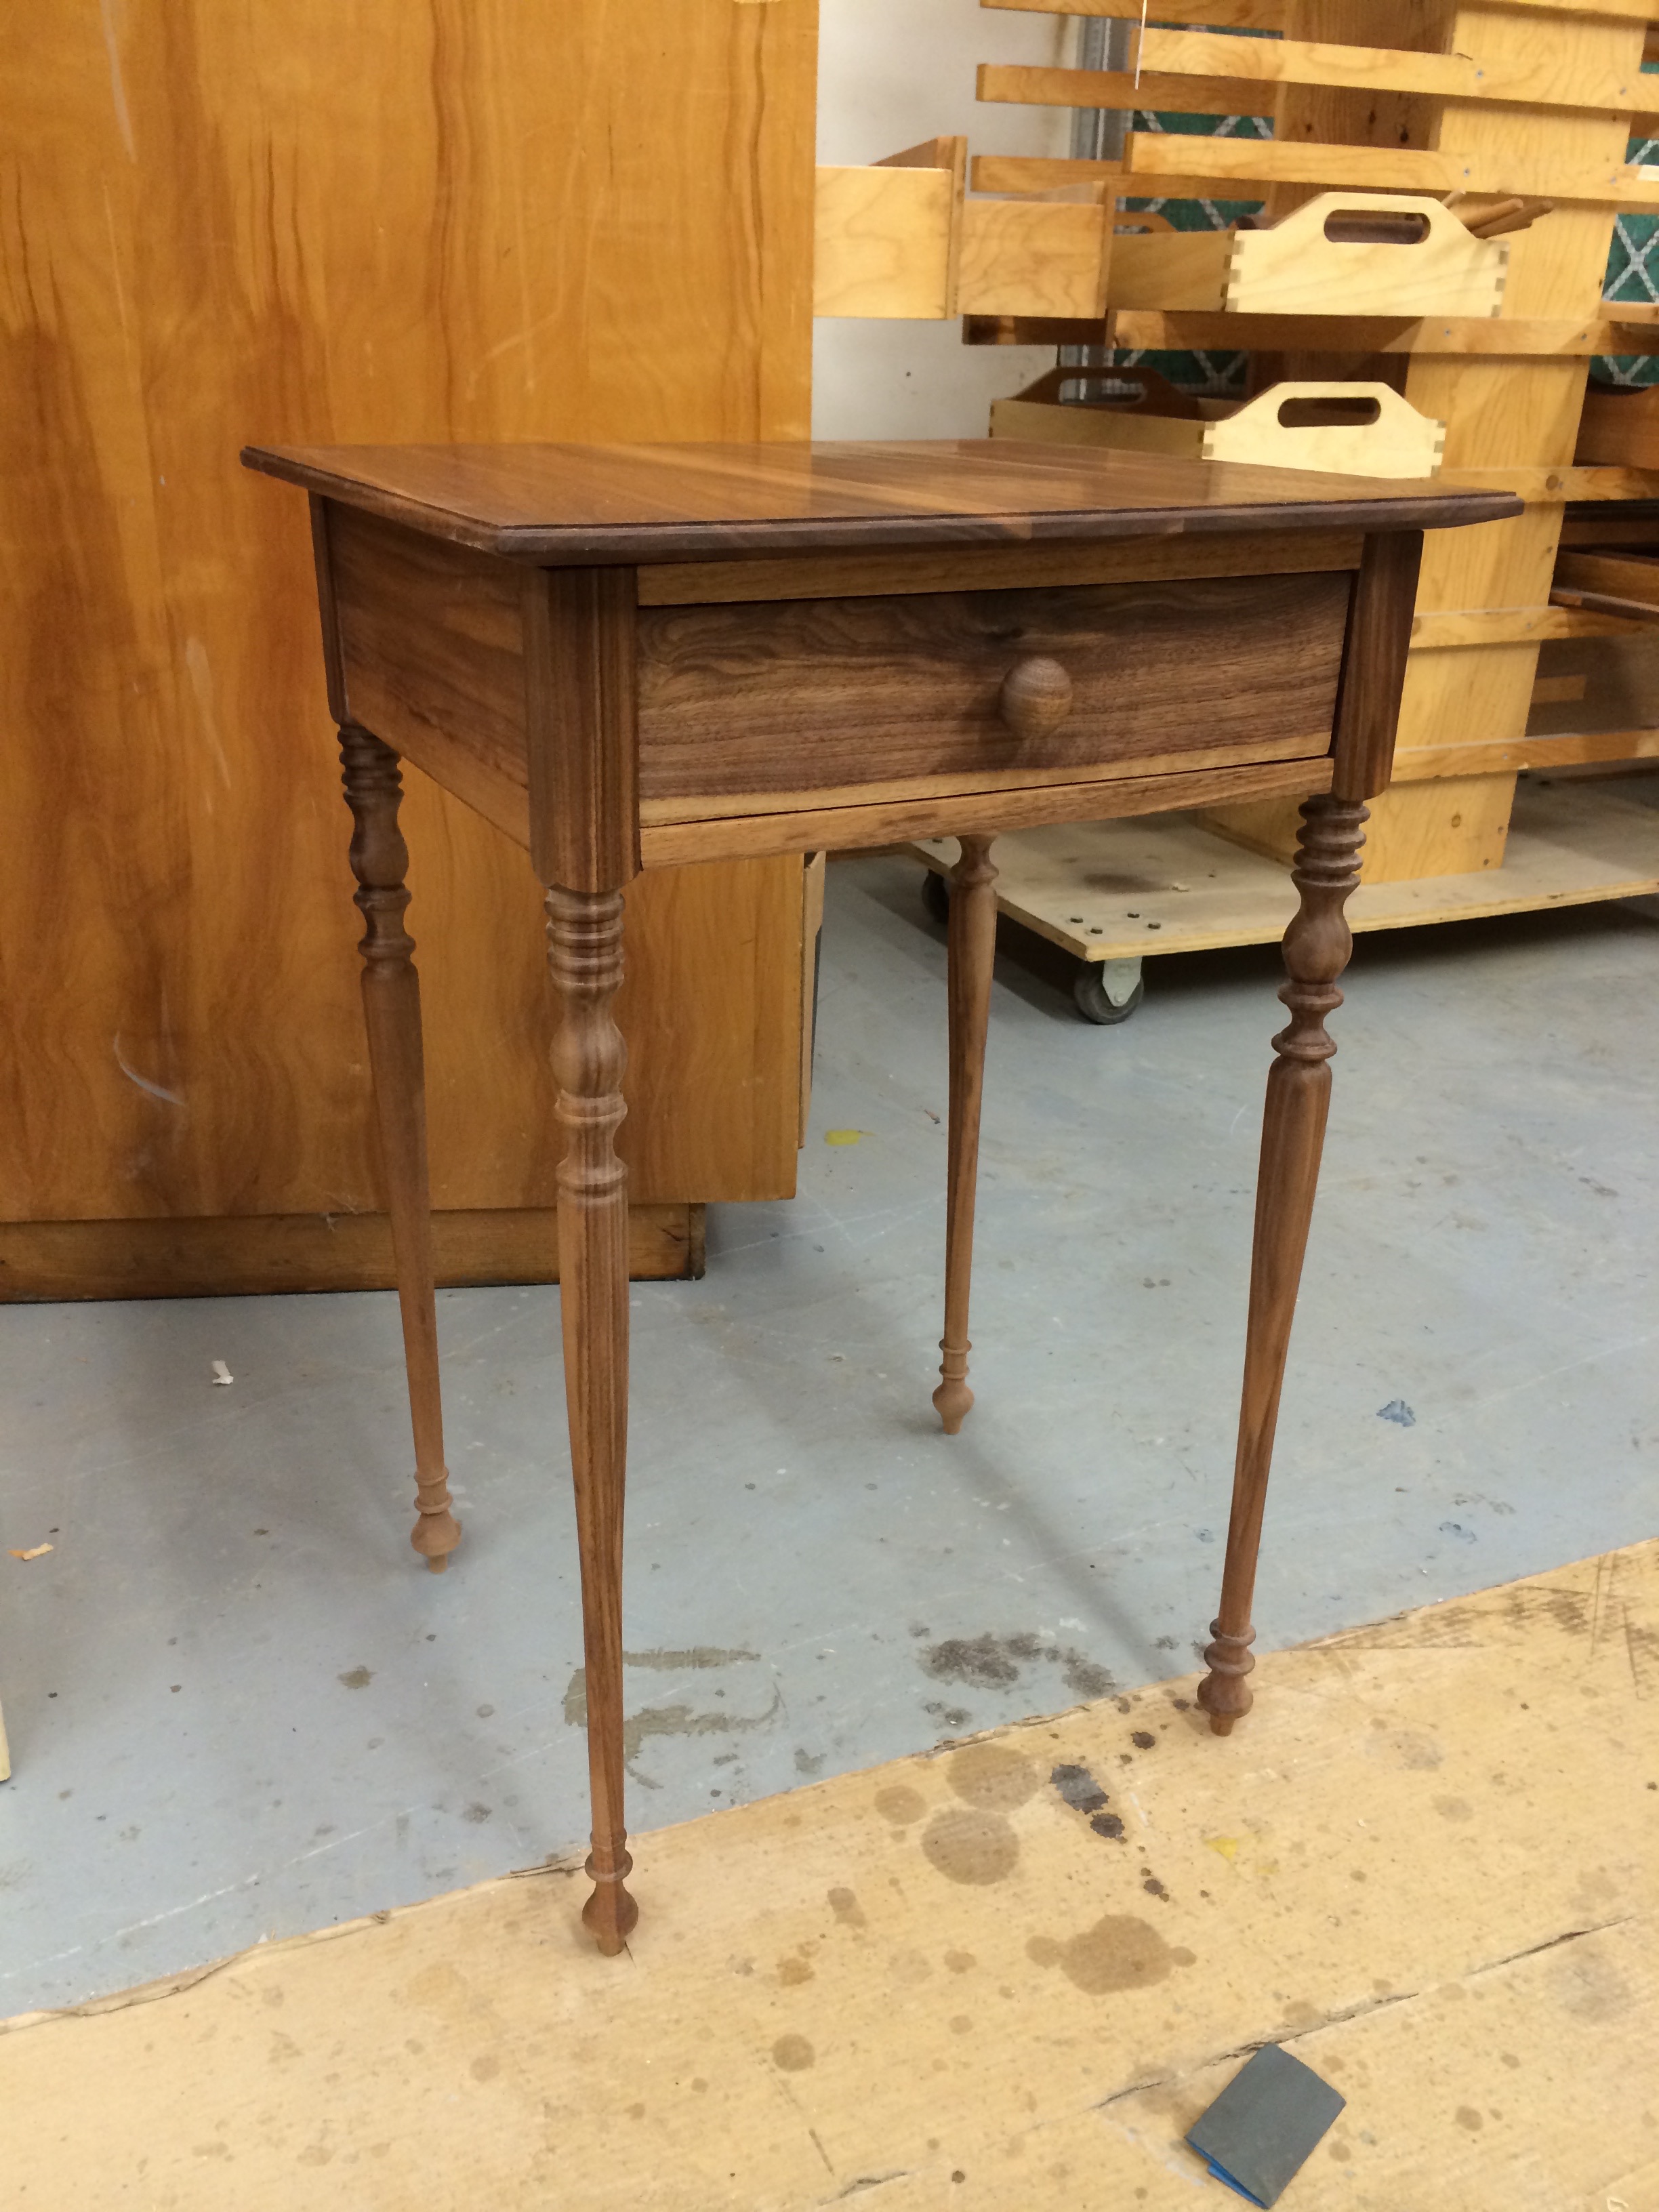
I made this dark walnut sofa table during my second year in the BCIT TTED program as an example for a senior woodworking project. The major challenge to create a furniture is true Sheraton style is the four turned legs and half blind dove tail drawer construction. With a project based on dark walnut it is imperative to cut once and measure twice, this can be exceptionally difficult when attempting to creatively reproduce four legs that all look alike in proportion and shape. The turn legs, drawer details and material make this project a great delicate project for a senior student woodworker to tackle!
Mr. McCormack
Cherry cup I made at BCIT. Great beginner lathe project! Functional too!
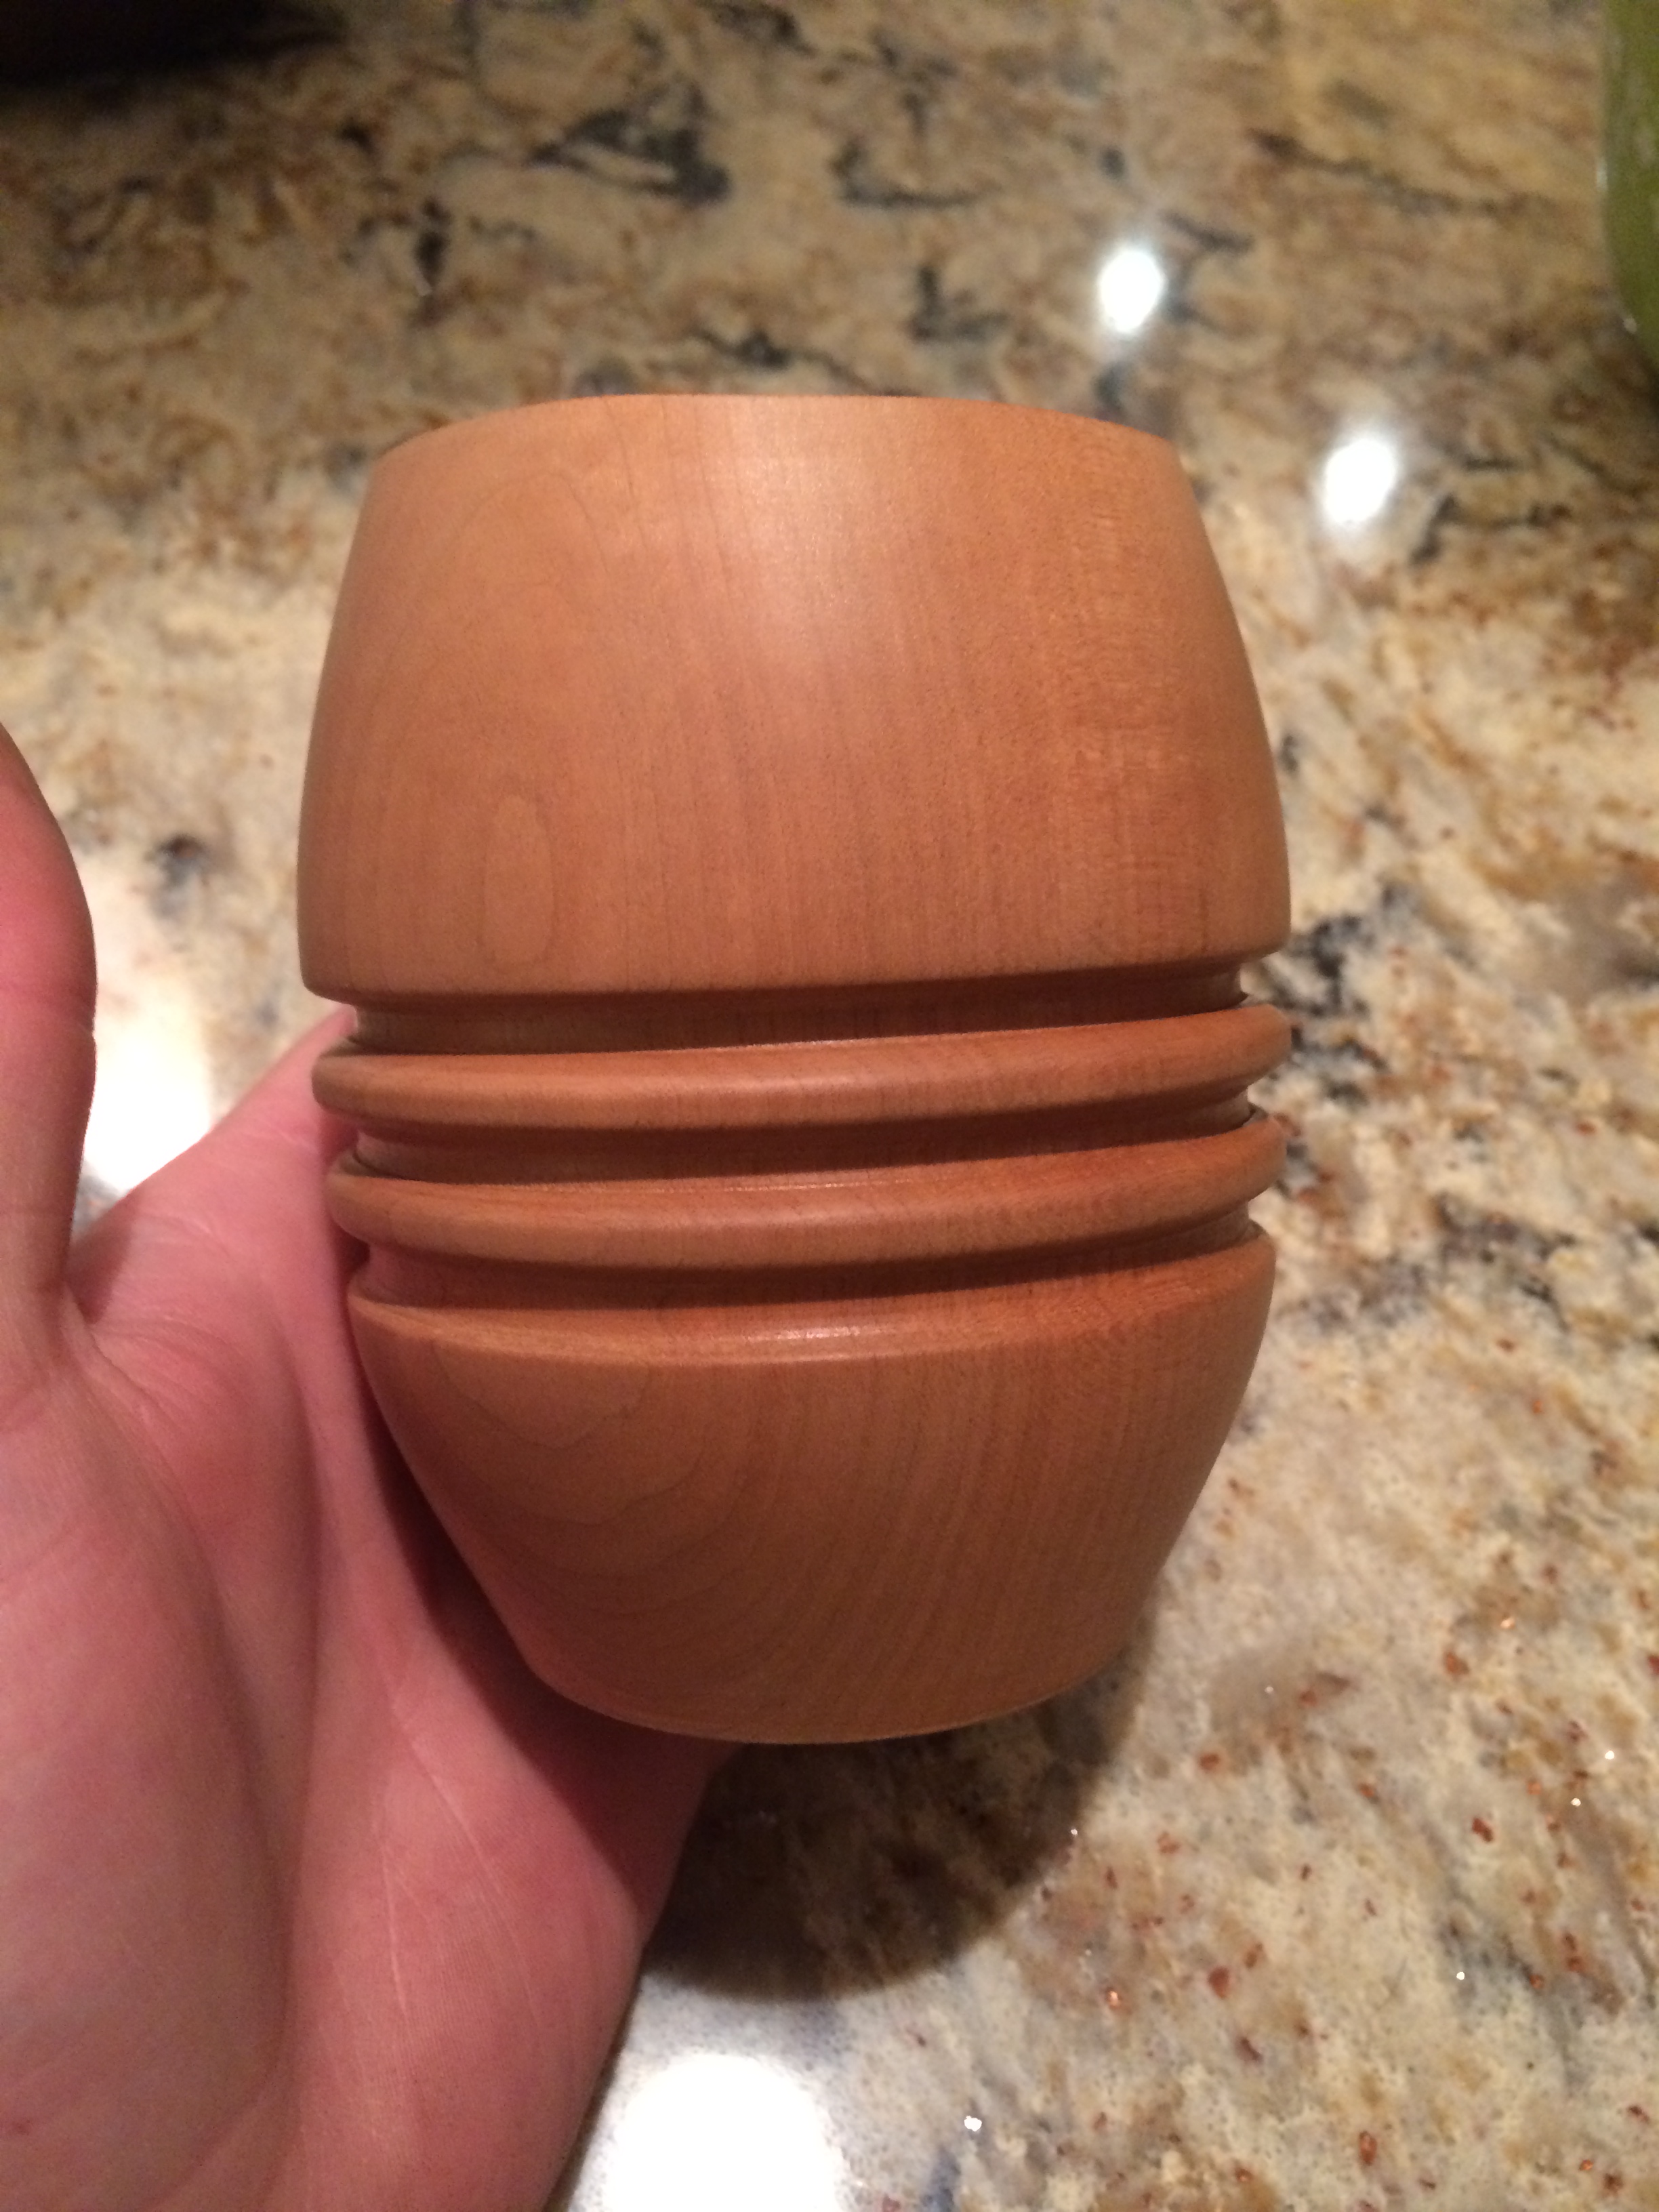
-Mr.McCormack
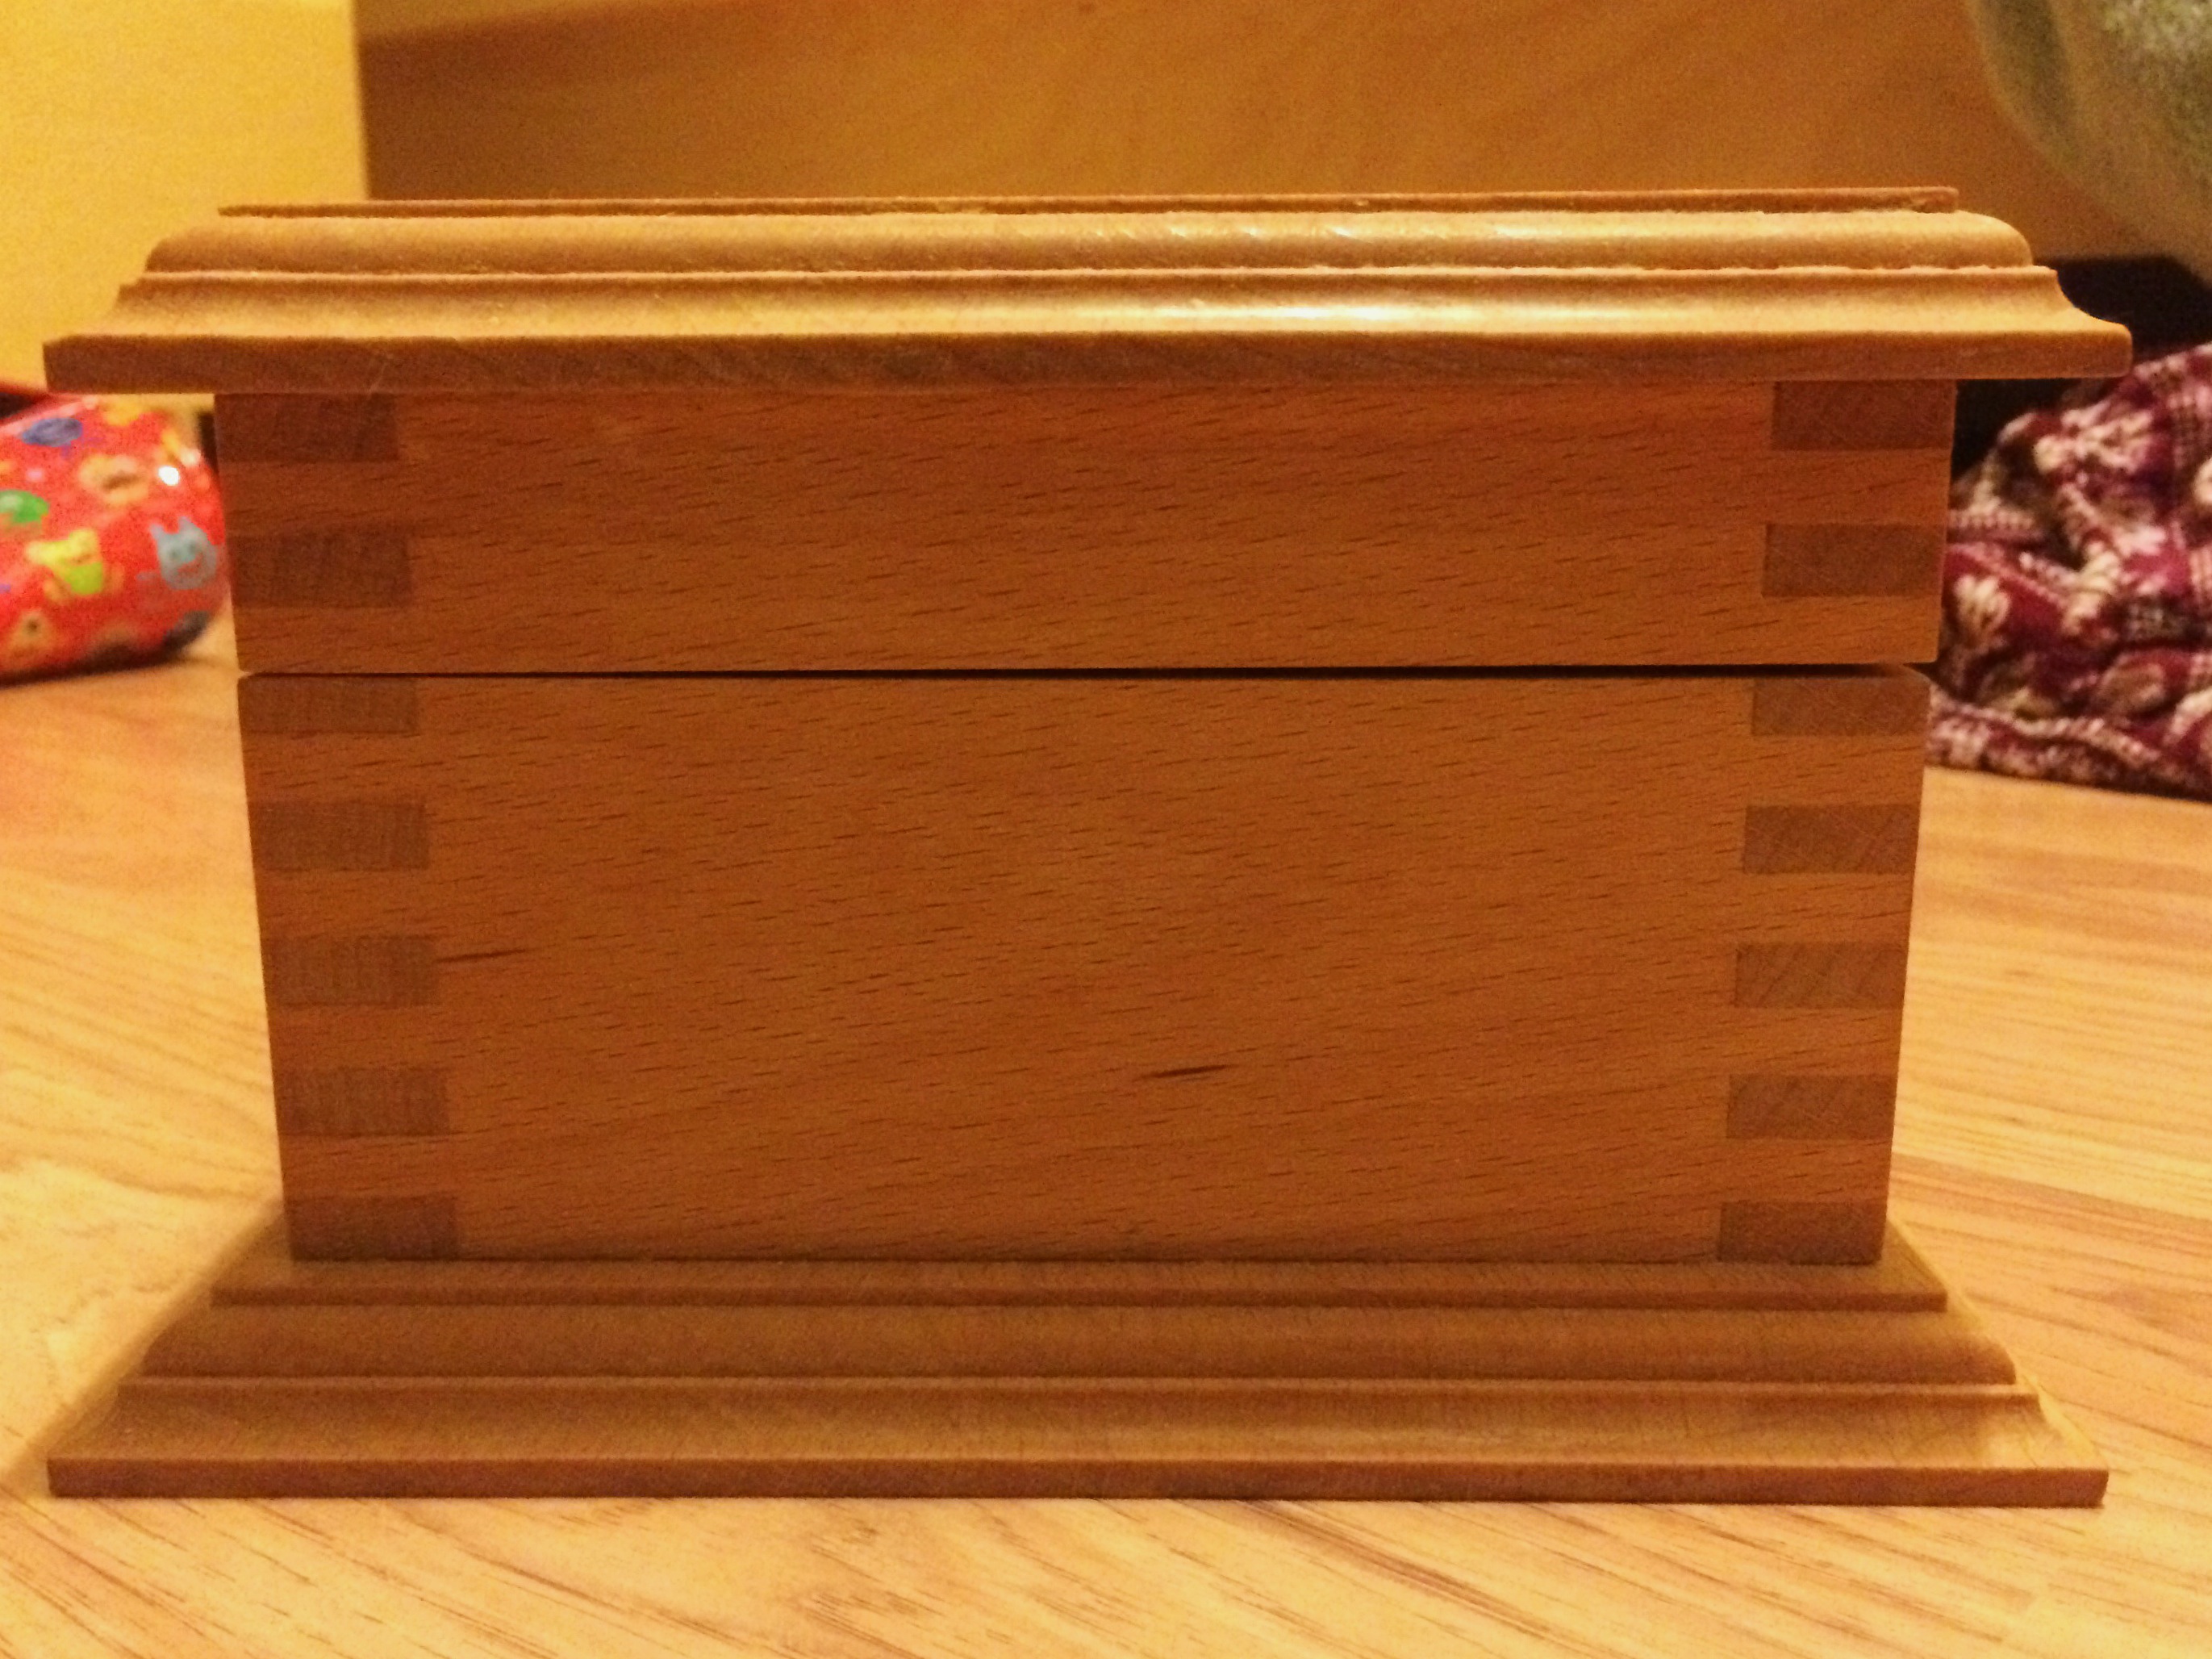
Here I have a project I made at BCIT in the TTED program. This would be a great grade 11/12 project because it utilizes finger joints and delicate work with the hinges and latch. The final look of the jewelry box comes from lots of time sanding and finishing the touch points of the box. This would be a good project to start a senior wood class with because it gets the student using all the basic equipment such as the: jointer, planer, table saw and thickness sander.

Mr.McCormack
Here I have a project I made back in grade 11 for a metal art class. The overall dimensions are 3″x3″x3″. I really enjoyed making this jewelry box because it is very unique experience working with glass since accuracy in your cuts is absolutely critical for a good fit between your pieces. The lid to the box pivots on welding wire fed through copper tubing that is tinned to the lid. I would suggest keeping the design for the walls of your box simple so that the dimensions are repeatable.
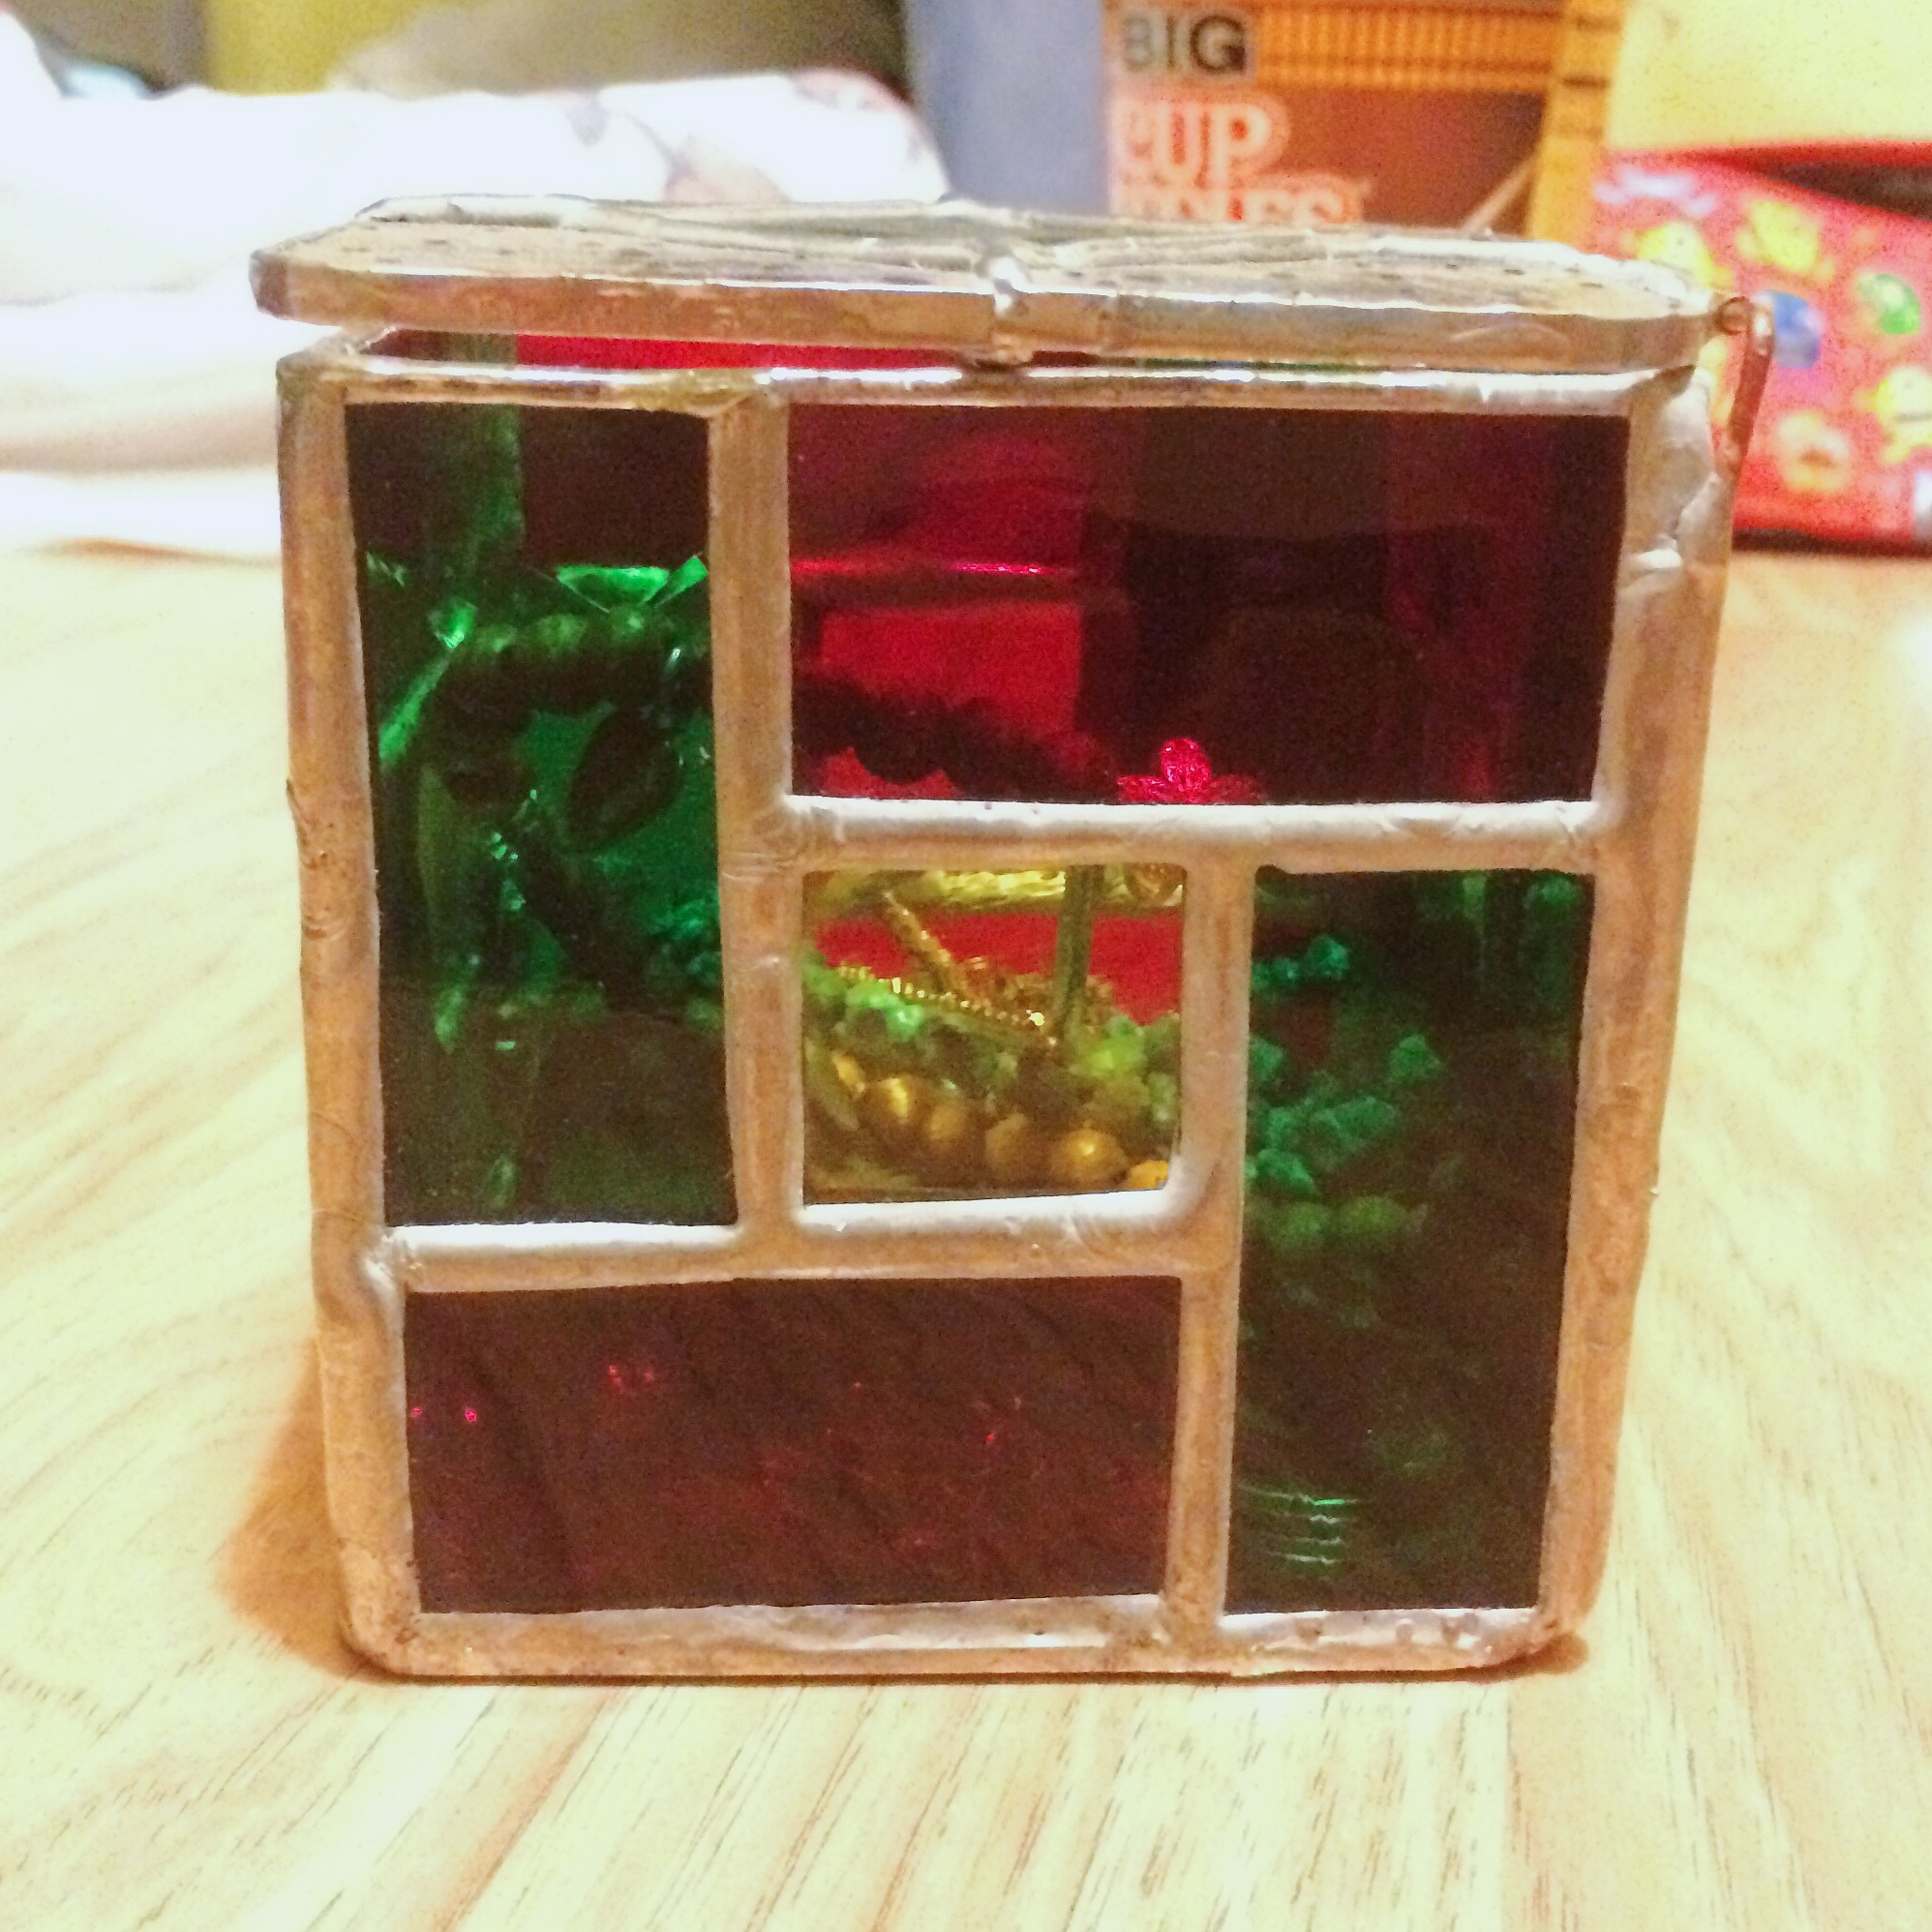
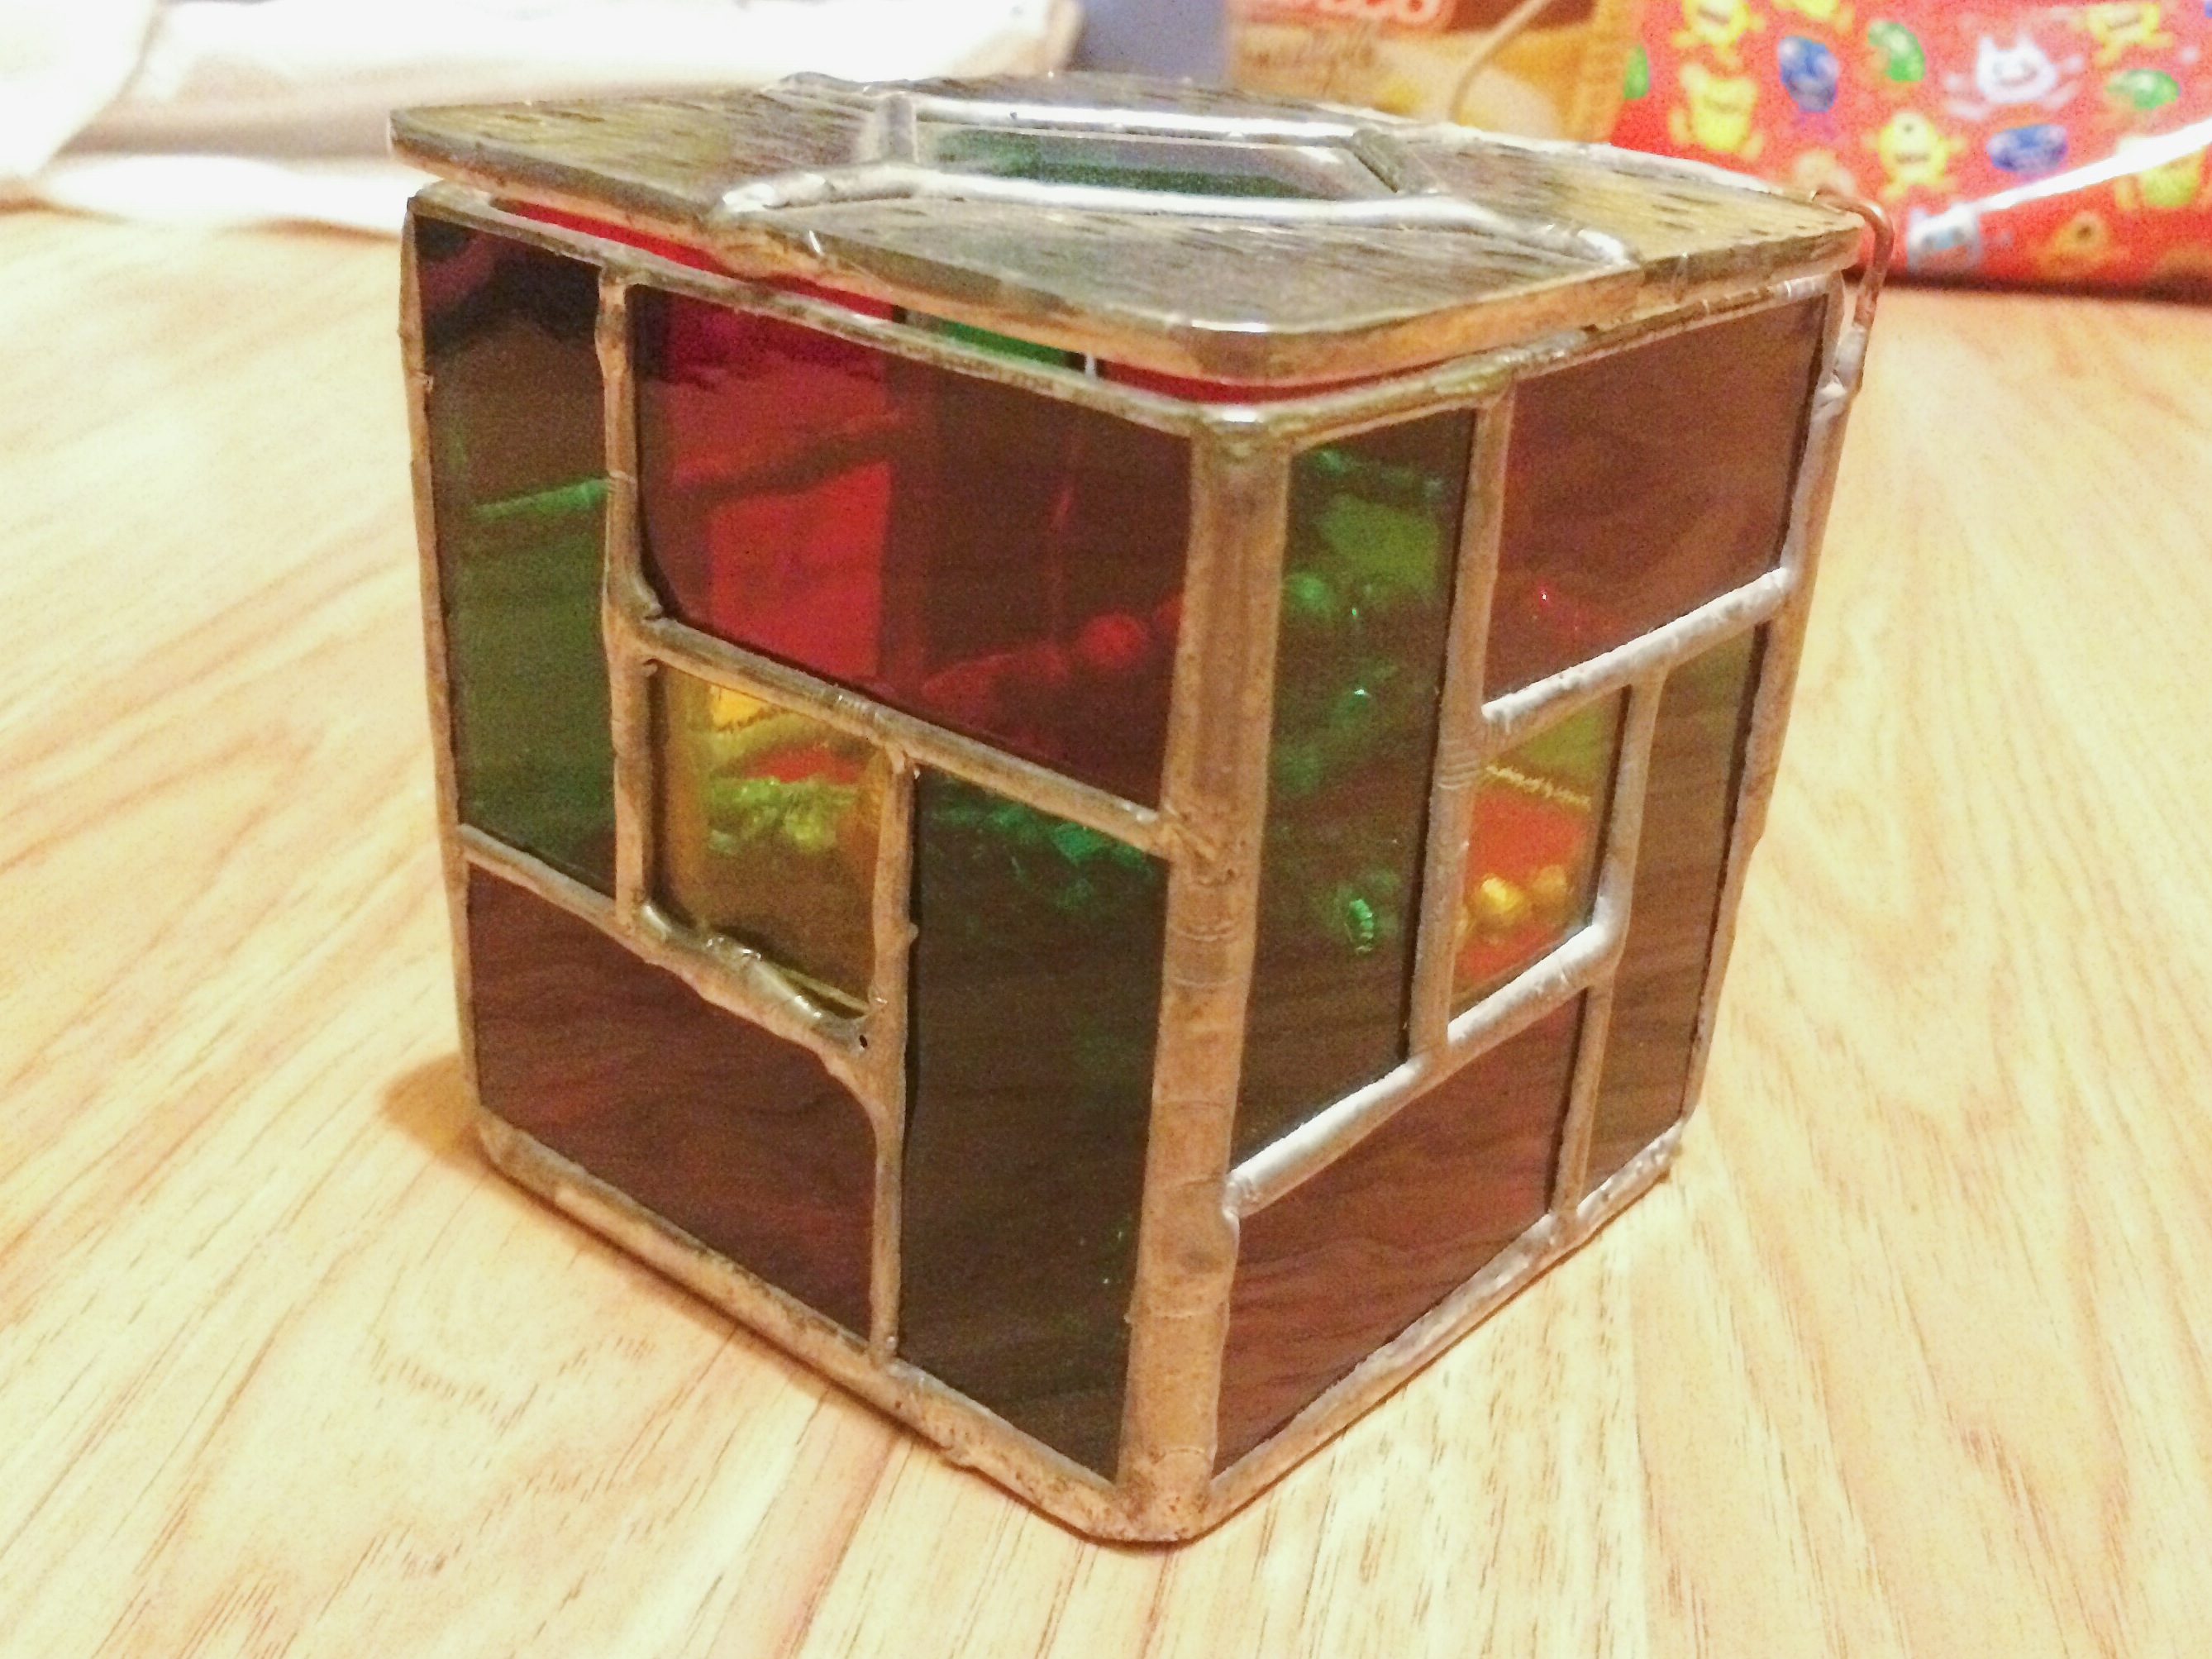
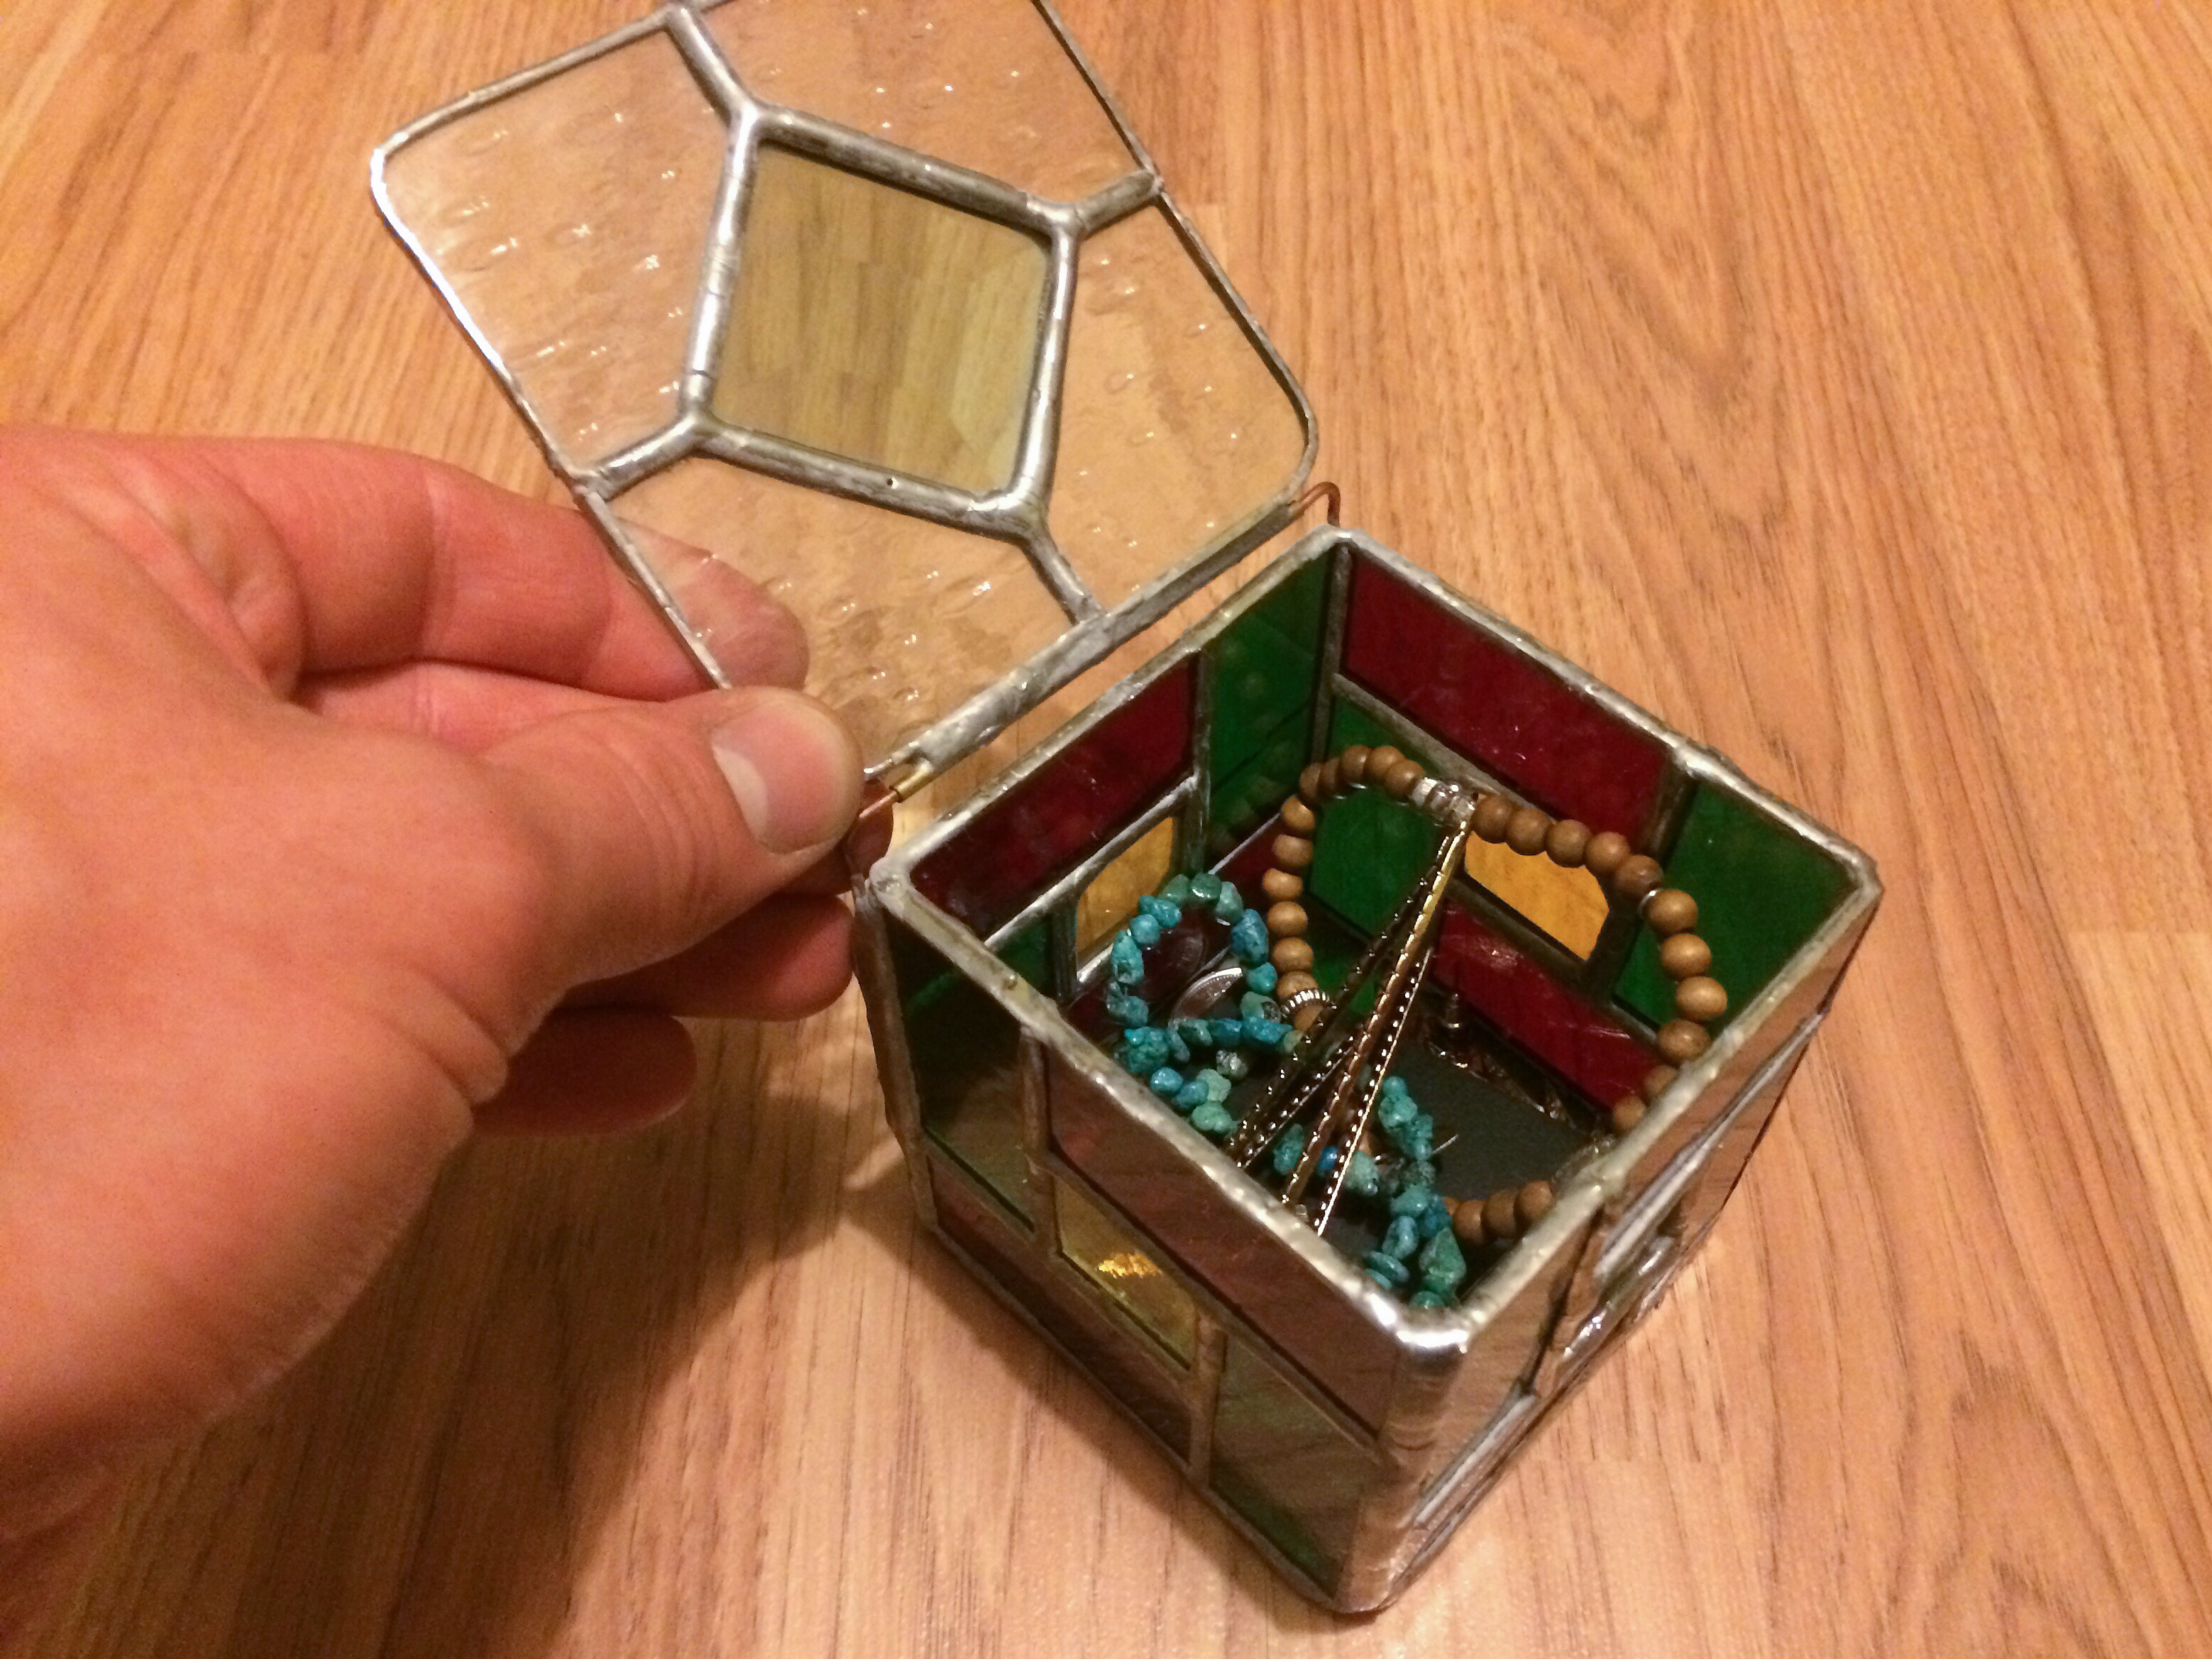

Mr.McCormack