Tag Archives: silicone

Week 12 – Robot assembly, purring adjustments, design changes

Week 12 (April 2-8)
Assembled the robot (finally!) – water included. Started brainstorming tentative design adjustments/improvements, including for the hardware side.

Robot assembly
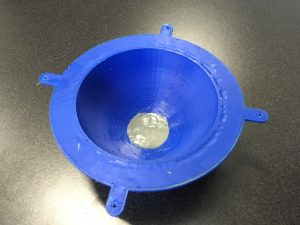
I am now 1 for 3 in terms of successful mold designs… apparently, larger air channels plus release agent still isn’t enough to allow the dome mold to come apart without breakage. The bottom half of the cast came out really smoothly, so the takeaway here is that these types of molds should definitely be designed to come apart in pieces for easy (and non-destructive) removal.
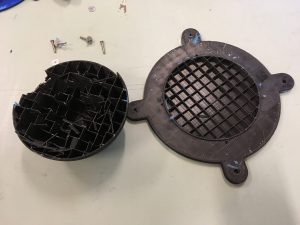
Lesson of the day: molds need to be made in several pieces.

Since the water channel was missing from the top of the dome due to the mold issue during printing, I had planned to cut it by hand – which turned out to be far more challenging than anticipated. The silicone is too soft and malleable, so attempts at drilling only led to a small pinhole in the silicone. Same with manual cutting with a knife – I could only cut a small slit, which definitely would not have qualified as a water channel on its own.

In the end, I settled for leaving it as a slit, and having a piece of rubber tubing inserted for the purposes of pumping in water.

Gluing the two parts of the robot (using more silicone – see Week 7) together without the overlapping part did turn out to be quite a challenge, but still doable (albeit taking about half an hour), as predicted, which was a relief.
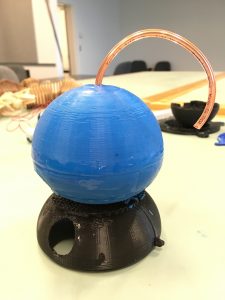
Gluing the two robot halves together.

Adding water
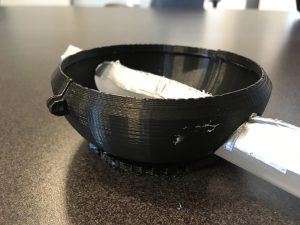
After the (silicone) glue had cured, the next challenge was to get water into the robot. The initial plan of using the rubber tubing for this purpose quickly proved fruitless, as the straw was so thin (out of necessity, in order to fit into the slit in the robot) that even getting water into the tube was a challenge in itself.

The method that ended up working the best was removing the straw and pushing the tip of a squeeze bottle into the slit instead. Seredipitously, the slit I had arbitrarily cut was just the right size to 1) allow the bottle head to fit just right so that the water could be easily squeezed into the robot without to much spilling, 2) allow easy insertion and removal of the plug. (Of course, in future designs, I can’t rely on being so lucky; I definitely need to come up with a new design for getting water in and out of the robot.)
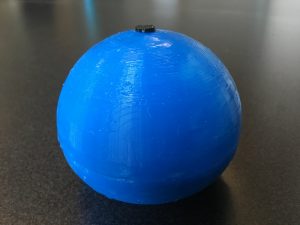
Robot body, after being filled with water and plugged.

Purring adjustments
Because the purring motor’s previous settings had been calibrated to work with a completely different robot body, we had to toy with the purring patterns and intensities to see what worked for this particular robot body. Still a work in progress, but overall, the robot is quite tactily satisfying.

(The purring is so subtle that it can’t be seen on video, so… just take our word for it that it feels pretty cool!)

[photo to come]

Design changes
We’re hoping to increase the illusion of the robot being a sort of living entity, and it seems a large step towards that goal would be to hide the hardware parts. As such, I’m hoping to be able to program the motor on a smaller controller, one that could also be tucked into the motor channel.

Taking home an Arduino Micro and another microcontroller; hopefully I can figure out how to get one of them to work.

As well, now that a prototype body has been made, I plan to try to get an accelerometer (see Week 8) working as well.
Week 11 – Fixing the mold, casting, user study design

Week 11 (March 26-April 1)
Getting resourceful about fixing the mold. Casting the robot. Some more in-depth discussion on user studies.

Fixing the mold
There were a number of problems with the mold, as noted last week:
1) The “outer dome” part of the top mold had some printing errors on the inside
2) Parts of the outer dome were printed with incorrect dimensions, including the holes for screwing the mold pieces together
3) Couldn’t print the cylinder part of the bottom mold

These issues needed to be addressed before casting could begin:

1) The printing had messed up on an internal structure that was supposed to create a water channel in the top of the robot. I decided that it wasn’t too much of an issue, as I figured that we could just cut or drill the water channel after casting the dome. Thus, I simply carved out the extraneous (messy) plastic bits, filled in the holes with Plasticine, and painted the area over with nail polish to prevent the silicone from clinging to the Plasticine (in an experiment we had conducted several weeks earlier while trying to come up with ways to glue silicone pieces together, we had found out that nail polish absolutely does not stick to silicone).

I also did some small-scale testing with a spare piece printed from the same plastic as the mold. The first was to paint over the mold with nail polish and spray it with the release agent, to see if the nail polish would stay on. Next, I cast some silicone with it, to see if removing the silicone would dislodge the nail polish (which would complicate the removal of the dome). These tests indicated that the fixes I made on the mold should work as intended.

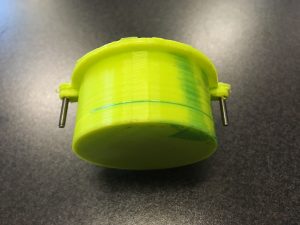
The inside of the mold, after fixing.

2) This was a very simple fix; although we didn’t have any larger screws, I managed to find a box of washers and other metal pieces that, when working together, still managed to center the two molds properly.

3) This was a rather tricky one to solve. We decided not to try printing the cylinder again, and instead try to find some other way of making a cylinder that would serve our purposes.

In the end I settled for roughly making a cylinder out of plastic and duct tape. It was a little messier than I would have liked, but it was the best choice given the time constraint – for now I just wanted to make a first prototype to test with, and if we were to continue using this exact mold for future iterations, I would make a higher-fidelity piece out of better (read: not scavenged) material.

The cylinder was also subjected to the same small-scale testing as the nail polish fix, and also passed (but barely; I still had to be careful not to get too much of the release agent under the edges of the duct tape).

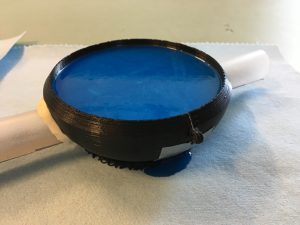
The assembled mold for the bottom half, using the makeshift cylinder.

Casting
Came across an interesting and unforeseen issue while assembling the mold for casting: the edges of the bottom mold pieces had not printed out flat. This presented a challenge, as the edges were supposed to be pressed together – in the current state, they could not fit together properly, and there were large gaps in the mold. I ended up sanding the pieces in order to press them together better, but so much sanding was required that the tabs on the mold had wore out, rendering them almost. To circumvent this problem, I had to duct tape the mold together in order for it to keep its shape.

Casting robot bottom.

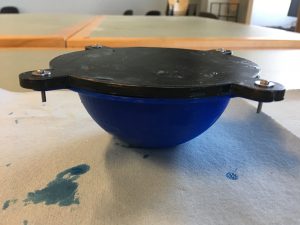
Casting robot top.

Realized a little bit too late that I had forgotten something during the casting process; the bottom mold was made to be filled to the brim, as part of the design involved having overlapping material to allow the two pieces of the robot to glue together properly. I think it can still work even without the overlap, but I suppose we’ll just have to find out next week.

User studies
Had a long group conversation about possible user studies for all the CuddleBits currently under development. We had originally been entertaining the idea of doing the same study design for all the robots, but it soon became apparent that the various robots were definitely more suited for very different studies.

The tentative conclusion at this time is that the purring CuddleBit is likely best suited for a longitudinal study, where an individual (or several individuals – we are really hoping to be able to settle on a mass-producible version soon) takes the robot home with them, and interacts with it on a daily basis. I am not terribly familiar with this type of study, but it seems to make the most sense, as I had been developing this robot with therapy/companionship in mind – a longitudinal study would allow us to look into long-term interactions with the robot. How would it fit into someone’s daily routine? Would one get tired of it once the novelty wears out? Could it actually become “accepted” by the people interacting with it?

Week 6 – Mold design, casting

Week 6 (Feb 19-25)
Designed and printed a smaller-scale prototype version of a mold, and started a cast in it.

Mold design
Decided against the one-size-fits-all mold, so this final design is a lot neater and easier to use. It only has two pieces, and also includes points at which to screw the pieces together (to properly center the two pieces, relative to one another, and to keep the silicone from pushing the pieces apart when pouring).

[pictures to come]

The mold in particular that we printed was for design 1) from week 3.

A few issues we encountered/ things we noticed with the print:

1) Forgot to design an overflow valve for excess material to escape during casting. Ended up drilling a hole manually, which worked fine, but in the future it would be a good idea to include it in the design.

2) Holes don’t tend to get printed out at the design size. The holes we had in our design for the screws partially filled in by excess/overflow plastic from the printing process. Also ended up drilling holes manually, but it would be nice if we could find a way to avoid that.

3) Flat surfaces aren’t very flat. The way they are printed makes them quite bumpy (with the exception of the side printed against the table). This made it difficult to press the mold pieces together the way they were designed to, and we ended up manually planing the pieces in order to fit them together better. While that worked for this particular design, I imagine future designs might not be so easy to plane, so one might need to keep this in mind while designing and printing their designs.

Casting
Tested this mold by trying a cast in it. Went much more smoothly than last time (I could actually pour the material this time) – seems like material age might actually be a bigger factor than I thought. Tested with the highest viscosity material we have on hand.

Testing scaled-down version of mold with new silicone material

Motor issues
The purring motor started having sputtering issues – if interrupted in mid-motion, it would be unable to start up again. Sometimes it would also cut out by itself (although I suspect that’s mostly due to poor connection, as I haven’t yet soldered the wires to the motor), and also be unable to start up again. A quick measurement on a voltmeter showed that the output from the Arduino to the motor is only about 1 V, although the input to the Arduino is 12. Currently investigating.

Weeks 4 + 5 – Combined DOF, Mold design

Weeks 4 (Feb 5-11) and 5 (Feb 12-18)
Began some exploratory prototyping for combined DOF (breathing-purring hybrid). Embarked on a design marathon for a mold. (Also, I got sick. Much fun.)

Results of first pass at silicone cast
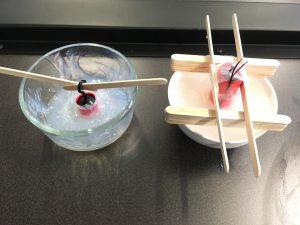
Lesson of the day: liquid rubber sticks to glass and ceramic like crazy (but easily peels off plastic).
The bottom didn’t turn out as well as I would’ve liked, mainly because I had run out of material partway through casting and didn’t have enough to finish the bottom. The top came out quite well though, despite not fully curing (likely due to my difficulty mixing), so while it’s a little sticky in some places, the texture is nice, and carries vibrations quite well.

For now, I am using the top as a bottom piece for testing hybrid design ideas.

IMG_0935
The first-pass “top” in use as the “purring bottom” for testing purposes.

Breathing-purring hybrid
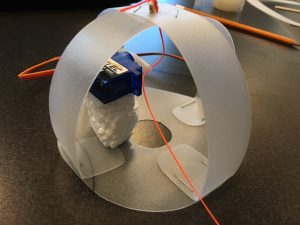
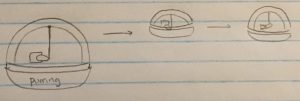
Started a physical prototype of a hybrid design (design 3 from week 3 post). The idea is to create a dome-shaped plastic “rib cage” that also serves as the overall body shape, and compress/loosen the rib cage via a string attached to the top of the dome to mimic breathing motions.

The servo will pull/loosen the string, alternatively compressing/decompressing the dome to mimic breathing motions.

[will take a demo video later]

At this point, I had stumbled into the issue of needing the ability to control multiple separate motors with one Arduino (the purring motor + the servo-string combination serving as the “breathing motor”). It was mentioned that this problem had been solved before for the CuddleBot, so I will look into that.

Designs for mold
It took a surprising amount of time and trials to settle on a reasonable design. I think I finally understand the cartoons of inventors surrounded by piles of crumpled paper. Anyways.

The design I finally settled on, and hope to have approved for printing, is a multi-piece multi-purpose mold that can be used to cast almost all of the different designs we have thus far for purring and hybrid CuddleBits:

Bottom half (the “purring half”):

The overall mold for the “purring bottom”. Consists of two pieces, A and B.

A) A rounded dish with diameter of 10cm and a height of ~4cm (need to adjust depending on motor size).
B) A “solid” (i.e. enclosed on all sides) cylinder of the same dimensions as the motor.

To cast the bottom, simply fill A with liquid rubber and insert B in the center as it starts to set (so that B “floats” on the liquid rubber). This would result in a silicone piece with a chamber for the motor.

Top half (the “breathing (or not) half”):

A) A simple bowl in the shape of half a sphere with a diameter of about 10cm (slightly smaller than the bowl I had used in the first pass, which I thought was a nice shape and size).
B) A “solid” (i.e. enclosed on all sides) half-sphere shape with a diameter of 8cm. Also, a separate, solid cylinder (height ~1cm and diameter ~1cm) that can be attached to the half-sphere.
c) A “Petri dish”-shaped… dish… that is just large enough to allow piece A to fit snugly into it upside-down.

The purpose for the multiple movable pieces is to allow this mold to be used in casting a variety of different CuddleBit bodies:

1) For a solid top (purring-only CuddleBit): fill A with liquid rubber.

2) For an “air bubble” top (hybrid CuddleBit, design 1 from week 3 post), attach the two pieces of B, and center B inside A. Pour liquid rubber to brim and allow to cure. Fill C to about halfway (so liquid is at about 1cm) with liquid rubber, and put the previously-cast piece on top, upside down. This would (theoretically) result in a hollow, dome-shaped silicone bubble. We can then use pneumatics or a servo motor to simulate breathing motions.

2b) For a “water bubble” top (purring-only): same steps as 2), but instead of using the top for breathing, can fill the bubble with water. Perhaps this can achieve a similar outcome as the water balloon CuddleBit?

3) For a “reinforced skeleton” top (hybrid CuddleBit, design 2 from week 3 post), create the skeleton first, and carefully cast using a combination of pieces A and B, in a similar manner as 2). This would result in a skeleton embedded in the dome part of the silicone air bubble. (Alternatively, piece C may not even be necessary – if the dome can hold its shape no problem, we can directly attach the dome to the CuddleBit bottom.)

In this way, this mold will cover all three designs that we came up with during the week 3 brainstorming.

Week 3 – Purring, Combined DOF

Week 3 – Jan 29-Feb 4
Further material/design exploration for purring CuddleBit.

Silicone body
First pass at attempting to cast a silicone body. Used some bowls scavenged from my house as a mold (that stuff’s not toxic, right…?).

Ran into some trouble with the liquid rubber material – it was a little difficult to mix and pour, and as a result the cast did not seem to be terribly successful. Some parts still haven’t cured yet (it has now been almost a week), and it seems that it will likely remain this way. Will try again with new material.

First pass at casting with liquid rubber.

Motor adjustments
Minor tweaks to the frequency of the purring motor. As previously noted, in designs where the motor is entirely encased in a quasi-fluid (as opposed to on top of a water cushion), lower frequencies transmit better.
IMG_0928

Combined design
Toyed with the idea of mixing DOFs – in particular, breathing and purring.

Two particular designs that came to mind were 1) silicone air “bubble” with the purring motor embedded in a thick silicone base, with hydraulics/pneumatics for breathing motions 2) same base, but a skeleton ribcage embedded in a thin layer of silicon for breathing motions.

1)

2)

Another design that we briefly considered was 3) to have the same purring bottom, but a skeleton-only top.