Week 6 (Feb 19-25)
Designed and printed a smaller-scale prototype version of a mold, and started a cast in it.
Mold design
Decided against the one-size-fits-all mold, so this final design is a lot neater and easier to use. It only has two pieces, and also includes points at which to screw the pieces together (to properly center the two pieces, relative to one another, and to keep the silicone from pushing the pieces apart when pouring).
[pictures to come]
The mold in particular that we printed was for design 1) from week 3.
A few issues we encountered/ things we noticed with the print:
1) Forgot to design an overflow valve for excess material to escape during casting. Ended up drilling a hole manually, which worked fine, but in the future it would be a good idea to include it in the design.
2) Holes don’t tend to get printed out at the design size. The holes we had in our design for the screws partially filled in by excess/overflow plastic from the printing process. Also ended up drilling holes manually, but it would be nice if we could find a way to avoid that.
3) Flat surfaces aren’t very flat. The way they are printed makes them quite bumpy (with the exception of the side printed against the table). This made it difficult to press the mold pieces together the way they were designed to, and we ended up manually planing the pieces in order to fit them together better. While that worked for this particular design, I imagine future designs might not be so easy to plane, so one might need to keep this in mind while designing and printing their designs.
Casting
Tested this mold by trying a cast in it. Went much more smoothly than last time (I could actually pour the material this time) – seems like material age might actually be a bigger factor than I thought. Tested with the highest viscosity material we have on hand.
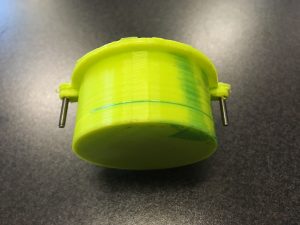
Testing scaled-down version of mold with new silicone material
Motor issues
The purring motor started having sputtering issues – if interrupted in mid-motion, it would be unable to start up again. Sometimes it would also cut out by itself (although I suspect that’s mostly due to poor connection, as I haven’t yet soldered the wires to the motor), and also be unable to start up again. A quick measurement on a voltmeter showed that the output from the Arduino to the motor is only about 1 V, although the input to the Arduino is 12. Currently investigating.