
I tried this when I was a little girl. I remember using a much small piece of cardboard and creating a wallet by going around the front and back. I couldn’t find any pictures or tutorials for something like that, but Kate at The Weaving Loom has a really good tutorial that shows what we did in class.
In my own words here are the steps.
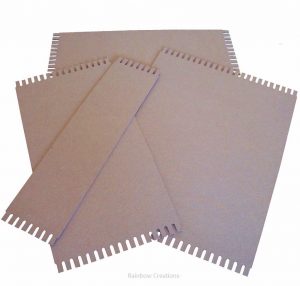
- Cut a square or rectangle of cardboard
- Measure, mark and snip equidistant slots along two opposing edges.
- Take a piece of string or yarn and attach it to the top left slot and let it travel down the front of the cardboard.
- Now loop the yarn through the bottom left slot, move it around the back to the next slot to the right and slip it back to the front.
- Let the yarn travel back to the top and slip it through the next slot to the back and back tot he front through the neighbouring slot on the right.
- Continue until the yarn has moved up and down looping through all the slots.
- This will create the warp.
Warp is the weaving term that stands for the up and down strings. Weft stands for the side to side strings. I tried looking up why warp means up and down. Etymologically, it has been traced to Old English, Old Norse and Middle Low German words that mean “to throw” or “to cast.” This was distinctly unhelpful, so I keep track by remembering that weft rhymes with left, which indicates side to side.
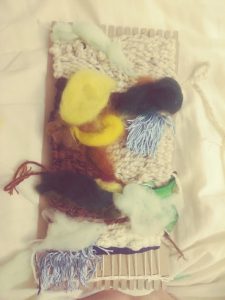
One thing we discovered about weaving is that it has a tendency to draw inwards in the middle, like a Slim Fast advertisement.
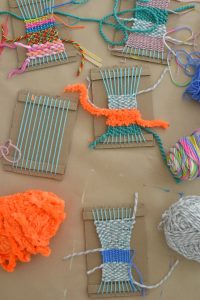

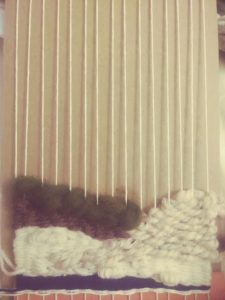
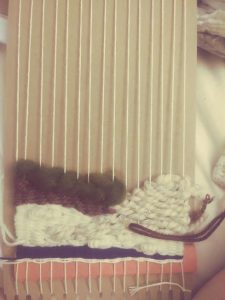
As the above weaving image shows, kids can get really creative and don’t care too much if their projects get skinnier. I decided to follow their example and not worry too much if mine shrank. Instead, I got really creative with my materials for my weft, and tried different thicknesses of yarn, roving, ribbon and even fringe.

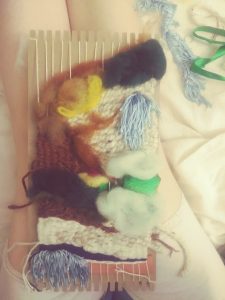


It was fun, but I pushed myself to get it done in one night. That was less enjoyable. I also worried a lot that I was doing it wrong. I wasn’t super sure of the criteria and my fixed mindset started showing. I also didn’t finish off my project in the same way as everyone else. I slid mine down to the bottom and popped it off the loom. Then I tied knots at the top to shorten the warp. I think the way recommended in class was to cut it off and tie knots in the warp threads. The fact that my way worked just goes to show that I should have relaxed and not worried about making mistakes.