Category Archives: stitch journal

methods and techniques

Quilting

So we dove into quilting this week. This is how Wikipedia defines it: “Quilting is the process of sewing two or more layers of fabric together to make a thicker padded material, usually to create a quilt or quilted garment. Typically, quilting is done with three layers: the top fabric or quilt top, batting or insulating material and backing material, but many different styles are adopted.”

Lorrie taught us some key quilting terms for materials and vocabulary:

  • batting: A light weight, warm product used between the quilt top and quilt backing, batting is used for quilts, wall hangings, quilted clothing and home décor. Batting is also referred to as Wadding. It is generally made up of cotton, cotton/poly blend, bamboo, wool, bamboo cotton blend. There are two types of batting: with scrim and without scrim.
  • binding: Finishing of the quilt. Long, thin fabric strips that are attached to the borders of a quilt.
  • block: The unit that is designed for a quilt. Generally there will be many blocks in a quilt. A quilt block can be a single piece of fabric cut with a rotary cutter into a perfect square or a block that has been pieced using many pieces of fabric and sewn together using ¼ inch seam allowance.
  • borders: Strips of fabric that frame the edges of the quilt. You can have one or many borders in a quilt top. You may also have borders surrounding your quilt blocks, also known as sashing, or as part of quilt block design.
  • cornerstones: name given to a small block that joins the sashing strips together to surround a block or blocks in a quilt top.
  • sashing: Strips of fabric sewn around or between blocks of a quilt top. These strips are generally joined together by cornerstone blocks or sashing squares.

These and additional definitions can be found at National Quilters Circle Glossary of Quilting Terms

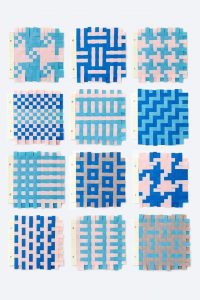
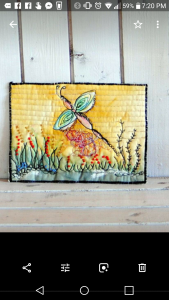
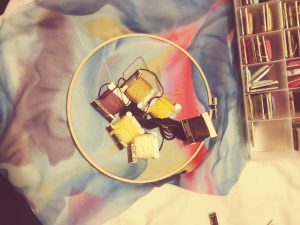
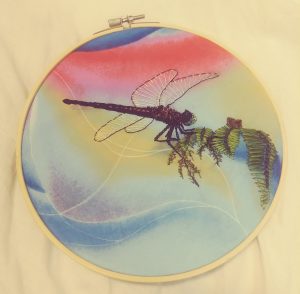
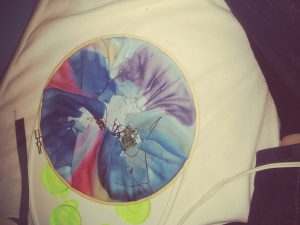
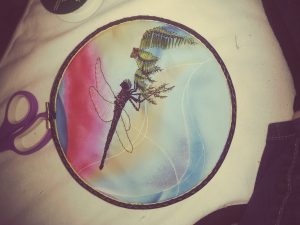
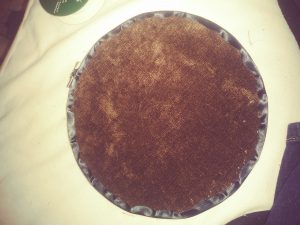
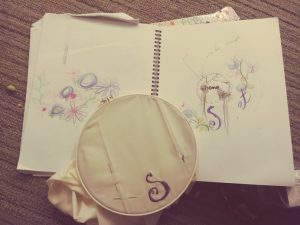
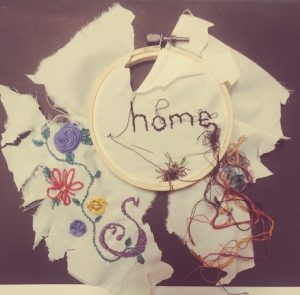
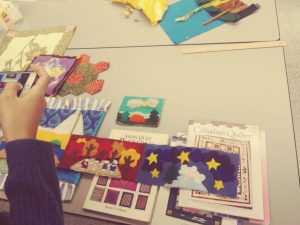
This photo includes several examples that Lorrie brought in, as well as some resources and someone’s work in progress in the back.


Leave a Comment

Filed under quilting, stitch journal

Weaving on a Cardboard Loom

I tried this when I was a little girl. I remember using a much small piece of cardboard and creating a wallet by going around the front and back. I couldn’t find any pictures or tutorials for something like that, but Kate at The Weaving Loom has a really good tutorial that shows what we did in class.

In my own words here are the steps.

  1. Cut a square or rectangle of cardboard
  2. Measure, mark and snip equidistant slots along two opposing edges.
  3. Take a piece of string or yarn and attach it to the top left slot and let it travel down the front of the cardboard.
  4. Now loop the yarn through the bottom left slot, move it around the back to the next slot to the right and slip it back to the front.
  5. Let the yarn travel back to the top and slip it through the next slot to the back and back tot he front through the neighbouring slot on the right.
  6. Continue until the yarn has moved up and down looping through all the slots.
  7. This will create the warp.

Warp is the weaving term that stands for the up and down strings. Weft stands for the side to side strings. I tried looking up why warp means up and down. Etymologically, it has been traced to Old English, Old Norse and Middle Low German words that mean “to throw” or “to cast.” This was distinctly unhelpful, so I keep track by remembering that weft rhymes with left, which indicates side to side.

One thing we discovered about weaving is that it has a tendency to draw inwards in the middle, like a Slim Fast advertisement.

As the above weaving image shows, kids can get really creative and don’t care too much if their projects get skinnier. I decided to follow their example and not worry too much if mine shrank. Instead, I got really creative with my materials for my weft, and tried different thicknesses of yarn, roving, ribbon and even fringe.

It was fun, but I pushed myself to get it done in one night. That was less enjoyable. I also worried a lot that I was doing it wrong. I wasn’t super sure of the criteria and my fixed mindset started showing. I also didn’t finish off my project in the same way as everyone else. I slid mine down to the bottom and popped it off the loom. Then I tied knots at the top to shorten the warp. I think the way recommended in class was to cut it off and tie knots in the warp threads. The fact that my way worked just goes to show that I should have relaxed and not worried about making mistakes.

Leave a Comment

Filed under stitch journal, Weaving

Paper Weaving

I have tried paper weaving before, but mostly just over-under-over-under. It was revelatory to discover that what I had been trying to avoid in the past (messing up the pattern) was actually the first step in creating a new one.

chevron pattern                                         my own ‘H’ pattern


Here are some others I would like to try:

I have decoded the pattern for the first three so far.


Key Vocabulary

• Weaving – The process of forming cloth or fabric on a loom by interlacing yarn or thread (or, as in this case, paper).

• Loom – A frame for weaving yarn or thread into cloth or fabric.

• Warp – Threads running lengthwise on the loom.

• Weft – The horizontal threads which are woven across the warp.

• Twill – A fabric so woven as to have a surface of diagonal parallel ridges.

Reflection

One of the coolest things I have experienced during this course is when one or more of my children come along and start creating alongside me.


Leave a Comment

Filed under stitch journal, Weaving

Printing on Fabric

I had some other prints I made with vegetables and stamps. I think they are in Lorrie’s office. I will have to check.

I was really stressed and had a hard time producing anything today. I had to focus on each task to get it done. Thank goodness for a supportive learning environment.

Leave a Comment

Filed under printmaking, reflections, stitch journal

Self Portrait Dragonfly

This started with the desire to create something artistic rather than copying someone else’s sampler.

Once I started to research dragonflies, I realized how much I identified with them.

Here are the images that influenced my initial design:

Creative Process in Photos

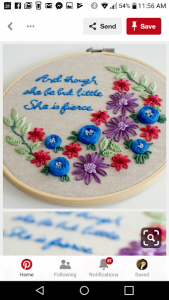
“Sew your Eyes Shut: Stitch your Mind Open” (I chose a crappy title for it. It seemed to make sense at the time.)

I learned to embroider as a young child. My mother cross stitched, and we wanted to create with her. She transferred images with her iron onto ragged white squares. We stretched these onto hoops and proceeded to stab out the outlines of ducks and flowers. I enjoyed creating, but I found my lack of skill and the limitations of following a pattern frustrating. I was happy to return to the therapeutic process of stabbing as an adult, especially given the opportunity to design my own pattern that communicated my own ideas.

The dragonfly gets a bad rap in western culture. She is called the devil’s darning needle. However, I chose to use a dragonfly as a visual metaphor for my self concept because I identify with both her strength and vulnerability. She is an agile flier and an adept predator. Her strong legs literally snatch her prey from the air; she can consume her own weight in half an hour. She migrates long distances, sometimes across an ocean. In spite of her strengths, the dragonfly is still very fragile and quite beautiful. She spends a large part of her life span in a larval state, feeding and growing, until she undergoes a transformation and erupts from her old skin in a new shape. Her adult life is short, but her ephemeral nature adds to her preciousness since it is so fleeting.

I have confidence that, like the dragonfly, I can achieve great ambitions. My journeys have been long and challenging, resulting in personal transformation. I often feel vulnerable and of passing significance, but I can see that my contributions are beautiful and influential in the moment.

I embroidered a dragonfly at rest in order to illustrate her strength and fragility. I stitched it into two swathes from the skirt of an old party dress in an organic process; I twined coloured strands and merged them on the background, and built texture with layers and layers of stitches. I feel inspired by layered colour; the multivalent effect portrays the layers of my personality.

The upcycled fabric speaks both to the brief nature of the dragonfly’s life and to my own impermanence. It also shows the value that can be found anywhere including in oneself.

I adorned the frame with evergreen twigs to juxtapose the artificial quality of my personal portrayal with the tangible reality of real branches. What I have framed is a construct–a two-dimensional depiction of a complex and changing entity with flawed vision. However, there is a resonance between the embroidered branches and the real ones that exemplifies that art is mimetic and communicates some truth.

I was influenced by textile artists Karolina Bakowska and Ann Dunbar. Bakowska’s embroidery appeared on my Facebook feed through the group Textile Arts. She entitled her work “Gold Polish Autumn” and imposed the white trunks and gold leaves of aspen trees on a vibrant pink batik background. It leapt from the hoop. Dunbar goes even farther. She creates her own backgrounds with watercolour paint, then embroiders the foreground. Her landscapes burst with texture.

My connection with the dragonfly may be as fleeting as she is, but creating her with fibre and fabric opened my eyes to many new possibilities of art and self.


Leave a Comment

Filed under Art, embroidery, reflections

Home: Creative Process

So starting from this image, I really engaged with this assignment. I was struggling with conflicting motivations. The easiest thing to do would be to make some social commentary that undermined the concept of home as an ideal. But I think positive standards around something like home are important. So I had to navigate in my own mind what I would want to set up as a new, more realistic ideal. Going back to beautiful, broken things, here is the windy path I took in my sketchbook.

Research

Process

Final Piece and Statement

home

The concept communicated by conventional “Home Sweet Home” hoop embroidery includes a cherished and safe environment. Happiness, peace and security are ideals portrayed by cute or elaborate patterns. For this piece, I choose to overturn these ideals by violently attacking a traditional pattern and juxtaposing it with an alternate depiction. Simplicity replaces elaborate craftsmanship. Process overthrows security. Imperfection’s wild energy counterbalances that of the organized stitching. The ideal of “home” is rejected, but its remains influence how viewers perceive the new image.

‘home’ may be imperfect, damaged and vulnerable, but framing it demonstrates that it is still worthwhile. There is desperation in the stark, tangled stitching, but there is hope in the a small repair, and commitment in the threaded needle. Home’s sweetness may actually be discovered through the process of creating it.


Leave a Comment

Filed under Art, embroidery, reflections

Home: initial discussion

Embroidery and the development of “home”

Assignment:

how many words do you know for home (think broadly about the notion of home). (take no more than 5 minutes)

House

Residence

Domicile

Nest

Den

Pad

Refuge

Cave

My place

Chez moi

Casa

Doma

Living space

Lodgings

Mom’s place

Burrow

Warren

Habitat

Territory

Castle

Village

Hut

Hovel

Now think about how many words can you think of that deal with Homeless – (broadly)

Alone

Cold

Vulnerable

Without

Lost

Shame

Poverty

Transient

Uncertainty

Empty

“If an artist were to address the notion of home/ housing/ homelessness; and link this to the notion of common images associated with embroidery, what might be the subject? How might an artist address this within the confines of an embroidered work of art?”

So if I were doing my own satirical embroidered art, I would stick with Home Sweet Home as the wording and stitch a cartoony picture of a mom at her limit. Messy house, kids fighting or crying and mom tearing her hair out.

Or maybe I would do a demolished gingerbread house.

But I think the most meaningful would be a typical home sweet home embroidery of a house and flowers and hearts that had a broken hoop, torn fabric and stitches coming loose, that had been obviously mended. I would incorporate patches and brighter thread and maybe leave some holes.


Leave a Comment

Filed under Art, embroidery, reflections

Embroidery Stitches

I have messed around with embroidery as a child and as an adult. I didn’t realize there were actual embroidery stitches other than the straight stitch, the backstitch and the cross stitch.

15 embroidery stitches from thesprucecrafts.com

Learning new stitches

I wanted to make a modern sampler. I didn’t want to follow someone else’s pattern. I realized that music notation had lines and shapes so I adapted it to create this whimsical design. For the lines, I used back stitch, chain stitch, stem stitch, split stitch, and whip stitch. For the note heads and symbols, I used brick stitch, satin stitch (flat and padded), blanket stitch, French knots, and woven wheel stitch.

From my sketchbook

Leave a Comment

Filed under embroidery, stitch journal

Felting

I have never felted before. I didn’t even know what roving was. Now I do. It is very peaceful to sit and stab a ball of fluff with a needle. Right until you get your finger.

I prefer additive sculpture over reductive, so I enjoyed this process. I made a caterpillar by felting several little balls and attaching them together in the form of an inchworm. Then I kept adding layers and adjusting the position. Layering the colours reminds me of working with pencil crayons. I never lay down one colour and often deliberately choose colour that contrast jarringly to get the effect I want.

I got wrapped up in needle felting and planned to do the wet felting at home. Sadly I got sick. So I didn’t get to it yet.

Leave a Comment

Filed under Felting, reflections

Crochet – almost new to me

I made a little crocheted snowflake once. There was a lot of hand holding and I didn’t really learn how to crochet.

My friend taught me to cast on in the summer… sort of. But now, I have finally learned how to crochet. I made two samples and then I bought a pattern called Autumn Leaves. It was a fun and authentic way to practise a variety of stitches.


For the Stitch Journal

How to crochet

Leave a Comment

Filed under crochet, stitch journal