07/26/14

Surrealist Collage Mini Unit Plan

Surrealist Art Collage Project

Reflection and ideas: I introduced this project to my grade 6/7 class as a mini art project. The results were mixed. The exquisite characters worked well as a sponge activity for the students who had already finished the project my SA had assigned. It was a good transition, and the kids had a lot of fun making them. The invitation to be totally silly, as well as to work collaboratively, made everyone feel successful and took the pressure off for those students who don’t feel very successful in art.

I made a powerpoint to present the collage project, introducing the ideas of surrealism, the history, etc. I showed some examples of surrealist art, and surrealist collage. I introduced the concept of juxtaposition, and we looked for examples as a class in the art I showed them. Some students really took these ideas to heart, and it showed in their work. Others were more confused, or less serious. I see this as a mistake that I made, encouraging the silliness at the beginning. While this made the project fun, many didn’t take it very seriously. However, those who did take it seriously both had fun and created beautiful work.

I ran into an issue with a couple students using inappropriate images (booze, weapons, etc.). Unfortunately these images are a part of the advertisements in the magazines from the art room, and in most magazines available today. I had a conversation with the students, and they covered up or recreated their work without much fuss. Middle school is an age of testing boundaries, but I consistently have found that if you treat students respectfully in these situations without shaming them, small problems like this are easily solved.

Rational:

People participate in the arts for a variety of reasons:

  • to learn and play
  • to communicate
  • to honour rites of passage
  • to define, strengthen, and preserve culture and heritage
  • to nurture the emotional, social, intellectual, physical, and spiritual self.

Total Classes: 3-5

Surrealist Art Collage:

Grade 6:

A3 create images using particular visual elements and principles of design — including rhythm, asymmetrical balance, and space — to produce a variety of effects

A4 manipulate selected materials, technologies, and processes to create images scribed Learning Outcomes Suggested Achievement Indicators

A5 create 2-D and 3-D images − that reflect art styles from a variety of social, historical, and cultural contexts

Grade 7:

A1 use a variety of image sources to create images, including observation, emotions, ideas and concepts, imagination, memories, and sensory experiences

A2 create images using a range of image-development strategies, including: juxtaposition, metamorphosis, distortion, exaggeration

A5 create 2-D and 3-D images that incorporate the styles of selected artists from a variety of social, historical, and cultural contexts

Intro: Look at images by surrealist artists including:

The Son of Man – Rene Magritte

The Listening Room – Rene Magritte

The Persistence of Memory – Salvador Dali

The Elephants – Salvador Dali

Shirley Temple,The Youngest, Most Sacred Monsterof the Cinema in Her Time – Salvador Dali

Observatry Time – Man Ray (Exclude The Lovers, which is paired with this photo but is not classroom appropriate)


History of Surrealism: Movement began in the 1920’s. Features include the element of surprise, juxtaposition, and non sequitur. Instead of simply painting reality, artists of this movement attempted to express their visions or dreams through their art work. Surrealism was also a movement in literature and philosophy. It treated art as a way of expressing imagination and thought rather than reality.


What was happening in the world?

  • WW1 had just ended
  • Sigmun Freud was psychoanalyzing and treating patients with shell shock, attempting to delve into their unconscious and analyze dreams.


The project:

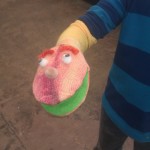
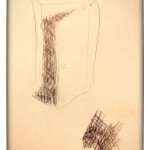
Intro Day Project: Exquisite Characters: Fold a piece of paper into three equal parts. 1st person draws a head of a creature in the top section. They continue their drawing just far enough into the next section that Person 2 knows where to begin. Person 2 draws the body. Repeat, with person 3 drawing the legs. An exquisite character is born!

  1. Using collage, painting, drawing, photography, or a combination of these things, create an image in the surrealist style. You may choose to find a landscape in a magazine and use that as a background.
  2. Write an artist’s statement or a description to go along with your work. Include the vocabulary you have learned in this unit including at least three of the following: juxtaposition, surreal, distortion, metamorphosis, asymmetry, and exaggeration. Make reference in you statement to at least one of the artists or works that you looked at in the beginning that influenced or inspired your work.
02/2/14

Adventures in Drawing

This is the drawing exploration that we did in the BEd Elementary Art course. We played around a bit with different pencil hardness, as well as shading, cross-hatching, and stippling techniques. A fun project for that could be done to practice these techniques could be to create a comic strip or single panel comic of a scene in the classroom. This way, students have real objects that they can look at to copy for their line drawings, as well as real shadows to mimic with their cross-hatching or stippling techniques. The images that look like aliens here are blind-contour drawings of people in my art class. The rules for blind contour drawings are simple: 1. Don’t lift your pencil off the page, and 2. Don’t look at your page. This type of drawing forces you to focus entirely on the subject of the drawing, rather than the drawing itself. It is a good way to begin training the eye. However, it does often produce ridiculous drawings like those pictured in this post. A safe space in the classroom is a must before doing this activity, as some students might be offended by the horrifying line-messes that are supposedly them. One way to get around this could be drawing objects rather than people. Moving on from this activity, contour line drawings where the artist is allowed to look at the page are a great activity for focusing on the subject and the lines in the drawing. Choosing which parts of an object to represent with lines and what to exclude is good practice.

02/2/14

Clay

Clay cups textured to look like birch bark are on display at The Centre for Creative Arts in Grande Prairie, AB.

I had the good fortune to play with hand-building a little in my grade 8 art class, but I really got into the medium while I was working in Grande Prairie, AB. My shifts were 10-12 days long in remote corners of Alberta and would be followed by a few days off in Grande Prairie. Not knowing anyone in town, and as the days off were mandatory, I looked for a hobby to fill my time. I found the Centre for Creative Arts where I started going to do pottery during drop-in studio time. My schedule did not allow me to take classes, and so I learned most of what I know about pottery from YouTube. I found pottery to be an exercise in patience. The time spent on each piece was nothing compared to the time waiting for it to dry oh-so-slowly without cracking, or the time it took to get fired, then fired again with the glaze on. It took patience with myself when I dropped pieces I’d been working on for hours, leaving me with nothing but broken shards of my day. Still, not despite all this but because of it pottery became a valuable hobby for me. Pottery has become a kind of active meditation for me, and I hope that students I introduce to it will find the same catharsis and solace in it that I have.

Clay is one of the most anticipated and exciting media worked with in the art classroom. It is messy and typically not something students have access to at home. While there are some obstacles to it’s use such as kiln access, short blocks of time for art, and lack of space to work with it, it is actually a fairly accessible medium to work with in many ways. The clay itself is quite inexpensive, particularly if it can be found recycled. If there is a pottery club in your area, inquire about using the recycled clay of its members. Many potters are happy to donate their once-thrown clay rather than wedge it for re-use on the wheel. Wedging is a great skill for potters to have, and a great way for students to get out any extra energy they may have. While pottery wheels can be difficult to find and take a lot of time to get used to, hand-building is a rewarding way to work with clay as well and exciting projects can be done with all ages.

Clay is a great way to explore texture and form. Garlic presses can be used to make spaghetti-like hair, and stamps or textured materials such as lace can be used to imprint the clay. There is a whole world to explore with clay, and while beginners are able to create and have fun with clay, potters with many years experience are still learning about the medium, exploring new techniques and experimenting with glazes.

Students who are less excited about producing beautiful 2D works of art may be hooked with this potentially utilitarian medium. Seeing the value of the outcomes of work is a motivator for students, and the idea that they may be able to use the bowl or mug that they create could get otherwise disengaged students excited about art.

02/2/14

Pastel Drawing

IMG_20140121_151512[1]Pastels are an inexpensive and fun way to play with blending. They are a wonderfully hands-on tool, as much of the shading can and should be done with one’s fingers. They can produce crisp lines or dots, or soft blended shapes. Pastels can be used to add variation in texture to a multi-media artwork.

The picture above was done using chalk pastels. Oil pastels are another option and can often be found at the dollar store for very little money. The vivid colours provided by pastels make them an especially big hit with young children. As well, they can be used on black or coloured paper without changing the colour of the pastels.

A gallery walk part way through the making process is an excellent way for students to check out other techniques or styles that they may want to experiment with.

02/2/14

Puppet Mastery

With the new draft of the BC Art Curriculum bringing together dance, drama, and visual arts into one IRP, why not draw those threads between the arts trinity through projects. Puppets are a great elementary art project that can be a part of both drama and art. Puppets have potential to be cross-curricular to other subjects such as language arts through acting out a play or as a creative alternate form of book report.

02/1/14

Print Making!

Print making! What a simple and rewarding project to bring to any classroom. Print making is a way to learn and practice skills from basic motor control to image or design layout. There is lots of room in this project to explore colour, shape, and texture. As well, print making could be used cross-curricularly to connect math or science through a study of shapes or collected natural objects in primary levels.

The two types of print-making that I experimented with in this class (lucky me!) were block printing and mono printing.

Block printing can be done with wood, linoleum, or even potatoes, but for a simpler, quicker, and safer project with no knives required, Styrofoam can be used. Styrofoam can be bought new, but it would be cheaper and more environmentally friendly to wash and re-purpose meat or vegetable trays, so long as they have flat bottoms.

Mono printing can be done as more of a found-item art project. It is a great way to experiment with shape and layout, and generally produces a more abstract image than a specific design drawn onto a block. Some great materials to use include items found in nature on a walk, screen materials, bits of recycled materials, and shapes cut out of paper. Tools such as plastic forks or paint brushes can also be used to manipulate the ink before or after the printing process.

If you had the time and interest in your class, variations on screen printing could also be done. Taking a sheer fabric and painting Mod Podge onto the desired negative space could be something to experiment with. Homemade light tables and screens can also be made if screen printing is something that you wanted to make a staple medium of your art class or classroom. With a particularly self-directed and inquisitive student or two, the task of producing a light table could be a project in itself!