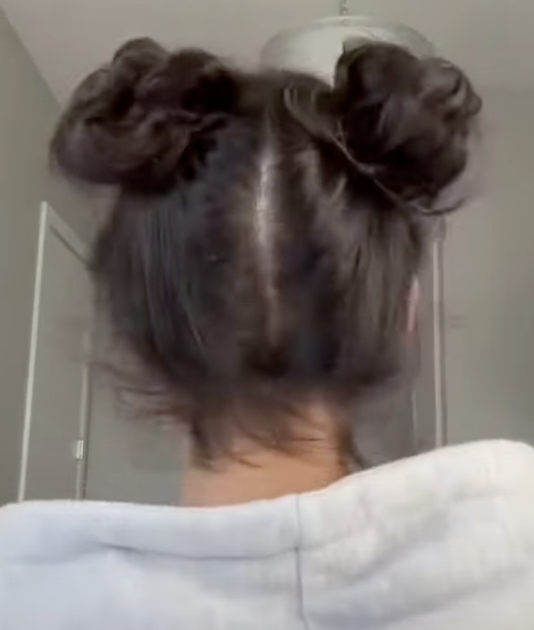
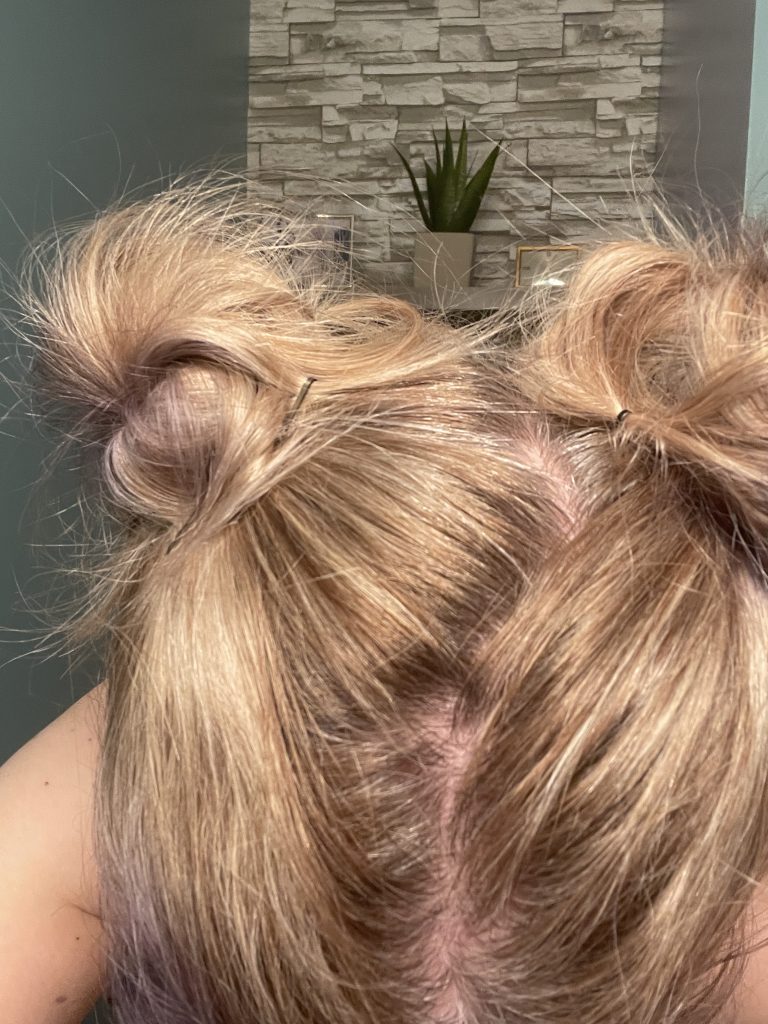
From personal experience with tutorials, I’ve come to realize that there tends to be a learning curve which requires lots of practice to perfect a particular task. Some instructions are either assumed, details are left out, or minimal forethought has gone into providing ALL tips and tricks. Exhibit A: This is my attempt (right) at re-creating “space buns” (left) (tutorial by Andrea Ventura, 2022). NAILED IT.
That being said, the potato stamping tutorial provided in our course Revamping Your Stuff with Potato Stamping (2015) was easy to follow — although the way the knife was used made me cringe a few times.
Choosing Your Potato
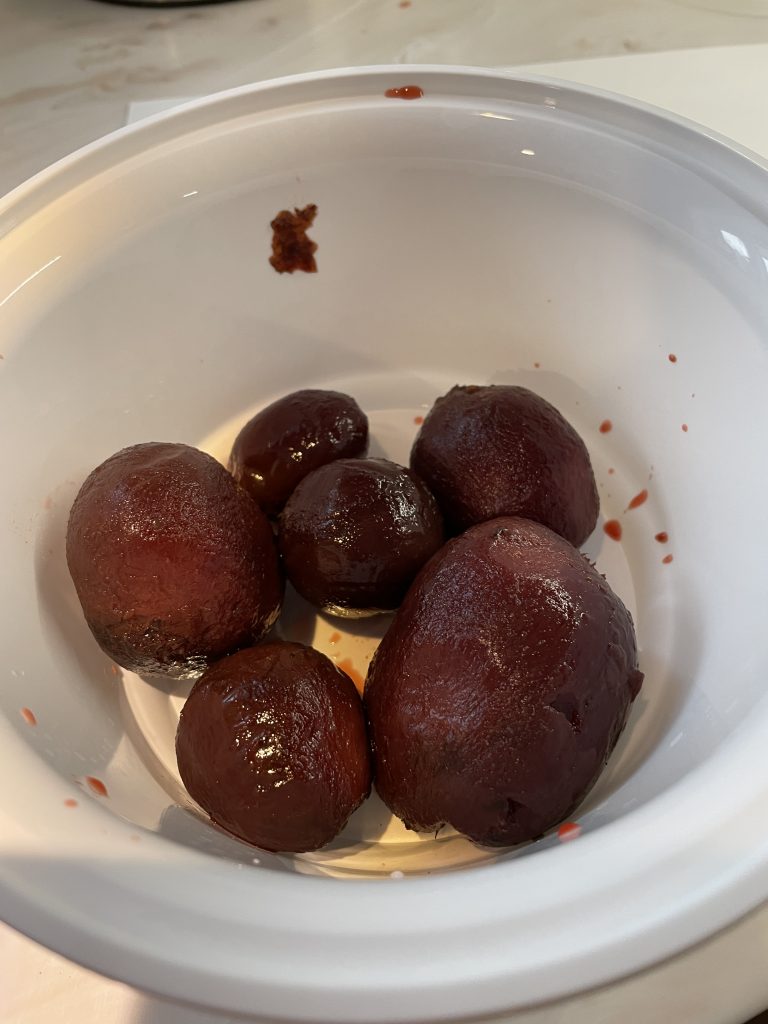
I went with large baked potatoes – relatively porous and easy to cut. My husband bought me 5 potatoes. This would provide two letters per potato if I use the ends only… plus a couple spares for inevitable failures.
The Process
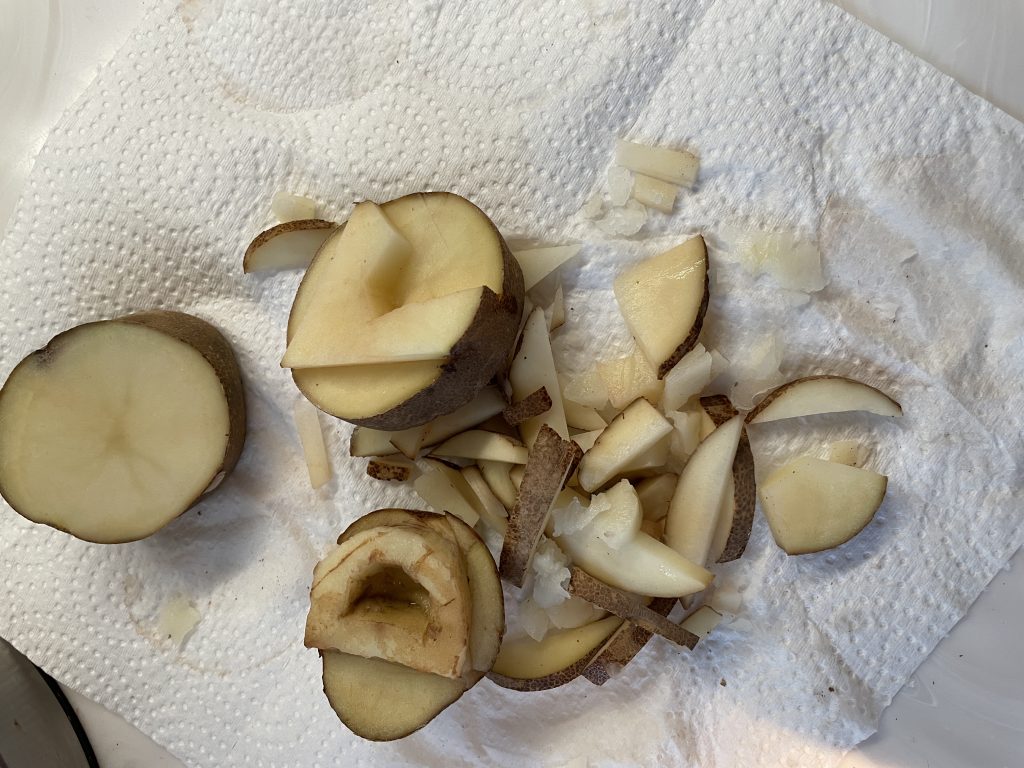
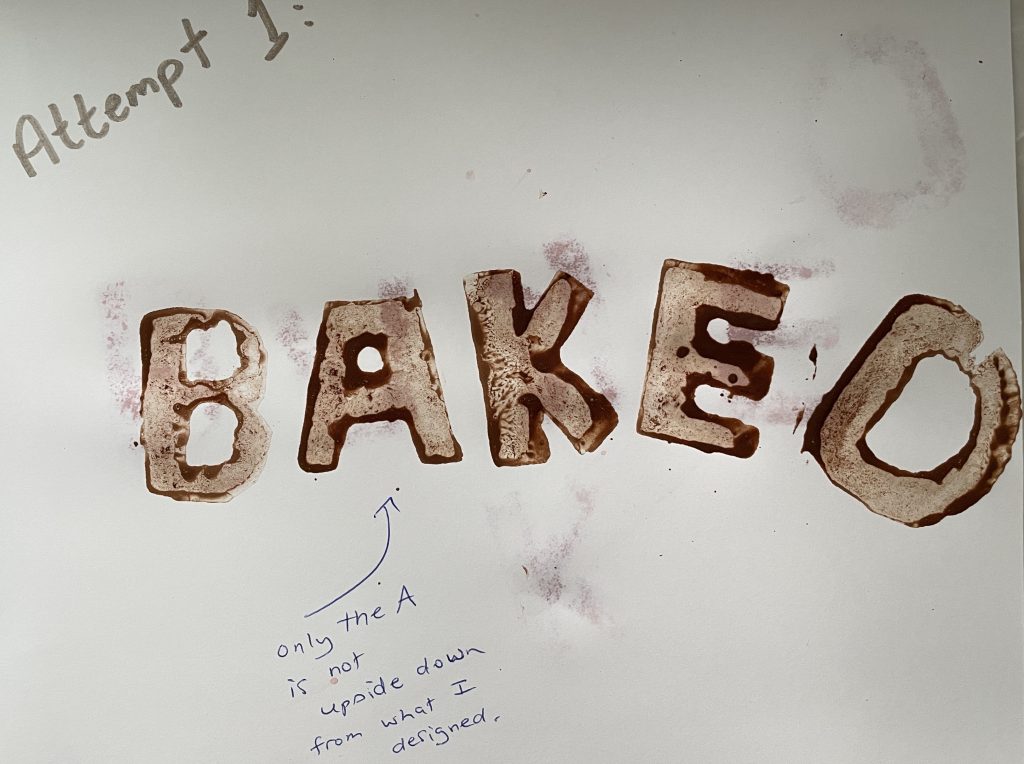
I had to consider what 5-letter word (no repeat letters) I would use. I chose BAKED. It just made sense for potatoes. The first go-around, I had 30 minutes available to make one letter and practice stamping. I cut into a potato, dabbed it on paper towel, then looked for a dark marker for tracing a letter (demo’ed in tutorial). I couldn’t find a dark thick marker so I tried a pen and thin marker. Neither worked. I decided to go rogue. I cut into the potato with no guardrails! Against my better judgment, I jumped in with a serrated knife. Slowly, I cut out an uppercase “D”. This first attempt was tedious. But as a kindergarten teacher, I knew I could make this work since crafting and problem-solving come with the job. Once I had the “D” cut out, I had to choose a liquid for stamping. No crafting paint handy. Natural materials? I tried beet juice which was okay. I decided on cocoa power with a bit of water to make a paste. I liked the brown colour is in keeping with the natural colour of potatoes. This went well.
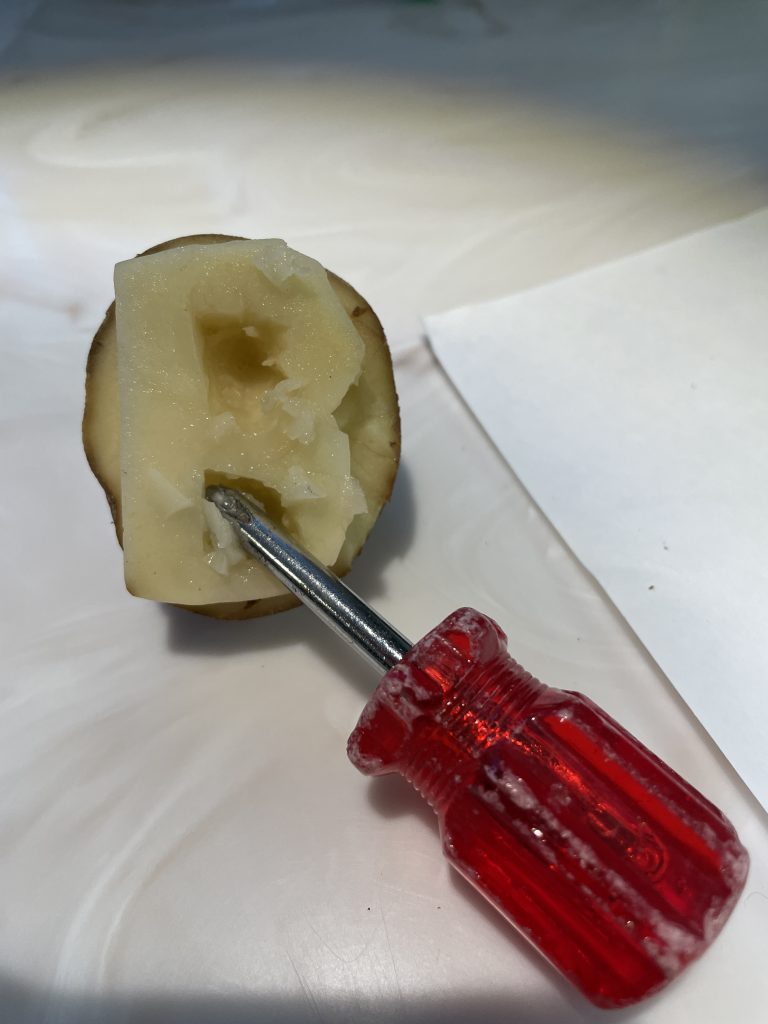
Saturday morning, I had more time and energy to continue. I laid out specifics: transference tool (potato); stamping medium (cocoa powder); tools (paring knife and screw driver); canvas (white card stock).
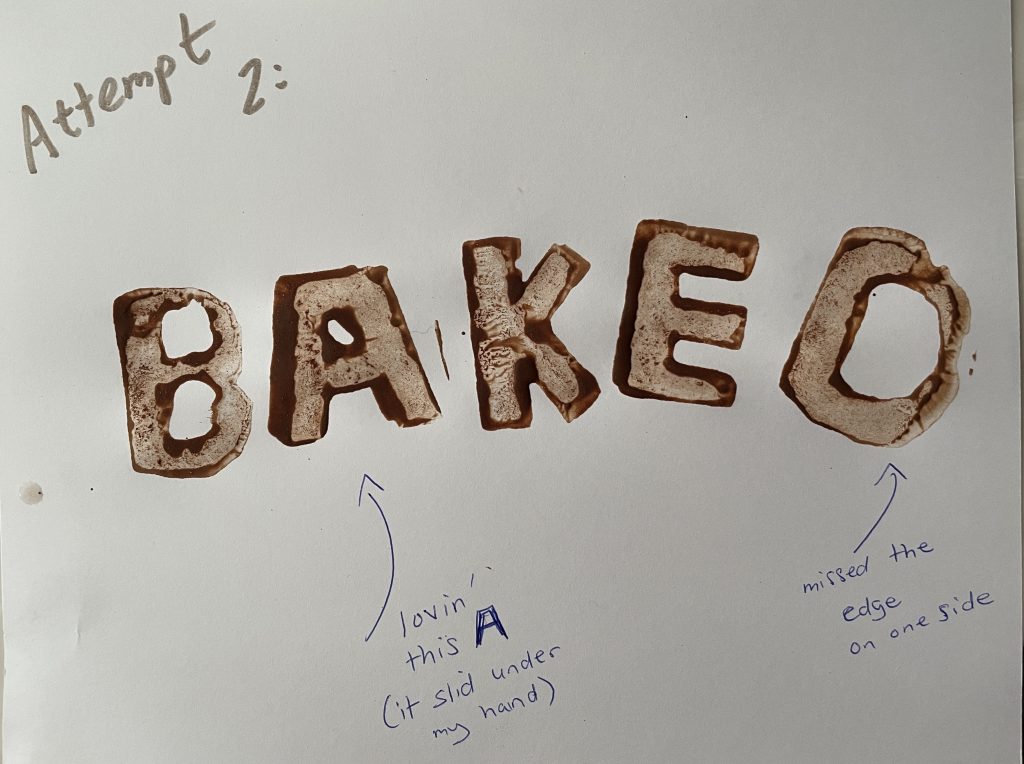
I decided against using a marker to draw the shapes. I chose a sharp paring knife. I use x-acto knives often, but this particular task brought back memories of my first job out of high school. I worked for a small newsprint journal as a receptionist/typist. Being this was a 3-person operation, I quickly moved to paste-up design of advertisements using Letraset, which are “pre-printed sheets of rub down letters based on a sticky adhesive that was applied with pressure” (Image Transfers, 2017). One of my first experiences with an x-acto took the tip clean off my middle finger. I now take more care with sharp tools. Anyways, for letters “A” and “D” I had to consider how to scrape out the centres. I chose a screwdriver.
Once I finished shaping all the letters, I noticed the “D” I had made earlier was smaller than the other 4 letters I just made. Similar to the turn of phrase, “Kids are like pancakes, the first one is always a throw-away”, https://getyarn.io/yarn-clip/ef7f71ba-cac9-4087-babc-d5c584f4aa19, I decided to redo the “D”.
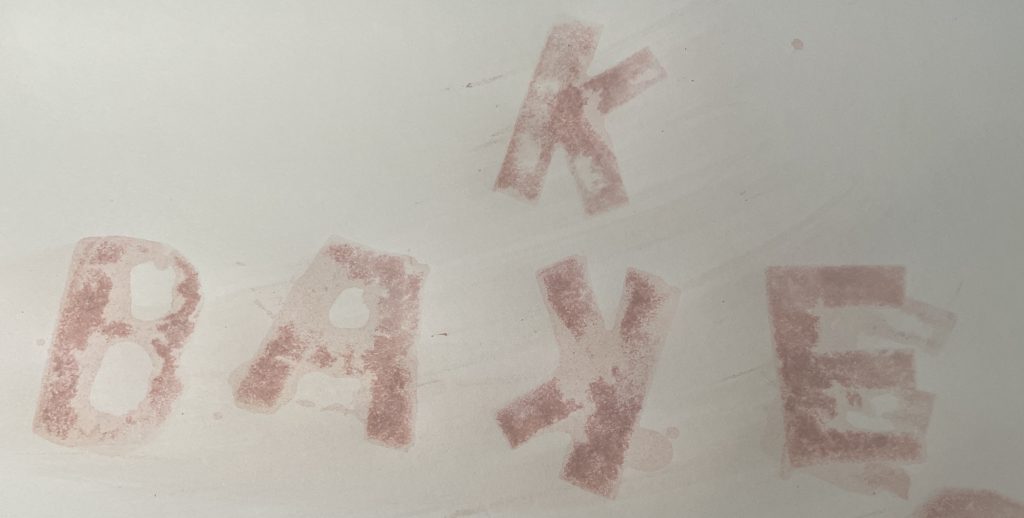

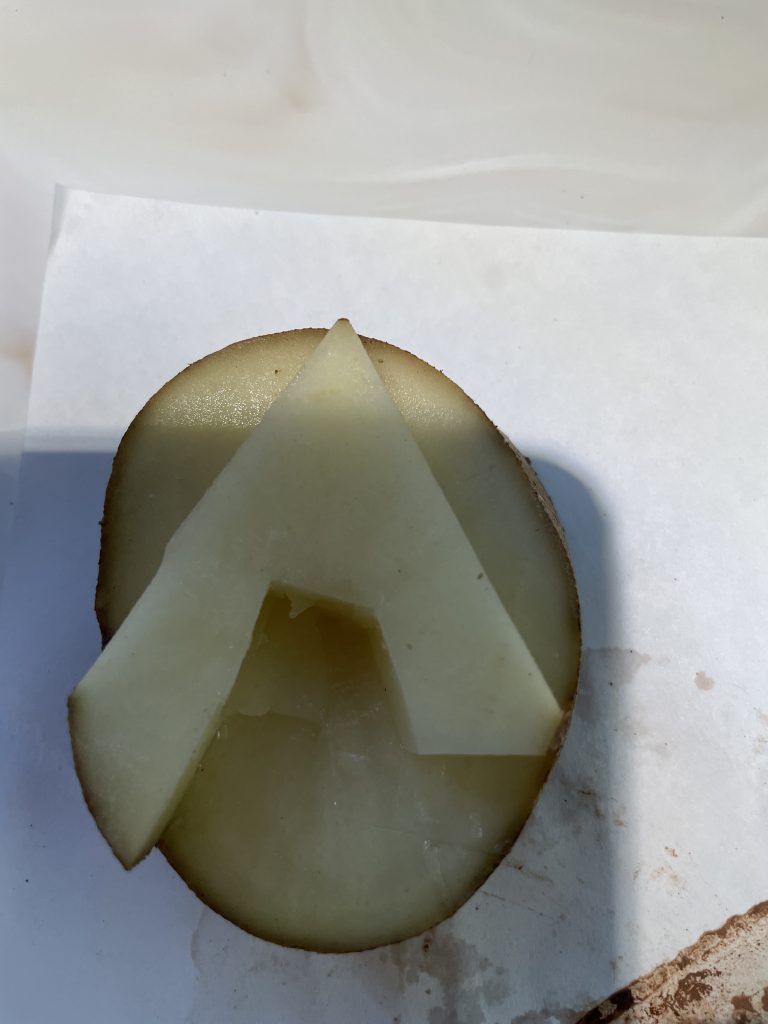


Choosing how to position the stamps took some thinking. I hadn’t fully considered that the potatoes would have to be turned upside down. This changes the direction of some letters and can cause some to be opposite the direction intended. The “A” was not affected because it is a symmetrical letter.
I’ve done similar art projects in my classroom using pre-made sponge letters and paint. I like seeing the difference in each child’s art project. The finger pressure, placement, and amount of paint used makes such a difference.
Final Product
Potato project took approx. 2 hours from prep to completion. I think that’s a manageable amount of time based on the learning curve.
Challenges
- Making letters relatively the same size (solution: not concern myself with identical sizes)
- Curving shapes with a paring knife
- Cutting out centres of letters (solution: leave centre intact)
- Determining directionality when carving letters (reflective of the letterpress)
- Creating identical stamping – difficult to duplicate the kerning (spacing), amount of liquid, maintaining same hand pressure and motion, aligning stamp onto paper without guidelines (solution: create guidelines)
- Cutting recognizable shapes – control of the blade
- Considering asymmetry of letters when carving certain letters
- Realizing that once you cut, you can’t go back
- Deciding on less complicated style to make it easier
And Then I Ate It

Mechanization of Writing
As I’d expected, I was unable to make identical images. Typsetting and computer design has given us the luxury and convenience of duplication. With original art, there is far less control over the outcome. That is the beauty of original art. No two creations are the same.
Both original and reproduced visual art have varying benefits depending on what one wants to achieve. If the goal is to provide art to the masses, then digital design is preferable. If originality is the goal, then handmade creations are best.
As I made the potato stamps, I thought about two forms of writing technology I was producing:
1) Cutting out the letters individually reminded me of the painstaking and difficult task required of those who etched in clay and stone, the earliest of which have been unearthed from the ancient city of Uruk on the bank of Euphrates (Gnanadesikan, 2011). “Drawing curved lines on clay is relatively hard; stamping marks into clay is much easier. And so over time the curvilinear signs of proto-cuneiform gave way to the angular signs of true cuneiform, pressed in to the clay with a stylus made from the end of a reed” (Gnanadesikan, 2011).
2) The stamping component reminded me of the invention of the letterpress for typography. As described in the David Cooke video, the letterpress “requires a greater degree of consideration when you’re using this mainly because there are no quick change sizes or typefaces like we can do on the computer” (2012).
References
Big Bang Theory. (March 31, 2008). The Pancake Batter Anomaly episode. [Video]. Retrieved from https://getyarn.io/yarn-clip/ef7f71ba-cac9-4087-babc-d5c584f4aa19
Cooke, D. (January 26, 2012). Upside down, left to right: A letterpress film Links to an external site. [Video]. YouTube.
Gnanadesikan, A.E. (2011). The first IT revolution. In The writing revolution: Cuneiform to the Internet (pp. 1-12). John Wiley & Sons
Image Transfers. (November 25, 2017). Letraset: the history of dry transfers. Retrieved from https://imagetransfers.com/blog/history-letraset-instant-transfers/
Juniper. (August 3, 2015). Revamping your stuff with POTATO STAMPS Links to an external site. [YouTube]. Retrieved from https://www.youtube.com/watch?v=tRKyECgL1wY
Ventura, A. (June 6, 2022). Space buns hairstyle tutorial for thin hair. [YouTube]. Retrieved from https://youtu.be/Y_wyRyGCgRg