April 2021

Week 4 (April 19th-23rd)

What a fun week we had! This week emphasized global warming and ways we can protect our environment, engaging in and understanding Indigenous perspectives and knowledge systems, and behavioural adaptations of animals. Continue reading to learn more.

Unit of Inquiry:

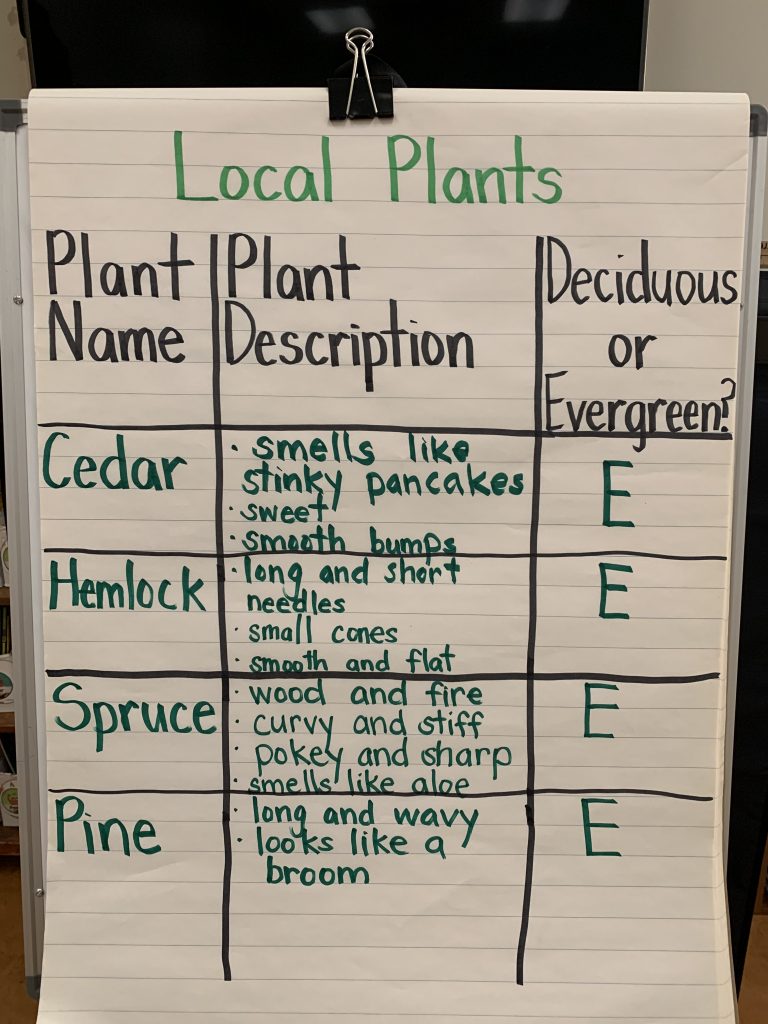
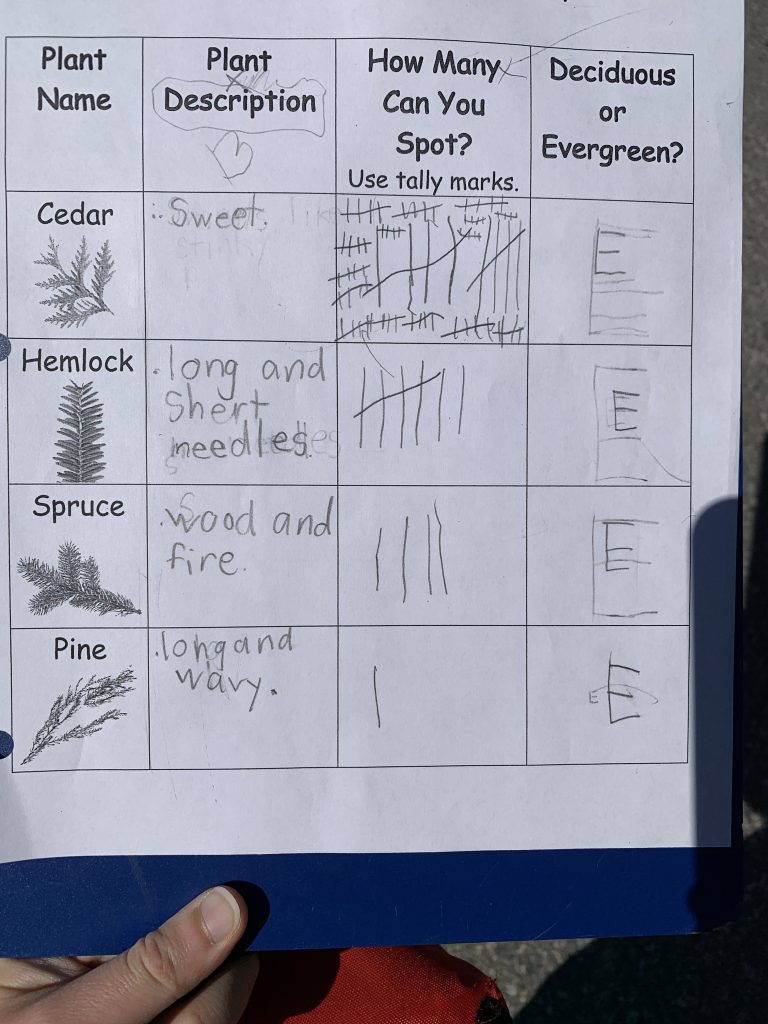
We started the week off making polar bear salt dough! This art activity was part one as we used the polar bear models for the second part, in a science experiment. This art activity was centered upon the concept of global warming. While demonstrating how to make salt dough, I had the students brainstorm and share, through Think/Pair/Share and as a whole class, what global warming is. We discussed how global warming is when the Earth’s temperature rises at a faster rate than if it were to naturally. Then I asked, “What causes global warming?” Students were accurate in that various human activities increases global warming such as driving, using electricity, and cutting down trees (deforestation). Students made a connection that trees release oxygen and absorb carbon dioxide, a toxic gas that isn’t good for our environment, which helps to protect our environment. Trying to make a connection to our unit of inquiry, living things, I asked, “How are polar bears affected by global warming?” Students shared how global warming causes the ice in the Arctic to melt. We discussed how global warming not only affects polar bears but also the wildlife in that environment. Because global warming causes sea ice to melt at a faster rate, this affects the seals as well as crustaceans. Polar bears depend heavily on seals as one of their main food source. Seals depend heavily on small fish, crustaceans, and krill that are near the edge of sea ice. As sea ice is melting due to global warming, this results in less food source for seals and polar bears. 

As part of our science experiment, we placed a polar bear salt dough model on ice (sea ice) in a plastic container and made observations throughout the day on what happened. Since this experiment occurred on a very warm day, the (sea) ice started melting five minutes after taking it out of the freezer! Students made connections to our science experiment and what is happening around the world. We wrapped up our two-part lesson on how we, as individuals, can help protect our environment, such as by walking more and not driving.

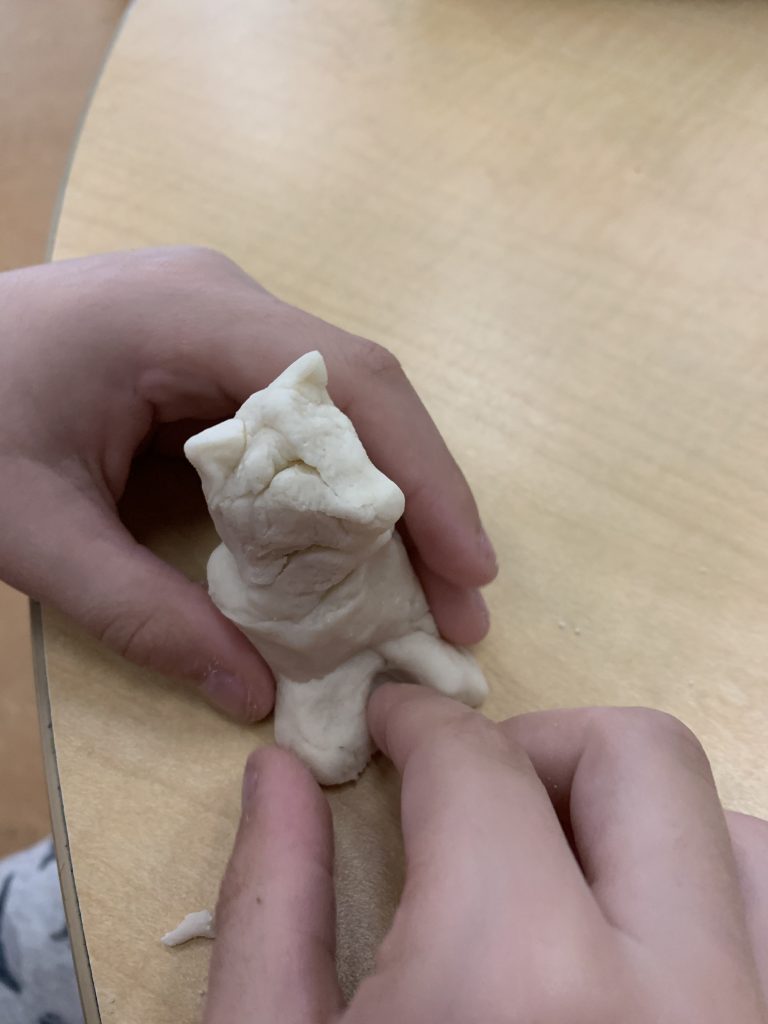
A student making their polar bear salt dough model.

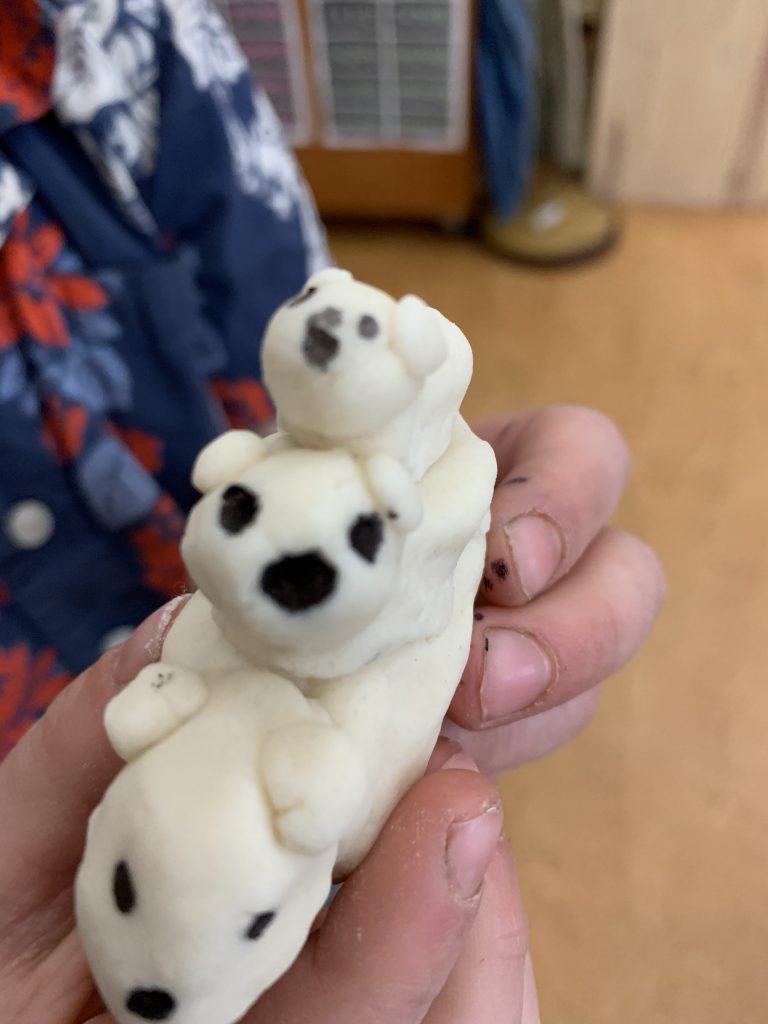
Finished product of salt dough polar bears.

A collection of our students’ salt dough polar bears!

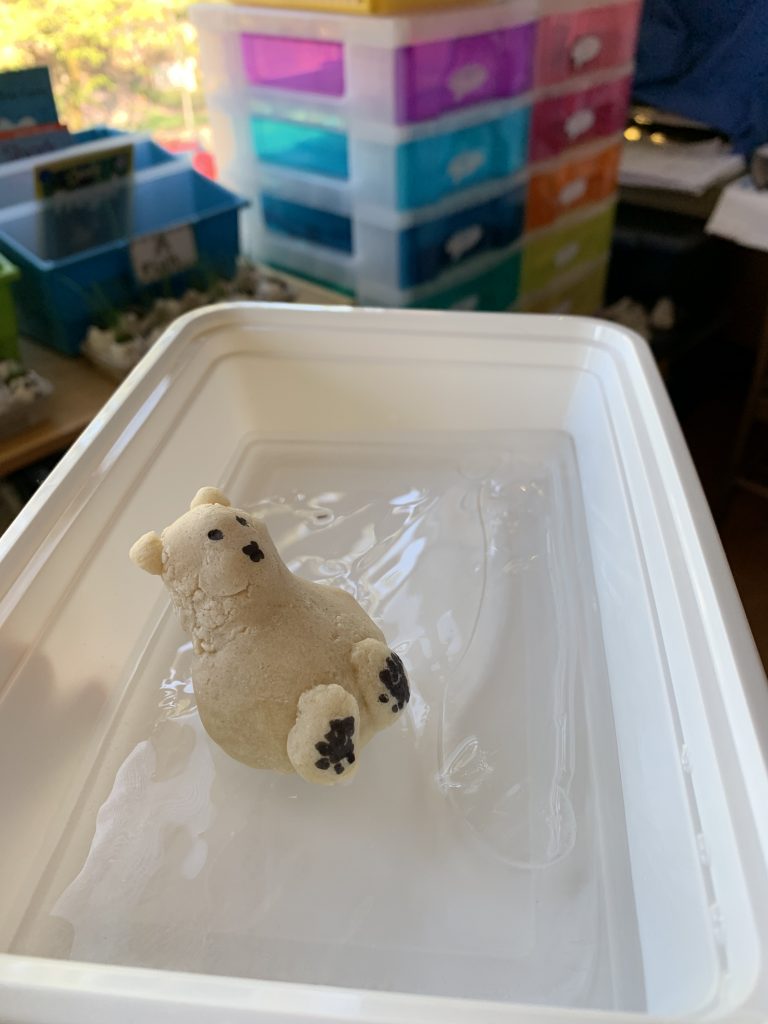
Science experiment: salt dough polar bear on (melting) sea ice.

Weaving in Indigenous perspectives and knowledge system is crucial for me, as a beginning teacher, to incorporate into any of my lessons. This week, students learned about animals symbolic to Indigenous peoples. As an introduction to this lesson, I showed students a website, https://native-land.ca, that helps identify territories, languages, and treaties native to the land we are guests on. We searched up the school we are at and it informed us that we are on 5 different nations: Coast Salish, səl̓ilwətaɁɬ təməxʷ (Tsleil-Waututh), Skwxwú7mesh-ulh Temíx̱w (Squamish), S’ólh Téméxw (Stó:lō), and xʷməθkʷəy̓əm. Then, I read them a story called Sharing Our World: Animals of the Native Northwest Coast. Information provided in this book has been provided by Nuxalk, Namgis, Caost Salish, Kwakwaka’wakw, Haisla, Heiltsuk, Haida, Bella Bella, Tsimshian, Kwa Na Ki Nulth and Nuchatlaht Nations. https://www.strongnations.com/store/item_display.php?i=1957

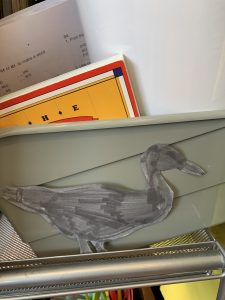
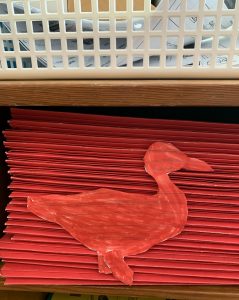
Students were provided a worksheet with 12 boxes describing the meaning of different animals symbolic to Indigenous peoples. We worked together as a class to cut and glue the correct Indigenous animal to its symbolic description. 

Activity incorporating Indigenous perspectives and knowledge system.

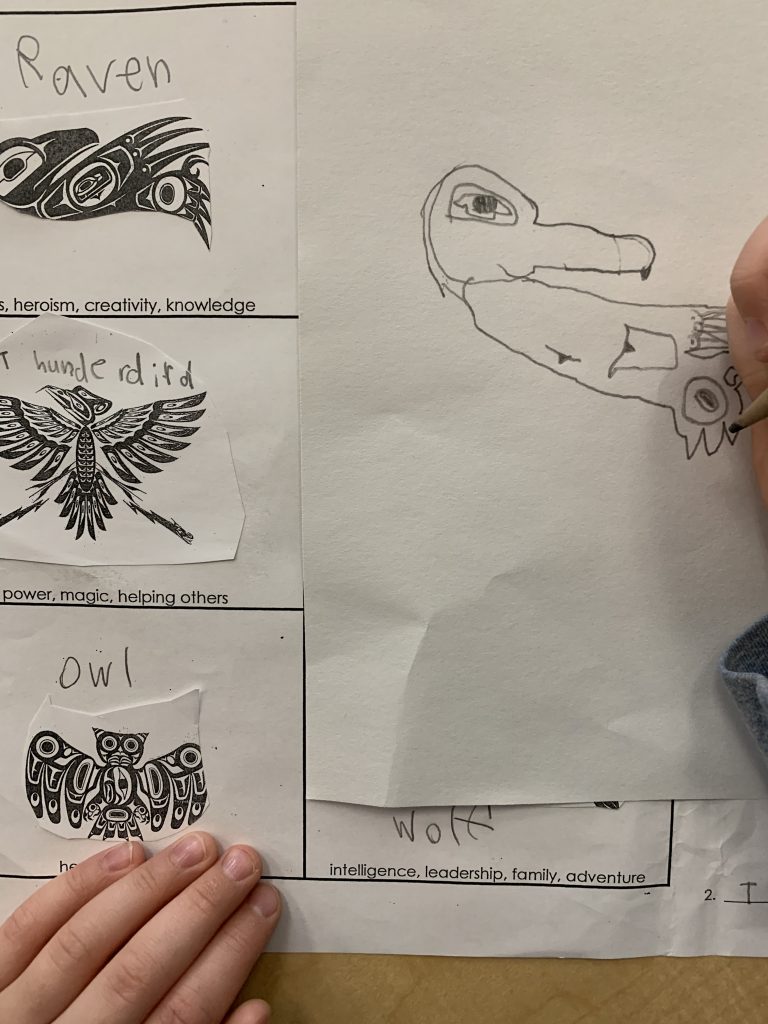
As a follow up activity, I introduced the six basic Haida shapes as students were instructed to choose one Indigenous animal they resonated most with and try their best to draw it. It’s important that I introduce some simple Indigenous drawing shapes so students can identify them in any Indigenous art work. 

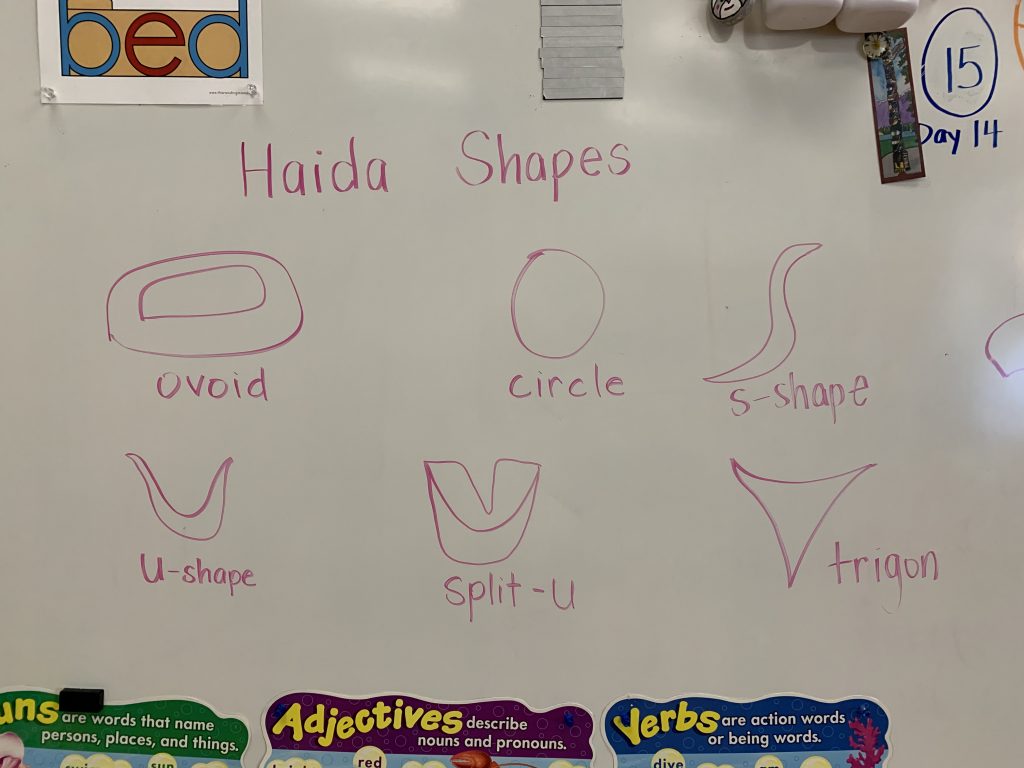
Six basic Haida shapes.

I encouraged the students to include at least one of the basic Haida shapes in their Indigenous animal drawing. Students took two days to outline the animal’s body with pencil and then marker, and add design on the animal. Below are some finished results.

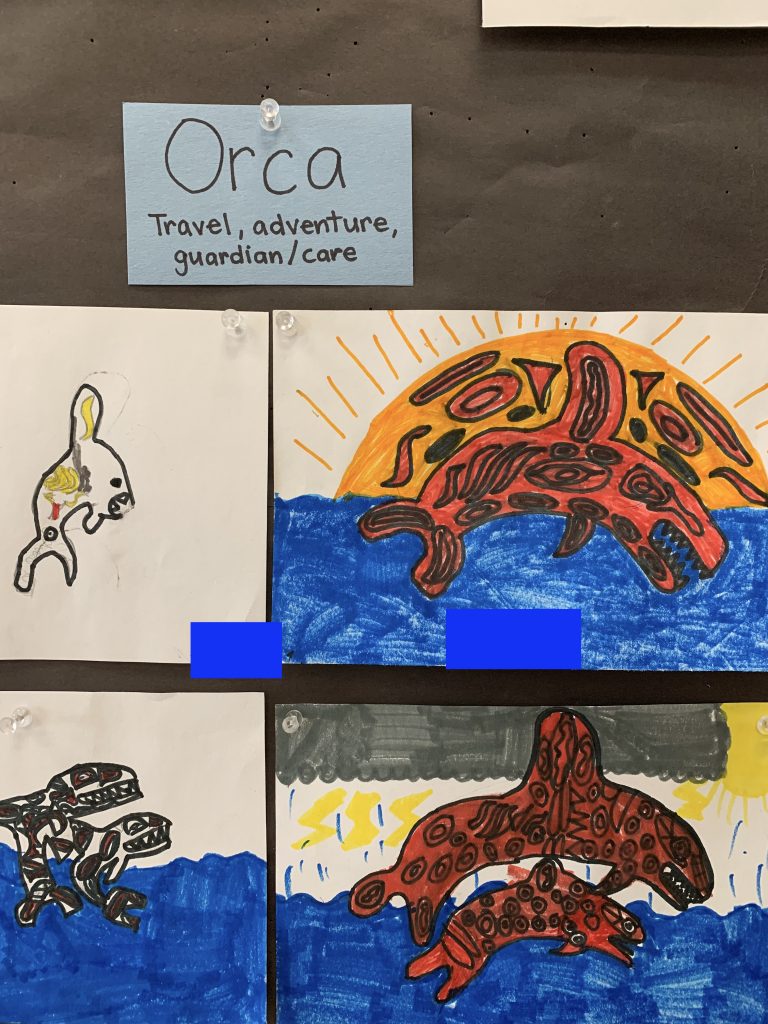
Orca Indigenous animal drawings.

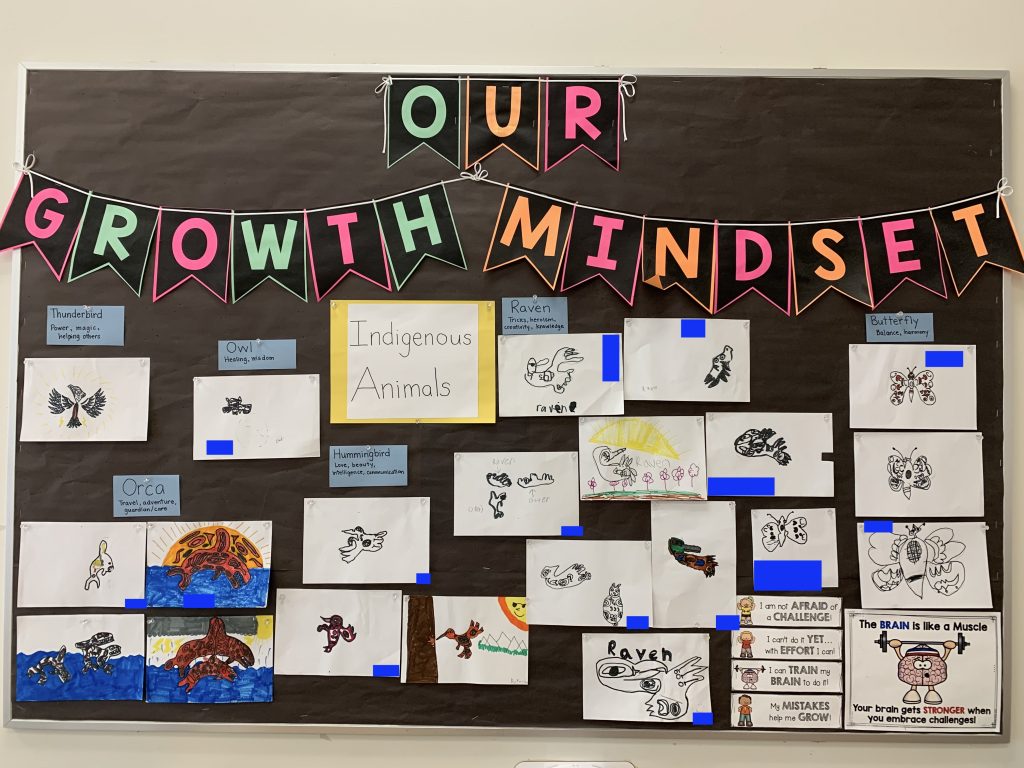
Bulletin board of each student’s Indigenous animal drawing.

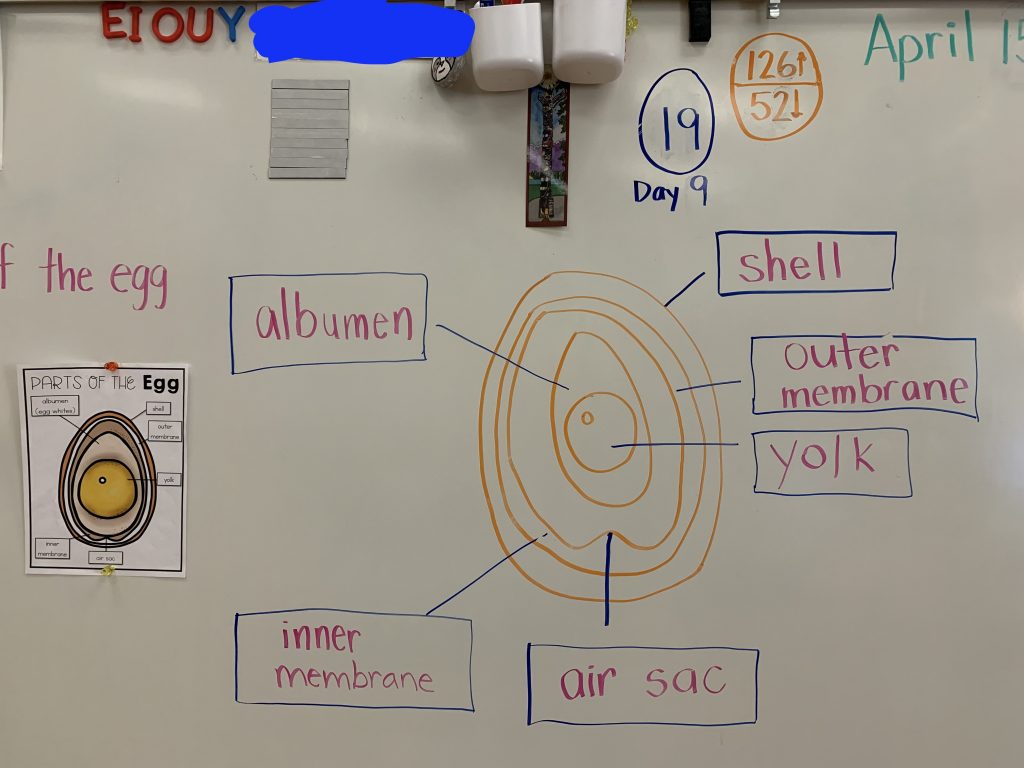
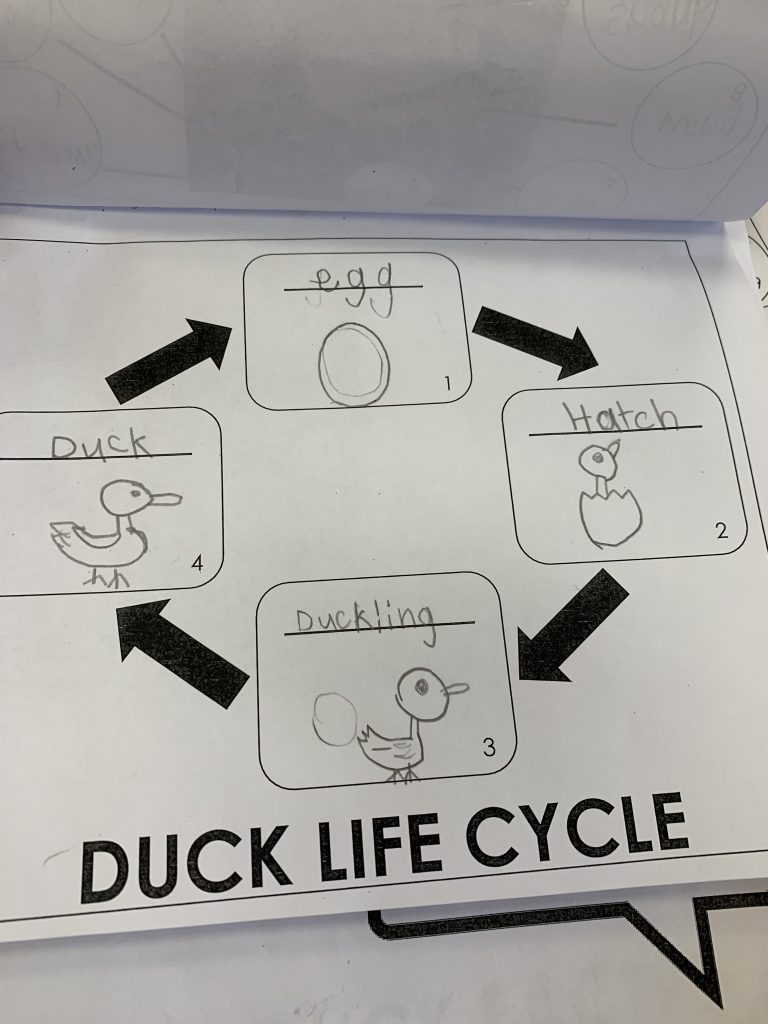
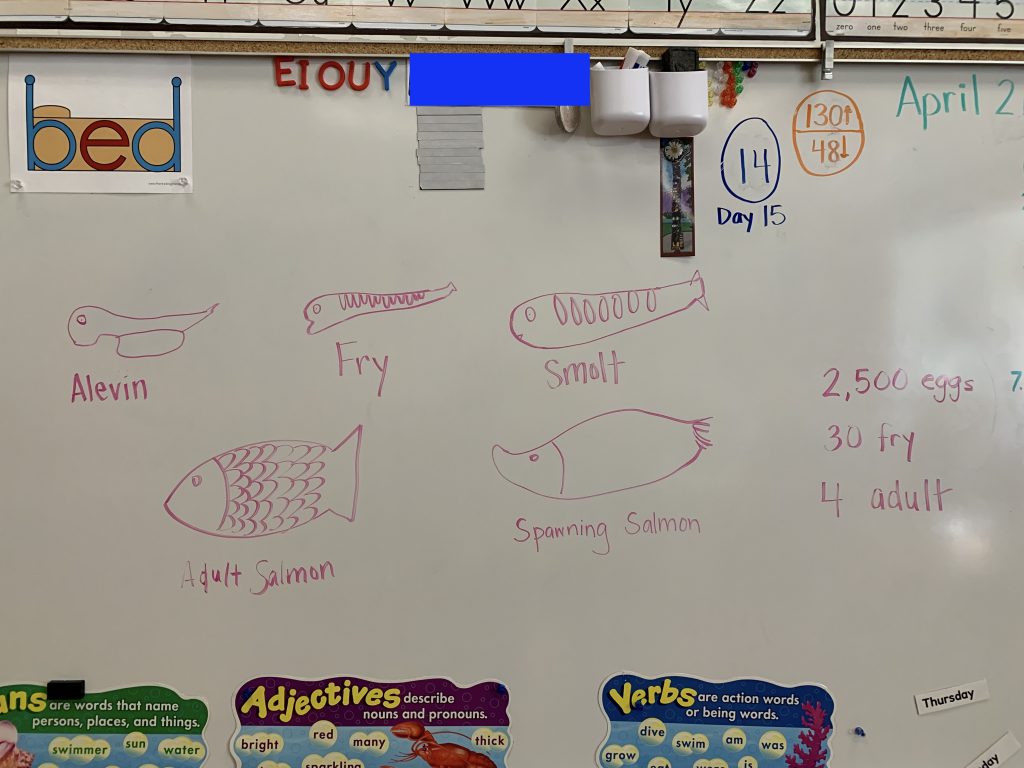
We also learned about the life cycle and journey of salmon. Students were provided a mini booklet and they drew each stage of a salmon on the appropriate pages: egg, alevin, fry, smolt, adult salmon, and spawning salmon. In this lesson, students learned the importance of:

  • the yolk sac that an alevin carries during the first 6 weeks after hatching
  • how salmon fry imprint to remember the scent of their home stream
  • how smolts change their physical appearance by having Parr marks to camouflage in shadows and help them survive better in their environment
  • smolts swimming downstream to an estuary, where the river meets the ocean, as it contains rich source of nutrients and minerals to help salmon grow
  • the change of smolts’ physical appearance to an adult salmon by becoming a light silvery colour to help them better adapt to ocean life
  • the change of adult salmon’s physical appearance to a spawning salmon by turning bright red to attract a mate
  • the challenges of adult salmon swimming upstream to get to their home stream

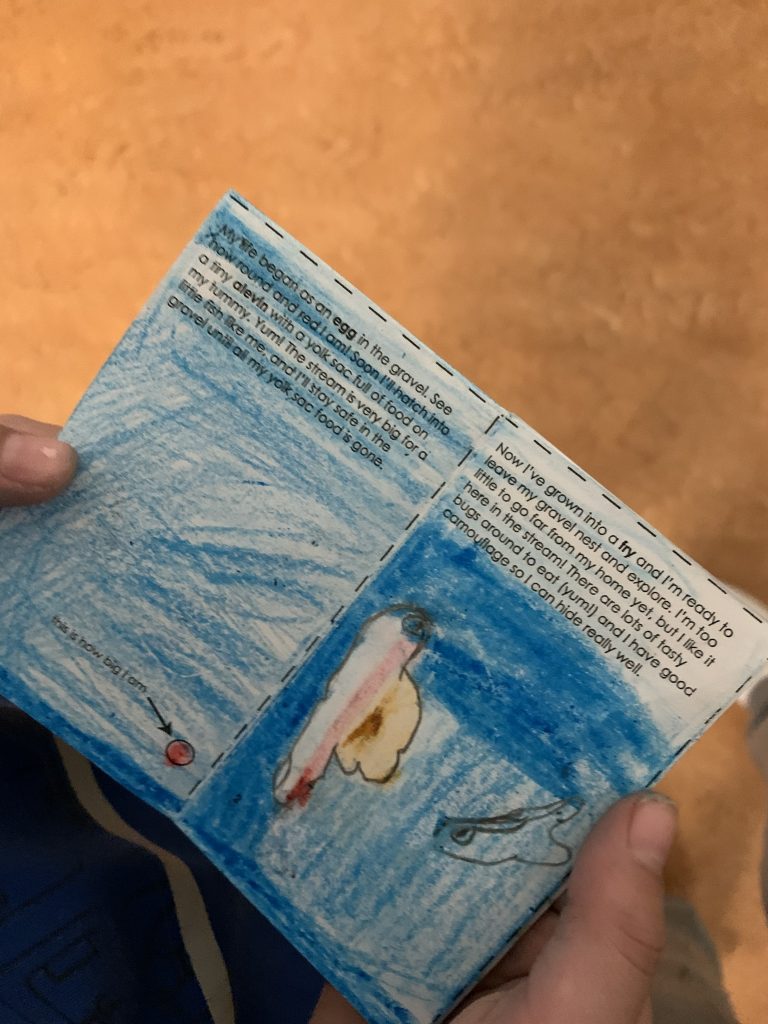
Life cycle of a salmon booklet.

The life cycle of a salmon.

Students learned the importance of hibernation, migration, and adaptation. As a warm up activity, I drew three boxes on the white board of each concept and asked the students to draw an animal they think would go under each category.

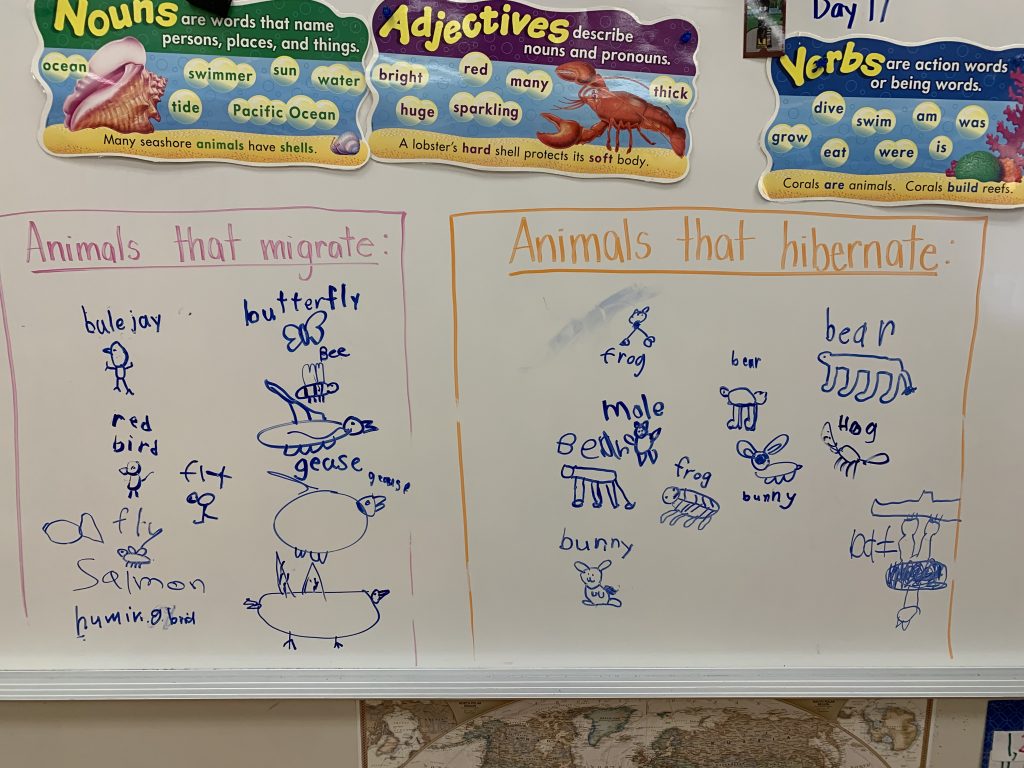
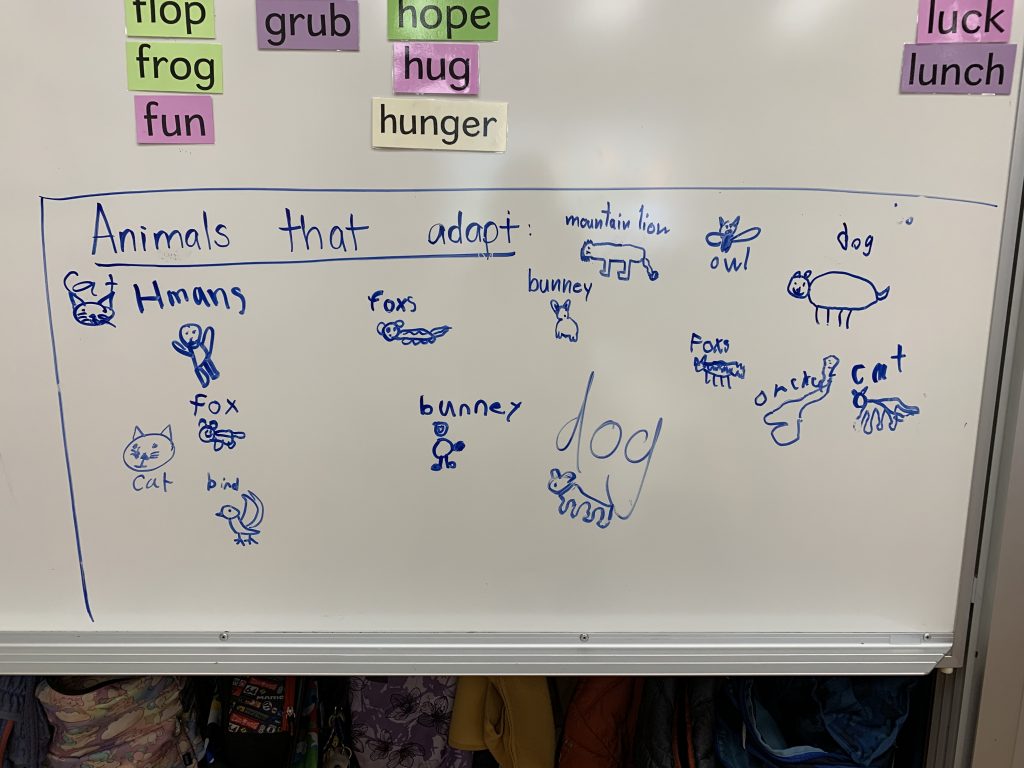
We then gathered at the floor as a class to discuss what each concept meant and examples of animals that do it. We discussed how many cold-blooded animals hibernate because their body temperature is dependent upon the temperature outside. So, when the temperature is colder in the winter, cold-blooded animals bodies are colder, they move slower, and are more vulnerable to predators. That is why they hibernate. We also know that some bears hibernate because during the winter, they lack availability of food like berries and fish. We learned a couple weeks ago that berries and leaves fall down on Deciduous trees during the winter. We also learned from our salmon lesson that they migrate. So, bears don’t have as many food sources as they do during the summer so they hibernate to save energy and help them survive the winter. We also discussed how some animals adapt in the winter so they don’t need to hibernate or migrate. Students made a connection that we, humans, adapt as well as foxes and rabbits. Making a connection to the type of animal coverings mammals have, fur or hair, helps those animals keep warm in the winter so they can adapt and hunt for prey. After our discussion at the floor, the students were instructed to complete a worksheet that entailed cutting and gluing animals into the correct boxes.

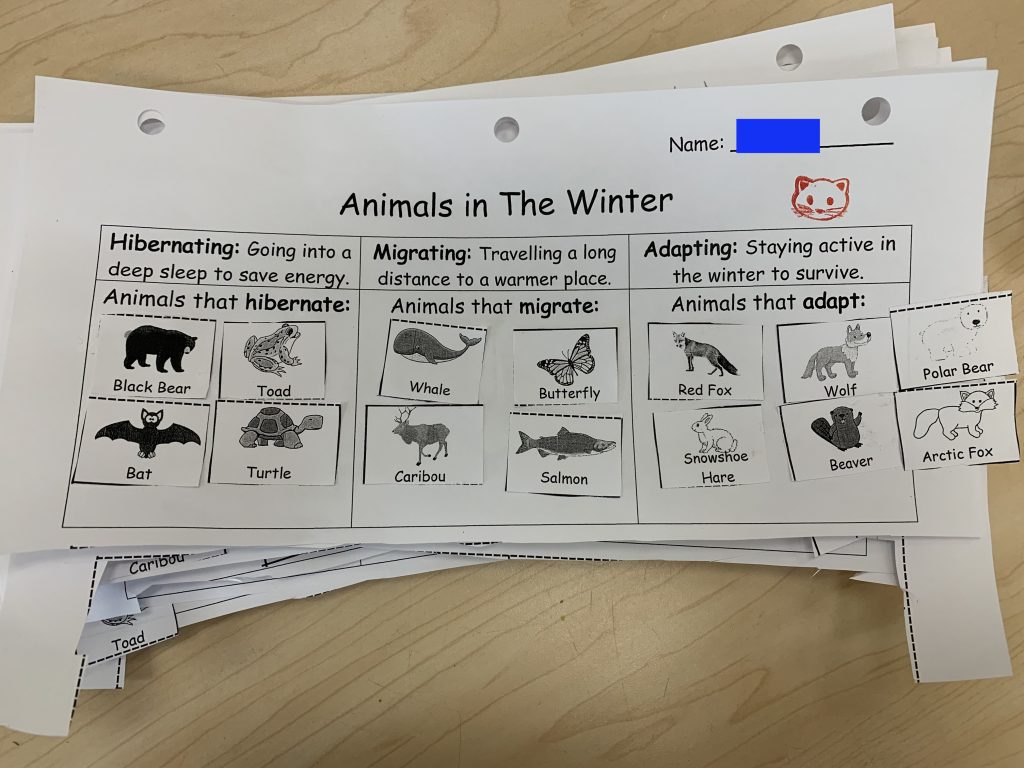
Hibernation, migration, adaptation worksheet.

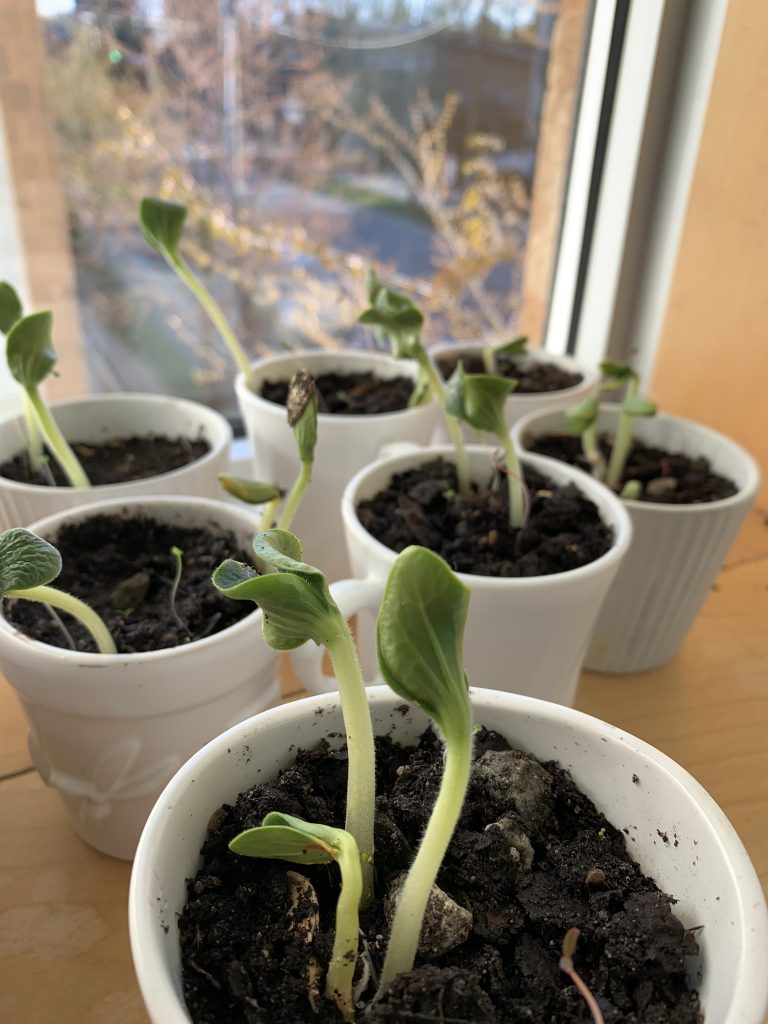
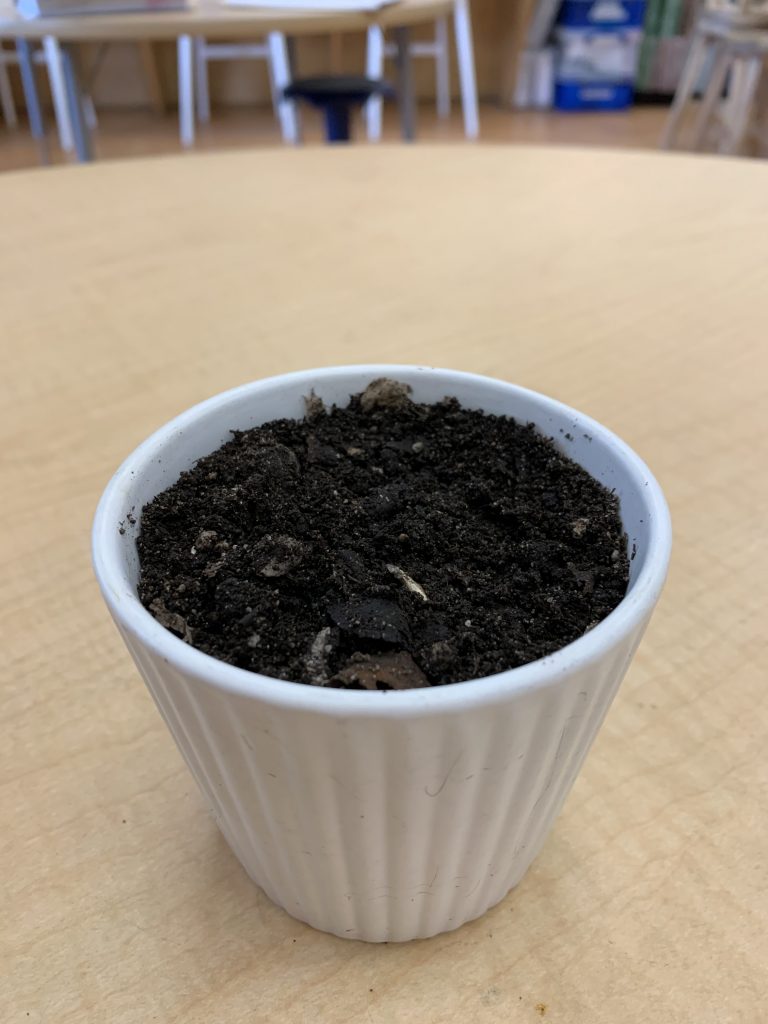
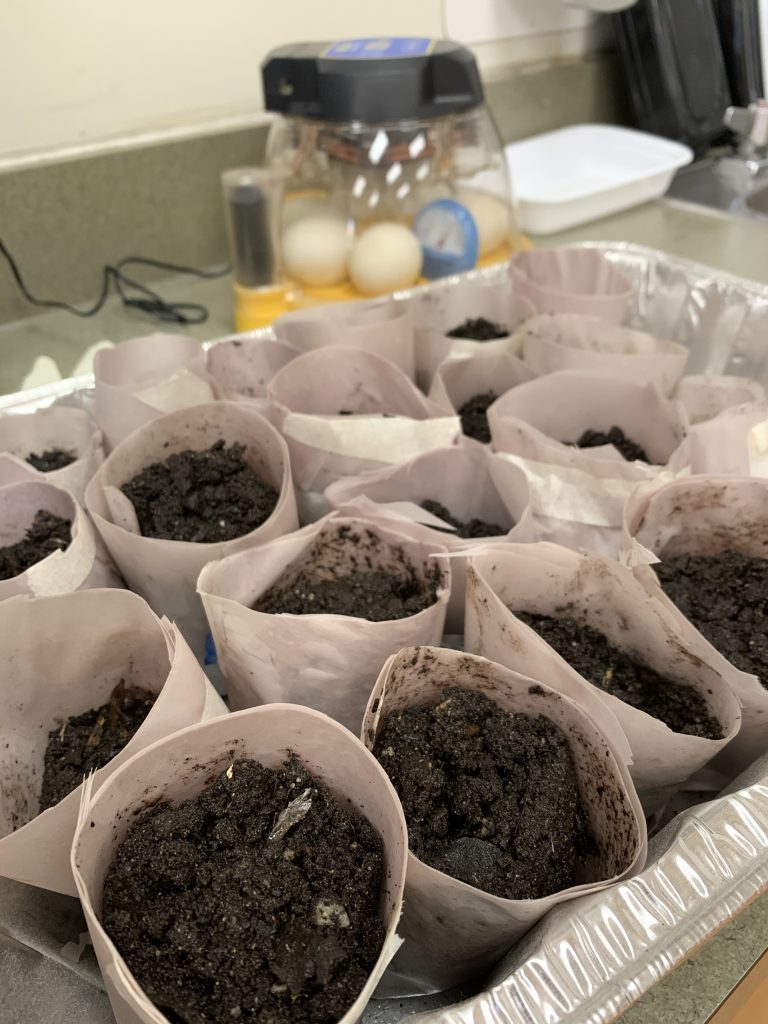
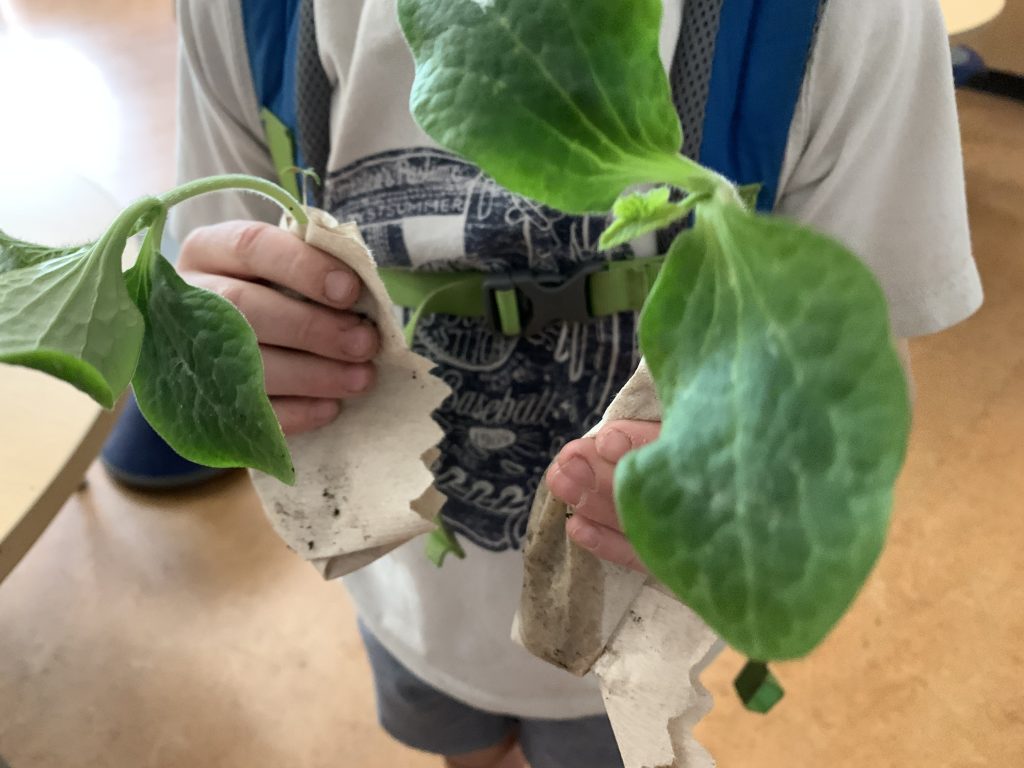
Our pumpkin sprouts have turned into plants! They were outgrowing our small pots in our classroom so we asked students who had a garden at home and enough room to plant one or two pumpkins to take them home. They were happy to take a pumpkin plant home and continue observing the stages of its growth.

Earth Day Art Workshop:

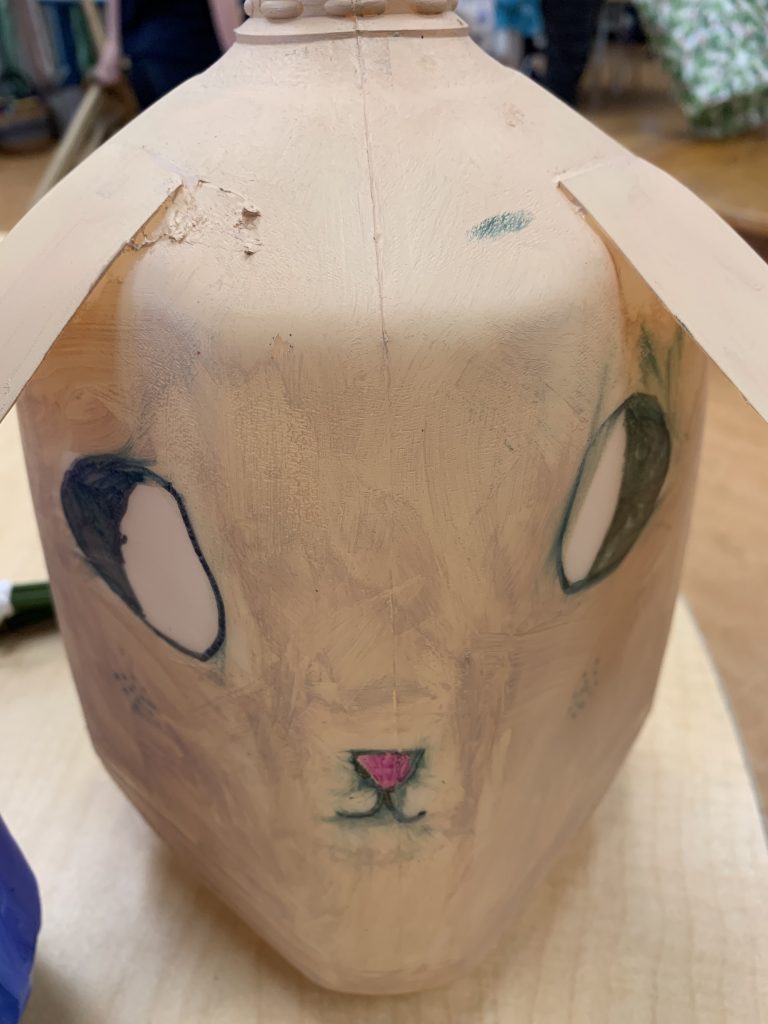
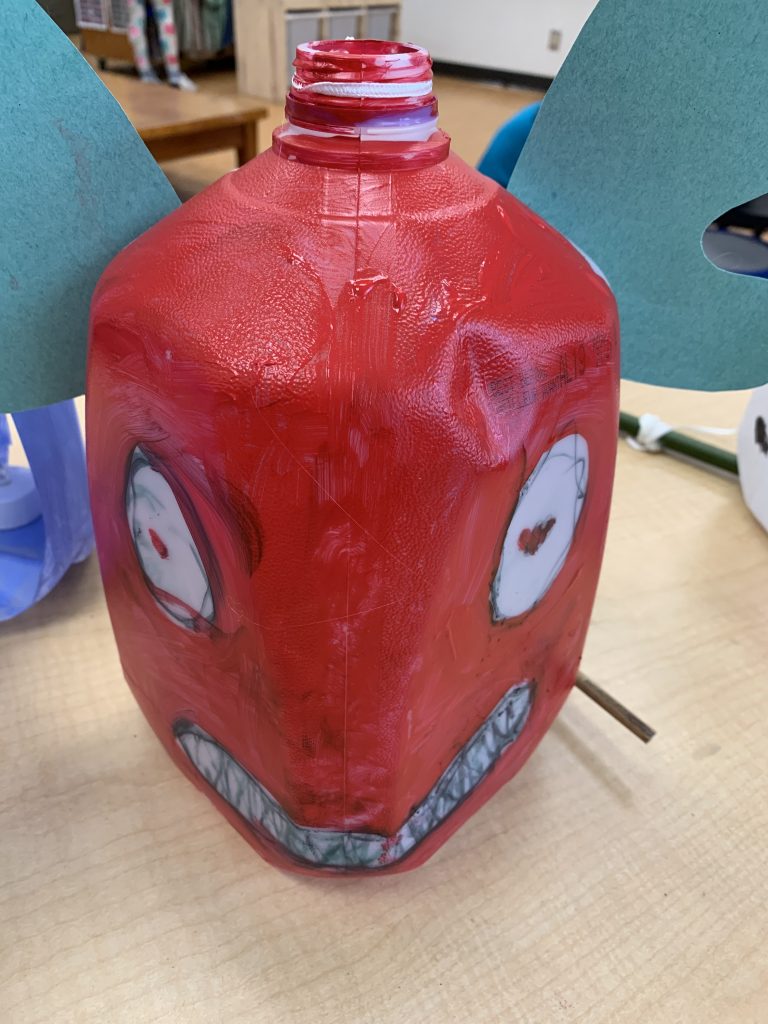
My School Advisor (SA) was able to organize a Zoom art workshop with artist Fei Guan to host a lantern workshop. Fei explained how she is an environmental artist who uses recycled plastic to create works of art. Students were asked weeks prior to bring in a clean 4L plastic milk jug. This was a whole day art activity and the students loved every minute of it! 

Materials needed:

  • 4L clean plastic milk jug
  • Black marker
  • Exacto knife
  • LED light from dollar store
  • acrylic paint
  • twig/bamboo stick and yarn
  • hot glue gun

Each student got to choose what animal they wanted to create. Some even made aquariums! Take a look at the awesome creations.
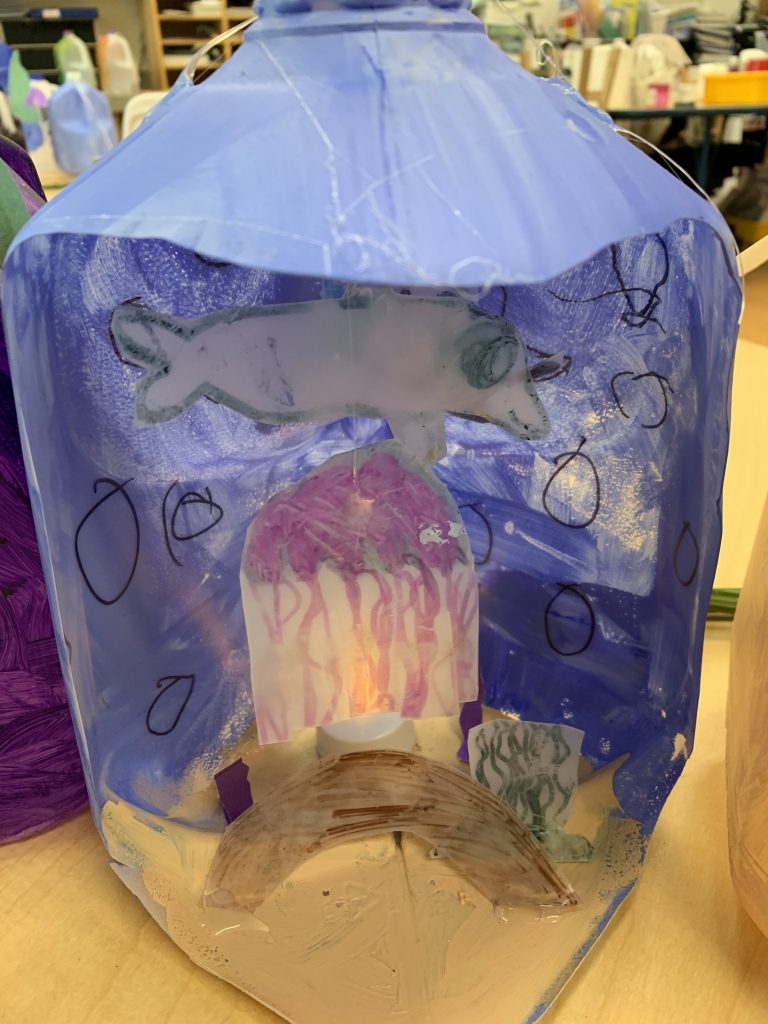
Aquarium

Dog

Dragon

Snake

Other:

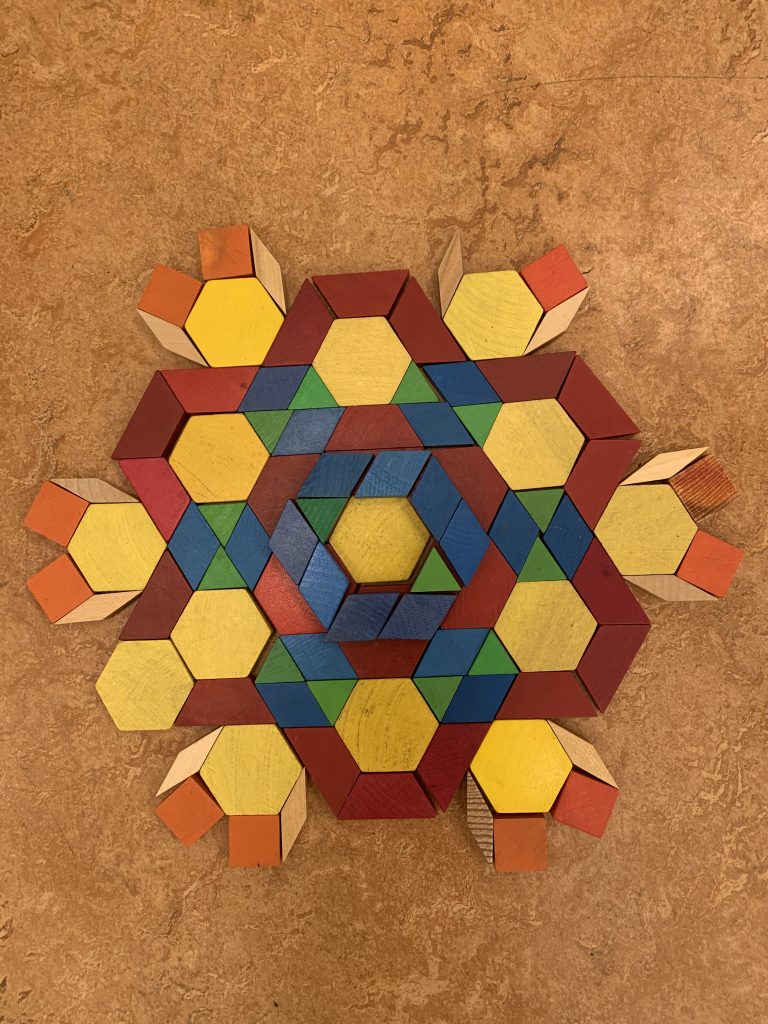
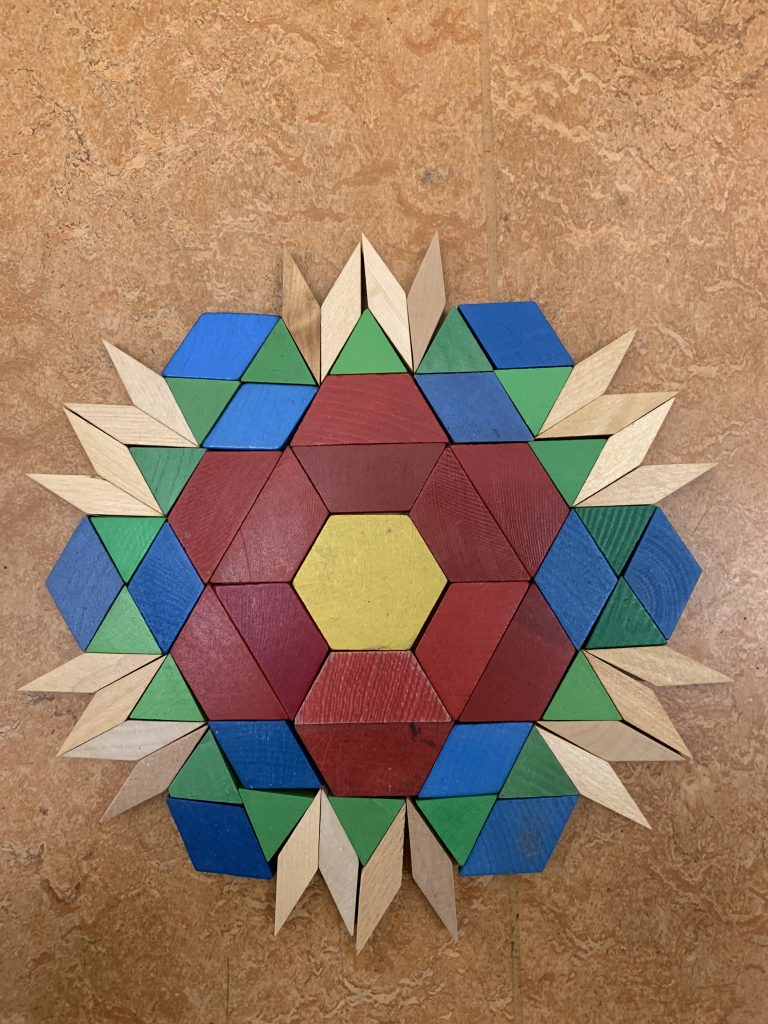
During Centres, two Grade One students were working together to create a pattern out of blocks. They weren’t done when we had to clean up but they wanted to show me their progress thus far. It looked amazing and I had to snap a picture! 

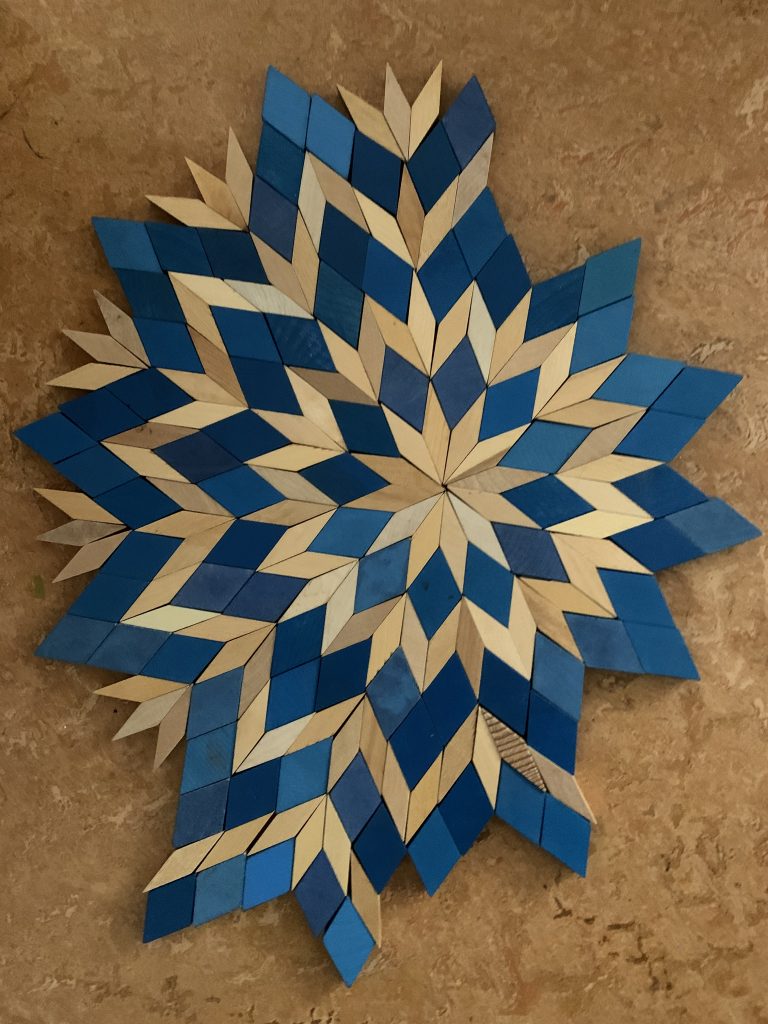
Patterned design during Centres.

I hope you enjoyed reading about my fourth week of long practicum. I’ll be starting to teach 100% (full-time) this upcoming week and am looking forward to it (although there is much lesson planning to be done!)

Thank you for reading!

-Ms. Mah

Week 3 (April 12th-16th)

Hello! This week we were blessed with warm and bright days. It felt like the beginning days of summer even though it’s still Spring! We’re more than half way done our unit of inquiry on living things and I still have so many more things I need to cover! I bet all teachers can relate. Keep reading to learn about what our class engaged in this past week.

Art:

The students engaged in a camouflage hand art project and they turned out so well! Students were given a few options of different animal covering patterns (i.e., cheetah, jaguar, giraffe, lady bug, zebra, etc.) that they would sketch  and then paint onto a piece of paper using tempura paint. Immediately after painting, while the paint is still wet, they would stick their non-dominant hand onto their painting and camouflage their hand into it. The students had a great time getting painted and being creative with their patterns. After this art project, the students definitely understand the concept of camouflage!

Golden Retriever

Lady Bug

Zebra

Bulletin board outside our classroom.

Two weeks ago, my School Advisor (SA) made animal clay pots with the students. The clay had to harden for over a week and this past week the students painted them. Then they were glazed. My SA also bought different coloured marbles from the dollar store and after the paint dried, the students chose a few marbles to put in the middle of their pot. That way, when it’s in the kiln the marbles will melt and yield an awesome swirl/spiral pattern!

Animal clay pots.

Unit of Inquiry:

Since we’re learning about living things and more specifically, plants and animals, it’s important for the students to understand how we classify animals. As a provocation activity, each table group was given a bundle of animal pictures and seven categories: Mammals, Reptiles, Amphibians, Birds, Fish, Arthropods, and Other. After, we debriefed as a class how table groups sorted. Then, students were given a classification worksheet that had a word bank at the bottom describing different animal characteristics that they would have to write in the correct categories as well as providing animal examples under each. We worked as a class to complete it and I wrote it on the white board.

Classification of animals.

The students also learned about the parts of an egg as we have duck eggs in our class. I informed them that it is important to understand the function of each part of an egg. We labelled this in the morning and then the students got to colour theirs after. Students learned that the yolk (yellow) contains the fat to help the embryo grow, the albumen (white) contains the protein, the shell is porous so air can get in, the air sac helps the embryo breathe, and the inner and outer membranes are two layers that help keep bacteria out.

Parts of an egg.

On Thursday, the students became educated in local plants around their school community because on the following day they went on a scavenger hunt nature walk to identify them! I was very excited about this lesson and the students were too. I’m fortunate that I have a Cedar, Hemlock, Pine, and Spruce tree in my backyard. I brought a branch from each with their respective cones for the students to make and record their observations. Students were paired up and worked on a worksheet together to fill in the description of each plant. They were able to feel and smell each branch and share their observations. We also discussed the difference between Deciduous and Evergreen trees. We know that in the winter trees that are bare and naked are deciduous because their leaves fall down. (Deciduous trees = leaves fall down.) We know that trees that keep their needles stay on all year around. That is, evergreen trees’ needles stay on forever. (Evergreen trees = needles stay on forever). Below is what the students came up with.

Description of local plants.

On the following day, Friday, we went on a scavenger hunt nature walk. There’s a small forested trail/area a couple blocks from our school. I took the students there, with my SA and an Education Aide, and instructed them to stay with their pairs. I tried to make connections to the four local trees we discussed even before we got to the trail. Walking on the sidewalk, there were many Cedar trees and some Hemlock trees. The students were able to explore the area, within the stated boundaries, to try and identify the four local trees we discussed as well as new ones. It was a beautiful and sunny day and the students were engaged throughout the walk. The students were able to identify local trees and engage in small group discussions on how they were able to identify them. Our nature walk was 30 minutes and although I would have liked it to have been longer, I will try to find another opportunity to do a similar nature walk because it was such a success and we could even expand it to identifying different animals!

Scavenger hunt to identify local plants.

Captured during our scavenger hunt nature walk. 

The students engaged in a sorting activity to understand that animals can have different coverings (i.e., skin, fur, scales, shell, and feathers). For early finishers, they were instructed to add two additional animals under each covering column as an extension activity.

Cut and glue animal coverings.

Other:

It might be evident from the picture posted below that I am a novice gardener as I didn’t realize that planting five or six pumpkin seeds in a small pot would actually be successful in sprouting. Nonetheless, this was a great opportunity for the students to observe what they see and how seeds turn into sprouts, and eventually plants, right in front of them! We are planning on moving one pumpkin pot into our outdoor community garden and see how many students have gardens of their own at home to continue planting their pumpkins. There won’t be much room or more time for these sprouts to grow into plants!

Our pumpkin seeds are sprouting!

Remember the eggheads we drew and planted grass seeds in last week? Well, check out how cool they look now! The students can start cutting off their grass hair next week if they’d like. 

Our eggheads are growing (grass) hair!

During Centres this week, a couple students proudly showed me their designs. I was very impressed and wanted to share them here! 

Pattern making during Centres.

That’s a wrap for Week 3! It’s crazy how fast time flies. Check back next week for another weekly reflection. Thanks for reading!

-Ms. Mah

Week 2 (April 6th-9th)

Just like that, Week 2 is complete! It’s crazy how fast time is flying by for me. This week at school has been super eventful. Below I will cover these subjects in more detail: Math, Unit of Inquiry (Science), and Physical Health and Education.

Math:

We were very fortunate to have a couple sunny and dry days this week. I took advantage of the beautiful weather and brought math outdoors. The students engaged in a math bean bag game! We are still learning subtraction (currently without regrouping for Grade 2s). As this is a combined Grade 1/2 class, I paired students off within their grade. I drew two separate grids for each grade. Grid #1 represented the minuend numbers while Grid #2 represented the subtrahend numbers. In pairs, one teammate would throw their bean bag onto the grid. Where the bean bag landed provided the minuend for their subtraction equation. Then, they would shuffle over to Grid #2 to throw their bean bag. Where the bean bag landed provided the subtrahend for their subtraction equation. As Grade 2s have been practicing solving subtraction equations with a Place Value Mat and base-ten blocks, they were required to solve each of their subtraction equations with them as well. For Grade 1s, their minuend and subtrahend numbers on the grid were much smaller in value, of course. Once they created their equation, they had to work together to draw and solve it. The students were engaged and they seemed to have fun taking turns to throw the bean bag. I thought this was a hit and will most likely do this again in the near future.

Grid #2 subtrahend numbers for Grade 2s.

Grid #1 minuend numbers for Grade 1s.

Unit of Inquiry:

Our current unit of inquiry is Living Things. This week we got duck eggs! A very exciting opportunity for not only the students but also for myself! My School Advisor (SA) got duck eggs two years ago and has the equipment and experience. I decided to take this project on because having my SA as a mentor/guidance to support me in this amazing learning journey is such a privilege. I think taking care of a living thing within our own classroom, if that’s possible, is an opportunity I shouldn’t miss. We got six duck eggs on Wednesday, April 7th. They take 28 days to hatch. Since the incubator we have is small and intended for chick eggs, I have to manually rotate them four times per day. There is a required minimum humidity and temperature level to keep the eggs healthy. Hopefully all six will hatch (crosses fingers)! When my SA and I let the students in on the surprise, they were so excited.

Six duck eggs in the incubator.

We also learned about camouflage and why it is important for some animals to survive. As an activity, the students cut out an outline of a duck’s body. Then, I asked them to choose a spot in the classroom that they could tape their duck onto, while I stepped out of the classroom, to camouflage it. They would have to colour their duck accordingly and add any details, such as patterns and textures, if desired. The students were excited to choose a spot and kept telling me, “don’t look at mine, Ms. Mah!” when I was making my rounds to each table group as they were colouring. I still have yet to find all 21 students’ camouflaged ducks. The pictures I’ve posted below are some that I have found. Aren’t they creatively camouflaged?

Not only did we get duck eggs and learn about camouflage this week, but the students also planted pumpkin seeds and other types of seeds! Back in October 2020, we went on a walking field trip to a nearby grocery store to purchase one pumpkin per table group. As a math activity, the students took out all the pumpkin seeds and grouped them by 2s, 5s, 10s, etc. My SA thought in advance and kept some pumpkin seeds for me to plant with the students when I start my long practicum. Now that I’ve started my long practicum, I thought it was a great time to have the students plant them. Each table group got one pot to plant a handful of pumpkin seeds in. For our other planting activity, we used newsprint (compostable) and rolled it into an individual garden pot using a cylindrical container. The students had a choice of planting swiss chard, green onion, cucumber, or carrot seeds in their pot. We made a class terrarium and will eventually take them outside, once seeds have sprouted, to our community garden.

A table group’s pot of planted pumpkin seeds.

Our classroom terrarium.

This week we focused on learning about birds. Since we got duck eggs, I thought it would make sense to learn more about ducks. I made a PowerPoint presentation on duck parts, a duck’s life cycle, and interesting facts about them. This was a follow along activity as I created duck flip-books for each student to complete. Did you know ducks are known as waterfowls and are part of the Anatidae family of birds?

Student’s drawing and labelling of a duck’s life cycle.

Interesting facts about ducks.

We ended the week off by making Eggheads! This science experiment entails each student drawing a face on their eggshell and adding soil and planting grass seeds inside the eggshell. (Note that I had to begin collecting eggshells since February in order for me to execute this lesson! Lots of planning and thinking that goes into teaching.) Hopefully with the help of the sun’s energy, water, soil, and air the grass seeds can sprout into a plant. Then, it’ll act as hair for each student’s egghead. Since this was a science experiment, students exercised their ability to ask questions, share their wonders, make predictions, and draw observations. I’m excited to see how these eggheads will look in a few weeks! This was such a fun activity to do with the students; something you can do indoor or outdoor that invites multimodal learning.

Our eggheads!

Physical and Health Education:

This week I picked up a new unit, PE, to teach. I’ll be focusing on throwing and catching with them for the next few weeks at least. We are fortunate to not only have a gravel field but also a grass field. I usually like to use the grass field for PE because it’s a softer landing if someone falls or trips, for example. This week I organized a developing activity that involved pairs running to a cone, pausing, and making eye contact with your partner before throwing a ball to them. We went over how to throw a ball (knees bent, opposite leg stepping forward, arm holding the ball following through, etc.). As a culminating (main game) activity, we played Fire and Ice tag. Overall, I thought the students enjoyed my PE lesson. I always find PE goes by super fast. We allot 30 minutes twice a week for our PE schedule.


That concludes the second week of my long practicum! Thanks for stopping by and reading my blog post. Check back next week for my Week 3 reflection!


-Ms. Mah