DIY Sweater Project


HI! Wow it’s been awhile since I’ve made a post. Don’t worry, I’m here.. thriving, breathing, and happy. So much has changed since the last time I posted. To give you an update on where I’m at in life and what I’ve been doing… well, I’m in my last semester of undergrad which is super exciting! It’s the home stretch and I can definitely feel it. I’m not taking a full course load this semester which is very nice. I have more time to do things I enjoy such as helping out in elementary schools, reading for leisure, and doing DIY crafts! I’ve done a few DIY crafts over the past couple of months and I’ve really enjoyed making them.

I usually get my inspiration for DIY crafts from YouTube. If you know me, you know I’m not THAT creative. Like seriously. But, I do like to challenge myself and I have done DIY projects with clothing and it turned out well. Surprisingly though, this specific DIY sweater project was not inspired from YouTube.

With more time to myself this semester, I felt inspired to do a fashion DIY project because a) it’s fun, b) you save $, and c) it’s so rewarding to see the finished result and wear it around knowing that YOU made it and that you didn’t get it at Brandy Melville or Urban Outfitters. Alright… let me give you some background context as to how I got inspired to start this DIY sweater project.

For some time I have been wanting a white Champion sweatshirt/hoodie. Don’t ask. Why I wanted the specific colour and specific brand.. well, just because. And trust me, I know that’s a crappy answer. It’s funny because I’m taking a sociology course about consumption and society so the fact that I’ve always wanted or thought I needed a white Champion hoodie is hilarious to me. Our constant desire of wanting to consume, with regard to fashion at least but also in all aspects of life, is demonstrated by the fast fashion industry and the fact that a lot of us convince ourselves that we just don’t have anything in our closet to wear! I mean don’t get me wrong I say that too, but many of us, myself included, need to be more consciously aware of the type of consumer we identify as and how our consumption patterns affect social and environmental relations. 

Okay I’m definitely derailing from what I actually want to write about. I do that sometimes, whoops! Ok. Back to the white Champion hoodie. I didn’t just want to go out and purchase one. I didn’t need it and I knew owning one wouldn’t change my overall long-term life satisfaction – I mean does any piece of clothing do that? Christmas just happened and my wallet was still recovering. Somehow somewhere I came up with the idea of going to a thrift store in hopes of finding a plain and simple white hoodie. I mean how hard could that be? If I found one, I’d want to add a personal touch to it like a cute iron-on patch. So that’s when I started looking on Etsy to see if anything caught my eye. I started searching keywords like “cute iron-on patches” and “butterfly iron-on patches” on Etsy. A current fashion trend I’ve seen pop up on social media and in stores is a cropped top with a butterfly print right in the middle. I always thought it looked nice but not enough for me to go buy it with my own money. 

Fast forward a bit. I found two iron-on patches that I really liked on Etsy. One was a bottle that said “feelings” on it. The other was a blue butterfly. I’ll link them below at the end of this blog post! Before purchasing them, I wanted to hit up a thrift store or two to see if I could find a hoodie to crop. So I did. Last month in January I drove to my nearest Value Village. I’m pretty sure after walking up and down the aisles I had ~15 sweaters/hoodies to try on. I finally narrowed it down to two! A white PINK (the brand, not the colour) hoodie and a Hanes navy blue sweater.

Pictured below are the two sweatshirts I purchased from Value Village, for a total of just under $20.


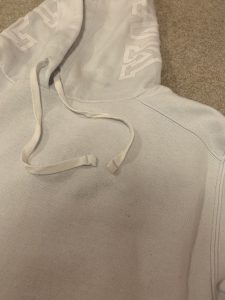
I started with the white PINK hoodie. I found it useful already having a cropped t-shirt to use as a reference for how cropped I wanted my white hoodie to be. I put my cropped t-shirt on top of the white hoodie and used a ruler to mark a dotted line with a pen so I would know where to cut.

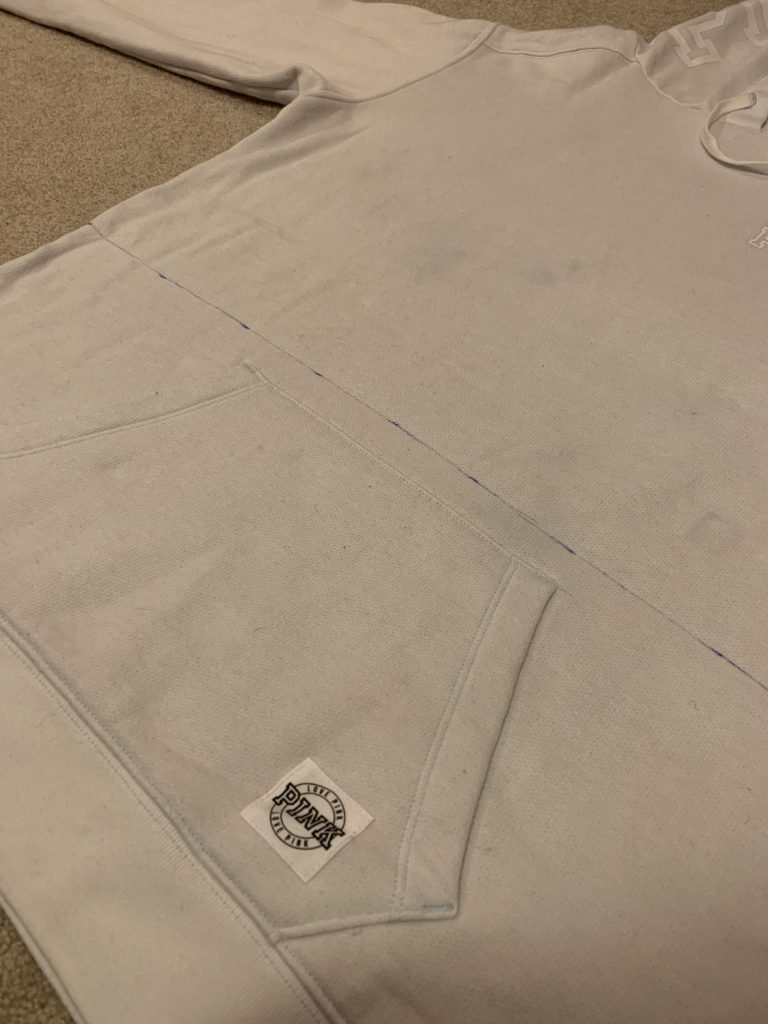
After cropping it, I started peeling the PINK lettering on the front left side of the hoodie with my fingernails. I did this because I knew I probably wanted to put an iron-on patch around that area and also I didn’t want the brand to be visible on the front. Thankfully it was easy to peel off!                                            

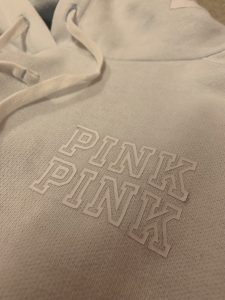
I did the same cropping method for the blue sweatshirt.

Oh yeah and I finished cropping both pieces the same day I purchased them. When I got home from the thrift store, I immediately purchased the two iron-on patches from Etsy because I knew each would take ~3 weeks to ship. So.. technically the whole project took like over a month because I had to wait for the Etsy delivery but regardless this was such a fun and creative project (at least in my mind!). 

To iron on the patches, the instructions were stated on the Etsy website (again it’ll be linked at the bottom of this blog post). Super simple and straightforward.

I did a mini photoshoot with papa mah today so enjoy some low-budget in-the-back-yard photos!!! 


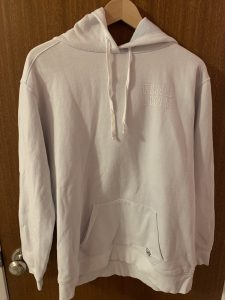
DIY Cropped Feelings Sweatshirt


Look #1: Vulnerability Looks Good On You

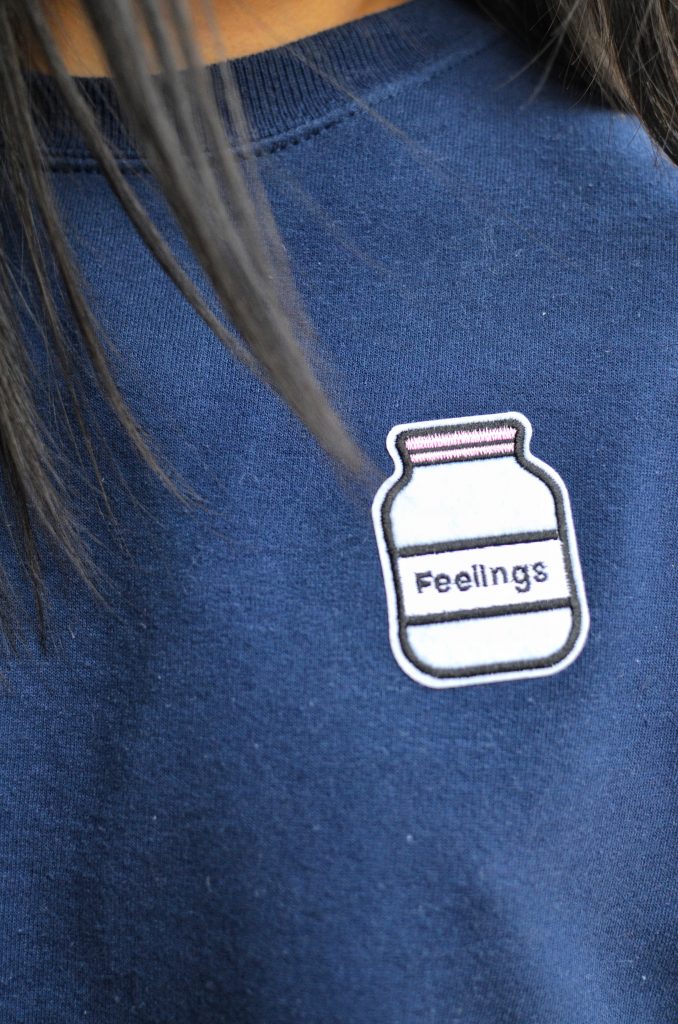
                                                                      Close up of “Feelings”


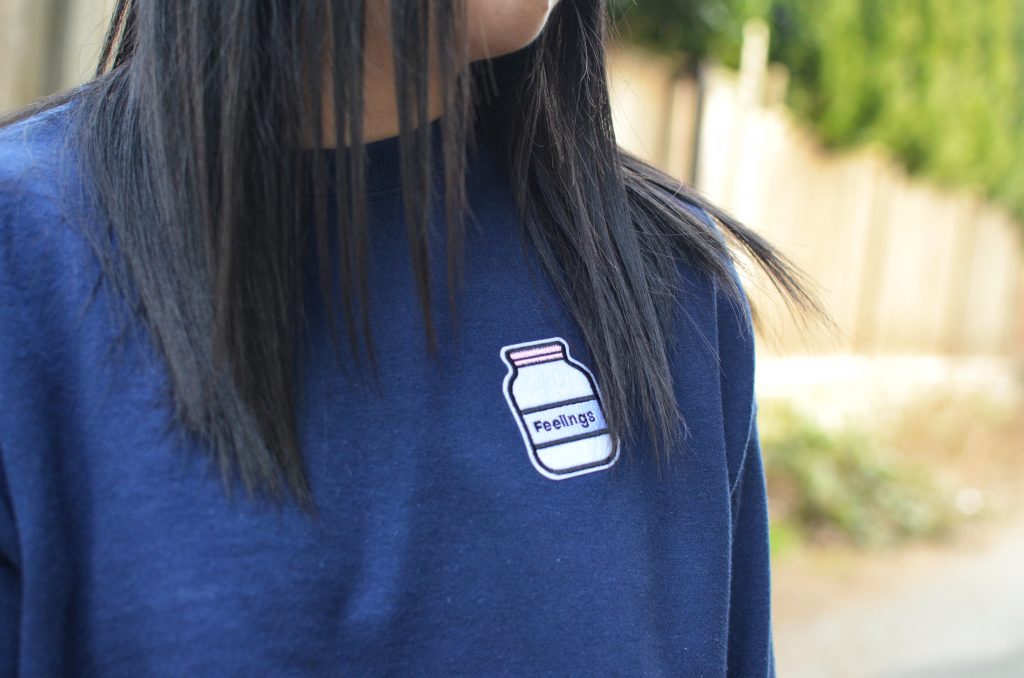
                                             Have you checked in with yourself today?


I chose to purchase the “Feelings” iron-on patch because it’s a gentle reminder that it’s good to be vulnerable and express your feelings. It’s good to have feelings in general. It’s healthy to express and acknowledge them. Sometimes in the moment we feel things that may not actually represent our true selves. Sometimes we hold in feelings because of X, Y, and Z. Sometimes we convince ourselves we’re feeling some type of way when we’re feeling quite the opposite. Wearing this for me will hopefully act as a subtle reminder that everyone has feelings and that feelings can sometimes be messy and murky. But as long as we acknowledge them and let ourselves feel what we’re feeling instead of continually bottling them up for an unhealthy period of time, we’ll get through things.


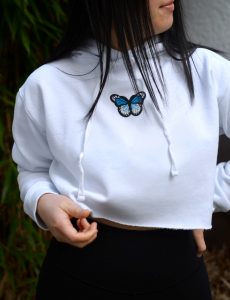
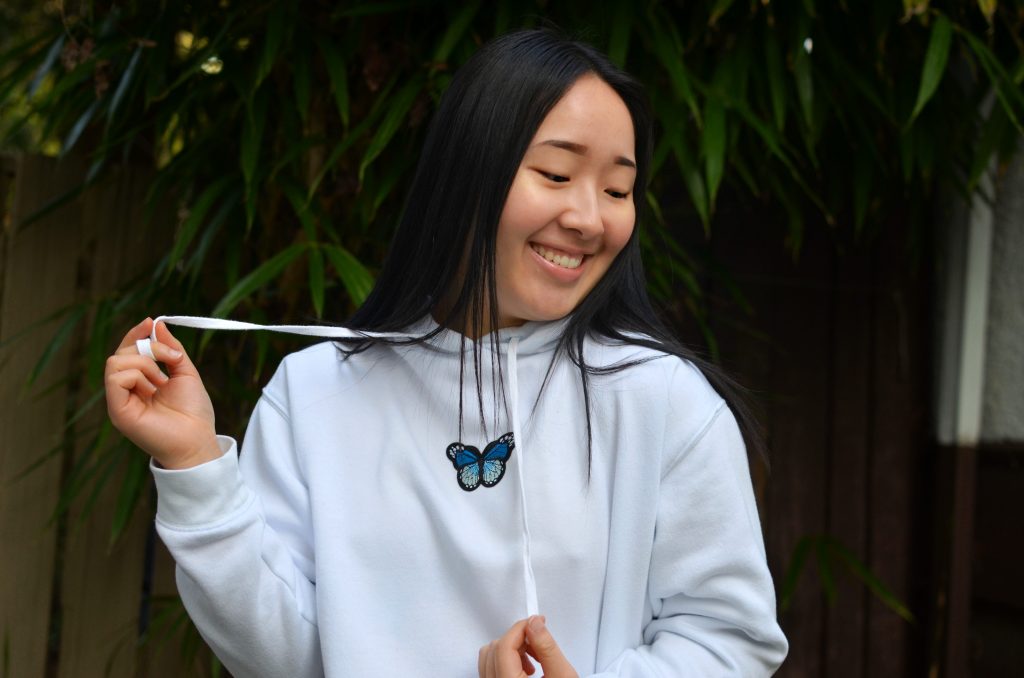
DIY Cropped White Butterfly Hoodie


Look #2: Kill Them With Confidence
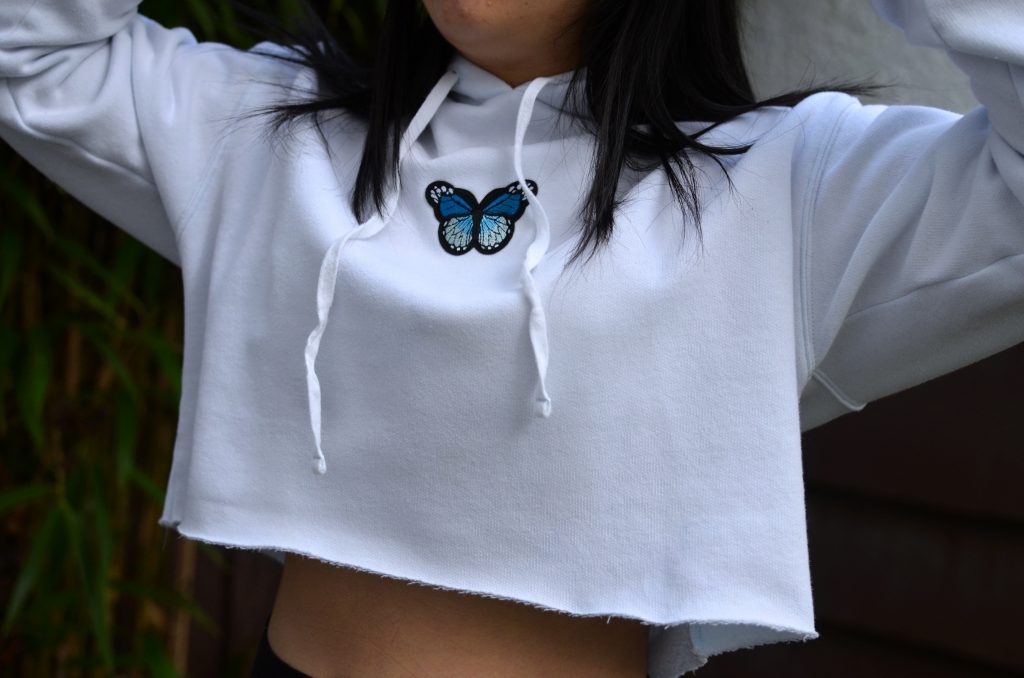
                                                                        Spread your wings.


                                                             Own your wings and love them.


I chose to purchase the blue butterfly iron-on patch for two reasons. One, because it’s trendy. Secondly, and more importantly, I associate butterflies with confidence, kindness and uniqueness. Wearing this will serve as a reminder to believe in myself. To not always be so hard on myself, to take a leap of faith or challenge myself and recognize that I have unique qualities.


That concludes my Spring 2020 DIY Sweater Project! I had so much fun making them and honestly a lot of fun with this blog post, too. As promised, here is the link to the “Feelings” iron-on patch. Here is the link to the Blue Butterfly iron-on patch. I’m excited to wear them on a daily basis. (Hover your cursor over the word “here”. I’m a noob and definitely not tech savvy so if you couldn’t visibly see the link don’t worry, I got you). Just like my style, they’re extremely comfortable, soft and casual! Best believe I’ll be rocking these everywhere I go. 


As always, thanks for reading and stopping by. :)


xoxo, 

ali

PC: @iamstevekim

Bridesmaid at 21

Fun fact  #1: I was a bridesmaids for one of my closest and oldest friend, Serene, at 21.

Fun fact #2: June 22nd, 2019 was one of the most fun and happiest days that I’ll cherish forever.

In today’s post I’ll be sharing my experience of how being a bridesmaids at Serene and Nathan’s wedding was through a chronological manner.


6:00 AM – 8:10 AM

My alarm goes off and I start getting ready for the big day. Giving myself ample time before getting picked up at 8:10, I do the majority of my makeup at home. And no, calling me out on how long I take to do my makeup is not necessary. Because I already know I take long. Hence, why I woke up at 6am LOL.

My makeup look consisted of foundation primer, foundation, eyebrows, bronzer, blush, highlighter and eyeshadow primer. (I decided to do my eyeshadow look and lips at Serene’s house).


8:10 AM – 11:00 AM

We drive to Serene’s house to start/finish our makeup and get our hair professionally styled. I went for a smokey eye (and for only practicing it once on myself prior to the day of and for almost never experimenting with eyeshadows before, I say I did a fine job.) I tend to tell myself that what looks dramatic in person will only look, at best, half dramatic in pictures. So, I made sure to pack a lot of eyeshadow on and blend blend blend. (Repeat this multiple times!).

I was the first bridesmaid to get my hair styled and I really liked how it turned out. The hair stylist curled my hair and did a half up half down look where she braided and twisted/crossed sections of my hair side to side to make an elegant and intricate look. The most important thing was that it felt secured and it was because it stayed like that for the entire day.

After our hair and makeup was done we all headed to a park to take the first look wedding photos.


11:15 AM –  12:00 PM

Although we were a bit strapped for time as we were scheduled to leave the park at noon to get to church before the ceremony, I think we did a great job at getting several different pictures taken… all thanks to Steve, our photographer! Steve was efficient at delegating who should stand where and how we should pose; it felt like a professional photoshoot!

  • Pic 1

This was my favourite photo! L to R: Clara, Serene, Ali, Nicole.


Pic 2

Can you believe that Serene MADE our bridesmaid’s skirts?! Yep, that’s right. My best friend is hella talented. And might I also add how aesthetically beautiful and complimentary our bouquet of flowers matched our outfits? Pastel purple is the way to go.


Pic 3

Serene also made the groomsmen’s ties! L to R: Loren, Hilton, Douglas, Nathan, Serene, Clara, Nicole and Ali.


12:oo PM – 3:30 PM

We left the park shortly after noon and arrived at Lord’s Grace Church, where the ceremony took place, at quarter past twelve. We had a little bit of time to recharge, touch up and refuel before the ceremony started at 1pm. We were provided Bánh mì for lunch which was deeelicious! To be honest, that was the first thing I had eaten all day. I was starving but allowed myself to eat just half because I didn’t want to be extremely full or bloated during the ceremony… especially since I would be standing the entire time!

Post lunch, the bridesmaids and I, along with Serene, headed into the nursery room (our private room to hide in) to get ready. Clasping Serene’s elegant wedding dress signified the exact moment when everything hit me. She was going to get married and that this was really happening! All of us shared a heartfelt moment together minutes before the ceremony began and were ushered outside of the room to get into formation.

The ceremony itself went by pretty fast, definitely faster than I had expected. It took less than an hour and then there was time afterwards to mingle and enjoy light refreshments.


3:30 PM – 10:00 PM

We made our way to the banquet which was located at River Rock. We had our own private dinner room and it was so cute! Serene decorated the tables with a floral centrepiece and cut out/handmade the guest lists.

Pic 4

The banquet was very fun. I think our table (groomsmen and bridesmaids) was the loudest LOL but only because we were having a BLAST getting to know each other. None of us had met the groomsmen until the day before the wedding at the dress rehearsal and we definitely all bonded during the banquet. It was a great evening with good food and even better company.

Pic 5

After dinner, Serene and Nathan had their first dance and before you knew it, the banquet was slowly wrapping up! I feel like the other bridesmaids and I would now agree that after experiencing being a bridesmaids for the first time, we were/felt more stressed leading up to the actual day than the day itself. And I think that is a good thing. The day went by so smoothly, every transition and speech was sharp and clear and no major speed bumps were encountered.

I’m so thankful and grateful to have been a part of Serene and Nathan’s special day. To know that my Kindergarten friend that I hold dear to my heart is married makes my heart so full because I know how happy she is and proud I am to be her friend. 

This signifies a new chapter in both Serene and Nathan’s life as they take on a journey of their own hand in hand. I wish them all the best and here’s to making more amazing memories with each other!

Photo Credits

Cover Photo: @iamstevekim

Pic 1, 2, 3, 4 and 5: @iamstevekim

Must Have: Spring 2019

What’s your staple clothing item for the Spring?


For me, I’d say it’s my oversize/boyfriend fit jean jacket. I wear it so frequently; it’s super comfy, trendy (at least I think so) and versatile. For the past year or so I’ve been trying to find the perfect oversize jean jacket for myself. But it’s so hard! Jean jackets tend to not fit the best on me; usually the sleeves are too long, the sleeves are snugger than preferred or it just overall doesn’t make me think “wow this is the one.” At last, I stumbled upon one at Urban Outfitters. Well, to be more specific I tried on maybe 4 or 5 different ones but this one really spoke to me. I also wanted denim that wasn’t too dark, light or distressed… and this one checked off all the boxes.

Since jean jackets can help dress up or down a look, making them even more of an attractive clothing item, I’ve styled them in 2 different ways to show their versatility.


Fit 1: The ‘Flirty-Baseball’ Look

Backpack: Fjallraven
Cap: Fjallraven
Jean Jacket: Urban Outfitters

You can dress it down and sport a more casual and low-key look by wearing a cap and backpack. I went hiking and since the weather was cooler, I opted for a jacket that would keep me warm and look cute. Adding dimension or texture to your fit such as curling your hair can significantly spice up your look. I was kind of going for a ‘casual-baseball-sporty-hiker’ look. Pair it with sneakers and you’re good to go! I find a jean jacket just ties your whole fit together, especially if it’s oversize as it still gives shape and comfortably conforms to your body. If it’s chilly outside wearing a hoodie or sweatshirt underneath and pairing it with leggings is a two thumbs up in my book – literally what I am wearing right now as I’m typing this!


Fit 2: The ‘Polished’ Look

Tank Top: Brandy Melville
Shorts: Little Mountain Vancouver
Jean Jacket: Urban Outfitters

If you prefer sporting a dressier look, look no further! Since the weather has become warmer, I opted for a pair of shorts. Usually I find black shorts the most ideal to pair with a jean jacket simply because the former is a neutral colour. Since I chose to wear black on top, I opted not to wear black shorts just because I wanted to create a more summery look. Here I’m wearing some fun orange (pumpkin-coloured) shorts with brown undertones that has an elastic waistband. I love the loosely pleated  design which actually compliments my legs nicely. I have to say that I fell in love with the elastic waistband even before I tried it on (I know what I like when I see it haha!) and the bow tie in front effortlessly ties the look together (pun intended) and gives my waist some definition. I purchased this pair of shorts from Little Mountain Vancouver. I wore black mules as my foot attire which complimented my black tank top. This was definitely a more glammed up outfit for myself (as you can catch me wearing sweatshirts & leggings on most days).


Optional: Cuff It Like It’s Hot

Bracelet: Reiko Designs
Ring: Reiko Designs
Jean Jacket: Urban Outfitters

What I really like about this jean jacket (not sure if all jean jackets have this exact look effect) is that when I fold the cuffs, it creates a poofy and synched look that accentuates my wrist, allowing me to show off my bracelet. Spicing it up with some jewelry, such as a ring or bracelet, can complete a look. Cuffing it is of course logically beneficial for me with my short lil arms so as to not get in the way of my daily activities (i.e. eating) – so basically it’s a win-win… fashionably cute and sensible!

I am so so happy with my purchase of this jean jacket. I have put it to some good use ever since I bought it and I’m sure it will be one of my forever staples, whether it’s Spring or not. Whoever invented this is a JEAN-ius!

Healthy Oatmeal Raisin Flaxseed Cookies

This image has an empty alt attribute; its file name is a8825b91-fcbe-4f1c-ba19-21fc1b3a2547-2.jpg
mix mix mix.

Stop. Drop. & Bake.

Do you ever just feel so overwhelmed or stressed that you just want to stop whatever you are doing, walk to the kitchen and start baking? Yeah, well that was me this morning.

Usually I like to plan in advance when I am going to bake to ensure I have all the ingredients readily available in the kitchen. But this morning was different. Although I told myself I would sit down and focus on studying for my final exam, my mind and taste buds had another plan.

I don’t know what inspired me but I just felt like making oatmeal raisin cookies. Yes, you could argue that this could have been a procrastination tactic but I’ve come to realize that baking is therapeutic and stress-relieving for me. It puts my mind at ease and I always feel like time passes by so quickly.

I used Mahy’s Healthy Oatmeal Raisin Cookies recipe which included Flaxseed.

This recipe is DEFINITELY one to keep! Using simple and minimal ingredients, my cookies turned out delicious. Soft, chewy and moist would be my top three descriptive words. Keep reading for the recipe!

This image has an empty alt attribute; its file name is 9d677248-6591-418c-b119-1d19bba463d4-2.jpg

Ingredients

6 tbsp butter

3/4 cups brown sugar

1 egg

1 tsp cinnamon

1 tsp vanilla extract

1 1/3 cups oats

3/4 cups raisins

1/3 cup flour

1/3 cup flaxseeds

1/4 tsp baking powder

1/4 tsp baking soda

pinch of salt

Instructions:

  1. Preheat oven to 350 degrees and prepare a baking sheet with parchment paper.
  2. Beat the butter and brown sugar (1-2 mins). Then add in the egg, cinnamon and vanilla.
  3. Mix the dry ingredients together: flour, raisins, baking powder, baking soda, and salt.
  4. Add the dry mixture to the wet mixture. Fold it in using a spatula.
  5. Once you’ve reached a crumbly texture, use your hands to roll them into small balls.
  6. Place them ~3cm apart. You should be able to make 12 cookies.
  7. Put in oven for 15 minutes.

Enjoy!

I had a good time making these and they did not take much time. If you give this recipe a shot, let me know! I hope I’ve inspired some cookie lovers out there to make this :)

This image has an empty alt attribute; its file name is f36c011b-16ed-4770-a504-e0b6621c991c-1.jpg
Tastes so good on its own OR with a scoop of ice cream!