Hello! I can’t believe I finished the first week of my long practicum (or would you even consider it one week if it was only 4 days of school?). One week ago on Friday, March 26th I was probably panicking, feeling stressed and anxious (and also excited), to complete and prepare for the lessons that I would be teaching this week. Don’t get me wrong, although I have a long weekend, because of Good Friday and Easter Monday, and completed my first week in one piece, it would be false to assume that I have lost all sense of stress and anxiousness.
As much as I was told about how key it is for teachers to be flexible and adaptable, it never fully resonated with me until this week. I like to plan and feel (relatively) prepared for what’s to come, teaching wise. I spent all of Spring Break and the week prior modifying and working on my unit plans because I wanted to make sure that: a) the worksheets and activities I created were printed and ready to go for this week, b) my lessons would be engaging for my students to reduce the chance of them being disengaged, c) I was making meaningful cross-curricular connections throughout my lessons, and d) I was planning additional worksheets and activities for early finishers and/or if there was still time left. I learned early on in the week that no matter how much effort and time you invest into your unit plan, there will always be unexpected outcomes and events that will make you become, if you aren’t already, flexible in your teaching. You’ll read more on my experience about this below.
I am in a combined Grade 1/2 class with an intelligent, creative, kind, and friendly group of students. The pictures I will be attaching to my future blog posts will only be of my own writing and the work of my students’. A hand may be in some pictures but all names will be obscured and faces will not be included due to privacy policies.
As a teacher candidate doing a 10-week long practicum, I am working my way up to teaching full time at 100%. For the first week I am required to teach a minimum of 20-30%, which includes two units. The two units I have started with are Math and Science. Continue reading to learn more about what the students have learned this week with me.
Math:
For math, I tend to split teach because even if I am teaching the same topic to both grades, how they learn it differs. I have planned to cover subtraction with both grades over the next 6 weeks, if not longer. For Grade 2s, they will be learning subtraction with regrouping. The Grade 1s will learn subtraction using various strategies such as counting with their fingers, using a number line, exploring with loose materials, using a rekenrek, and much more. On the first day back to school after Spring Break, I learned my lesson that what I had instructed the Grade 2s to do was too challenging. My SA (School Advisor) and I debriefed after school that not only was introducing subtraction a new topic to them, they had two weeks off from school. I’m learning that it’s important to create your own worksheets and activities, execute them, and then reflect afterwards on what went well and what can be improved on because you grow the most from that. I realized that the majority of the Grade 2s needed to review their place values (ones and tens place values) before jumping straight into subtraction with regrouping and learning a new strategy with it.
On the second day, I made sure to provide the Grade 1s math instructions first so they could work independently at their table. Then, I focused on teaching the Grade 2s together at the floor. This week I introduced the use of a Place Value Mat and base-ten blocks to help them with subtraction. I got them to pair up and work together. We went through three subtraction equations with regrouping before time was up. I noticed that throughout this lesson, some students were bored and getting restless because they are very strong at subtraction with regrouping while I had many other students feeling very confused. At the end of Day 2, I was feeling a bit lost because I didn’t know how I should scaffold and implement differentiation effectively knowing that within one grade, there was a range of students’ strengths. My SA was supportive and offered that for Day 3 (Wednesday, March 31st) I should take a step back and create a new math worksheet that focused on subtraction without regrouping. This was an important takeaway for me because I realized that as a teacher, yes I can unit plan as detailed as possible but I MUST listen to my students and understand where they are at in math. Since many of them needed a review of their place values and they were not understanding how to regroup (carry/borrow a ten over), I had to adapt to their needs. This meant that on Day 3, I created a new math worksheet on subtraction without regrouping. As a group, we did the first equation together and then I allowed those who felt confident to work at their own pace individually at their table. Those who wanted some more support could stay at the floor with me. One student stayed at the floor and after we worked on an additional equation, they felt confident to continue working on it themselves. It wasn’t until after my lesson on Wednesday (Day 3) when I finally started feeling a bit relieved because as a teacher, I want my students to understand what they are learning and to be engaged throughout the lesson. I was reminded that promoting a growth mindset and having the students tell themselves, “I can do it!” is very powerful in situations where they feel something is too hard. Yesterday (Day 4) was a catch up day. Students finished their worksheet and worked on a colouring subtraction page.
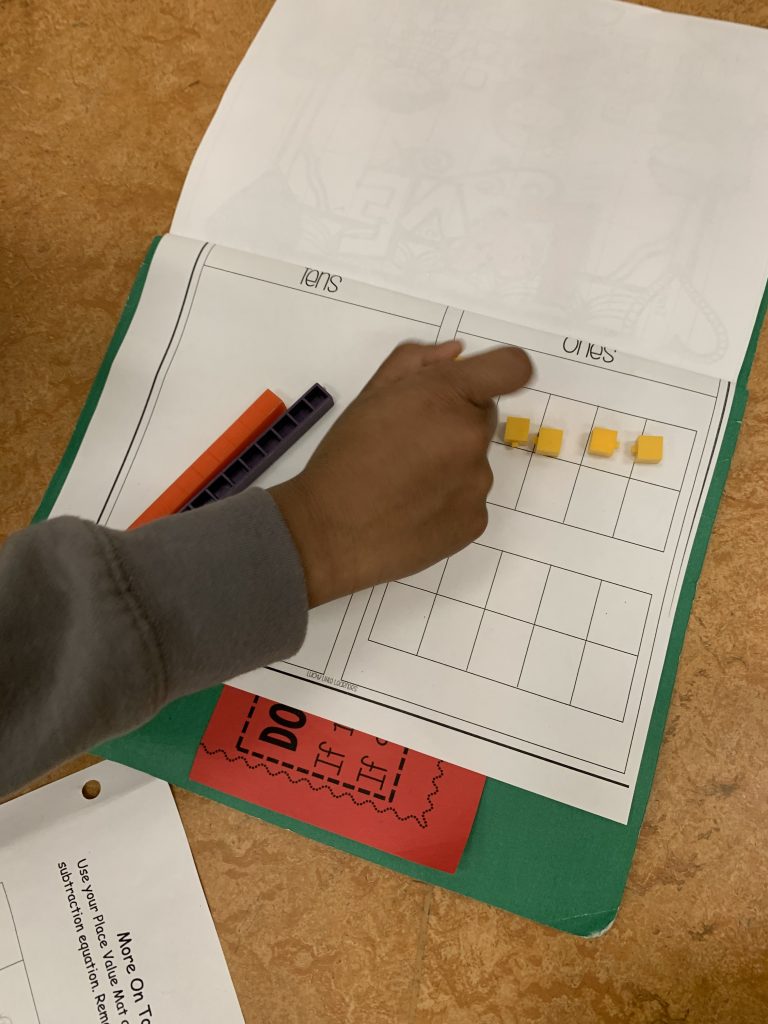
A student working on a subtraction equation using a Place Value Mat and base-ten blocks.
Science (Living Things):
For the next 6 weeks, our Unit of Inquiry is on Living Things. Unit of Inquiry is what my SA terms Science or Social Studies. Every 6 weeks, we cover a new Unit of Inquiry and it switches between something Science related to something Social Studies related. With Living Things, I will not be split teaching. I will be teaching the same thing to both grades as one class. Below are the curriculum content that I will be covering:
- Classification of living things and non-living things
- Structural features of living things in the local environment
- Local names of plants and animals
- Behavioural adaptations of animals in the local environment
- The knowledge of First Peoples (local landscape, plants, and animals)
- Metamorphic and non-metamorphic life cycles of different organisms
- Similarities and differences between offspring and parent
- First Peoples uses of their knowledge of life cycles
This week we learned how to distinguish between living and non-living things. As a provocation, I printed out the same pictures of different living and non-living things for each table group. I gave them a few minutes to work together to sort them however they would like with no instructions. Then we debriefed as a class how each group sorted and why. Many groups sorted them into Natural vs. Human made or Outdoor vs. Indoor things. At the end of the interactive activity, I informed them that our next UofI (unit of inquiry) will be on on Living Things! Then we transitioned to the floor and I made a T-chart on chart paper. The left column states, “Living things can ____” while the right column states, “Living things include ____.” We focused on the left column first and brainstormed what livings things can do. To wrap up our lesson, we went on a short field run outside on the grass field. I asked them to make note of at least one living thing around them while they ran a lap around the field. After the short field run, we went back inside to the classroom and each student got a Post-It note to draw one living thing they observed while outside. We then added the Post-It notes to the right side of the T-chart column.
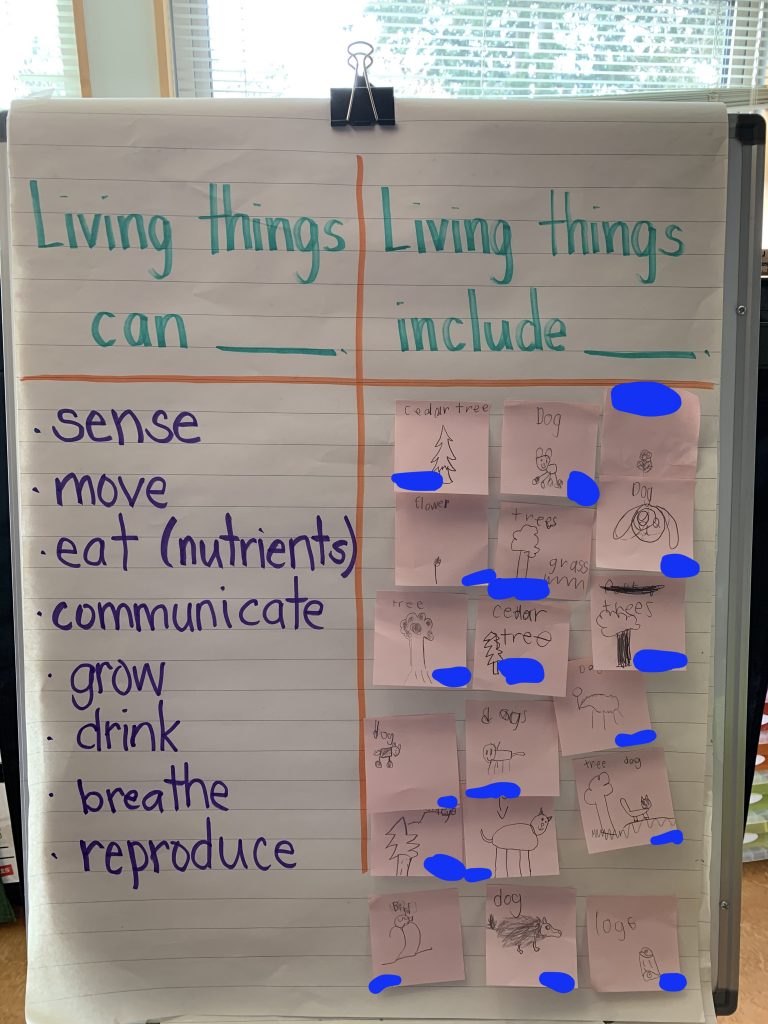
T-Chart about living things.
For the next two days, the students were scientists as they engaged in a celery experiment! This experiment took two lessons (two separate days). For this experiment, students had to fill in a Scientific Methods worksheet. We brainstormed different questions we could pose, predictions we had, and we made our first observation by drawing what we saw. The purpose of the celery experiment was to understand how plants absorb water. The students acknowledged that we walk above ground and since we never see what goes on underground with the roots of plants, I thought this experiment would be a good visual to see how plants absorb water and that they grow.
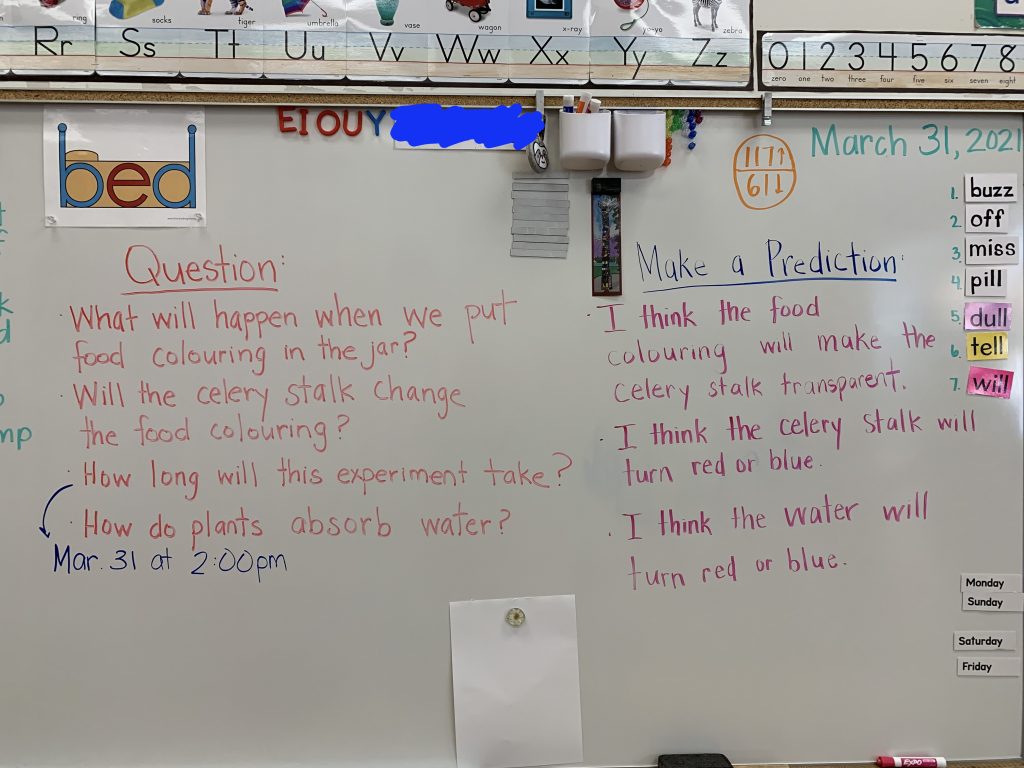
Students brainstormed various questions they wondered and predictions they had.

Student filling out their Scientific Method worksheet.
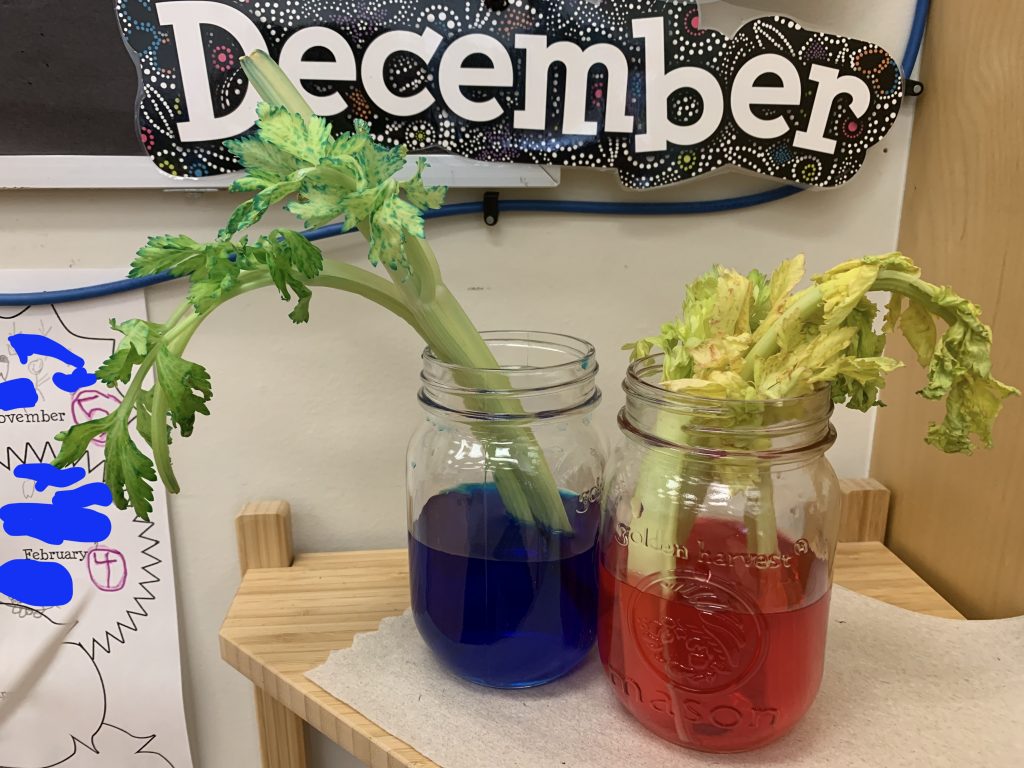
Celery Experiment: 24 hours later.
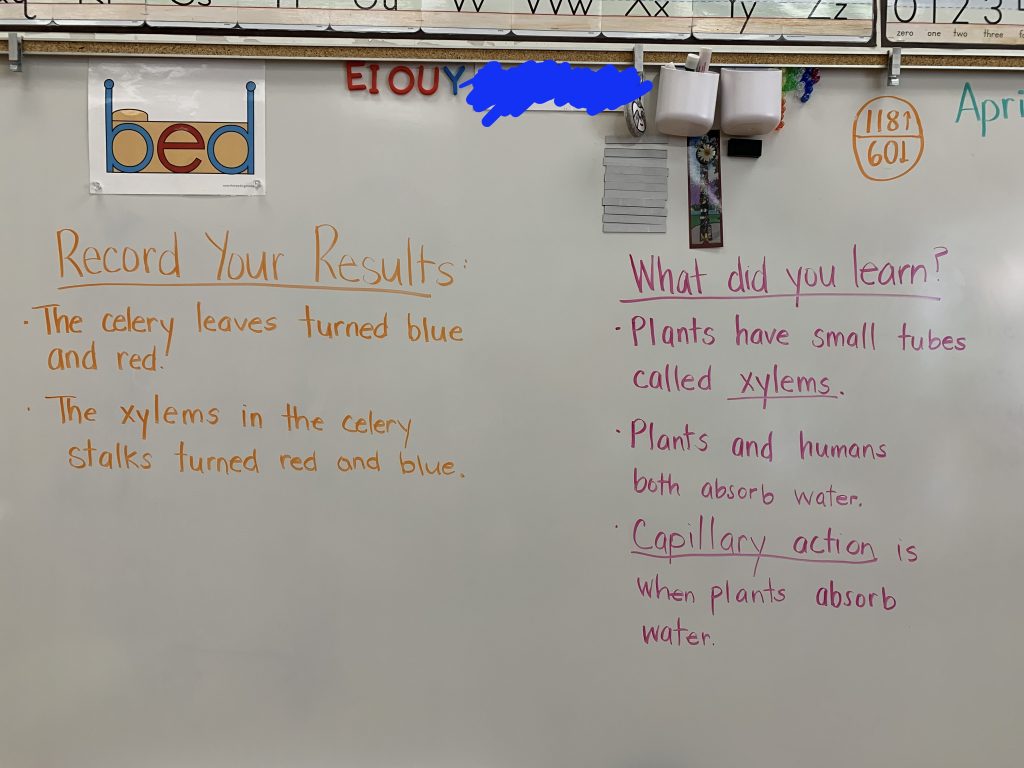
24 hours later: Students brainstorming what they observed and learned.
Overall, I think the celery experiment went well. The students were excited at the start to explore, ask, predict, and observe. At the end of the experiment, students got to share with a partner beside them on what they thought happened and what they observed a day later. They were eager to share their thoughts. A student made a comment about how plants have blood vessels like humans. I used that as an opportunity to teach them the term xylem which are small tubes that plants have (similar to a visual depiction of straws). The students were also introduced to the term Capillary Action, the process of plants absorbing water.
Other:
During Centres, two Grade 1 students were excited to show me their finished result from making a pattern with the blocks. I snapped a picture and wanted to share it here because it’s amazing how math (i.e., patterns) can be weaved into activities like Centres. Beautiful, isn’t it?
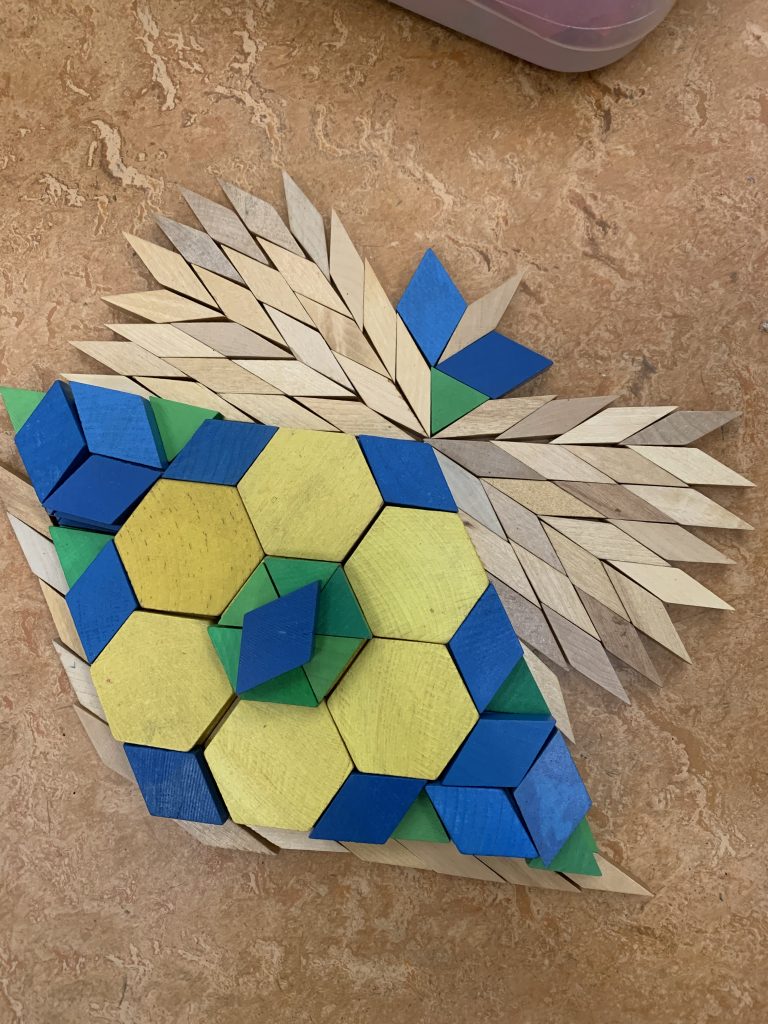
Patterned design made by two Grade 1 students during Centres.
If you’ve made it this far, thanks for taking the time to read my blog post! Check back here at the end of next week for my Week 2 reflection post.
-Ms. Mah