
 This has been my first experience working with the Moodle platform, and let me tell you – it was a pretty good experience.There has been moments of frustration, and excitement. These last few days, as I have been putting the finishing touches on the site I have found satisfaction in beginning to understand how Moodle can help me as a teacher. Below I will walk you through some of the elements that I experienced, hopefully to shed some light on Moodle as a platform, as well as my experience with designing an online course.
Navigation
Opening my course for the first time was a daunting experience. I knew that I would find support online, and in the elearning toolkit wiki, however as I looked at all of the empty page with a long list of empty sections I felt that parenthetical “pit in my stomach”. After working through the first assignment in the toolkit I began to feel more comfortable with the admin settings of Moodle and decided to take the leap and work on how the site layout.
Having worked in several online environments I knew what I didn’t want – a page 30 miles long where I constantly had to scroll down to find that days activity. So to mitigate this I selected to collapse the sections by default. allow the user to more easily find the section that he would be working in.
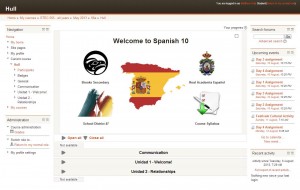
As per the assignment details I created a “splash page” introduction using the Section-0 summary. For my navigational links I decided to link to our District mysite (a staff and student personal portal that has links to documents, and class sites), the school site, the Real Academia Española (the legal authority for the Spanish language in Spain), and the course syllabus. Under the splash page I created a collapsible introduction section which introduces students to both the course and the instructor. I also included a questionnaire that would allow me as a teacher to get to know the students better, a course vocabulary index – a really handy tool that allows you to categorize vocab in the way that makes sense in your curriculum, and a folder that contains all of the course handouts that would referenced to during the course – nothing worse than having to search through a site trying to find a reference sheet that was used in a previous module.
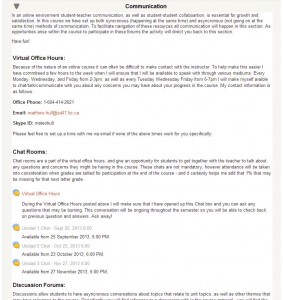 Following the Introduction section I decided to create a place that would house all of the communication for the course. Here I provide information to students on the different ways that they can reach out. As per discussions regarding communication with students, I decided to create a dedicated office hour where students could (if they want) be able to reach me by phone. Because this course isn’t designed for an international audience it is reasonable to expect that a teacher could have office hours where students could have synchronous communication with the instructor. In addition to contact information I decided to place a central discussion board in this section. My hope is that throughout the year students would continue conversations beyond the discussion end, as well as allow for easier review as I would incorporate discussions into quizzes, tests, and finals.
The next question that I grappled with was whether or not I should focus the sections on module units, or on a 5-day-a-week schedule. In the end I decided to go with the week set up. The reason being that it would help students keep up with the content and organize it in a way that I as the teacher could ensure that the work that I have assigned fits within the time allotted. One of the dangers of an asynchronous self-paced online course is that it is easy for students to get out of pace with the other students, and try to rush through the content at the end of the semester, thus missing out on the reflective time to all content to sync in and create more lasting learning. Another advantage of having a more synchronous learning environment is enabling a more dynamic discussion forum for students to participate in – image that a synchronous environment improved asynchronous communication.
Course Length
When I decided to create a Spanish 10 online course I not only had to decide on the course content and layout, but I also needed to decide on the course length. In the end I decided that I would create a course that was designed to deal with the issue of declining enrollment and the subsequent loss of course selection in schools because of it. So the online course, though self-paced in theory, is designed to fit within the standard semester.Each unit is designed to be spread out over 5 days, with the 5th day being a ” cumulative day” where students do a unit quiz, that allows retakes, as well as a “Cultural Activity” that asks them to work in groups to accomplish the given task – another reason why students are expected to keep up on their schedule. Daily there are assignments that allow students to experiment with various web 2.0 technologies such as bitstripts.com, goanimate.com, and blabberize.com, among others. (every time I added a new web 2.0 activity I bemoaned the annoyance that the work to make the activity FOIPPA compliant would involve).
Resources
Folder: I found the folder resource useful to house all of my course handout materials. Then throughout the course I would simply link documents back to the main folder
Label: The label was useful to divide my sections into days. During the beginning of the course design I was struggling with layout, whether or not to have each day as a section, or to use labels. I settled on labels as it would allow students to look at a full week as opposed to have to constantly open and close sections.
Page: So I took a try at creating pages offline then uploading them, but in the end I found that I had more control over the page itself when I use the Page resource. Perhaps it boils down with inexperience with the system, I will probably reattempt in the future.
Activities
Assignment: I ended up using this activity daily as I found that the ability to include all of the instructions along with the submission details to be very useful. The ability to allow students to either submit online text (ie a response to the question), upload an activity, and/or include upload comments – which I have found particularly helpful during my MET experience.
Chat: Synchronous communication is incredibly helpful in fostering teamwork, and adhoc learning. I also like the idea of having the chats archived so that students can go back and review their previous conversations. In one of the chat activities I created I enabled groups which allowed students placed into groups to have individual chat rooms – however I did enable visible chats so that other students go “read” other transcripts to follow along other conversations if they wanted.
Choice: I used the choice activity to allow students to select the group project that they wanted to work on. I like the flexibility that this activity gives, in that you can choose to limit the number of people who select a certain choice.
Forum: A simple way to create discussion boards for the whole class, or, as I did in one case, enable group discussion boards where each group is given their own discussion board to discuss the topics – which is what I did for the group project, again using visible groups.
Glossary: A must, in my opinion, for any course. Instructors can include key words and vocabulary that may be unique to the field of topics of discussion. Particularly important in language learning.
Quiz: One particular feature of the quiz feature that I liked was that questions are reusable, which would be particularly useful when creating summative assessments, where you could pull questions from previous quizzes throughout the semester with out having to rewrite questions.
Survey: I used this as a get to know you activity at the beginning of the course – a simply question-response system.
Overall a really great experience. I found the interface intuitive and simple. Because it is template based it was simple to select a style that worked for me personally without having to download and modify templates using CSS or html. I would (and will) suggest the use of Moodle as either a supplement to a regular course or a full online curriculum – in fact just last night I got an email from our IT manager detailing my user credentials for my personal Moodle server! Looking forward to moving ahead with his learning experience.