
iClicker Cloud
iClicker Cloud is an online student response system that allows instructors to collect and grade responses to in-class questions that students answer individually using their own computer or mobile device. They receive the responses instantly, and can use these results to inform their teaching and/or share them with the class. Through the Canvas integration, iClicker Cloud poll and quiz results can automatically count toward student grades.
There is no cost for instructors or students to use iClicker Cloud. Unlike iClicker Classic, students do not need to purchase any special device and will instead respond in their web browser.
iClicker is useful for polling, quizzing and attendance in which instructors want to track student responses and/or grades. If there is interest in doing anonymous informal polling not for points, zoom polling is ideal.
Supported by:
Integrated with Canvas:
Yes
Use by UBC Sauder Instructors:
Frequent
Status Info:
Guides
iClicker Cloud Instructor Login
iClicker Cloud Student Login
Instructions for Sauder Instructors to set up an iClicker course and Connect to Canvas.
For more detailed information and instructions on how to use iClicker Cloud see Instructor Guide.
Instructions for students can be found in the Student Guide.
How to add a TA to your iClicker course
Students can sign up for iClicker Reef (the student iClicker Cloud application) accounts. Because the registration data is stored in the U.S., students can use a pseudonym and email address. As long as students are informed of the data residency, iClicker Cloud is FIPPA compliant. There is also an integration with Canvas that will allow the students to register their iClicker Reef account within their Canvas course in order to activate it for free.
Once Sauder Instructors create the iClicker course in iClicker Cloud and activate iClicker Sync in a course, students will be able to register via the iClicker sync link and will automatically see the course in the iClicker application.
Students will also need to click the iClicker Sync navigation item in the Canvas course at least once, in order to properly connect their Canvas account with their iClicker Cloud account and sync their grades.
iClicker Resources for Synchronous Classes
Set up iClicker
These instructions will guide Sauder Instructors to set up an iClicker Cloud Course and connect it to their Canvas Course.
Here are the step by step instructions:
Enable iClicker Cloud in Canvas
- Go to your course in Canvas and click “Settings”
- Select the “Navigation” tab
- Find and enable “iClicker Cloud”
- Click “Save”
Download iClicker Cloud for your desktop
We recommend running iClicker Cloud from the desktop app and not from the web browser.
Go to the iClicker Cloud download page and select Windows or Mac to download the application. Once you do this, you can usually find the iClicker Cloud icon on your desktop.
Register / Sign Into iClicker Cloud
- In the iClicker Program, either Sign in or Create Account
Create an iClicker Cloud Course
- Within the iClicker Program Click “Create New Course” on the top left. Note that if you have multiple sections, you will need to create an iClicker course per section to prevent students from receiving “double credit” or being marked as absent in sessions they do not belong to
- Even if you only want to use iClicker to take attendance, keep “Full Course” selected
- “Course Name” should be the same as what it appears on your Canvas course page
- Start and end dates should be teaching start and end dates
- Back on the iClicker homepage, select the three dots on the right hand side of your course > Settings
- On the Polling tab, select:
- “Do not send a picture of my screen” → Students cannot see and answer the question if they are not in class
- “Do not send results” → This ensures that students will not automatically see the distribution of responses in the class. You can still share results manually from your end if needed
- “Session Participation” is how you wish to grant participation marks
- “Session Performance” is how you want to mark student answers
- On the Polling tab, select:
Integrating iClicker Cloud with your Canvas Course
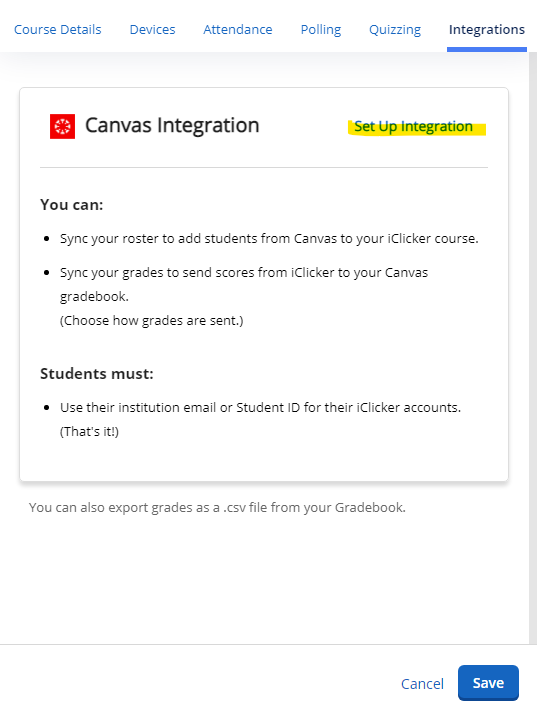
- In the “Integrations” tab of the settings, select “Set Up Integration”
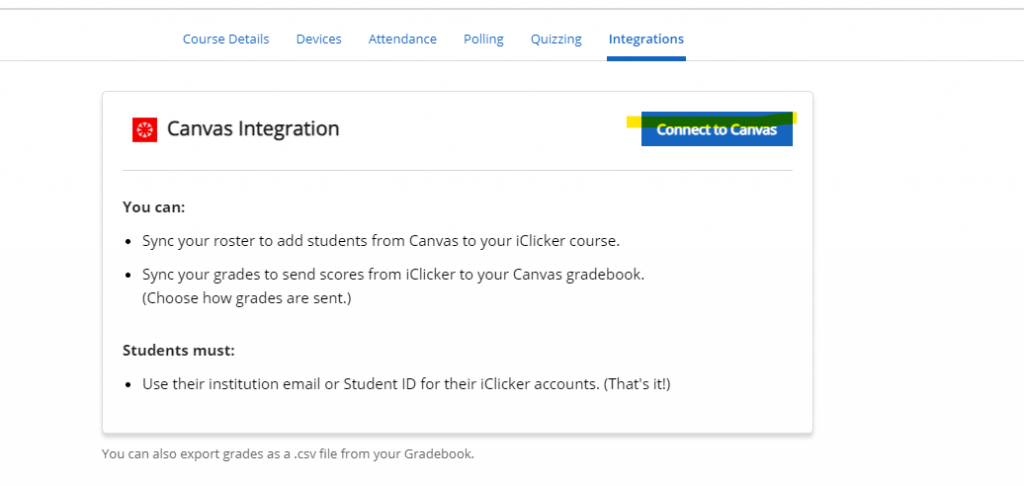
2. A window will pop up that says “Setting up this integration requires the web application”. Click “Save and Continue” and a window will pop up leading you to the web application.
3. In this new window, select “Connect to Canvas” and then click “Go to Canvas”. If prompted, please log into Canvas with your UBC CWL.
4. iClicker will request Authorization. Select “Authorize” to proceed connecting iClicker with Canvas.
5. You will be brought back to the iClicker Cloud web page where you will see a list of the Canvas courses that you teach. Select the course that you wish to sync with iClicker and click Next.
- *Note: By default, you will be shown a list of your published courses that you are teaching. If your course is currently unpublished, toggle the button on the top right side of the “Select Your Canvas Course” window to “Unpublished” and select the course you wish to sync with iClicker.
6. If your course has multiple sections, select the section you wish to add to your class and click “Connect”
7. Select “Sync Roster Now” and the Canvas integration is complete!
Get your students access to your course
Prior to your first iClicker class, we suggest sending an announcement to students to get them to sign up for your class. Here is an example:
Welcome to COMM 123 sec 234. Tomorrow we will be using iClicker in class. If you do not have an iClicker student account. please follow the instructions on the iClicker Student Guide. Once you have an account, you must access the course by going into the Canvas course and clicking ‘iClicker Cloud’ in the left hand navigation. You must access the iClicker course through the ‘iClicker Cloud’ link at least once for your points to be captured. Then add the iClicker course to your account. This course is called COMM 123 sec 234. Please make sure you join the correct section so your grades will be captured.
Suggested Settings
Within settings, under polling, instructors can set scoring for the course and what to share with students. These are suggested settings.
- Send a picture of my screen to student devices: Do not send a picture of my screen
- Send class results to student devices: Do not send results
- Participation: Instructors can select an amount of points to give students if they answer a certain percentage of questions. These points will be added on to the session performance points.
- Session Performance: Instructors can select an amount of points for correct response and for just responding. Usually instructors will chose 1 point but it is up to each instructor.
Grades
You can choose to sync your iClicker grades with your Canvas Gradebook.
- Log into iClicker Cloud and select your course
- Select Gradebook on the left hand navigation
- Select Sync Grades Button on the top right
- Select the Sesssions that you want to move from iClicker to Canvas. ‘Sessions’ correspond to each of your classes.
- Click ‘Sync’
If you run into an error:
-Ensure you have set up your Integration to Canvas via the settings area in iClicker.
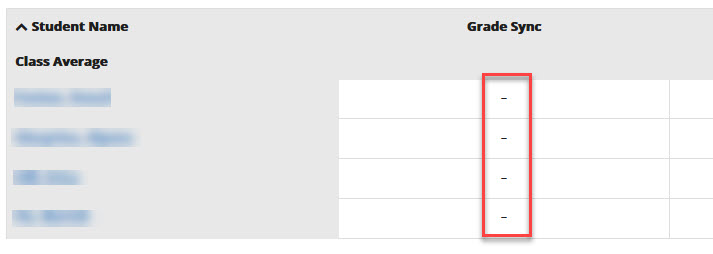
-Have your students sync’d their accounts? If you are in your grades area in iClicker cloud and you do not see any green dots under Grade Sync column, that means that no students have sync’d their iClicker account with you specific course. Every student needs to go into your Canvas course and click on the iClicker Sync button once to enable this and get their grades.
FAQ’s
- Why are some students grades not syncing from iClicker to Canvas?
- If student have not accessed an iClicker course from your Canvas course at least once, the grades will not sync properly. Please relay the information below to students. it is also available in the UBC iClicker Student Guide.
- Once an iClicker account has been set up, log in to the Canvas course and click iClicker Cloud in the Course Navigation.
- If students don’t see the iClicker Cloud option in their Course Navigation, contact the instructor. iClicker Cloud needs to be enabled in the Canvas course by the instructor for students to see it.
- Students must add each course that uses iClicker through the iClicker Cloud link in Canvas or else they will not receive grades for iClicker activities in the course. Students should not try to add courses in iClicker Reef directly, unless your instructor specifically tells you to.
- Once the course has been added, students can participate directly through your web browser for the course activities by logging in at app.reef-education.com.
- If student have not accessed an iClicker course from your Canvas course at least once, the grades will not sync properly. Please relay the information below to students. it is also available in the UBC iClicker Student Guide.
- Is iClicker free for students?
- Yes! They can set up a free account here (https://lthub.ubc.ca/guides/iclicker-cloud-student-guide/#set-up-an-iclicker-account-0), and then click “iClicker Sync” in their Canvas course to complete the setup.
- Can students only use iClicker on a smartphone?
- No! Students can use their web browsers as well by logging in here (https://app.reef-education.com/ (Links to an external site.)).
- What should I do if I have multiple sections merged on Canvas?
- Create a separate iClicker Cloud course for each section. Make sure you’re in the right one before starting a class activity!
- Note that course sections in iClicker will all have separate columns in your Canvas Gradebook. For example, you are not able to automatically combine all ‘session 1’ marks for your section 101, 102 and 103 iclicker courses into one column in Canvas gradebook. If you want help organizing the iclicker grades, please contact Learning Services at Help@sauder.ubc.ca
- I got an error message using iClicker Cloud and a MAC, what can I do?
- iClicker is frozen and I cannot close the program
- If the fatal error message appears and you are unable to quit, use force quit to close the application. The hotkey for force quit is Command+Option+Escape. Another option to force quit is to use your Activity Monitor. You can open your Activity Monitor by opening Spotlight Search (Command+Space), then type ‘Activity Monitor”
- If force quitting the application does not fix the fatal error, you can try deleting and re-downloading the application.
- How can I remove sessions and/or attendance from iClicker?
- Log into the iClickerCloud website.
- Select the course you are interested in.
- Navigate to the Class History tab.
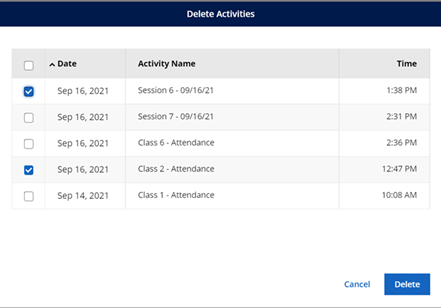
- In the top right corner, select Delete.

- Check off the attendance and/or session dates you’d like to remove. Confirm that you’d like to delete the data.
- Attendance and sessions are counted separately. If you remove the attendance for a class, it will not remove the poll results for that class, and vice versa.
- If you have already synced grades, clicking “Sync Grades” again will not remove the grades for the deleted sessions from Canvas. You will have to remove them manually.
- There is no way to retrieve deleted attendance/sessions.
Instructional Video
Video instruction on how to set up iClicker Cloud Course