Dry (or needle) Felting:
https://www.craftsy.com/knitting/article/needle-felting-for-beginners/
These sweet little dolls were all created by the “dry” felting method of taking clumps of wool roving and repeatedly sticking it with a sharp needle until they are compact and sturdy. It struck me as a rather violent process to create such charming little figurines and I received many an interesting look from people as I was working on these pieces to and from class on the bus and skytrain. I wondered if some of the onlookers thought that I was indulging in a bit of voo-doo whilst on my commute.

Wet felting sample:
https://rosiepink.typepad.co.uk/rosiepink/tutorial-wet-felt-making-for-beginners.html
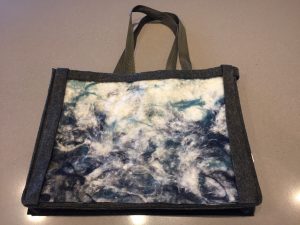
I had very high hopes for the wet felting before I began. I had perused the work of dry felt artists a fair bit on Pinterest before class and I was really impressed by the “painterly” feeling of this medium. I already was beginning to look towards the end of term project and was hoping to create a wet-felted bag with embroidered embellishments. Wet felting did not disappoint, even though it was a bit challenging to get my felt to stick together… as a class, we discovered that the white roving had not been carded in the right way and it made the wool a bit harder to felt, but through perseverance and a good deal of hand rubbing (thanks Lorrie for your support with this!) I was able to get a wet felted piece that worked really well for my project. I look forward to buying more roving and showing my daughter how to do this process too. I think she will enjoy the process and final product as much as I do.