Image Transfer: Photocopy onto Canvas

Thanks so very much to Nathalie for her lesson on how to transfer images onto paper and fabric in several different ways. I especially enjoyed her experimental approach to trying many different methods of image transfer, by changing one or two variables at a time. This “scientific method” approach is a great one to use with students. Teaching in this way encourages students to explore the inventiveness that is innate in creative process. What Nathalie’s lesson re-enforced is that art is not only about creating a pleasing product, but it is also about taking time to explore various techniques.
The process I used in creating the above transfer was:
-paint acrylic medium over the photocopied image
-press the photocopied image face down onto the canvas
-press it down firmly with my hands
-let it dry
-use a damp sponge to wet the image
-rub the damp paper gently but firmly until balls paper form
-continue to rub away the paper until all that remains is the inked image on the canvas.
I found this to be a very simple yet satisfying technique.

Printing Technique: Styrofoam Print on Paper


This technique is accomplished using styrofoam and a pencil. The image is transferred by using an ink roller (also known as a brayer) to put ink onto the styrofoam. Then the styrofoam printing image is ready to put onto paper or fabric.
The interesting thing about this print-making process is the mirror image aspect, so words or print must be written backwards. Also you end-up with a “negative” impression every time you Print: what was white on the styrofoam print is now the colour of your ink and what was imprinted by the pencil will be without ink.
here is a link to a video I made on how to print with ink and styrofoam:
https://m.youtube.com/watch?v=H4extzqmQyw
Vegetable Prints: Ink on Paper:

These prints were made using ink and mint leaves, okra, shallots, and radicchio.

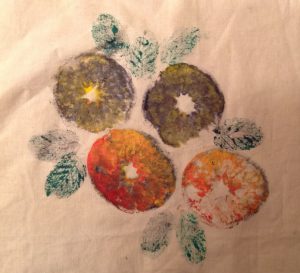
Vegetable Prints: Stamp Pad and Ink on Canvas:
These prints were made using oranges, shallots, okra and mint leaves.