Weebly
In the spirit of teacher librarianship, Karen and I decided to collaborate on our 10 minutes of fame presentation. Karen will be giving background information on what Weebly is and discuss possible applications for Weebly in the class. For my portion, I have created a tutorial for Weebly.
Weebly has 2 forms, a general version and educational version. My tutorial will be using the educational version.
Weebly: http://www.weebly.com/
Weebly for Education: http://education.weebly.com/
This version is specifically gear for educators. They have both a free and paid option. The difference between the free and paid service is the addition of extra features and more storage.
Paid Option Fees:
Class level ($5/month)
-manage 10 student accounts
School level ($499/year)
-20 teachers and 500 students
Tutorial
I have created a sample website on Weebly showcasing it’s varies features and design functions. My screenshots will show the the editor format when creating the website. Please refer to my sample website to see how each feature looks like when published.
(I used Weebly to make a website for another LIBE course)
Getting Started
1. Registering
Weebly for Education: http://education.weebly.com/
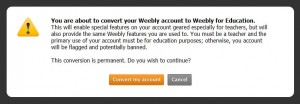
Note: If you already have a general Weebly account and convert your account to Weebly for Education you will get the following prompt.
Disclaimer for Weebly for Education:
Enter the title of your website, the type of site and then choose your website domain.
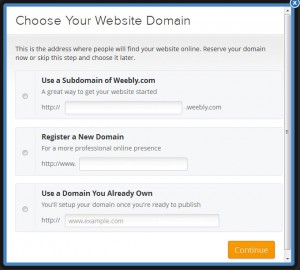
For the free version, choose “use a subdomain of Weebly”. The URL of your website will now be http://”what have entered”.weebly.com. Weebly will let you know if your URL has been taken or is available.
3. Customizing your site
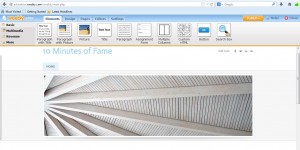
Website features are found in the tabs at the top of the screen. By opening the tabs, you can drag and drop all the features that you want to include in your website.
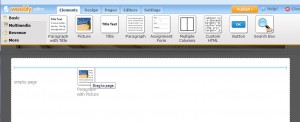
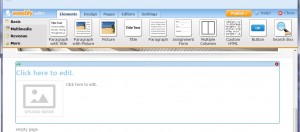
A. Elements
Elements are the different forms of content on a website. The placement and order of the elements can be rearranged by clicking it and moving it up and down the page. Elements are divided in the 4 categories: basic, multimedia, revenue, and more.
Please refer to the home page to see examples of what the basic elements look like.
How to upload photos or files:
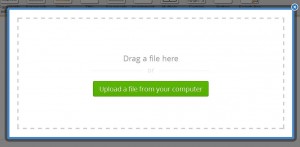
Multimedia Elements
![]()
Please refer to page 2 and sub pages photo gallery and slideshow.
How to upload photos to a photo gallery or slideshow:
It’s the similar process as uploading a file or photo. But now, to upload multiple photos, hold the button (CTRL on PC; ⌘ on Macs) on the keyboard and click the photos you want to select.
The photo gallery shows all the picture and they are displayed in a tile format. The arrangement of the photos in the photo gallery can’t be altered after you have upload the photos.
How to add a slideshow:
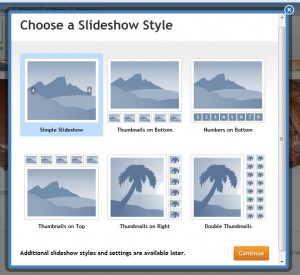
The order of the slide show can be modify by moving the photos around.
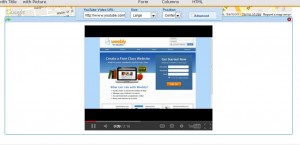
Uploading and embedding a file use the same process. Unlike the embed function in mindmeister, the embedded object must be uploaded from a drive and can’t be linked online.
The Google Map can be modified by changing the address.
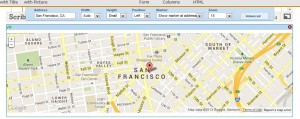
Revenue
This category is for for e-commerce (selling stuff), which isn’t relevant for education.
More Elements
Additional feature that can be added.
![]()

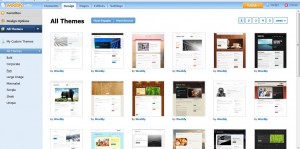
B. Design
Design is the overall layout and look of the website.
Pre-designed templates (themes)
C. Pages
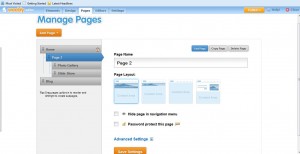
The website can consist of many pages and can be organized into sub pages.

These pages can be added easily on the manages pages. Pages can be designated as standard page (regular webpage), blog or another website (creates a direct link to another website). Using the manages pages, the arrangement and organization of the different pages can made by moving the boxes around.
How to add a blog page:

NOTES:
Remember to use the edit pages button on the manages pages to make sure you’re editing the correct page. And use the save settings button to save your work.
D. Editors

The editors page allows for collaborations with others building the website.
E. Settings
The settings page allows for the control of the site settings
And finally publishing…puts your website live on the internet. If you make any changes after publishing, you need to republish your website each time for the changes to take into effect.
Other resources for Weebly:
https://www.youtube.com/watch?v=5AqR6vo0pno
http://help.education.weebly.com/
http://wefed.weebly.com/tutorial.html

