How to make your face look more clear and bright?
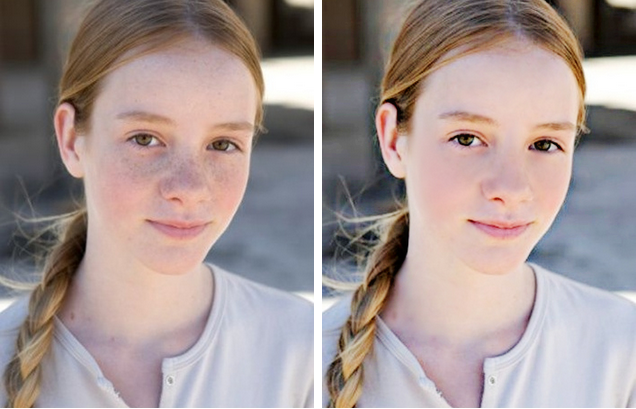
Before/ After
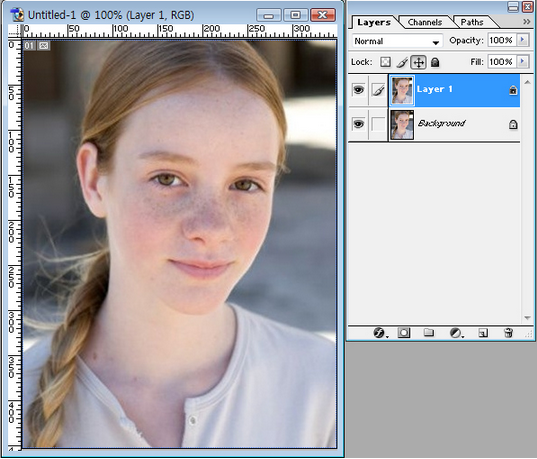
1. Please open your picture, then copy your layer
Drag your background to the very bottom icon looks like![]()
or
just simply, Ctrl + J
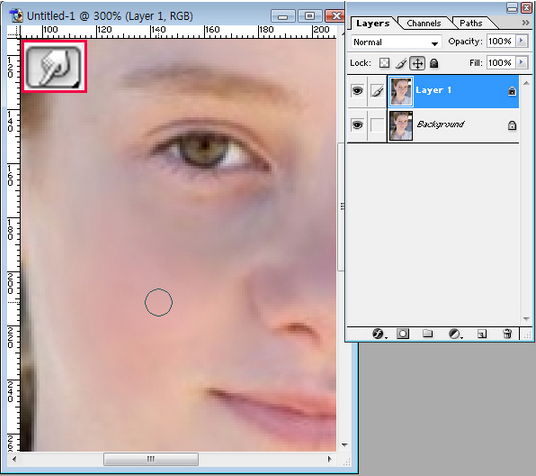
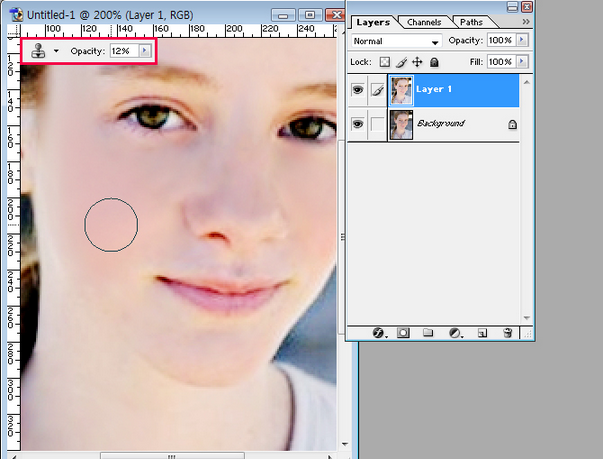
2. Using smudge tool, rub it on the face.
When you rub it, the strength has to be less than 10%
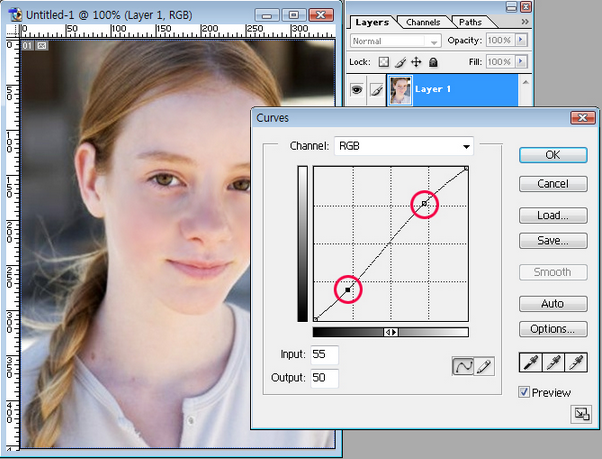
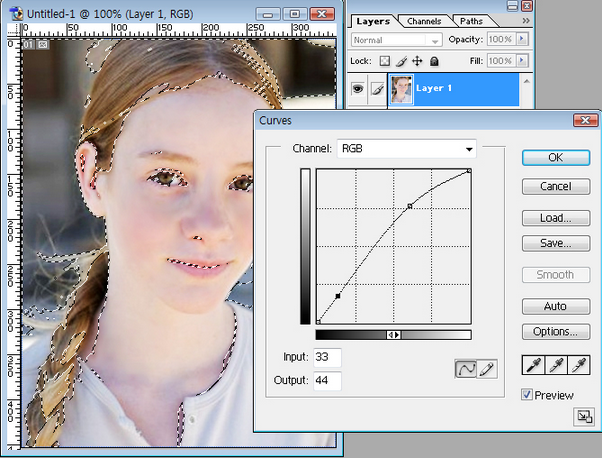
3. Image -> Adjustment -> Curves
Make curves in order to control the brightness
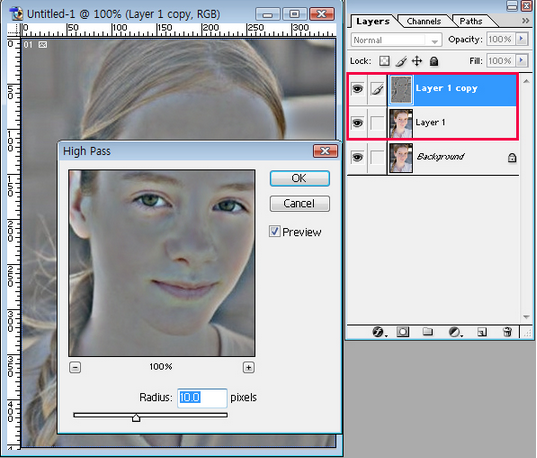
4. Filter -> other -> high pass
Before you go into high pass, copy the layer that you just made the curve to control the brightness.
After that, go into high pass change to 10 pixels.
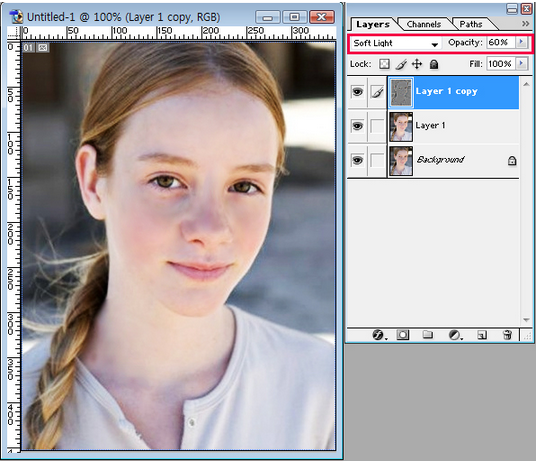
5. Blending mode-> Soft light or overlay
Change blending mode to soft light or overlay. Then, change ‘Opacity’ to 60%
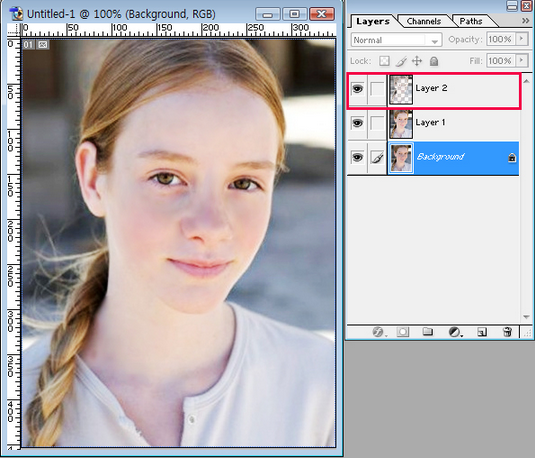
Then, unite layer 1 and layer 1 copy into one.
6, Go to Channels on your layer window, then click Cirl+ Red
Or just click Cirl+1
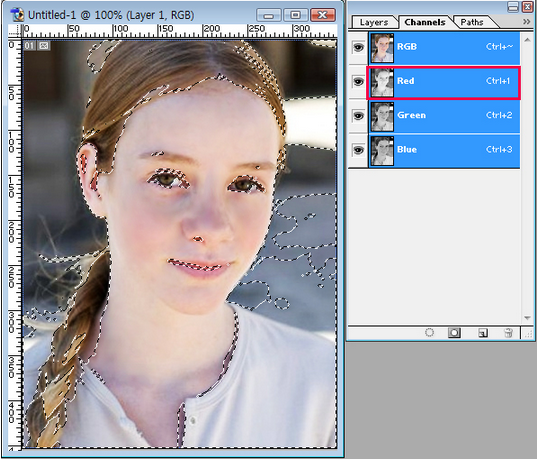
7. Image -> Adjustment -> Curves
Again, make curve in order to make the picture much brighter
8. Click Ctrl+ i to inverse the selected region. Then, copy and paste (Can be found under file)
This will allow a person’s eyebrows, eyelashes and lips will be copied.
9. Filter -> Sharpen -> Unsharp Mask
Change the numerical values like it is shown on the screen capture.
Then, unite the layers again.

10. Click ‘Stamp Tool’ – copy stamp, reduce the numerical value of ‘Opacity’. After that, stamp on the image until a person gets uniform skin tone.
Alt+ Click -> Copy
Click -> Paste
Repeat ‘copy and paste’ process
This means,
Copy medium skin tone and paste on the areas where it is too dark or too bright.
11. After you have done changing all effects on your layer, control your transparency of the layer in order to make the picture look natural.
