Category Archives: B. T-GEM

Exploring Density and Buoyancy with T-GEM Cycles in the Elementary Classroom

It’s been a few years since I’ve taught either Science or Math, and that was to Grades 1-3 most recently, but as I read about GEM and T-GEM I was intrigued and wondered how this model could be applied to primary science. The challenging concept I selected was that of buoyancy and its relationship with gravity/mass/density. In Grade 3, students in Ontario study material forces. I recall classes having a hard time understanding why the buoyant force allowed certain objects to seemingly overcome the force of gravity but not others. The concepts of mass, volume, and density are not solidified at this stage so explanations or even demonstrations were not usually deeply understood. If I had an opportunity to teach this Science unit again using T-GEM cycles it might look something like this (over a series of classes, I’m sure):


Compile Information – I would begin with showing students a data table for five blocks of mystery objects from the PHET Density & Buoyancy Simulation and demonstrating how to read a two-column chart. Then we would briefly discuss what students know about these objects, the abbreviations (what does L and kg stand for?) and the numbers beside them (making a connection to money when reading decimals, are these numbers placed in any particular order?). Add keywords to a word wall: litres (L), kilograms (kg).

Source: https://phet.colorado.edu/sims/density-and-buoyancy/density_en.html


GEM Cycle 1:

Generate – First, I would then ask students to find trends or generate some relationship statements about the data in groups and then share with the class. For example, “The water has the smallest number but the gold has the largest number” or “I wonder why gasoline is smaller than water? Aren’t they both liquids?” Other questions related to the nature of the data the teacher might guide discussions of include: “What might “density” be measuring?”, Why is the pool measured as 100 L but the scale measuring 0 kg right now?”

Then, I would direct their attention to the cubes and ask them to explain what they see: Each shape is a cube, they’re five different sizes, five different colours, labelled with five different letters. I would ask them to put the cubes in order in two ways (letter label and size) and then to predict what the scale would read if I were to measure each cube. (I would deliberately not use the term “weigh” or introduce the term “mass” at this point). I would also ask them to predict whether they think any of the numbers on the data table might appear on the kg scale and what whether/how the 100 L measurement of the pool might change.

Then, I would ask students to predict which cube would measure the highest number when I place it on the kilogram scale. (They will likely say the largest cube will be highest and smallest lowest and I will add the word “size” to our word wall). I would ask them write a rule explaining what they think the relationship between a cubes size and how many kilograms it is.


Evaluate – Now, I would begin the simulation by placing each cube on the scale and have students (or a student scribe for the class) record the data in a new table:

Block Label Size (1-5, 5=largest) KiloGrams (kg)

I’m deliberately constraining them at this point by doing this part of the simulation as a demonstration to keep them from dropping the blocks into the pool or changing any of the other variables. I’d ask them to reflect on what they saw: Were your predictions completely correct? How can you explain this? I’d ask them to notice the L measurement change and compare that by measuring the block on the kg scale again and compare these numbers…


Modify – Finally, I’d ask the students if their original rule needs to be changed now that they’ve seen the measurements and have their groups try to make a new rule explaining why each block received the measurement it did since it can’t be because of its size.


GEM Cycle 2:

Generate – To start the second cycle, I would ask students to predict what will happen when each block is dropped into the pool and explain their thinking. If they say the same thing will happen to all five blocks (ie. all sink or all float) I would not correct that at this point. I would ask them to draw what would happen on a two-column drawing one side for “prediction” the other for “actual”. I’d again ask them in their groups to write a “rule” for predicting what will happen to a block when it’s dropped into a pool of water.


Evaluate – Now, the students would stay in their groups and load the simulation themselves using the Mystery button and experimenting with dropping the blocks into the water, and drawing what actually happened beside their predictions. I’d ask them to reflect on what they saw: Were your predictions completely correct? How can you explain this?


Modify – I’d again ask the students if this original rule needs to be changed now that they’ve run the simulation and have their groups try to make a new rule explaining why each block behaved as it did when dropped into the pool and write that down. I’d ask them to record the kg of each block on the “actual” side of their diagrams and consider whether this number might be connected to what they observed in the simulation or not when they make their new rule…?


GEM Cycle 3:

Generate – At this point, I would ask students to predict what will happen when each block is dropped into the pool if the simulation is changed so that all blocks have at least one thing the same, if they all measured the same kilograms for example. I’d again ask them in their groups to write three “rules” for predicting what will happen to the blocks that are all the same (a) mass, (b) volume, and (c) density when they’re dropped into a pool of water (it’s not important that they don’t know what they terms mean, this is part of the discovery).


Evaluate – Then, the students would stay in their groups and load the simulation themselves and use the “same” x buttons to set the blocks to the same value and continue experimenting with dropping the blocks into the water. I’d ask them to reflect on what they saw and evaluate their predicted rules. I’d assign a role to one of the group members to keep a running record of “things we want to know/don’t understand” and to another as the recorder to write or draw the group predictions and rules and the actual results. At the conclusion of this part of the simulations, I’d ask them to come up with a working definition of the terms “mass”, “volume”, and density” that they’ve been observing.


Modify – I’d again ask the students if their original rules needed to be changed now that they’ve run the simulations and have their groups try to make a new rules explaining why each block behaved as it did. I’d challenge them to incorporate their definitions of “mass” and “density” into their explanations.


GEM Cycle 4:

Generate – Finally, I would ask students to think about four materials that come in blocks they are familiar with: Ice, Metal, Wood, and Styrofoam. I would ask them to explain to me what would happen if I threw a block with the same mass but of each different material into the pool. (I might bring in these objects and a bowl to help them imagine). I would then return to the Mystery simulation screen and reveal to them that the blocks in this simulation are each made of a different mystery material just like my example objects. I would ask them to generate a rule using material names for what would happen when we dropped those materials into a pool.


Evaluate – So now, the students would stay in their groups and load the simulation but go to the Custom button. I’d ask them to experiment with the different materials, their masses and volumes and explore/record/discuss what happens.


Modify – I’d ask the groups to use this information to try to identify the material of each mystery block using the data from all the simulation tabs. As an extension, I’d introduce the Buoyancy Simulation (Intro tab only) and allow them to gather information to inform their hypothesis from those materials and we’d discuss the concept of weight (N) versus mass (kg) at this point, while formally introducing the topic of the buoyant force.  Finally, we’d return to the data table from the first cycle and ask students to explain what it means that wood has a density of 0.40 kg/L while lead and gold (both metals) have a much higher density. What would happen when we drop wood into the pool versus metal? Then in the Buoyancy Playground tab of that simulation, they’d compare materials such as styrofoam, wood, or metal and craft a final truth statement about gravity (N or kg) and density as well as density and buoyancy.


Extension/Next Steps – I’d draw their attention to the bottom of both tabs in the Buoyancy Simulations where the density of the fluid within the pool can be changed and observe what happens to the blocks when the fluid is converted to “air” “gasoline” “olive oil” “water” or “honey”.


Have you used GEM cycles in Primary Science or Math in your practice?  I’d be interested in how that went in terms of student understanding, management, and time.
Patterns in G3

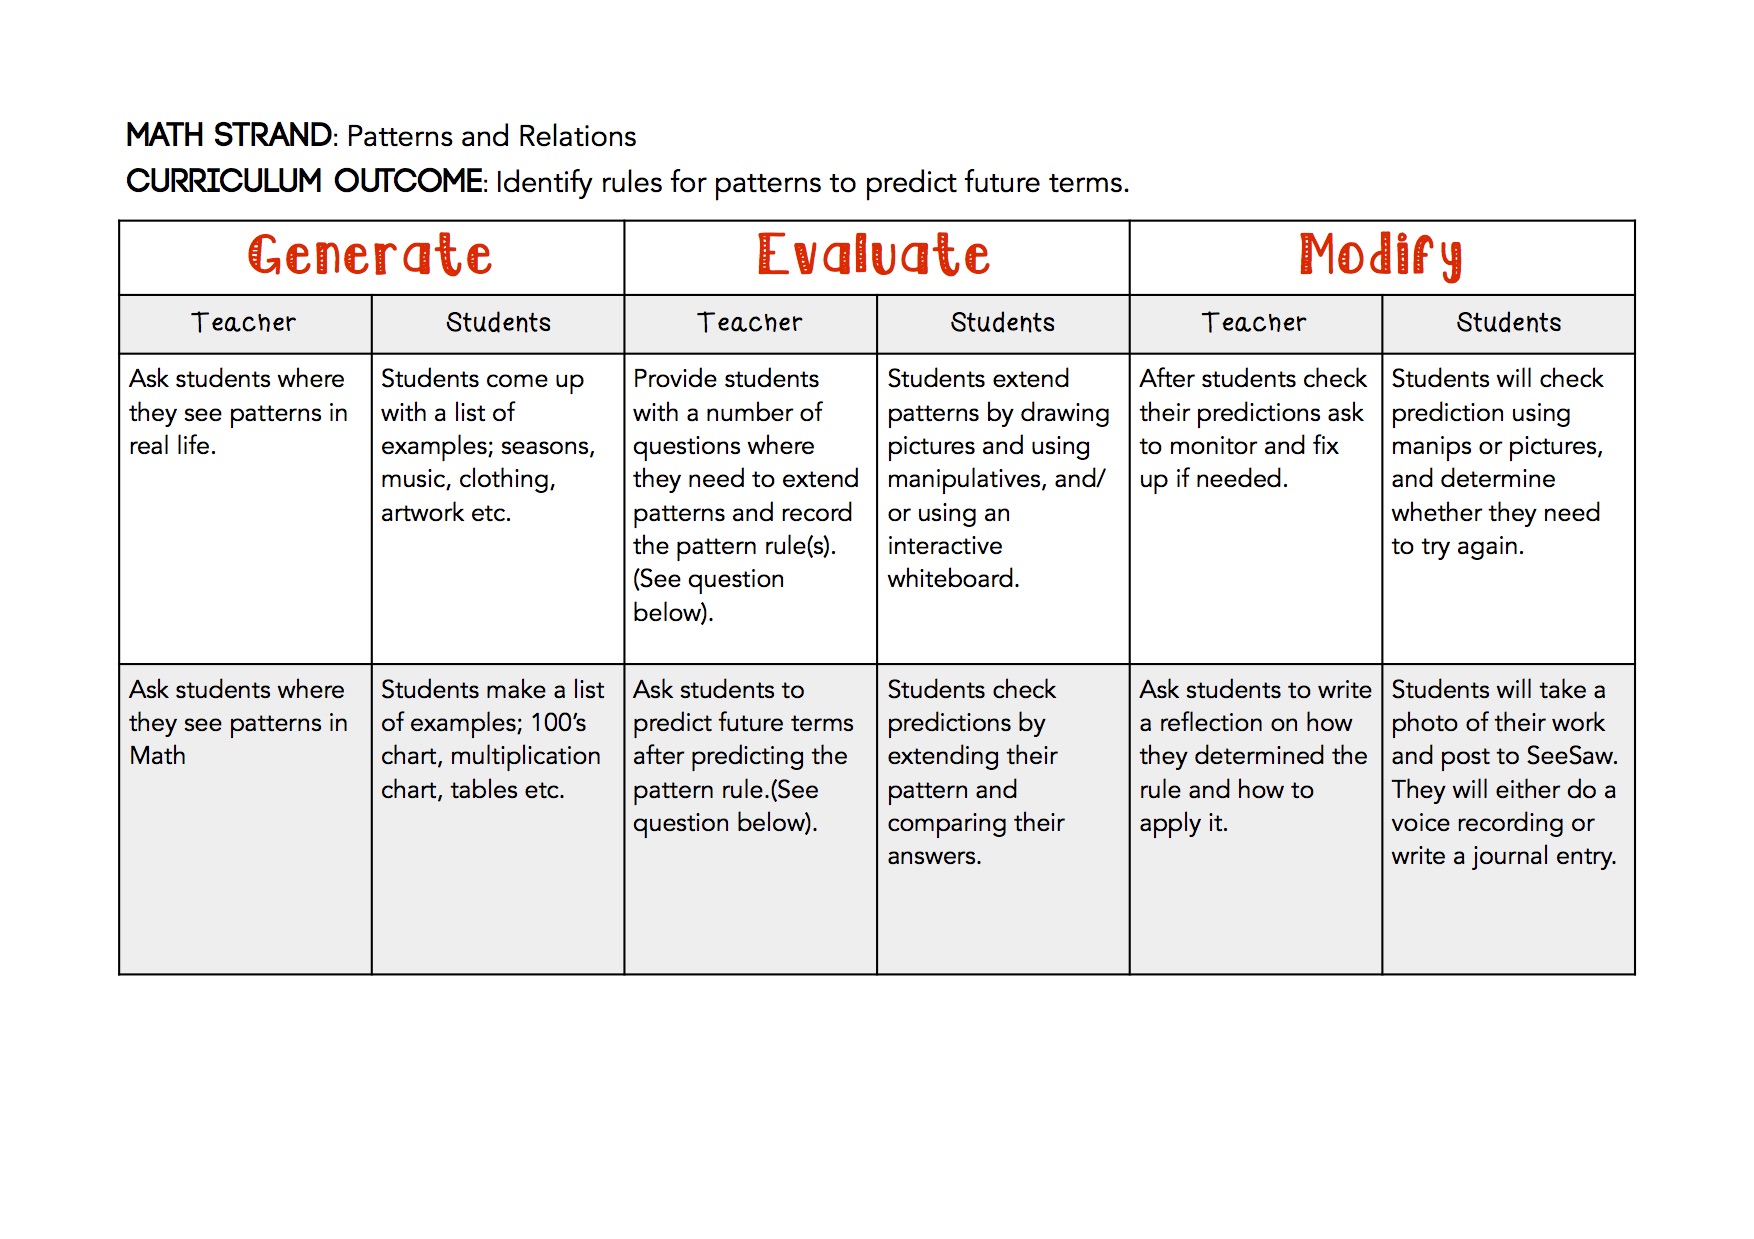
Similar to the LfU model, I appreciate how the T-GEM approach to teaching is through inquiry. I chose to create a lesson around a ‘Patterns and Relations’ outcome. In my experience, in the early years, students have a strong understanding of how to identify, extend and replicate simple patterns such as AB patterns, ABC etc. Next steps in their conceptual understanding is to identify pattern rules for increasing and decreasing patterns and then apply them to an algebraic equation. This is a concept that many students in Grades 4 and 5 struggle with. I teach Grade 3, and our goal is to prepare students for this by having them predict future terms by analyzing and thinking about patterns critically. In the plan outlined below, I integrated technology as both an optional tool for students to use in their investigation, and as a tool for students to explain their thinking. As Khan (2007) explains, this is a cycle that students should go through many times, therefore students would be asked to repeat the ‘evaluate’ and ‘modify’ activity in different ways to help achieve mastery. Example question for ‘Evaluate

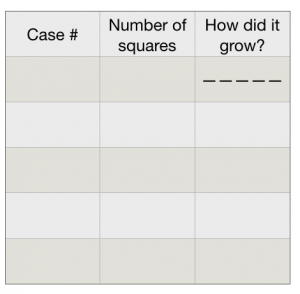
Replicate the models below by making a drawing, using tiles, or using your interactive whiteboard. Identify the pattern rule and then make Case 4 and 5.

Fill in the table below.

Analyse the pattern rule. Can you predict what Case 7 would look like? How many tiles would it use? Case 10? Make your predictions and then check your answer by building each one.


References:

Khan, S. (2007). Model-based inquiries in chemistry. Science Education, 91(6), 877-905

Scaffolding a (T)-GEM: Magnetic Fields and Current

“ The inquiry processes evident in GEM included students’ finding patterns in information, generating hypothetical relationships involving three or more variables, evaluating the empirical consistency of information, coordinating theoretical models with information, and making predictions.” (Khan, 2007, p.898)

Khan (2007) purposes a learning model for students to gain first hand experience defining and refining relationships between variables. Although T-GEM provides a explicit framework, however, something seems to be lacking. When Khan (2007) inspected the teacher’s verbal response, it became clear that specific teaching strategies are required. Instead of identifying skills as teaching methods, scaffolds are a more fitting variable. Upon closer inspection, the T-GEM pedagogical model works harmoniously with problem solving scaffold foci outlined by Kim & Hannafin (2011). In combination, the teacher’s scaffolding role is made more specific and applicable.

Here is a design that provides suggestions about scaffolding prompts according to each step of the GEM cycle. Students will investigate the relationship between the strength of the induced field, current voltage, relative distance to the current, the direction of field and Earth’s magnetic field.

Students inquire about:

  • Strength of electromagnetic field changes relative to the current (i.e. current voltage and position of compass)
  • Strength of electromagnetic fields in relationship with flipped currents (i.e. current voltage & electromagnetic field)
  • Strength of induced fields (Investigate the relationship between strength of the induced field, current voltage, relative distance to the current, direction of field and Earth’s magnetic field.

Using the simulation from the Gizmos (i.e. Magnetic Induction), students can manipulate the voltage of the current and the position of the compass. Students will observe how the needle moves relative to voltage and location to the probe. The needle is parallel to the magnetic field lines.

G – Generate Hypothesis

Problem Solving Phrase: Exploration

Scaffold foci: problemization & internalization

In the case of T-GEM, students are asked to consult a data set, identify patterns and generate a hypothesis. This is consistent with the exploration phase of problem solving. Khan (2007) emphasizes that students are asked to propose a defining statement about the relationship between concepts. Kim & Hannafin (2011) supports that during exploration, students benefit from embedding scaffolds that ask students to identify anomalies and conflicting evidence.

Using the Gizmos (i.e. Magnetic Induction), students can place compasses around a wire. The simulation allows students to explore and change the voltage and the location of the compass. More specifically, students can observe the changes of a compass and the corresponding values when placed in multiple locations around the wire, when current is set at:

  • 0 amps
  • 60 amps
  • -60 amps

Students are asked to make an explanatory statement about the relationship between the direction of the needle, the voltage and the direction of the compasses.


E – Evaluate

Problem Solving Phase: Reconstruction

Scaffold foci: Internalization, generalization

In this phase, students’ hypothesis is taken to a test. More specifically, proposed models are confronted with new information. Khan (2007) expresses that this is a key phase where original models are challenged. Inferred conceptual relationships are refined in order to be applicable to new contexts. Here, it is important to support students with “[s]caffolds [that] help guide students to challenge their thinking, consider alternative evidence, and evaluate alternate solutions.” (Kim & Hannafin, 2011, p.410) The scaffolds that can support this will help reduce and or alter misconceptions. “[S]tudents generate and revise potential solutions and explanations as they encounter confirmatory or contradictory evidence.” (Kim & Hannafin, 2011, p.410)

To refine thinking model, students switch to magnetic field view, observe the following:

What happens the the compasses under these conditions…

  • Same current: far vs. close to the current
  • Same location: strong vs. weak current

This time, students click on the view show magnetic sensor. Record the change in values.

M – Modify

Problem Solving Phase: Reflection & Negotiation & Presentation & Communication

Scaffold foci: collaboration, feedback

This phase shares many similarities with the discussion part of a study. In light of the observations, students make inferences and informed predictions about the ways in which the variables interact. Students are to reflect upon their experience and offer an explanation about observations. Often through in-depth reflection, it may initiate new insights and investigations. However, it can be difficult to connect evidence to theory. Therefore, students may benefit from collaborating with peers. Thus, scaffolding foci for the presentation and communication problem-solving phase assist in helping students solicit feedback and inspire new ideas. Moreover, content scaffolds will help make relationships more explicit. Content prompts can also help students refine their models. When discussing about electromagnetic fields, understanding the science behind the induce fields from a running current may support learning (e.g. Magnetic field and wire; Faraday’s Law etc.). Since these new models requires confirmation, this inspires a new cycle of GEM.


Reference

Khan, S. (2007). Model-Based Inquiries in Chemistry. Science Education, 91(6), 877-905. doi:10.1002/sce.20226

Khan, S. (2011). New Pedagogies on Teaching Science with Computer Simulations. Journal Of Science Education & Technology, 20(3), 215-232. doi:10.1007/s10956-010-9247-2

Kim, M. C., & Hannafin, M. J. (2011). Scaffolding problem solving in technology-enhanced learning environments (TELEs): Bridging research and theory with practice. Computers & Education56(2), 403-417.

Gizmos – Magnetic Induction https://www.explorelearning.com/index.cfm?method=cResource.dspDetail&ResourceID=611

Mag Lab – Magnetic field around a wire 2

https://nationalmaglab.org/education/magnet-academy/watch-play/interactive/magnetic-field-around-a-wire-ii

Phet – Faraday’s Law – https://phet.colorado.edu/sims/html/faradays-law/latest/faradays-law_en.html


T-GEM is such a gem!

I have had the opportunity to teach an enriched class of grade 8 students who are expected to learn a little more than what cover the curriculum. Thinking back to the time when I was teaching the surface area and volume unit, I wanted to do something more than just a few difficult problems at the end of the unit for these students. I decided to get my students to inquire about the relationship between a prism’s surface area and volume. After looking at the results of this activity, I think I had overestimated these students’ abilities as this lesson did not go so well. I ended up using some difficult problems at the end of the lesson to make sure the students got something out of this lesson.

Anyhow, looking back at this experience now, I think T-GEM would have been a great TELE for me to use for this lesson. Instead of asking students to inquire using paper and pen, including technology would have been extremely helpful.  After doing the readings for this lesson, I realized that T-GEM would work great for this activity as it will require an online simulation and some probing on the teacher’s part during the activity and students will be putting on their inquiry hats while comparing numbers and getting deeper understanding of the concept.

The main outcome of this lesson is expected to be that students are able to get a visual understanding of how 3D shapes change when the dimensions are changed and how to use minimum surface while getting maximum volume of a 3D shape. My students were not able to do the latter part using paper and pen as it required an overwhelming number of calculations that ended up getting the students frustrated.

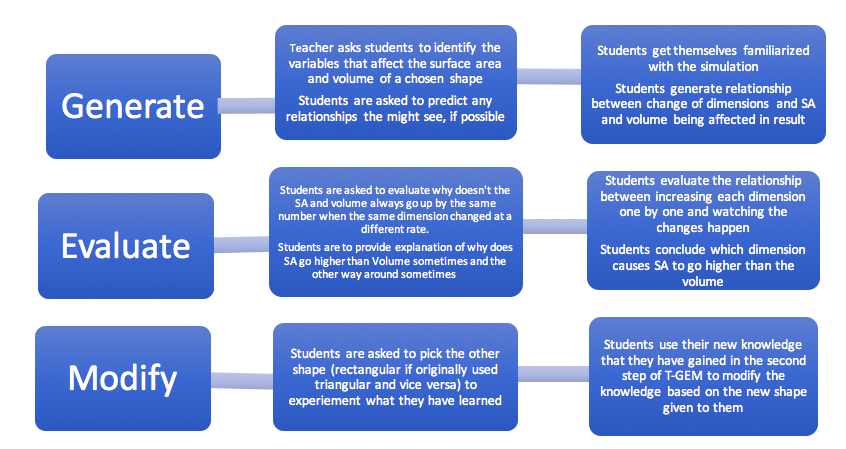
My 3-step T-GEM cycle plan includes an online simulator- http://www.shodor.org/interactivate/activities/SurfaceAreaAndVolume/

Please click here to look at my 3-step T-GEM cycle (blog settings won’t allow me to post a full size photo of my cycle)

null

This online simulator allows you to change dimensions of a 3D shape and instantly gives you the surface area and volume of the shape. I will use this online simulator to help my students understand the relationship between the dimension change and SA and volume. Their task will be to minimize SA while maximizing volume of rectangular or a triangular prism using this online tool.


I think T-GEM is a great resource for activities as such and I am excited to try this out with my grade 8 honors class next year. Best thing that I like about T-GEM is that it is a full package. It starts with inquiry based learning and probing students to inquire about new things on their own to get their feet wet, then it gets students to make relationships using their inquiry knowledge and leading them to be able to modify the knowledge that they have gained in this process to be able to apply to a new scenario. And all of this is done in a TELE setting which really makes this whole process much more efficient and engaging for the students. T-GEM really is a gem!!

Misconceptions over combining non-like terms.

One of the most common misconceptions for students new to algebra occurs in simplifying and evaluating algebraic expressions, that is the idea that 5x+4 equals 9x. It is understandable how students might simplify this expression based on their prior knowledge of adding integers, but once again they fail to recognise x as a variable term. Since the second term only has a numeric part, 5x and 4 are not like terms, and so they cannot be combined into a single term. Even higher-level algebra students make this mistake, it is not uncommon to see the expression 3x2+4x3 simplified to 7x5 rather than recognising that these terms cannot be combined since they have different exponents. I came across a simulation on PhET that would help to addressing this issue. Following is a suggested pedagogical approach using a graphic that depict the cyclical nature of GEM and its phases,

Generate relationship – the students will generate pictorial representation of algebraic expressions using the simulation on PhET. They will use different representation such as circles, triangles, and coins to generate graphical expressions. The aim is to have them categorise items and generate expressions such as . Then generate the relationship between the variables in occurrence bananas and apples in this expression, the students should generate an idea on how to simplify it to .

Evaluate relationship – the students will replace variables in pictorial representations with variables such as x, y, or z. They will then evaluate the expression, comparing their results with the pictorial representation. They are expected to produce x+y+y+y+x+x+x equals 4x+3y and establish an analogy with what they have done in the previous step.

Modify relationships – the students are also encouraged to substitute a random value in for any variables. In this case, x will have a random value, and y will have a different random value. They will evaluate and see whether the algebraic expressions are equivalent or not.

Reference:

Khan, S. (2011). New pedagogies on teaching science with computer simulations. Journal of Science Education and Technology20(3), 215-232.


Teach-’em with T-GEM!

One concept that my students find particularly challenging is circuits. Students seem to be OK if I’m simply giving them values such as voltage, resistance, and/or current, and asking them to toss those into Ohm’s law and see what the result is. However, once the questions become more theoretical (“why is there less current flowing through the higher resistance?”, “why does the current flowing through two parallel resistors equal the current before it splits, and after they recombine?”, and so on) the students struggle more and more. Even just mentioning “series and parallel circuits” is often enough for about half my class to shudder with disgust and tell an anecdote about why they hated this topic last time they encountered it.

Clearly there’s an issue there. To name just a few, I feel it’s a mix of 1) teachers not appropriately setting up and explaining the concept, 2) not giving enough analogies to make it “real” to them, 3) focusing too heavily on plug-and-play style questions and 4) electricity being, essentially, an invisible process without the help of visual simulations. I think approaching these electricity concepts using simulations supported by T-GEM could really make a difference, as they can, in the words of Samia Khan (2011, p. 227), “process large amounts of information and view representations in multiple ways”.

T-GEM is a framework or, perhaps more accurately, a cycle, and one I only first encountered in this week’s readings. Like in many other weeks, I was really pleased by how much sense it made while also being frustrated it isn’t implemented more often. I can see it being implemented for teaching circuits, and sketched out an idea for this to be paired with PhET’s HTML5 “Circuit Construction Kit: DC – Virtual Lab” . I chose an HTML5 activity to allow it to be accessed on any mobile device. I started brainstorming ways that the simulation could be used to extend the learning experience past tedious Ohm’s Law calculations. I organised my (still sketch-like) thoughts using a table, inspired by Khan’s table in New Pedagogies on Teaching Science with Computer Simulations (2011, p. 223). Feedback/comments/criticism welcome!

Major phase of (T-)GEM Main teaching methods Teacher guidance strategies Computer simulations
Compile information Ask students to locate data on a variety of series and parallel circuits (currents, resistances, and voltages across components) – simple circuits can be found online Demonstrate how to determine which variables/units relate to which measurement Teacher could recreate simple circuits using the PhET simulation and confirm the variables. Any extra information such as “Show Current” should not yet be shown.
Generate relationship (G) Identify variables for students (V, I, R) Direct students to “Labels” feature to help them Ensure students only explore the first set of components in PhET. Switches, alternate voltages courses, items should be hidden.
Ask students to find trends Focus students on simple circuits first, approaching series and parallel circuits separately. If found circuits are recreated using PhEt, Turning on “Values” could help students find trends
Ask students about relationships between V, I, and R for series and parallel circuits Focus students on simple circuits first, suggesting they approach series and parallel circuits separately Students could be encouraged to keep track of data in a table with separate columns for V, I, and R
Ask students to make incremental changes Student could be encouraged to change variables in tiny increments, such as adjusting a single resistor’s value or adding a single battery
Ask students to compare one circuit to another More than one instance of the simulation could run at once, on various devices, allowing for cross-classroom comparisons
Ask students to explain Teacher could allow “Show current” and have students discuss what changed when adding multiple resistance in series versus in parallel
Evaluate the relationship (E) Provide discrepant information Ask students “why isn’t current flowing in this circuit?” Teacher could use the simulation to create a circuit that seems like it should work but current is not flowing in one or more branches (connections not logical, too much resistance compared to another branch, etc”
Ask students “why is this circuit on fire?” Teacher could set up a short circuit and have students explain why this circuit is not safe using appropriate terminology (current, resistances)
Provide an extreme case Ask students “does this make sense?” Teacher could have students set up circuits that have a huge number of components (15+ parallel resistors, 15+ light bulbs in series) and see if their hypotheses about circuit function holds up
Ask students “why doesn’t this work?” Teacher could ask students to each create 3 different circuits that don’t work for some reason, and explain why
Provide a confirmatory case Ask students to predict Teacher asks students to make a prediction about a series or parallel circuit (and its values for voltages, currents and resistance) before using the simulation to confirm their prediction
Do not correct students Have students work together to create circuits following specific conditions (x number of series pieces, y number of components), fully solving the circuit on paper before creating it together and using the provided Voltmeter and Ammeter to confirm prediction
Ask students to compare Task several groups with the same circuit and have them all compare results
Modify the relationship (M) Ask students to revisit their original relationships between V, I and R Have students reflect in writing or through discussion on how their original ideas did or did not hold up in the face of each new case
Ask students to summarize relationships Have students rewrite what they understand about the relationships between voltages, currents and resistances for series and parallel circuits, having them refer to examples/circuits covered in the activity
Ask students to solve a new case Provide students with a very complex case involving series and parallel components and have students completely solve it (find all voltages, currents, and resistances) by working together and leveraging the PhET simulation


Oh, you’re still here! Thanks for reading 🙂


Reference

Khan, S. (2011). New pedagogies on teaching science with computer simulations. Journal of Science Education and Technology20(3), 215-232.

Misconception Throwback with T-GEM

For my posting today, I’m going with a classic throwback to the beginning of the course: Seasons and the phases of the moon. Since there are so many student misconceptions around these topics (it’s true! I asked my students the other day just randomly to explain it to me and they fumbled around and couldn’t quite explain it accurately), the added element of the simulation may give them the impetus that they need in order to finally grasp them.
I could envision this being worked together into a lesson about orbits, since both simulations involve looking at orbits to understand the concepts:

Simulations:

(Freezeray.com is a resource that contains many different simplistic, yet easily interacted with, simulations. Try the bouncing ball one (http://freezeray.com/flashFiles/bouncingBall.htm)! It’s strangely relaxing to play around with, yet could also be highly useful for students to learn about potential and kinetic energy.)


Generate:
In this phase of the process, students would be asked to diagram and to explain as best as they can what causes the seasons. I would ask them to do this before they ever saw the simulation to get a good baseline of knowledge and to give them more room to evaluate and modify. After they had all finished, I would project whichever simulation we are doing first, most likely the seasons. On the main screen, I would make sure that they understood how the simulation worked, the necessary vocabulary (orbit, axis, rotation, NESW, tilt, oblong, hemisphere), and that they had roles down for working together in teams. Teams would first write down their first hypothesis on how seasons worked and then interface with the simulation. This personal working with the simulation has been shown to have positive correlations with student achievement (Khan 2010).

Evaluate
In this phase, students would revisit their hypotheses after using the simulation to check for internal validity. If they notice problems, through questioning, they would be lead to discover which parts of their hypothesis needs to be changed. For groups that get it on the first try or early on, the second simulation of moon phases is available for them to move on to.

Modify
After identifying which parts of their hypothesis needs to be evaluated, students would be invited to change their hypothesis and then to start the process over.And the end, reflection journals could be written, along with new diagrams and explanations to show the growth. By putting them side by side with their original explanations, student growth would be evident to all the participants. This method of writing and reflection will also help to make visible mental models (Khan 2007).T-GEM seems to make a lot of sense, but to be honest, it is incredibly close to the traditional scientific method that we have been taught from early on (Hypothesis, experiment, analyze, modify, conclude), but with T-GEM, computer simulations replace the experimental phase and the teacher is hyper-aware of not giving students information that is not necessary. Rather, they are left to experiment and learn more independently, making it closely related to experiential learning and problem-based learning.

Sources
Khan, S. (2007). Model-based inquiries in chemistryScience Education, 91(6), 877-905.
Khan, S. (2010). New pedagogies for teaching with computer simulationsJournal of Science Education and Technology, 20(3), 215-232.

Authenticating GEMs with Optics

When teaching the optics unit in grade 10 science, I have noticed that students often struggle with the concept of refraction, both in lab settings and when working with it in theory such as a practice question or test.  Snell’s Law is the question most often left blank on the exam.  I believe the main reason for this is a misconception of what light is and how it travels, what is happening at the interface between two different substances.  Favale and Bondani, (2014), concur, stating about optics that “These misconceptions are widespread and do not depend on the gender, the level, and the age of the students: they seem to depend on some wrong ideas and explanatory models that are not changed by the curricular studies at school. In fact, the same errors are present in groups of students before and after taking optics courses at High School.”  That’s a goal I have as I go through another optics unit this semester; I plan to utilize a T-GEM inquiry approach to help students work through this difficult concept.

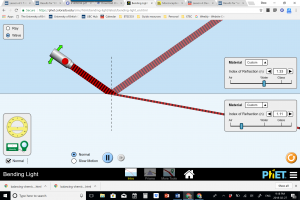
PhET has many useful simulations in the various fields of science, and there is a particularly good one for refraction called “Bending Light” which can be found at https://phet.colorado.edu/sims/html/bending-light/latest/bending-light_en.html.   To follow the GEM model, I would get students to access the Intro tab of the simulation.  The default is a laser going from air into water; I would explain what the index of refraction is, and then let students play around with it.  While students are exploring the simulation, I would ask generative questions like: “What do you notice about the relationship as you move the light?  What effect does the index of refraction have on the light beam?  Propose an explanation for this.” Once they have had a chance to propose a model, and to test it with various different conditions and extremes, I would have them switch to wave mode and try to propose what is actually happening at the interface to cause this effect.

The next stage is evaluation- having students determine if their model works for various conditions, and to challenge it with scenarios that don’t fit.  Having the students reverse the situation to have light start from water and go into air will cause a cognitive dissonance when the light reflects instead of refracting at the critical angle.  This would cause them to have to rethink and re-evaluate their hypothesis, forcing the third stage of GEM – modification.  This simulation also allows further extension with the use of prisms of various shapes that can demonstrate total internal reflection for example, and extra tools to measure the specific angles, and even the speed of light through the various substances.

These provide many further opportunities for students to go through more GEM cycles as they continue to shape and build their understandings.  This methodology will support what the teacher said in Khan (2007), “I want them to learn chemistry, [but] I don’t want them to just understand the concepts—I want them to understand where to get the concepts and where they come from.”  Later he further explained the premise of the GEM model: “[teachers] lead them through the use of computer simulations in a fashion that lets them look at individual pieces of relationships at a time, and then lead them through putting [those pieces of relationships] together into an overall concept” (Khan, 2010).  Students reported rich benefits, including that “simulations helped them to critically analyze a problem, make unobservable processes more explicit, and contribute to their science learning in ways that go beyond textbooks”, (Khan, 2010).

Digital simulations like PhET can effectively help to support learning.  Khan, (2010), in her conclusion writes “digital technologies such as computer simulations can be particularly engaging for science students because they can manipulate variables in multiple ways and observe changes as a result of this interaction and make predictions”.  Further, simulations may “engage students in multiple GEM cycles in one classroom period, beyond what could be accomplished in the scientific laboratory”, (Khan, 2010).  Khan (2007) stated that “Students expressed enriched mental models of molecular structures when engaged in GEM activities”, that “GEM cycles promoted students’ engagement with generating, evaluating, and modifying hypotheses” and further that “both modeling and inquiry facilitate the development and revision of abstract concepts” all of which serve to emphasize that our students’ understandings can be well supported through a technology integrated GEM model.

  • Favale, F., & Bondani, M. (2014). Misconceptions about optics: An effect of misleading explanations? Paper presented at the , 9289 92891A-92891A-5. 10.1117/12.2070520

Developing Division Skills

Pre-Lesson Information:

Teacher figures out what students know about division (basic and long) Students answer questions or complete assessment
This information helps guide future lessons and supports students who are struggling


Generate:

Teacher gets students to compare multiplication and division and their relationship Students create fact families, skip counting sequences, etc. to show relationship

Students create a relationship between the two concepts

When do we use multiplication and division? Division – Used for splitting items among groups, for sharing, for splitting bills at a restaurant, etc.

Multiplication – for purchasing more than one item, etc.

Understanding multiplication will create a solid understanding of division


Evaluate:

Teachers asks students to think about basic division and try and figure out how to solve more complex problems (long division) Students explore and evaluate questions. Can they figure out how to solve the questions?

Can students figure out what steps are required to different solve problems? 


Modify:

Teacher asks students how to figure out problems with remainders.

How can students use their existing knowledge to solve the problems?

What happens when a number does not divide evenly?

What can be done with the “leftovers?” (decimals, remainders)

When would we use decimals vs remainders?


The concept that I chose to explore is long division. Using the T-Gem method, I’m hoping that integrating technology into the process will help students grasp the concept a little more easily. I will start with a bit of information about my class dynamics and what I have done before re-introducing these students to long division. In my math class, even though, I have a grade 7 class, I have only 8 students who are actually at a grade 7 level. This has caused our school to take a closer look at how we can best support our struggling learners, since the majority of them have not been tested and therefore, are not on an IEP. As teachers, we are not able to modify the curriculum, but rather, we must do our best to adapt it in a way that makes it accessible for these learners. As part of our PLC (professional learning community), we have created small groups that focus on mastering one or two concepts before moving on. Our goal is to try and fill some of the gaps that these students have so that they can feel a sense of success. At the beginning of the year, we administered an assessment to all the grade 7s so that we could see what concepts they had mastered and what concepts they needed to spend more time on. After working with our students and looking at this assessment, we discovered that there are quite a few students who do not understand how to do long division.

I believe the first problem with long division is that many of the students do not have a solid understanding of basic division. With these intervention groups at my school, this is where we began our lessons. We started with having the students use manipulatives and moving (dividing) these manipulatives into groups. The students were shown some videos to help explain the process (BrainPop, Khan Academy).  We also related division to multiplication and showed how they are related (fact families, etc.). Phet has a division simulation that helps show this relationship. The students played “games,” worked with partners, and used whiteboards to practice. Throughout the process, the teachers in the room observed the students and created formative assessments to make sure all of the students were grasping the concept successfully.

Once this small group of students had a deeper understanding of what division is, they moved onto long division (this is the stage they are at now). One strategy that was used had the students using post-it notes to show the relationship between the numbers. 

http://middleschoolocd.blogspot.ca/2013/09/throwdown-linky-post-it-note-division.html – Sorry, I couldn’t figure out how to get the visual in this document.

This helped students see where the numbers go, the relationship between the numbers and the importance of lining up columns (this was an issue for many of these learners). One colour is used for the divisor and one for the dividend. The quotient and product are the same colour as the divisor so students can see that they are related. The difference is a third colour (yellow). I am trying to figure out how I can make this digital. Does anyone have any suggestions? Once students have mastered the PROCESS of long division (I find this takes longer than expected), there a tons of games, programs, videos and apps that help students practice this skill to create a solid understanding of how to complete long division questions.  

Games:

Who Wants to Be a Millionaire: http://www.math-play.com/Division-Millionaire/division-millionaire.html

Snork’s Long Division Game:

http://kidsnumbers.com/long-division/

Math Mountain:

https://www.funbrain.com/games/math-mountain

Drag and Drop math:

http://mrnussbaum.com/drag-and-drop-math/

Long Division with Scratch

https://scratch.mit.edu/projects/1387273/

Programs:

Mathletics

http://ca.mathletics.com/

Apps:

Division!! (free)

https://itunes.apple.com/ca/app/division/id492164003?mt=8

Long Division Touch (free)

https://itunes.apple.com/ca/app/long-division-touch/id574226151?mt=8

Videos

Khan Academy

https://www.khanacademy.org/tag/long-division

Brainpop

https://www.brainpop.com/math/numbersandoperations/division/

One app that is great for getting students to show their understanding and thinking is Explain Everything. In the past, I have had students create a “how to” book so that they can teach others how to do long division. I find this to be a very helpful strategy.

What strategies, resources or technology do you use to teach your students long division?

Nicole

On a side note, I absolutely loved the interactive Periodic Table in the Chemland Interactive website and wish I was able to use this during my chemistry course. Even though many of the concepts within this website are beyond what my grade 7 students are learning, some students might like to explore it if they have an interest in this subject area. In grade 7, students are learning a very basic level of chemistry, but this does not mean that some would not like to extend their learning and use Chemland to do that. They can click on any of the elements to learn more (density, boiling point, melting point, etc.). I also like that the descriptions are clear and written in a way that students can understand.

T-GEM: The State of the Matter

As a Technology Integrator, I think I can speak more vividly about my own experiences/misconceptions and work from there. Believe it or not, I still remember learning about the states of matter and not fully believing the explanation for that one major anomaly, solid water. How could it be less dense than liquid water? Then I was shown a diagram of water molecules and their arrangement in a solid, but I still was not convinced. If I were to create a T-GEM cycle to convince my younger self of the density of solid water, and the states of matter in general, it would play out as follows:

Generate – Students would interact with a program similar to Chemland called PhET Interactive Simulations by the University of Colorado Boulder [CLICK HERE and choose “States”]. I would ask the students to observe the different atoms/molecules at different states and try applying heat/cold to different states.  Afterwards, I would ask students to generate a hypothesis for the arrangement of atoms/molecules at each state and the effects of heat/cold.

Evaluate – Next, I would ask students to take a closer look at the different states of water and compare it to the other atoms/molecules. What is the same? What is different?

Modify – Finally, I would ask students to provide a full explanation on the states of matter and reconcile the anomaly in solid water. As a follow up exercise, I would ask students to suggest a real-life experiment that we could do to test their hypothesis.

If you get the chance, take a quick look at some of the other PhET Interactive Simulations. Note, I had some issues with the simulations that were powered with Java (coffee cup); look for the ones with a red 5 (HTML 5) in the bottom right corner. How do these simulations compare with the Chemland experiments?