A: Because it had too many unresolved issues and couldn’t find its ground!
Circuit Board
Okay, so the beautiful fritzing diagram I designed last week may not have worked out as well when Dr. Bob and I tried to go off-road a bit to connect the JST connectors to the same board instead of a separate smaller one like we were thinking last week.
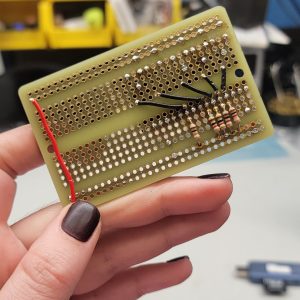

Good news: with some fancy underneath and on-top wiring what we currently have is working perfectly.
Bad news: The TP-4056 Lithium Battery Charger is on hold for another week so we’re still not wireless as ECHO is dependent on being connected to my laptop for power and to send data (both things I’m planning to resolve ASAP).
Sensors
With the female JST connectors on my circuit board, it was time to solder up my flex bend sensor, shorten the wires of my existing FSRs, and attach them all to male JST connectors. By using JST connectors instead of soldering them directly to the circuit board like in my previous prototypes, this will allow easier and more protective storage/transportation of ECHO, but will also allow me to easily swap out a sensor with a backup if needed.
3D Printing
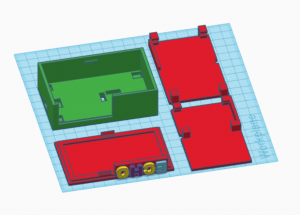
This time around, I’m starting to feel like a pro with the 3D printer (or maybe I just learned to measure twice before I print something). Regardless, with the circuit board around 75% completed, I finally have the measurements I need to begin designing a 3D-printed box that will clip onto my French horn.
Design Considerations:
- The design should accommodate JST connectors, allowing them to exit the box.
- The microcontroller’s LED should be visible to easily check its connection status.
- Include holes for the antenna and a battery On/Off switch.
- The design should have a slot for the microcontroller to plug in.
- The device should be compact enough to clip onto a horn without interfering with valve or slide movement.
- Ensure a secure fit for the Li-Po battery and circuit board to minimize the risk of damage.
- The circuit board and battery should be easily removable for charging and repair purposes.
Design Solutions Implemented (so far):
- Designed shelf inserts inside the box with “arms” to securely hold the battery and circuit board in place.
- The “arms” of the shelf holding the circuit board are designed to fit into specific holes in the box’s floor, preventing any sliding movement.
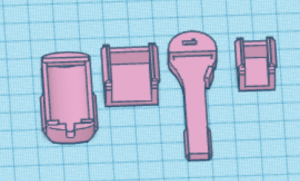
I’ve also started working on an update to my original key clip design which will include a snap-on cover to protect where the electrical wires are soldered to the FSRs after an unfortunate mishap I had this week breaking off the wires of my Li-Po battery.
Final thoughts
Knock on wood, but by next week I hope to finalize my box design, finish up my circuit board, and edit my arduino code so that it can send data wirelessly to MaxMSP using UDP send/recieve.
Onwards!