Who knew 3D printing could be so frustrating? Probably a lot of people other than me.
Week 2 of the ECHO project has been spent creating several prototypes of the clips that will eventually attach the FSR sensors to the keys of my horn.
Last week, I started this process by making paper templates of the shape and size of my keys. I then copied these templates onto an additional piece of paper to make precise measurements using a slide caliper. After getting measurements of all the dimensions I needed, I then worked on creating several 3D digital design prototypes of the 3 identical clips for the keys controlled by the player’s index, middle, and ring finger. With each prototype design, I then used PrusaSlicer to generate the G-code needed for the 3D printer.
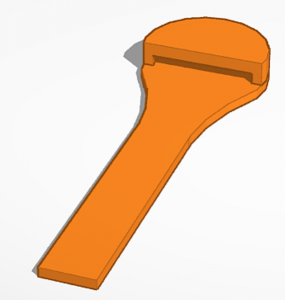
After this process, I’ve been able to create a design that is the perfect size for the FSR sensors I will be using, but I am still adjusting the cap so that it will securely stay on and won’t over-crowd the other keys. I was also able to create an initial prototype for the thumb key, though designing a clip for this key has proven to be a unique challenge when compared to the other keys as it is convex instead of flat and has some welded supports I will have to design around.
Onwards!