…and all through the lab, not a student was sleeping, not even a dab.
 Because the plan is by the end of this upcoming week, my FSRs will be mounted to the key clips I oh-so-lovingly designed a few weeks ago and I’ll be able to view incoming data while playing horn for the first time instead of through stimulations.
Before that though, it was time to finally “break out the good stuff” this week. In preparation, I put my new-found soldering skills to use by soldering the pins to my Arduino Nano 33 IoT. Unlike the Arduino Uno which I have been using for the past two weeks to prototype electric circuits, the Nano has Wi-Fi and Bluetooth connectivity making it wireless.

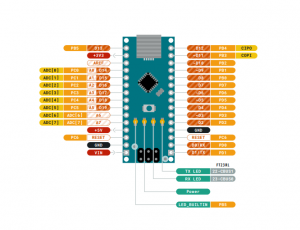
Luckily for me, arduino.cc has a great tutorial on connecting the Nano 33 IoT to a Wi-Fi Network. A cool feature of this tutorial is that it uses the built-in LED on the Arduino to tell you the strength of your Wi-Fi connection, which will be helpful later for performers when using ECHO. Especially on stage where they might move accidentally out of range of the router. The quicker the LED blinks, the stronger the connection is.
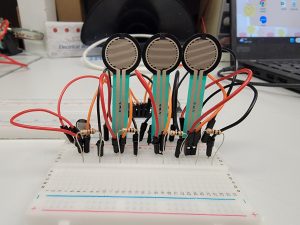
Also this week, I got to unpackage the shiny, beautiful, and new FSRs that will be mounted to the key clips. When I first started prototyping my electric circuits, I had only set up 3 FSRs so I expanded both my circuit and my existing code to include the 4th mini sensor which will be used for the thumb trigger.
Despite encountering some initial hiccups with Arduino2Max, where it failed to detect the connection between the Nano and my computer, I was eventually able to receive incoming data from all four FSRs and the Nano after troubleshooting.
Onwards!