Melting Snowmen Cookies

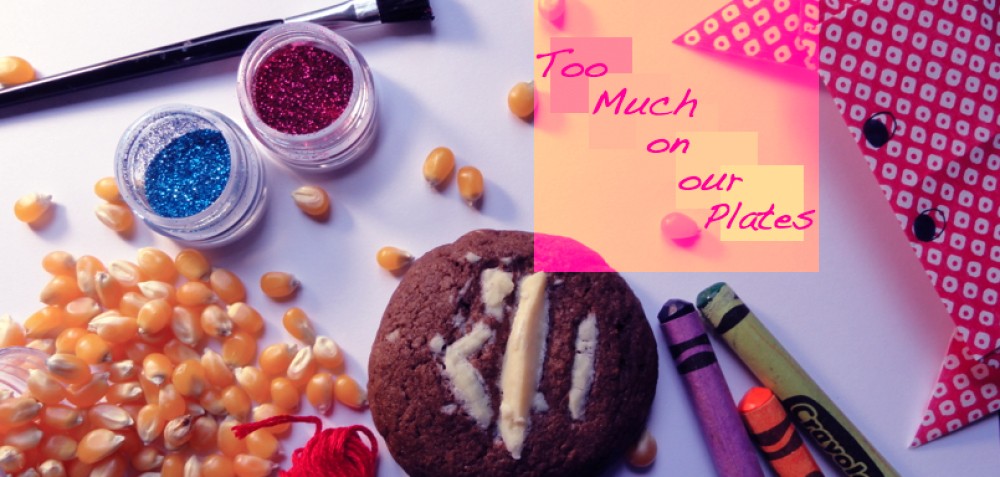
It’s been three weeks since my return to Vancouver. It has been hectic, overwhelming, and absolutely fantastic. However, I have been missing the luxury of having my own kitchen, so when the opportunity came up to prepare sugar cookies, I jumped at the chance. The last time I made sugar cookies was last Christmas, and I was extremely happy with the result. I thought I would toss on some holiday music and share some darn cute winter time treats!

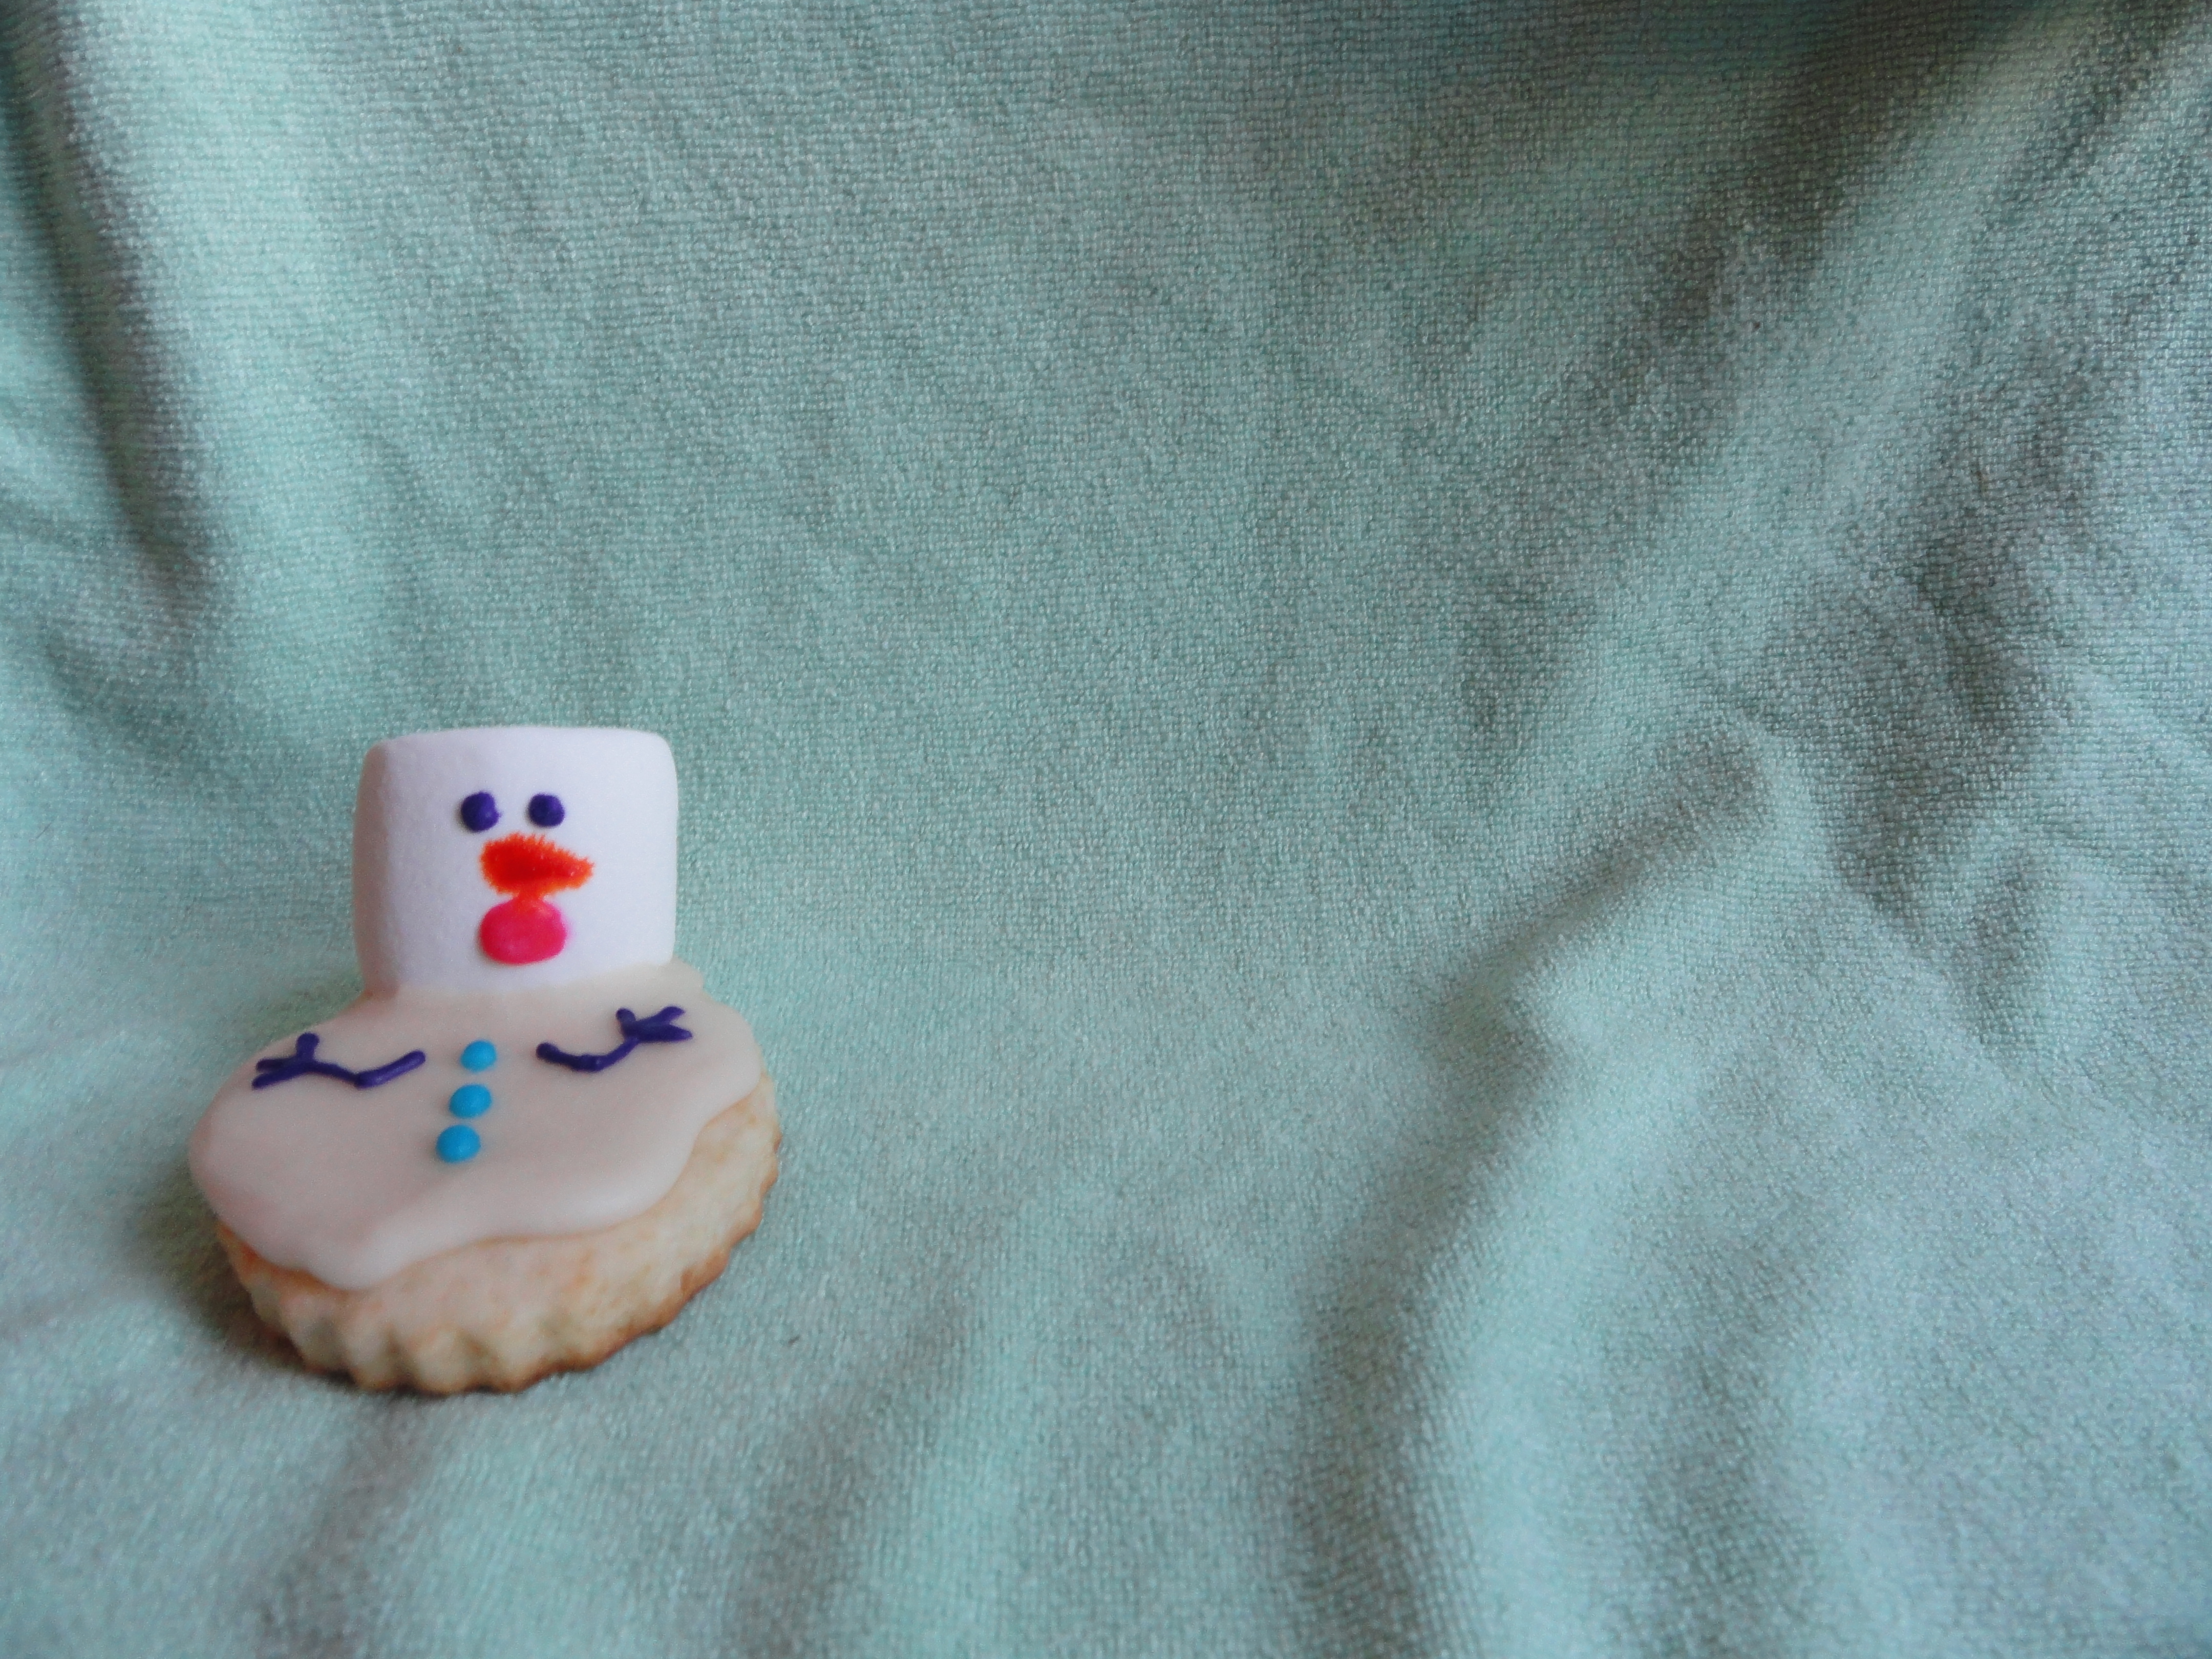
Over winter break I didn’t go home, as I was going on vacation with my friend and her family. Before I left, I had quite a few days in our eerily empty unit. Being surrounded by snow, what was I to do with all my freedom? Bake of course! I had seen a picture of these bad boys on the internet a while ago, and I knew I HAD to make them. There wasn’t a recipe with the photo, just a photo. I was obsessed.

I made sugar cookie dough a couple of weeks before and had put about two-thirds of it in the freezer. I pulled this out and set out to work. It made so many cookies. My goodness. Cookies everywhere!

I used a cookie cutter that looked like a cloud, I think the proper term is probably something like “a scalloped, circular cookie cutter, approximately 2.5 inches in diameter”. But yeah, something round-ish would be preferable.

Cut, cut, cut, cut, cut, knead, roll out dough again, cut, cut, cut, cut, cut, cut, put on cookie sheet, bake. That’s basically how it went. Then, when they were cool, the best part: decorating!! Okay, the second best part (the best part being eating, obviously).

I am a little new to cookie decorating, but after scouring the internet, I decided to try “flooding”. You begin by outlining the area you want icing in with a stiffer icing. I did a squiggly outline around the cookie, but you don’t have to be very precise, after all, they are melting snowmen! Let this dry for quite some time, then take a thinner icing and basically just dump it on the cookies and it will run to the edges, coating the outlined area. If you have some trouble with that like I did, you can use the back of a spoon to guide it all the way out. Push a big marshmallow on one side and let them be. I put them away and went to bed. What can I say, I like to sleep. But seriously, if you don’t let them dry for long enough the next step will turn into a complete mess. Sad days.

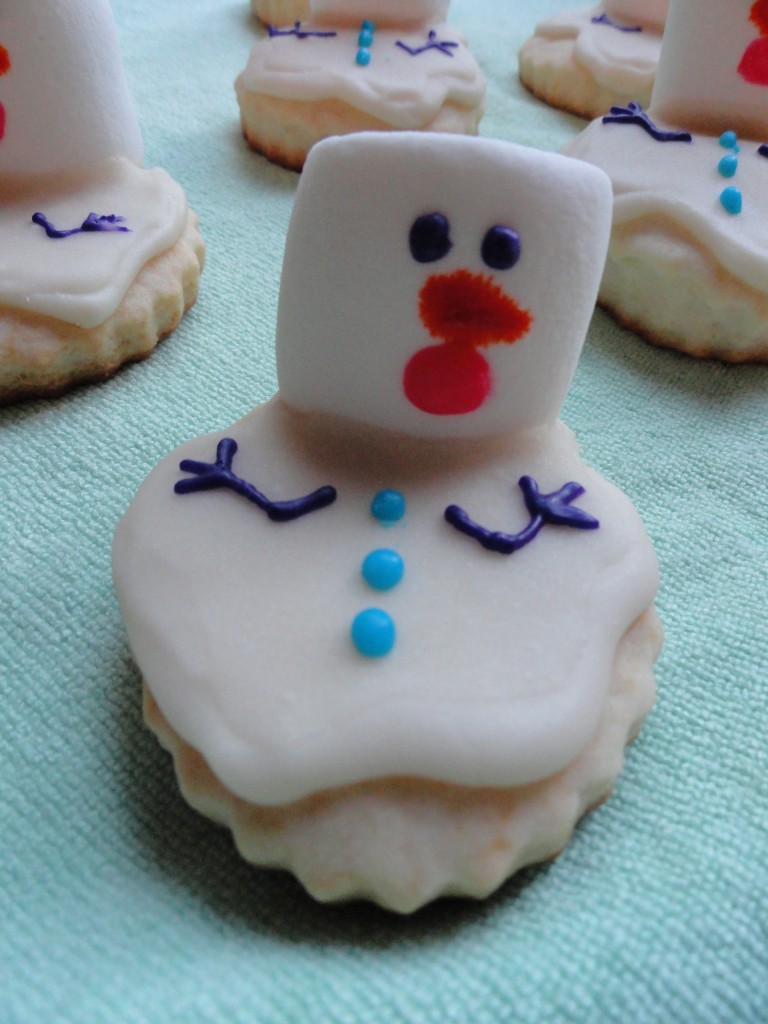
Once they are all set up, I made a tiny bit of icing in a few different colours, spooned them into separate little plastic baggies and snipped off the corners. I piped on three buttons and two arms on the base of the cookie, and on the marshmallow I did two eyes, a carrot nose and a shocked looking mouth. You can totally have fun with the colours and the faces!

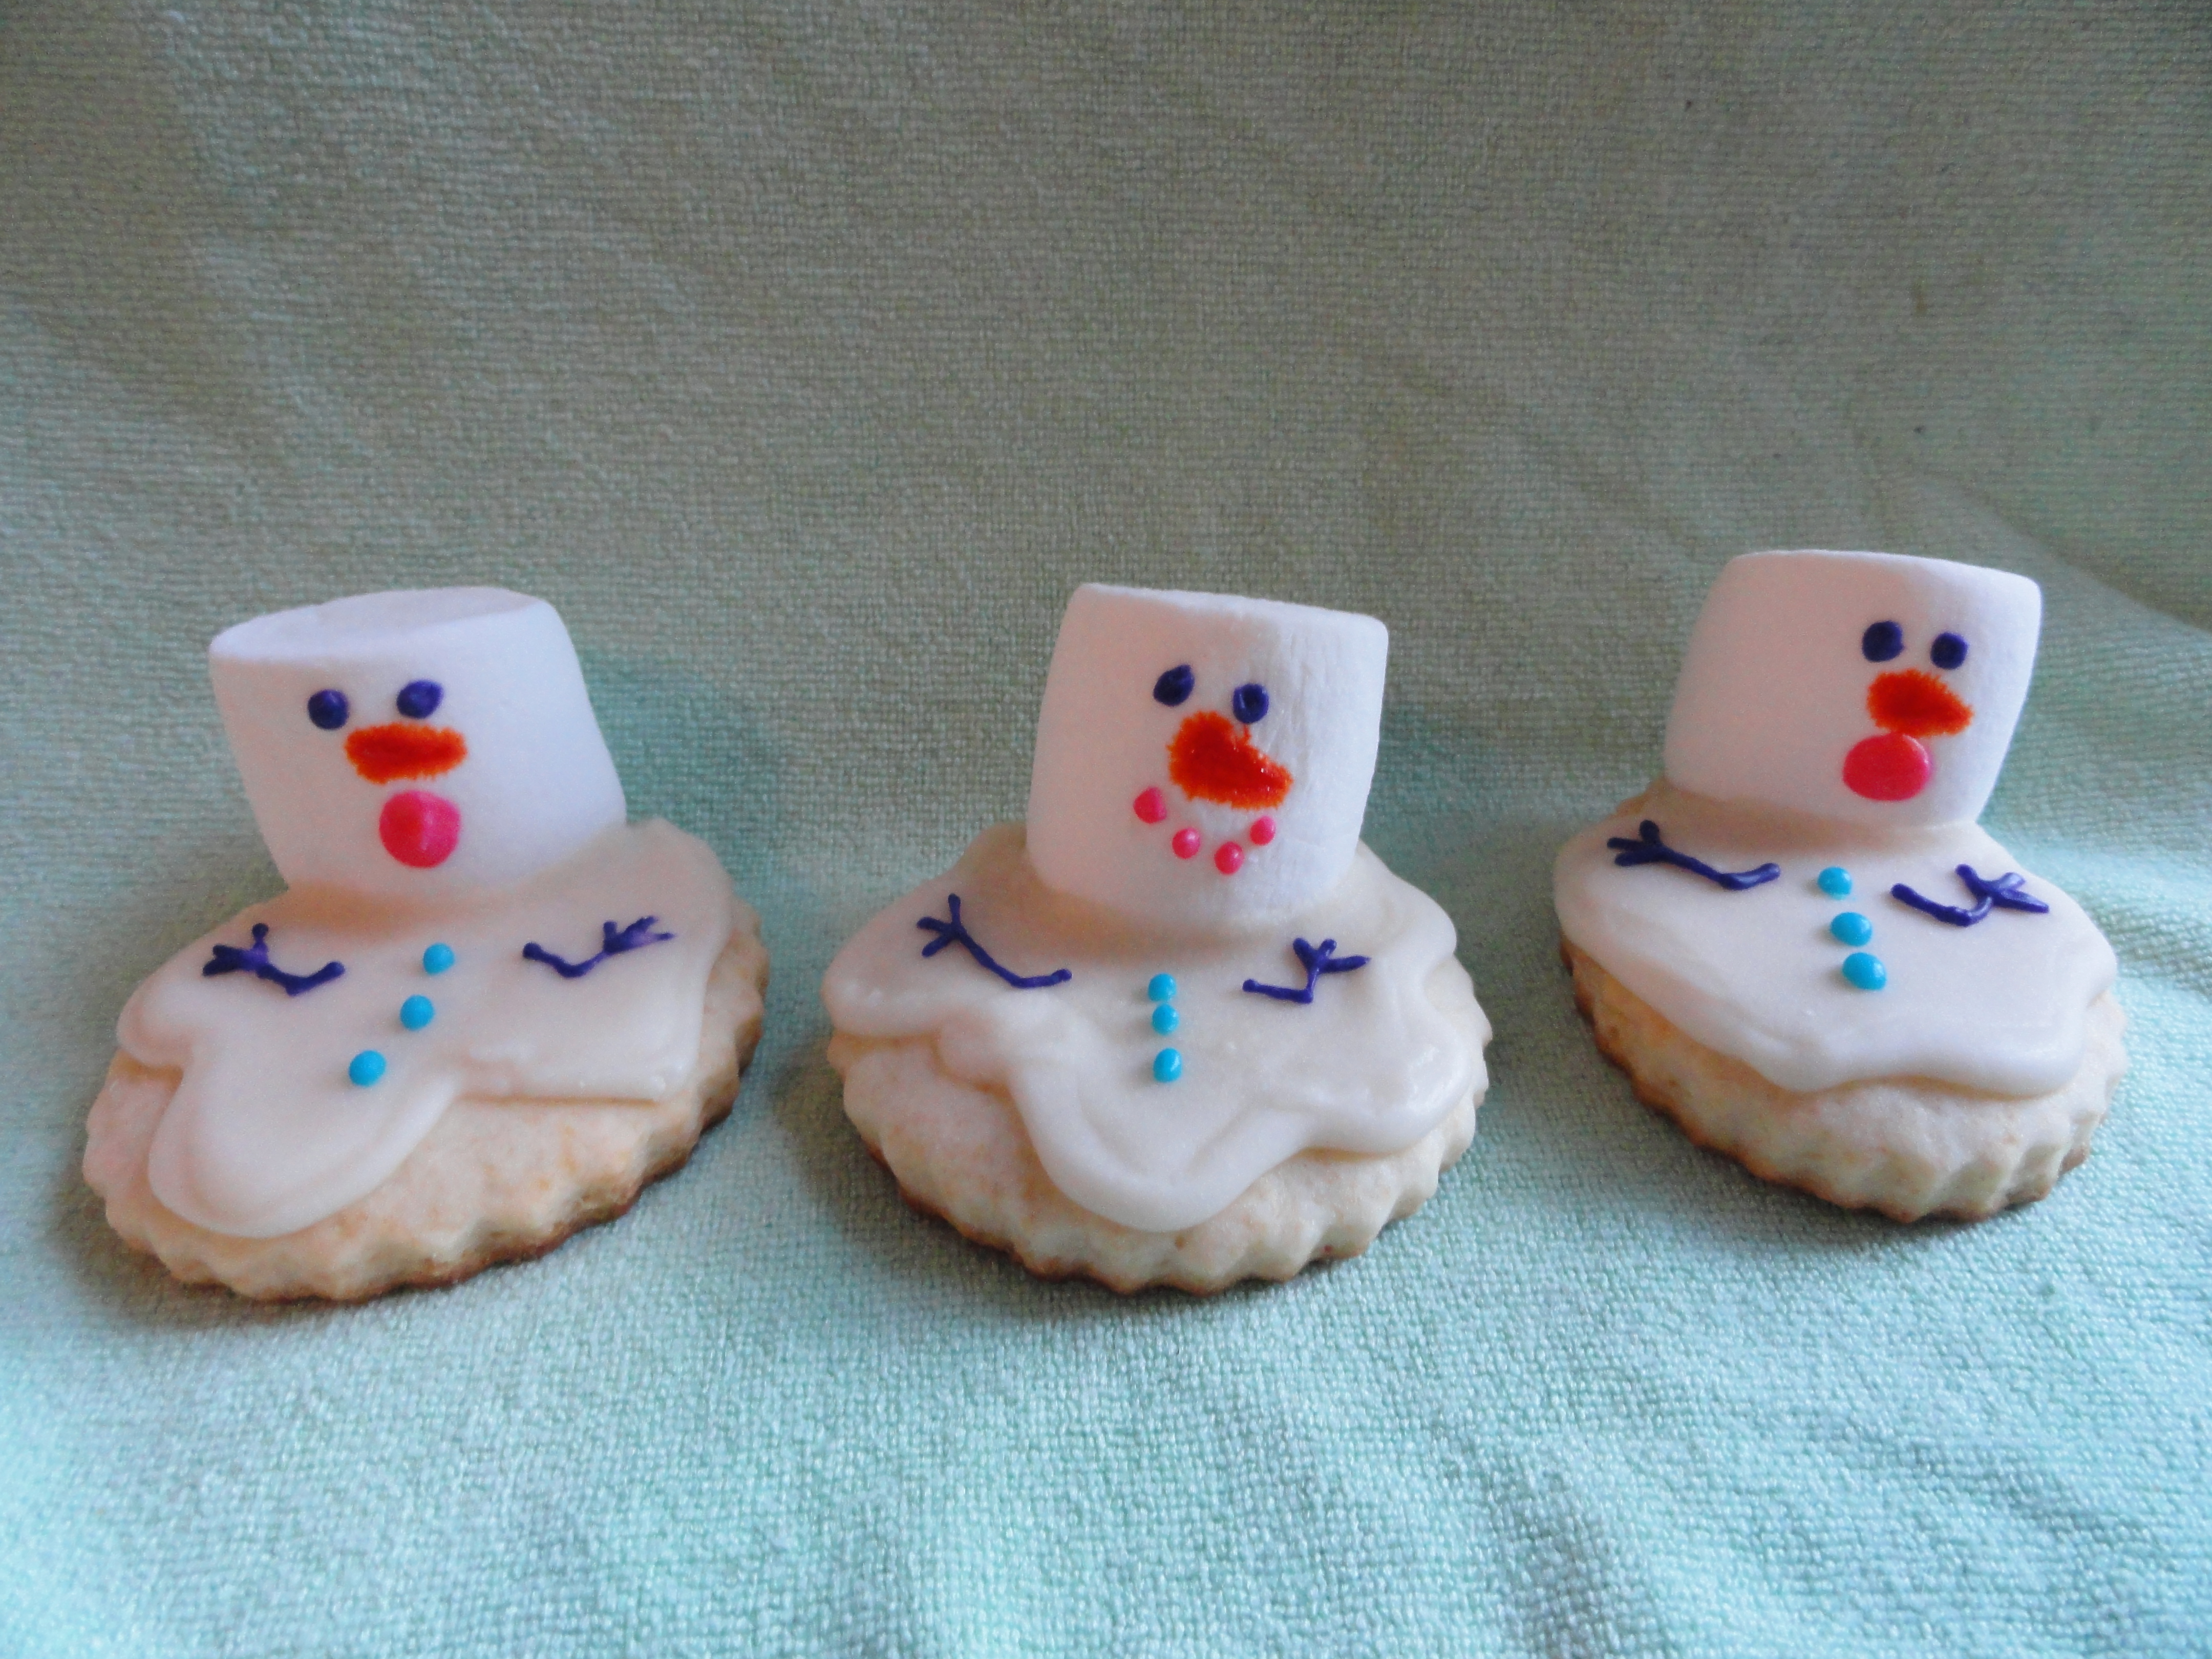
I thought these guys were so adorable and are they are definitely my new favourite holiday sweet, especially when paired with a warm mug of hot chocolate and a fuzzy blanket.

Hope your first week of classes went well!


Where I should be more often: Paper-Ya

Have you ever been to Paper-Ya on Granville Island? Better question, have you ever been to an arts and crafts store that inspires you to make ambitious goals and take on big projects that involve fancy paper and hand-spooled string? That’s Paper-Ya for me.

For some back story as to why I love paper, books, and stationary, I was once in visual arts at UBC. At the time, I loved print-making (and still do, which is why I belonged to an off-campus print studio when I went on exchange to Australia) and I’ve always been a fan of paper cranes. As well, there was this one point in my life where I was a contributor to the Sketchbook Project. Basically, I was given a single Moleskine sketchbook like thousands of other people in the world, I filled it, and then sent it back in the mail to have it end up be a part of a giant sketchbook tour across America, kind of like a concert tour for art. It was at this point that I began dreaming of putting together my own books or expanding/replacing pages in existing sketchbooks. Now, I’m reinspired by a recent trip to Paper-Ya to get started on some wicked summer projects that possibly involve binding notebooks.

What did I purchase during this trip? One of my coolest finds at Paper-Ya was a set of wooden postcards (as pictured above). You can get a small set for about $25 as a way to send a unique message through the mail. Next time? I think I need to go for the wax seal supplies and start sealing my letters to friends.

PS. I encourage you to check out their website, because I just recently discovered they maintain their own blog to help inspire others in their endeavours!

Sweet Parsnips

In my tutorial today, my professor asked the dreaded question “what do you want to do when you grow up?”. Thankfully he started at the back of the class because if he had started with me, I’m sure I would have blurted out “open a bakery” instead of stammering “I’m not sure”. I panicked. How does everyone else know what they want? I mean seriously! I don’t even know what I want to make for dinner! Well, I guess I could start with that. I mean one problem at a time, right?!

Sweet Parsnips

  • Parsnips (I used four because that is what I had in the fridge. It made quite a lot.)
  • Olive oil
  • pinch of salt
  • 1 tbsp brown sugar
  • drizzle of honey

As per usual, this recipe is pretty simple. Partly because I was hungry and super tired.

Begin by preheating the oven to about 400F, with a rack in the centre-bottomish slot. Wash and peel the parsnips, then cut the parsnips in half, and then into strips, like you are making carrot sticks. Toss in a tiny bit of olive oil and sprinkle a little salt on top. Place them in a pan that can go in the oven and evenly spread the brown sugar over the parsnips.

Cook them for about ten minutes before giving them a stir and drizzling some honey over them. The cooking time will vary depending on the thickness of your parsnips and the temperature of your oven. You want them tender on the inside and a little crisp on the outside. If they aren’t crisping up on the outside (mine weren’t), then turn the broiler on and move the pan up to the top shelf. If you do this, you MUST watch them carefully! It is super easy to burn things under the broiler. Like super easy.

Happy eating!


TMNT: Nostalgic Nails

The other day I walked into my 8am class and heard familiar music playing, but I couldn’t quite put my finger on it. I grabbed a seat near the front and pulled out my books. Then it hit me, it was the music from Final Fantasy! I excitedly texted my brother and told him we had to play that over the summer on our old Nintendo. He texted back with a slew of other games we had to play. The list included beating the Teenage Mutant Ninja Turtles game, a game which we finally conquered last summer.

Feeling kind of nerdy, I decided it was time to do my nails again. It’s been a bit of a crummy week and I really needed a break, so here goes:

Begin by doing a clear coat, then painting your nails green. Once they are dry, take orange, red, blue and purple polish and create the masks for the turtles, a different colour on each nail. To do this, I used the side of the brush, with very little nail polish on it. Make a straight(ish) line across the upper section of your nail, with a little bit of green still showing above your line. Then make two little bumps where you want the eyes to go.

On a side note, I am pretty sure I can still recite all of the old TMNT theme song.

Wait for this to dry. For the eyes, I used a mechanical pencil and dipped it in white polish, then touched it to my nail, moving it around to spread the white as desired. When the white was dry, I dipped my pencil in dark purple (still don’t have black. Ugh.) and touched it lightly on top of the white.

I decided afterwards that I wanted happy turtles! The smile is made by the mechanical pencil again, dipped in dark purple polish. Give them a clear coat and you’re done!

For the love of Pinterest & Geography

Procrastination is always best when it involves do-it-yourself (DIY) inspiration and Kate Middleton photograph collecting, that’s why the universe created Pinterest.Pinterest Boards Some of my Pinterest board collections. Follow me as ericafromcanada.

As it turns out, there are many cool things you can do with maps during periods of procrastination. Too bad Google Maps, as wonderful as it is, has made paper maps a “thing of the past.” Here are some examples of some mappy do-it-yourselfers from my “Projects” board.

State, territory, or province love

More maps and love inside picture frames

And then there was this guy (below), that inspired me to illustrate my road trip through New Zealand and to have it framed! The first picture is from Pinterest, the second is from my iPhone after it was complete. Wonderfully, it wasn’t a Pinterest fail.

Road trip

DIY Project, complete.

It’s Watermelon Time!

Are you glad it’s reading week? I know I sure am. It has been a stressful, overwhelming week and I am looking forward to a much needed break. 

My bestie from first year, who sadly no longer goes to UBC, is coming to visit me and I am beyond stoked. We don’t really have a lot of plans, but we have a lot of ideas, including baking. In preparation for her coming, I did my nails. Okay, I did other stuff too, but cleaning my room and doing laundry hardly makes an entertaining story.

When we were in first year, at the beginning of second semester, we sat down and colour coded our schedules. Like literally coloured in our schedules. We are just those kind of people. We also decided we needed to colour in our common break times when we would be drinking hot chocolate together. I mean studying, when we would be studying together. By this point we had run out of different colours to use, so we decided to make them watermelon “coloured” and call these times watermelon time. I don’t really have a reason for this choice, that is just what happened, and the name stuck.

So in honour of her visit, I present you with watermelon nails!

The cast: 

Begin my cleaning your nails with nail polish remover. Do a clear coat and allow it to dry. Usually by the time I’m done both hands, the nail polish is dry enough to begin on the nail I started with. Then put a green coat over top. It doesn’t have to be perfect, it will be mostly covered.

Now it’s time for the pink nail polish! Start about a third of the length of your nail up from the base of your nail and paint it pink. One coat usually does the trick, but if you can see the green I would suggest doing another layer.

Once the pink is dry, take a black marker (or nail polish, I left my black way back home) and make some dots on all of your nails. Let this dry! If you don’t it will smudge. Sad days.

Then add another clear coat, clean up around your nails, and you’re off to the races!


I hope you all have a relaxing, fun break!

Simple Pink Tipped Nails

When I was in high school, I went through a phase where I was obsessed with doing my nails. As in I would do them once a week, generally while watching a Disney movie or the Food Network. Not just a solid colour though, I would go all out. At Christmas there would be snowmen, snowflakes or presents. I painted on fireworks and flowers, and even transferred newsprint to my nails. I found it a great way to relax and do something creative that I could still consider somewhat productive. Although I no longer do my nails that frequently, I still enjoy making them pretty every now and then.

The other day I was in the mood for something simple. I was thinking a French tip, but I also really wanted some pink in there. I pulled out my nail polish bag, and this is what happened:

I started by cleaning my nails up with nail polish remover. I’ve read that you should clean your nails with nail polish remover first, even if you don’t have nail polish on already. Something about it going on better. I then put on a clear coat.

Next I took a really light pink, and in two strokes starting from the either side of the nail up to the centre at the tip, I made an upside down “v”. This sounds a little confusing, but looking at my ring finger in the picture below will help.

Once this dried, I took a darker shade of pink, and repeated the same step a little higher up on the nail. Let this dry, and slap on a clear coat. Bam. Done.

You can clean around your nails as you go with a Q-tip and some nail polish remover, or if you plan on showering later, I find most of it comes off then.

Happy Belated Valentine’s Day!

Hey Gage!

I like Valentine’s day. Not because of the candy, flowers and spending time with loved ones and stuff. I mean don’t get me wrong that stuff is pretty great. What I like about this special day is walking around campus and seeing all the adorable, happy people. I like getting calls from my brother asking me how to bake a cake and pictures of the mashed potatoes he dyed pink. Most of all, I like Valentine’s day as an excuse to bake things. Cute things. Pink things. Heart shaped things. Especially since I finally have an occasion to use my mini heart shaped cake tins.

The plan was red velvet cake, but halfway through making it I discovered that although I have a ton of baking supplies and six different colours of food dye, I did not have red. Seriously?!? Pink it is. Not as cool, but what can you do? The cakes turned out brown on the outside and pink on the inside.

Maybe this whole thing was a little disastrous. I tried a new recipe and the first batch of icing was weird. Okay, back to my reliable icing recipe I guess.

Chocolate Peppermint Icing

  • 1 Tbsp room temperature butter
  • 1/4 cup milk
  • 1/2 tsp vanilla extract
  • 1 tsp peppermint extract
  • 2-3 cups of icing sugar
  • pink food colouring
  • 1 oz baking chocolate, melted and cooled

Note: these measurements are very approximate and dependent on how much icing you want and what consistency you want.

For the icing, all you have to do is mix everything (I use a hand mixer) except the chocolate and about a cup of the icing sugar together. Then add the chocolate and continue to add in the icing sugar until you are at the right consistency. You don’t want it too stiff or it will hurt your hand and crack when you pipe it. If it is too runny it will literally slide off the cupcake and make sad looking cupcakes. Trust me, I’ve done both. Many times. The icing will look chocolaty with a hint of pink.

Now it’s time to decorate! Yay! Basically just have fun, using whatever you like. Sprinkles, candy, different colours, it’s all you!

I just used a piping bag fitted with a large star shaped tip for the chocolate peppermint icing and little plastic bags with a corner snipped off for the colours. I think the blue writing is my favourite!


Happy Baking!

Can’t Beet That!

Have you ever bought something at the grocery store, then when you got home realized you had absolutely no clue what to do with it? I bought some beets and they have been sitting in my fridge for eternity. Last night I decided I was going to cook them. I wasn’t sure how, but I was going to cook them and eat them and like it. It was just going to happen.

I began by bringing a (huge!) pot of salted water to the boil. I trimmed the stems off of my three beets, and placed them in the boiling water. Turn it down to medium heat and cover the pot. Now this is the time to put your laundry on, start that assignment you’ve been putting off, or go have a dance party in your room. It’ll probably take a solid forty minutes for them to cook. You basically just want them tender.

Um, so the water turns pinkish-red. Awesome! Your hands also turn pinkish-red when you peel them. Not so awesome. However, peeling them is super easy as the skin pretty much falls off in your hands.

Now you can have fun with them. I ended up making soup the first night.

Beet and Onion Soup

  • 1 boiled beet, peeled and chopped
  • 1 tsp butter
  • 1/4 cup of milk
  • 1/2 an onion

I had some leftover sautéed onion. Yum. Put that and the chopped beet in a blender. It helps if the beet is warm (it melts the butter! Also, then your soup is warm, and personally, I like my soup warm). Blend it as much as you can, and when it isn’t … blending anymore, add in the butter and milk. Blend until it is smooth. Pretty simple, right? Well the next recipe is even easier.

  • 2 boiled, chopped beets
  • 2 tbsp white vinegar
  • sugar (to taste)

Throw those chopped beats in a jar, pour in the vinegar and sugar, and shake. Consume. See, simple? And surprisingly tasty. Definitely happening again. And again. Soup makes chemistry go down a little easier. And yes, I eat my soup from a mug.


Toodles!

It’s Monday Again…

Oh hey there!

You know what Mondays make me realize – other than how unproductive I was on the weekend – ? How much I hate mornings. I am possibly one of the crankiest people you will meet in the mornings, and it is really embarrassing. I feel so bad about it, especially when I first moved into Gage. In one of the first weeks of classes my roommate said good morning to me, and what did I do? I grunted. Of course I apologized profusely later, but there’s just nothing I can do about it! I’ve really tried to be chipper in the morning. I just can’t. Let’s face it, mornings are hard. Some mornings you just want to pull the covers over your head and admit defeat. Here’s a recipe I hope will make your Monday a little bit brighter:

Manic Monday Milk

 Ingredients:

  • 1 cup of milk (I used soy)
  • 1 tsp brown sugar
  • 1 cinnamon stick
  • Splash of vanilla

Now this recipe is incredibly simple. It is so simple that some might not even consider it a recipe. Start by heating up the milk and the cinnamon stick in a pot on the stove. Don’t bring it to a boil, but when it is nice and hot (or warm enough for your liking) stir in the brown sugar and vanilla. Feel free to play with the amount of sugar, you know, depending on your taste and mood. Transfer it to a mug and make this week a great one!

Let me know what flavours you like to add to your milk!


Love from Briana