A fair number of people on campus use Creative Cloud apps (Photoshop, Illustrator, Acrobat, Premiere, etc.) and connect to Adobe’s servers to get their updates. It would be ideal to have an internal update server that downloads all the necessary patches once and the clients use that instead of downloading the same update 100 odd times from Adobe individually.
This blog is meant to go over the details of setting up the Adobe Update Server and talking a bit about the caveats about the tool.
Right out of the gates, I feel it’s worth mentioning the limitations of AUSST (currently version 4.0). It is ONLY capable of updating Creative Cloud apps <insert-confused-look-here>. Not Flash, not Acrobat Reader, not Shockwave (if that’s still a thing). I’ll keep my fingers crossed that one day we will be able to update ALL Adobe applications/plugins/etc. from a central location.
Moving on to the setup process.
Unfortunately, I will be doing the setup on a Windows Server 2012 R2 machine. I blame a coworker for deterring me from using Linux.
Web server Running IIS
Clients connect to the update server over the web and download patches. So we need to build a web server. With Windows Server installed and joined to the domain, we will proceed with IIS installation and setup. The documentation on Adobe’s site for this part is lackluster, so I’ll try and fill in the gaps.
Open Server Manager, and add the Webserver (IIS) Role.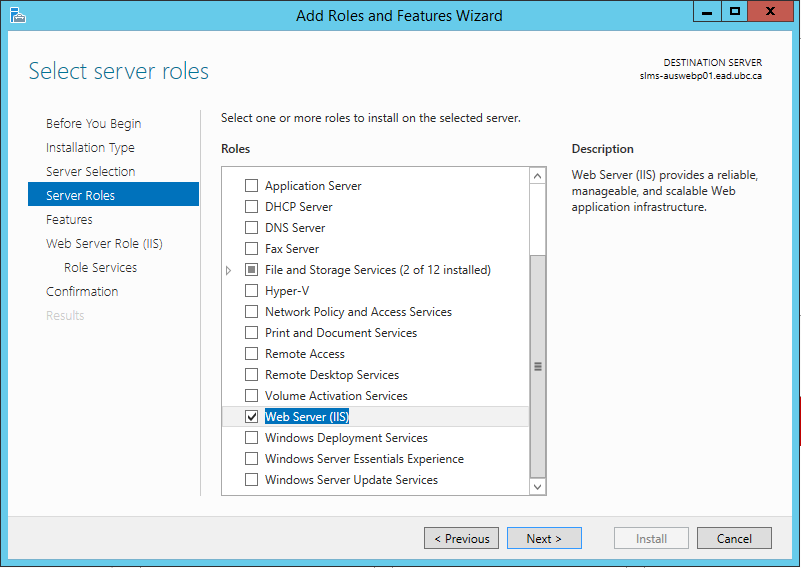
Under Application Development, be sure to select the following:
.NET Extensibility 3.5
.NET Extensibility 4.5
ASP.NET 4.5
ISAPI Extensions
ISAPI Filters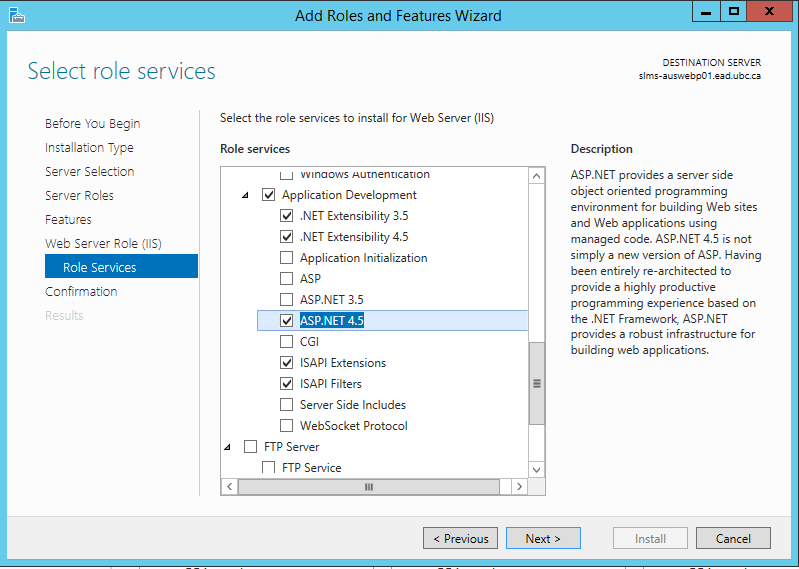
Test the new web server by going to http://localhost/ (or your fully qualified domain name) on the server. If all is well, you will be greeted with the IIS splash page.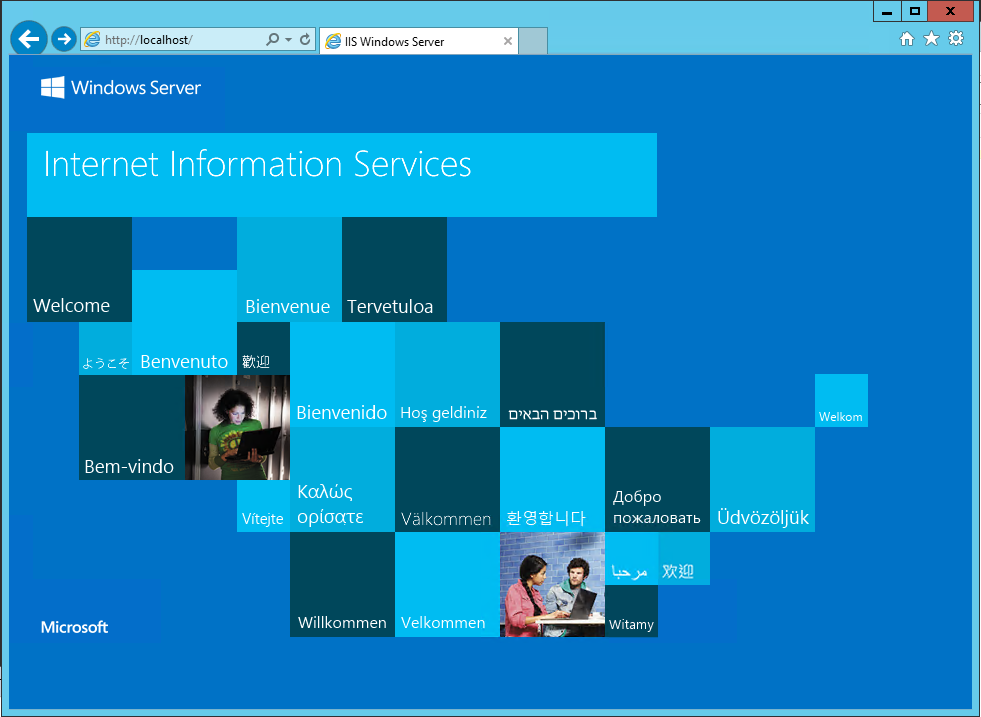
Adobe updates will be distributed in the form of ZIP files, DMGs, CRLs, etc. so we have to configure the web server to handle these files properly.
Open IIS Manager and Go to Handler Mappings under your site. This could be ‘Default Web Site’ or another site if you’ve chosen to create it. Handler mappings are site wide, so caution must be taken if you’re running multiple sites on the same server.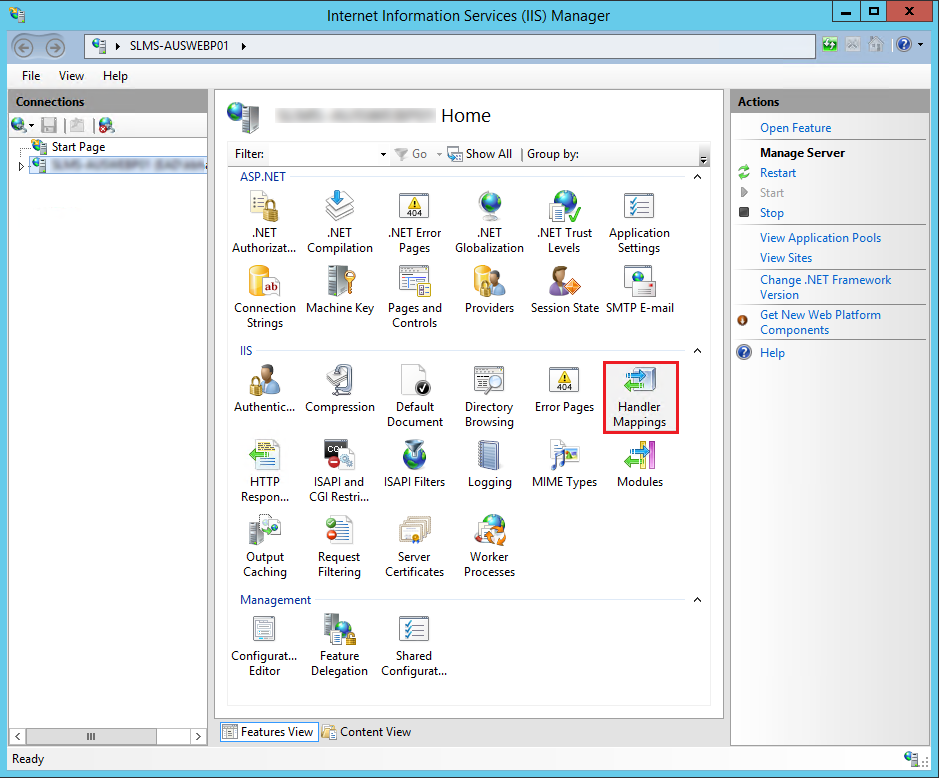
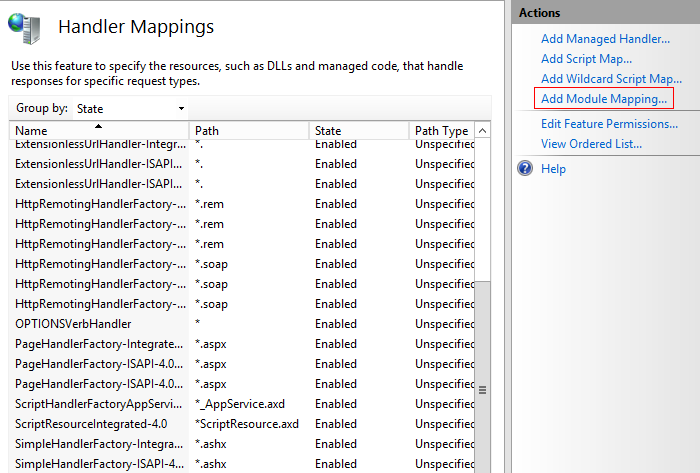
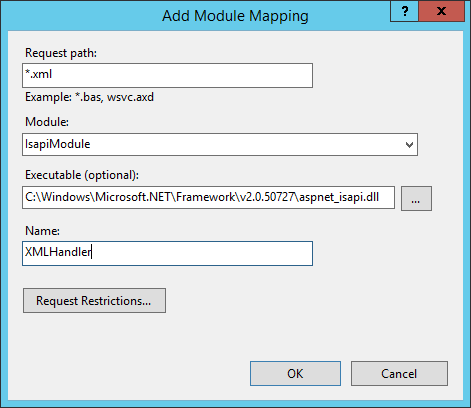
We have to add mapping for XML, DMG, SIG, CRL, and ZIP files. The below graphic demonstrates adding the XML mapping, and it can be repeated for the other four. Remember to give each one it’s unique name.
We also need to edit a web.config file in the following location:
C:\Windows\Microsoft.NET\Framework\v2.0.50727\CONFIG\web.config
Open the file with Notepad and add the highlighted text as shown below.
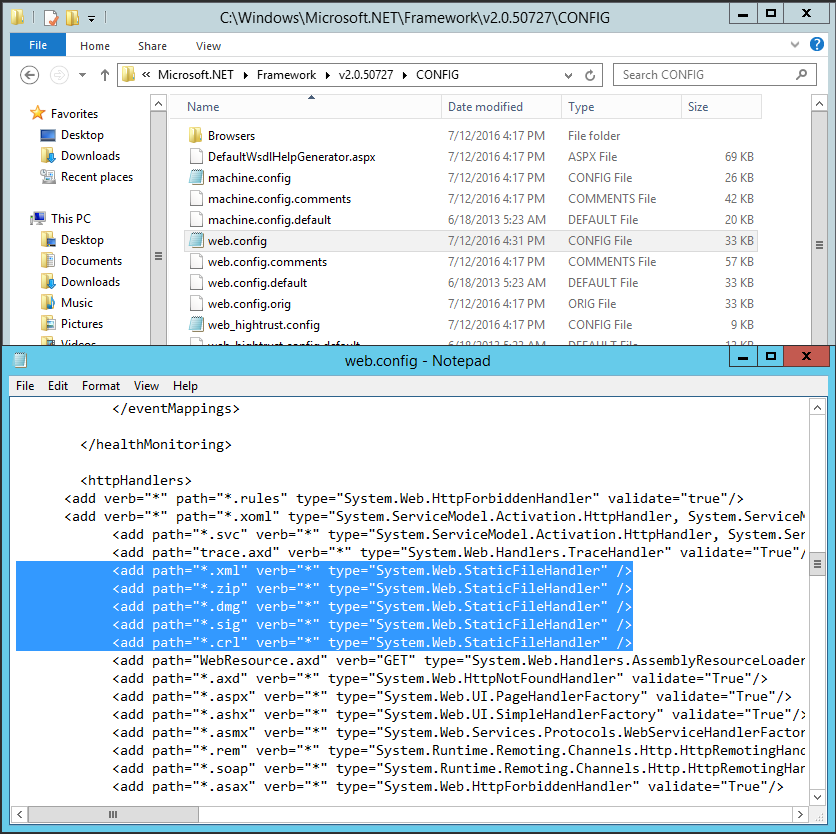
Save the file in the original location and restart IIS.
Adobe Update Server Setup Tool – AUSST
AUSST is installed when you install Creative Cloud Packager (CCP). You can download CCP from the Adobe Licensing Website (or contact your Adobe rep).
After CCP is installed, AUSST binaries can be found in:
C:\Program Files (x86)\Common Files\Adobe\OOBE\PDApp\CCP\utilities\AUSST
The executable is called ‘AdobeUpdateServerSetupTool.exe’ and the usage is as follows:
AdobeUpdateServerSetupTool —-root=”C:\inetpub\wwwroot\updates\Adobe” —-fresh
- This will do a full sync of ALL available CC updates from Adobe, so allow two to three hours to finish depending on your internet connection speed
- It will also delete everything in the ‘C:\inetpub\wwwroot\updates\Adobe’ folder before starting to caution must be taken
- Ensure you have about 100GB of free space before running the above command
AdobeUpdateServerSetupTool —-root=”C:\inetpub\wwwroot\updates\Adobe” —-incremental
- This will do an incremental sync from Adobe’s server (comparing what is in your repository)
- This must be done periodically to ensure you’ve got all the recent updates. I recommend scheduling a task that runs nightly, or weekly
Client Config
Now that we have our web server setup with the latest patches we need to generate an ‘overrides’ file that redirect the clients to your spiffy new server instead of Adobe’s.
AdobeUpdateServerSetupTool.exe —-root=”C:\inetpub\wwwroot\updates\Adobe” —-genclientconf=”C:\inetpub\wwwroot\config\AdobeUpdaterClient” —-url=”http://your.domain.com:80/updates/Adobe/”
- This command generates the overrides file for both Macs and PCs and places them in ‘C:\inetpub\wwwroot\config\AdobeUpdaterClient’ folder
- The respective overrides file can be packaged with CC Packager (suite, or individual apps) or can also be copied over to a location on the client machines.
The file created in step 1 needs to be copied over to the following folder:
In Windows 10 – C:\ProgramData\Adobe\AAMUpdater\1.0\
Windows 8 – xxxxx
Windows 7 – C:\ProgramData\Adobe\AAMUpdater\1.0\
Mac OS 10.11 – xxxxx
Updates (finally!)
Once the client machines have the overrides file in place, there are two ways to initiate updates
- Adobe Application Updater
- Remote Update Manager (RUM)
Dear benefactor,
Thank you very much for your documentation about AUSST.
It’s so clear not like the one provided by Adobe…
Best regards,
Chris
Cheers Chris! I wrote this because it was painful to set it up with Adobe provided docs and I’m glad to hear that it helped you!
Karan
Hi – Thanx for this excellent breakdown. Do you know if there’s a configurable option to allow updates from Adobe servers directly when clients are not in-house?
Yes, thanks so much!
This is a great write up and was very beneficial. If you haven’t done so yet, I would suggest adding this to the Spiceworks community. If you haven’t heard of that before, go to http://Spiceworks.com and check it out. It’s a huge IT community that’s free for everyone and they even have some useful tools.
*This really answered my problem, thank you!
Hi.
I’ve been spending days trying to set up my server with adobe documentations.
Most of them say to add one client file AdobeUpdater.Overrides in
“C:\Program Files (x86)\Common Files\Adobe\UpdaterResources”
According to your documentation, I deleted this and just let the file in
C:\ProgramData\Adobe\AAMUpdater\1.0
All work fine now. After loosing so much time for… just one file
Many thanks for sharing this !
Great article, very concise. I also found the Adobe documentation lacking. Too bad I found yours after mudding through theirs. Have you tested the filtering? We we only have Windows deployments, so downloading updates for Macs is a waste. Also any recommendations for clean up of old updates?
This article saved me, thank you so much for posting this. Adobe trying to be difficult every step of the way.
Thank you for this information I had been researching all Google in order to uncover it!