Week 2 – Purring

Week 2 – Jan 22-28.
Continue body/skeleton prototyping for purring CuddleBit.

Customized water bag design
First we attempted to create a customized water bag design, essentially a double-layered bag that would contain water between the layers, and allow the entire robot’s body to be water, instead of requiring a skeleton of some kind. Took a few trials to come up with a process to heat and press plastic (cut from a large ZipLoc) to create a good seal. The main downside to the process is that all the resulting seals need to be straight lines – we have yet to come up with a process to seal in curved lines, as it gets a lot more complicated.

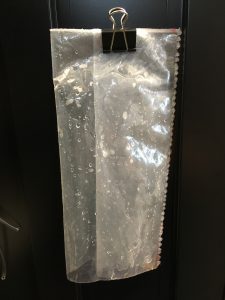
Two pieces of plastic heat-sealed together to create a double-layered bag.

The first past at this design highlighted a few unforseen complications – how can we easily get the motor in and out of the bags? Where does the wiring go? How do we seal the water inside the layers?

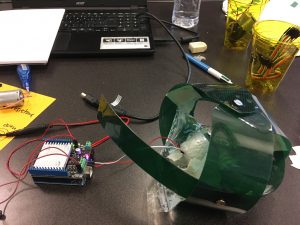
“Upside-down” skeleton
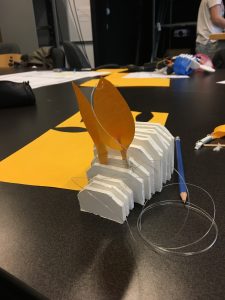
Decided to test out the idea of having a water pouch sitting on top of the motor instead of underneath. Made a rounded skeleton out of thin, flexible plastic (cut from a binder/folder) in a hemispherical shape, with a flat piece of plastic on top to support the water pouch. Seems to work quite well.

Skeleton that supports a water pouch on top. The motor is fixed in place inside the “basket”.

IMG_0898
Water pouch on top of skeleton. Blue paper on top to make vibrations more obvious.

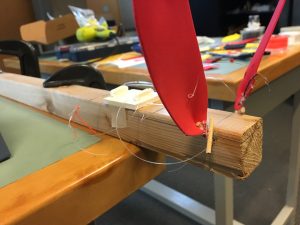
Water balloon design
Had the sudden idea that I could fill a balloon with water and tie the balloon to create a torus-like shape, and fit the motor in the center. This fabrication process would be much simpler than the custom water bag design, and would allow for the rounded shape that I had wanted for the robot body. As well, a rubber balloon would be a more durable material than a plastic bag.

It took a few tries to figure out the best way to create the torus shape, including the amount of water I should start with. One important step I discovered was that I had to blow up the balloon to near its max capacity first, in order to stretch the rubber evenly so that the torus shape will be even. As well, it seems that the consistency of the rubber changed enough between the different colours (I suspect the variable is colour, possibly due to the differences in material?) that certain colours of balloon (especially white) were very difficult to work with.

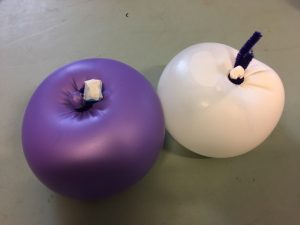
Tying the balloon into a torus-like shape. Note that the white balloon’s shape is less even than the purple.

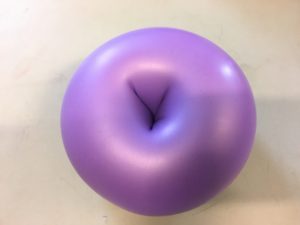
The bottom of the tied balloon.

IMG_0910
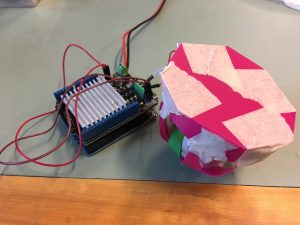
Balloon purring robot in action.

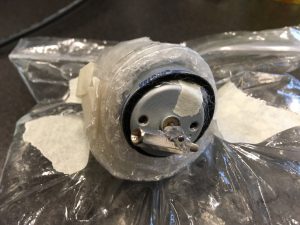
This design turned out to work exceptionally well – the entire body was able to conduct the vibrations of the motor. To make it easier to move the motor in and out of the body, we created a small container out of plexiglass that the motor could snugly fit into, and inserted the plexiglass into the balloon. It seems to still work quite well, as long as the container fit snugly around the whole motor in order to conduct the vibrations.

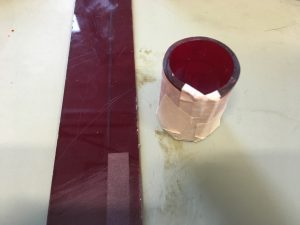
Plexiglass container for the motor.

IMG_0913
Adding the container into the design.

We then made another one of these toruses to suspend the motor entirely inside the body.

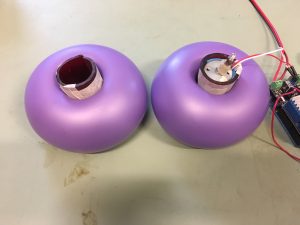
Two balloons for a body that entirely encapsulates the motor.

IMG_0917
Still works pretty well!

The success of this overall design indicated that the idea of suspending a motor inside a rounded, liquid body shows considerable promise. We plan to take this thought further and mold a rounded body out of flexible silicon for a more durable, higher-fidelity design.

Another observation is that with this design, lower frequencies transmit better.

Ear Refinements (Sean, Week 2)

After further experimenting with me previous model, I decided to abandon the springs in favor of more rigid attachment using barbecue skewers, since the spring allowed too much freedom of movement to consistently control the ear’s position. With some further trial and error around the shape and materials used to construct the ears,  I arrived at a system that allowed me to control rotation and forward-backward motion with three strings.


However, I the flexibility of the frame has made it difficult to consistently test the impact my changes would have on ear motion, as pulling on the strings moved the entire body as well as the ears. To solve this problem, I created a new model.


I used this block of wood to set the ears at a more natural angle (70°) and finalize my control system. However, controlling two ears (six strings total) with only two hands is difficult, meaning that the next step in this process will be some automation. I’m planning on attaching four servos, two for each ear, to this model to control the ears. This should let me make sure that this model is giving me the range of motion I will need to prototype behaviors later on.

Spinal Movement Prototype A Improved

Following the previous week’s thoughts, for this prototype I tried to incorporate some type of resistance in between each of the vertebrae. For my initial pass I tried a combination of springs and various foams.

However, based on the results the wires were getting “stuck” and the shape was not returning back to it’s stationary position. In consultation with Paul, we decided to move forward with the foam material, but to drill channels into them for the wires to go through. The results are indicated below.


Summary

The foam material seems to work perfectly, I also like that the channels hide the wires. A servo base will need to be constructed for the bottom “vertebrae”, but this will be attempted farther along when more med-high fidelity prototypes are called for. Since this prototype still doesn’t afford the freedom of movement of “twisting” the spine, this movement will be my next big pursuit along with the idea of spinal fins that move independent of each other. This will be further explored next week.


Week 1 – Purring

Week 1 – Jan 15-21.
Begin design for purring CuddleBit.

First pass at a “purring motor” consisted of a DC motor with a small, attached weight, wrapped in several layers of bubble wrap and plastic to ensure that the weight will not come in contact with anything as the motor spins.

First pass at purring motor.

Testing out the “fluid body” idea – that the sensation of a purring creature can be successfully conveyed by attaching the purring motor to a water base (here a Ziploc filled with water). The idea is that this kind of body can simulate the weight of a small creature, and is simultaneously a good medium for transmitting the purring vibrations. So far it seems to be going quite well.

IMG_0878|
Purring motor in action.


Testing purring motor setup with temporary robot body.

Borrowed a previous robot body to test if vibrations can transmit through a semi-rigid skeleton. Also seems to work quite well.

Early Ear Prototyping (Sean, Week 1)

For my first Cuddlebit prototype, I’ve decided to build a model that will allow me to experiment with ears, since they are a frequently used communication tool in mammal species, but not often considered in interactions with humans. I started by making a frame with a profile that I felt would be able to model both the entire body of a small animal (rabbit) and the head of a larger animal (dog) depending on where ears are attached to it. Right now I have rabbit ears that are attached to the frame by a spring, which allows for relatively free movement controlled by a string attached to the tip of the ear. Currently, the ears can be pulled in any direction, but lack rotational control, which will be the next thing I work on.

I’ve also started trying to create other types of ears, in particular a model similar to a German Shepard’s upright and slightly folded ear. So far, I’ve been unable to create a model that is able to fold when back in the same way as the dog’s ears. The folding motion of rabbit like ears is less mechanically complex than in a German Shepard’s ears, so I plan to move forward with the rabbit like ears for now. Ideally the final model will be capable of accommodating all sorts of ear shapes in the future, so I may have time in the future to come back to this.

Spinal Movement Low-Fi Prototype A

First step that I took was to create a mood board of spinal images/designs that inspired me:

I then drew out some sketches of what some spinal movements could look like, focusing on prototype A to follow through on today:

I then quickly created a low-fi prototype of what this could look like in a physical form using tape, plastic sheeting, and some joint connectors made via mecho parts:

I used some string running through each part to guide the horizontal rotation around the joints (using a single fastener at only the top of the prototype).


SUMMARY:

In order to get the type of fine-tuned motion this prototype needs to be adapted so that EACH “vertebrae” is capable of moving independent of the other. This could be accomplished by having a thread fixture at each of the vertebrae instead of only having one fixture at the top and then looping said thread through all of the lower vertebrae. Also there needs to be some mechanism that restores the original spacing between each of the vertebrae. I believe this can be accomplished via springs and/or sponges.