All posts by annmur

Studio Render Update


After preparing renders for the deliverable dimensions for studio, I will now be working on the render edges in order to prepare two 11×17 ” files. I’m hoping to do this by extending various planes (such as the street material) in order to better frame and highlight the intervention. I will also take this opportunity to improve the vegetation rendering in the community garden scene, and the people in the cafe scene.

renderprint2 renderprint

Studio Rendering Update

I’ve been preparing my rhino files to bring into Keyshot. After a few test runs, I’ve developed some strategies:

-Placing different elements of the structures on different layers as to prepare the ‘inside’ and ‘outside’ Keyshot renders,, in order to later insert people into the structures between separate photoshop layers.
-Importing my backgrounds into Rhino via Picture Frame as to play around with the angle I’m planning on rendering; this makes preparatory layer organization of ‘inside’ and ‘exterior’ easier as well.

Screen Shot 2014-11-30 at 11.22.31 PMScreen Shot 2014-11-30 at 11.23.13 PM Screen Shot 2014-11-30 at 11.21.07 PM Screen Shot 2014-11-30 at 11.21.58 PM

Rendering for Studio Update

Inspiration image:

I’m planning on producing three renders, each portraying an installation. My design is based on a series of components that can be used anywhere, but these example set ups serve to demonstrate what can be done with the parts.

Mock-up Renders/Progress Renders:

Screen Shot 2014-11-26 at 12.17.30 PM

My primary tool will be photo montaging. I will supplement this with some rhino modeling as well as photos of a my physical model. Screen Shot 2014-11-26 at 12.17.40 PM

I’m experimenting with protruding images that emphasize the insertion of the installation as well as key aspects of the environment that interact with it. Screen Shot 2014-11-26 at 12.17.47 PM

DROGON Update: 3D Printing

IMG_6837 IMG_6852

After watching some failed print attempts (see above photo), I was concerned that my print would have many unforeseen complications. But, overall, it went fairly well. I had to restart twice because the filament got tangled, but otherwise the print went smoothly and took about 3.5 hours.

IMG_6859 IMG_6860

My dad sometimes tells the story of the first time he used a fax machine, and how astounding it was at the time. I feel that my experience printing Drogon was similar, and that one day, in a not-so-distant future where 3D printing  will be ubiquitous, the memory of the confusion and excitement of my first print will deeply amuse me. I’m excited to be at a point where I feel more comfortable utilizing the 3D printer and I’m curious to see how I will apply this tool later on in studio.

IMG_6861

Removing the scaffolding proved very tedious but ultimately doable. An alternative strategy I might have used would be to print the head and body separately (and reduce the amount of scaffolding needed). My rationale was that I wanted to make sure the model could stand upright and was hoping that the Tinkerine suite software would calculate the weighting if I printed it as once piece. This could have been something to explore in multiple prints.

IMG_6862

Lessons learned:

-Don’t scale in Tinkerine. Also, having consulted with various classmates, it appears that Tinkerine has a tendency to tamper with scale, or just that variations in scale happen across a variety of printers. But still, scale in Rhino into mm before importing into Tinkerine.
-Though this is probably obvious, it warrants stating: I would’ve done a test print of the model beforehand. There were time constraints and issues with the printers, but I waited until I was done modelling to 3D print. In hindsight, I would’ve printed a crappy rough prototype ahead of time to troubleshoot some things (ie scaling) proactively.

DROGON PART II

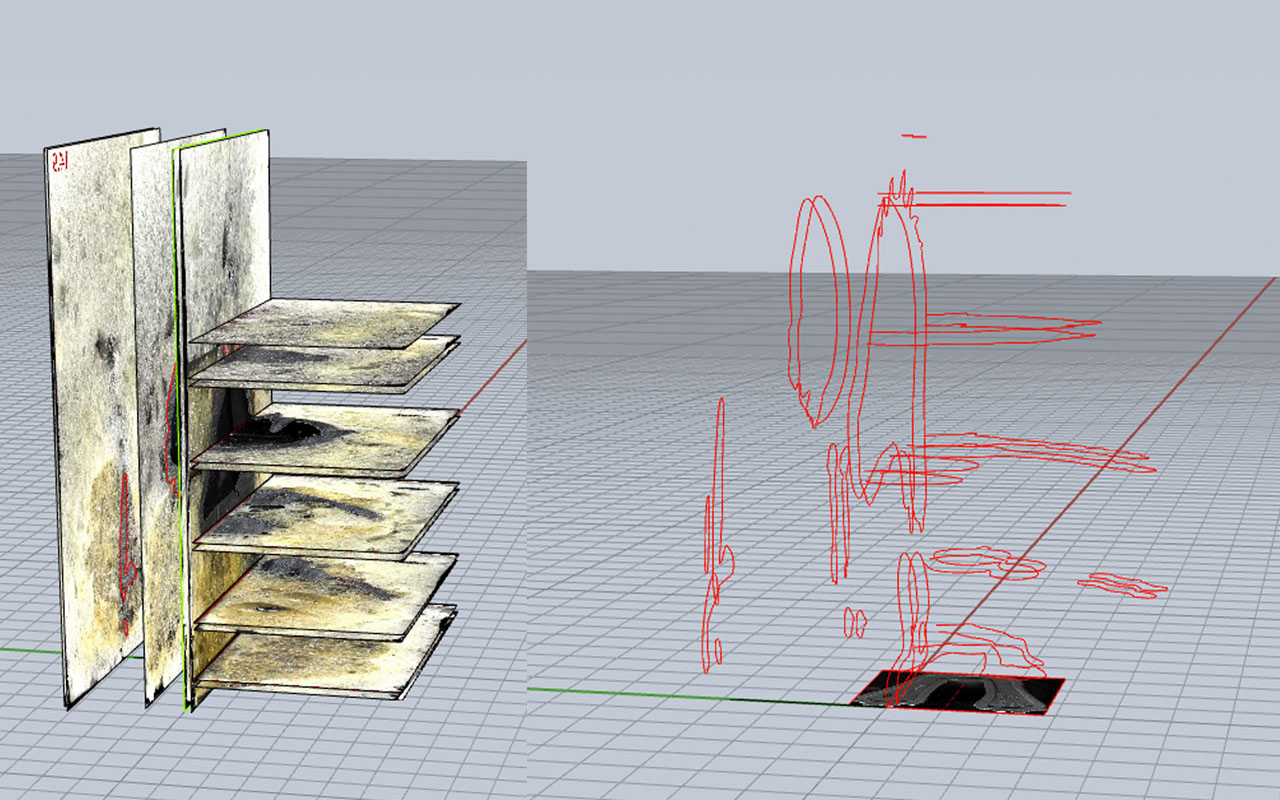
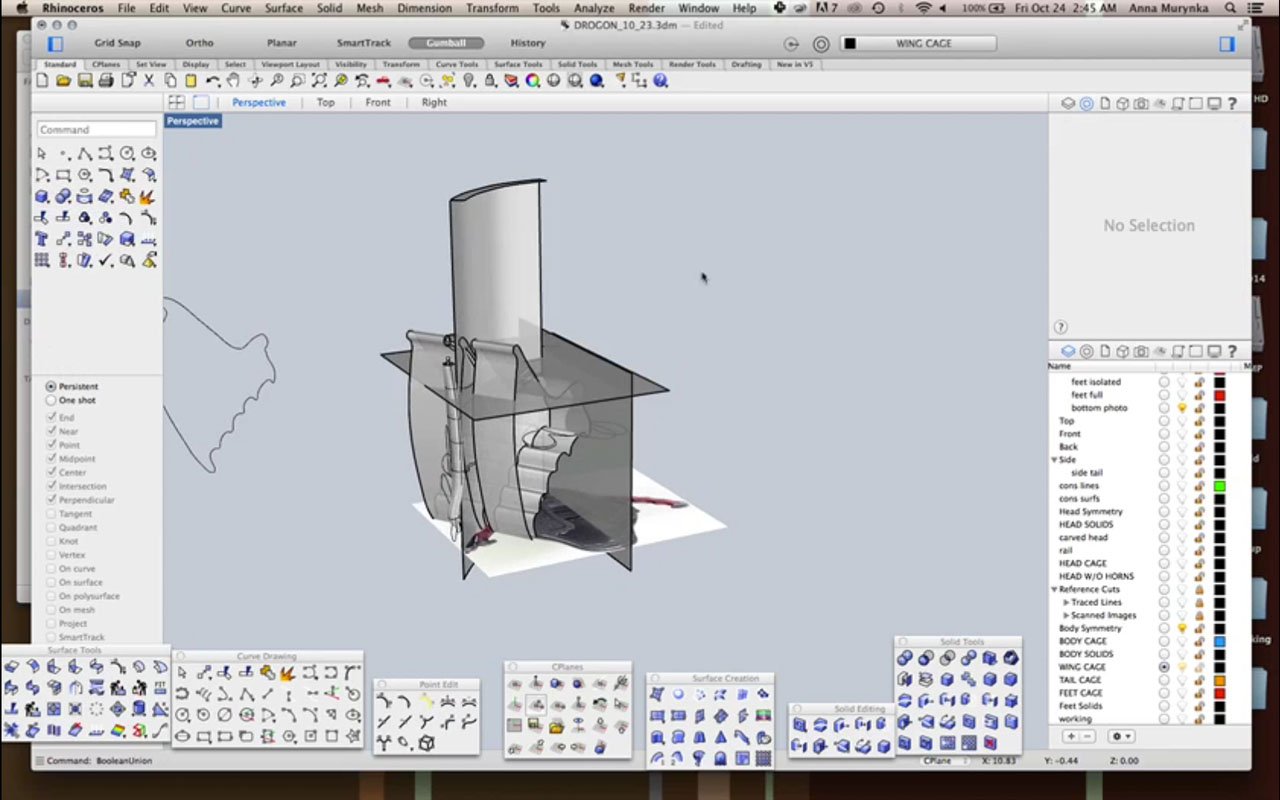
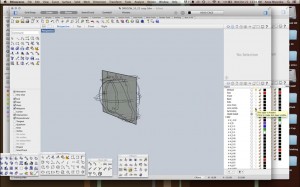
Liyang and I, having scanned and scaled and the physical section cuts, then went about importing them into 3D modeling space. Andy gave us the great tip that the saw mill cuts out ~2mm, so we used this in addition to our measurements to arrange the cut reference files.

g_modeling

We were careful to be neat with our layers, labeling, and organization.

1

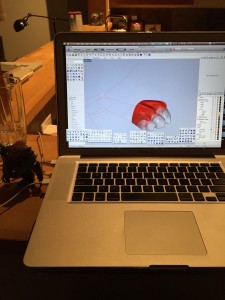
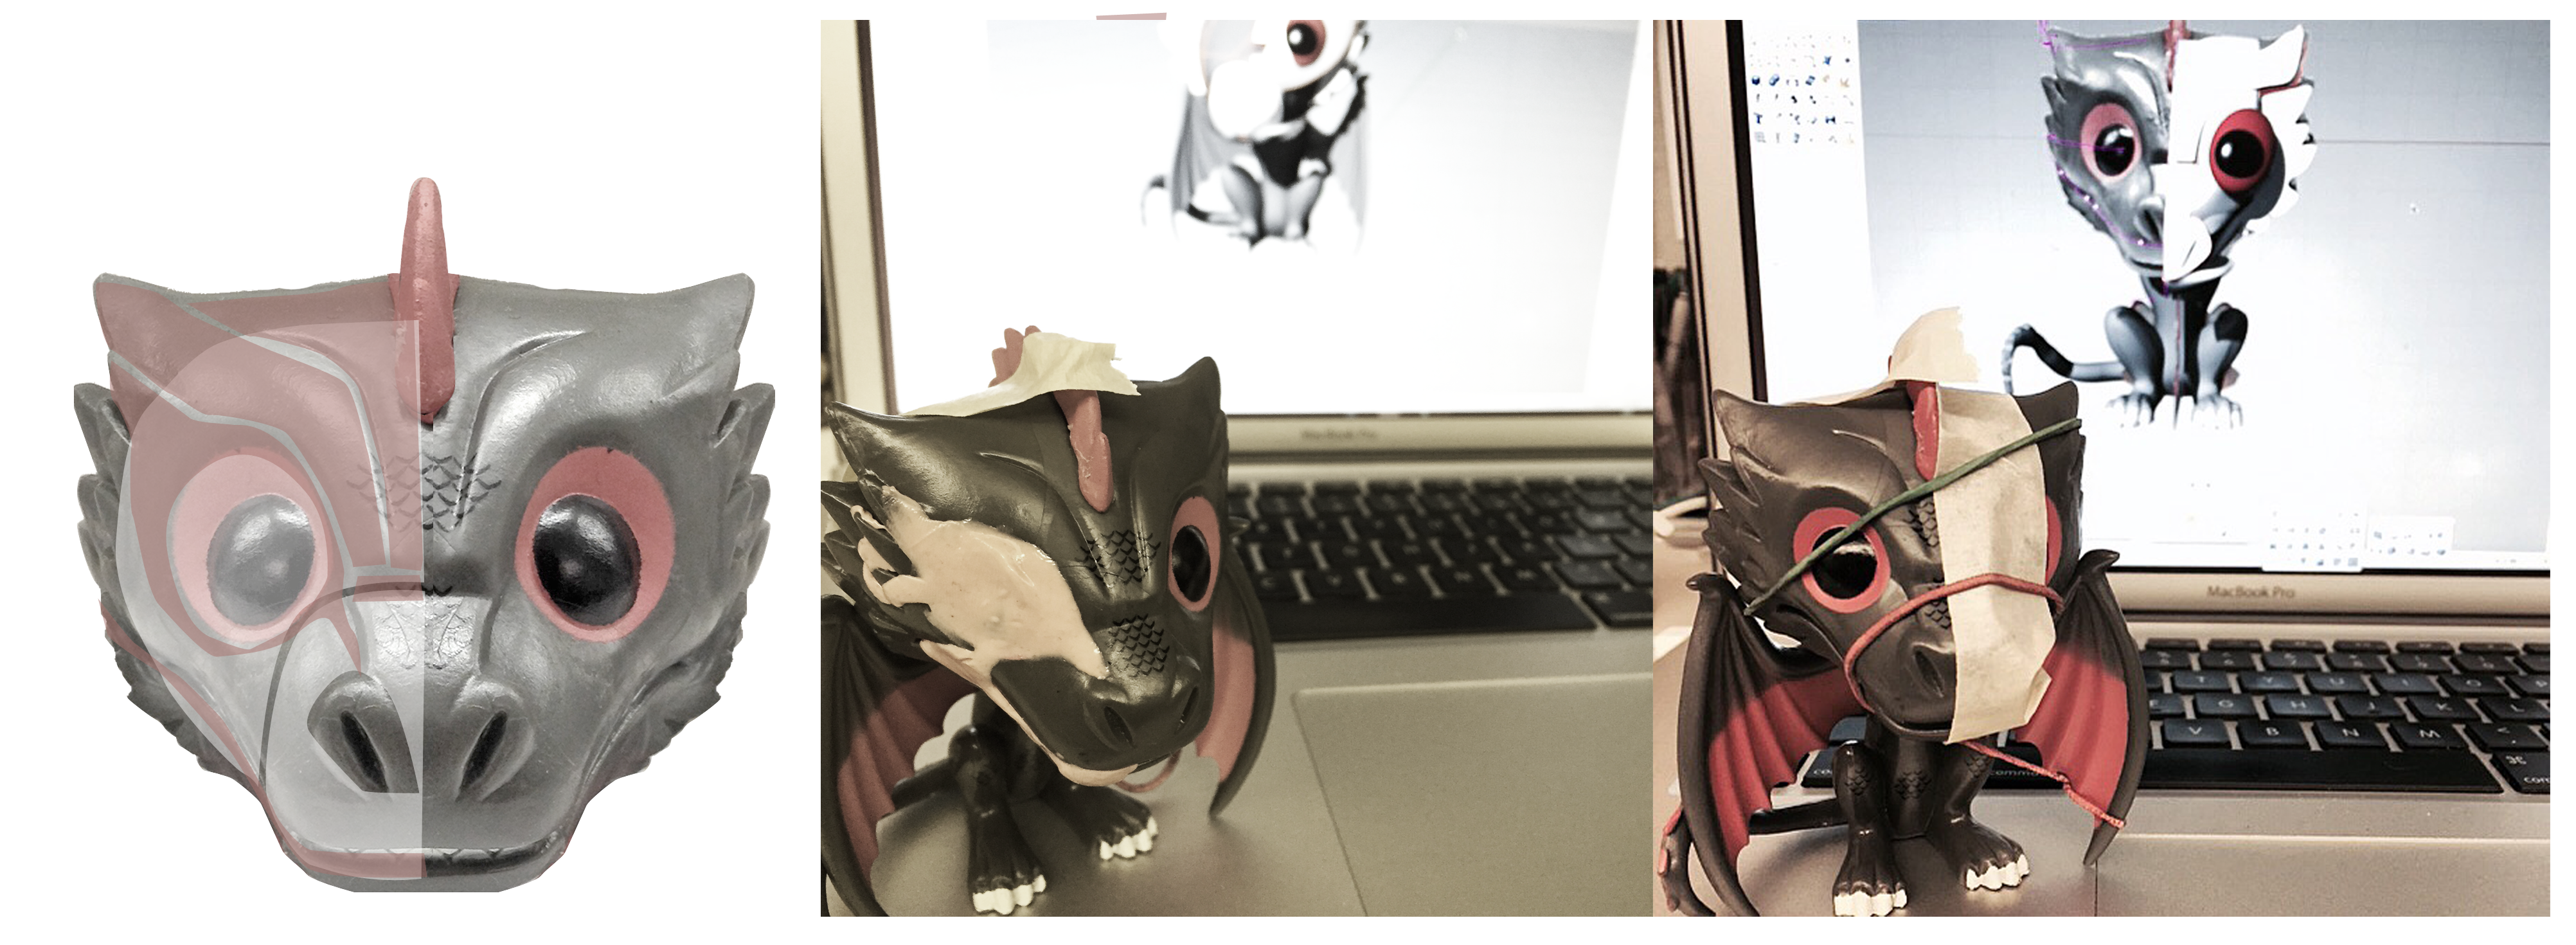
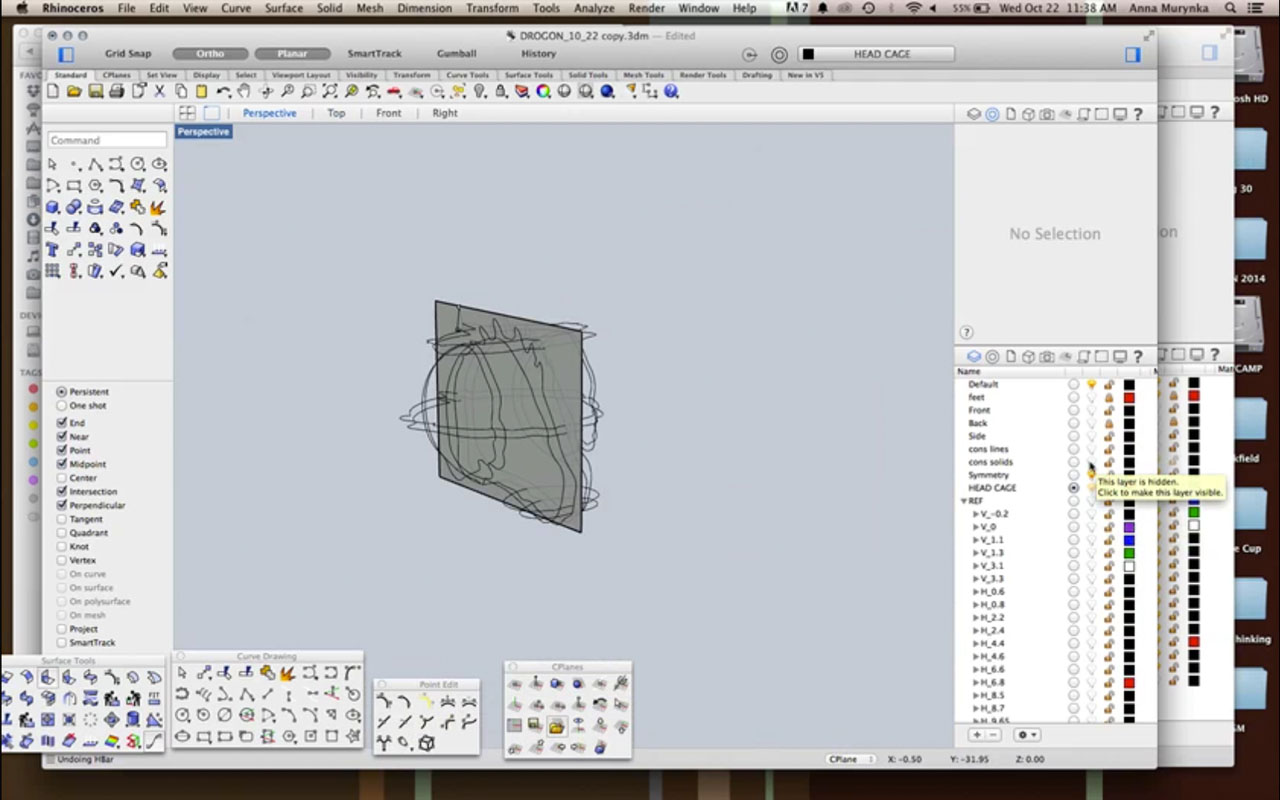
We then began to tackle the body in parts. For example, with the head, we found a plane of symmetry, mirrored the reference lines, and began to form a network of curves.

2

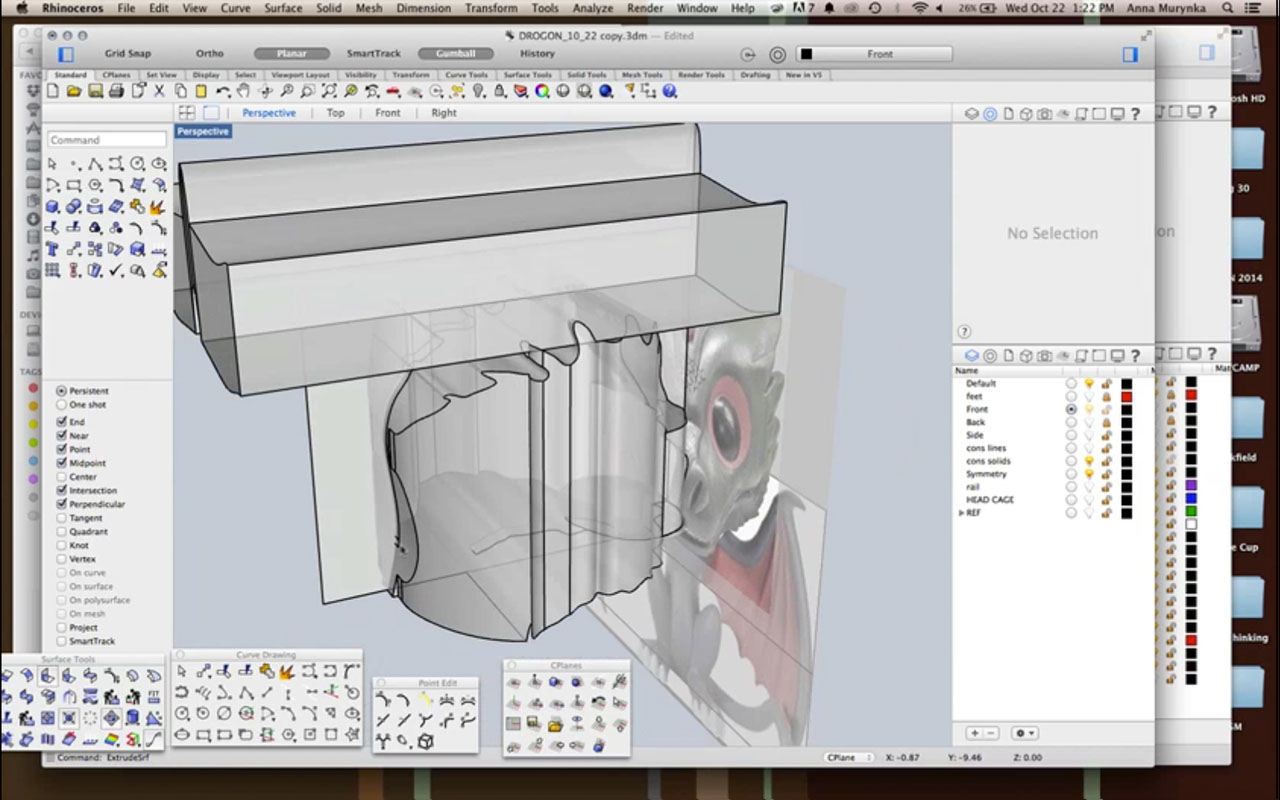
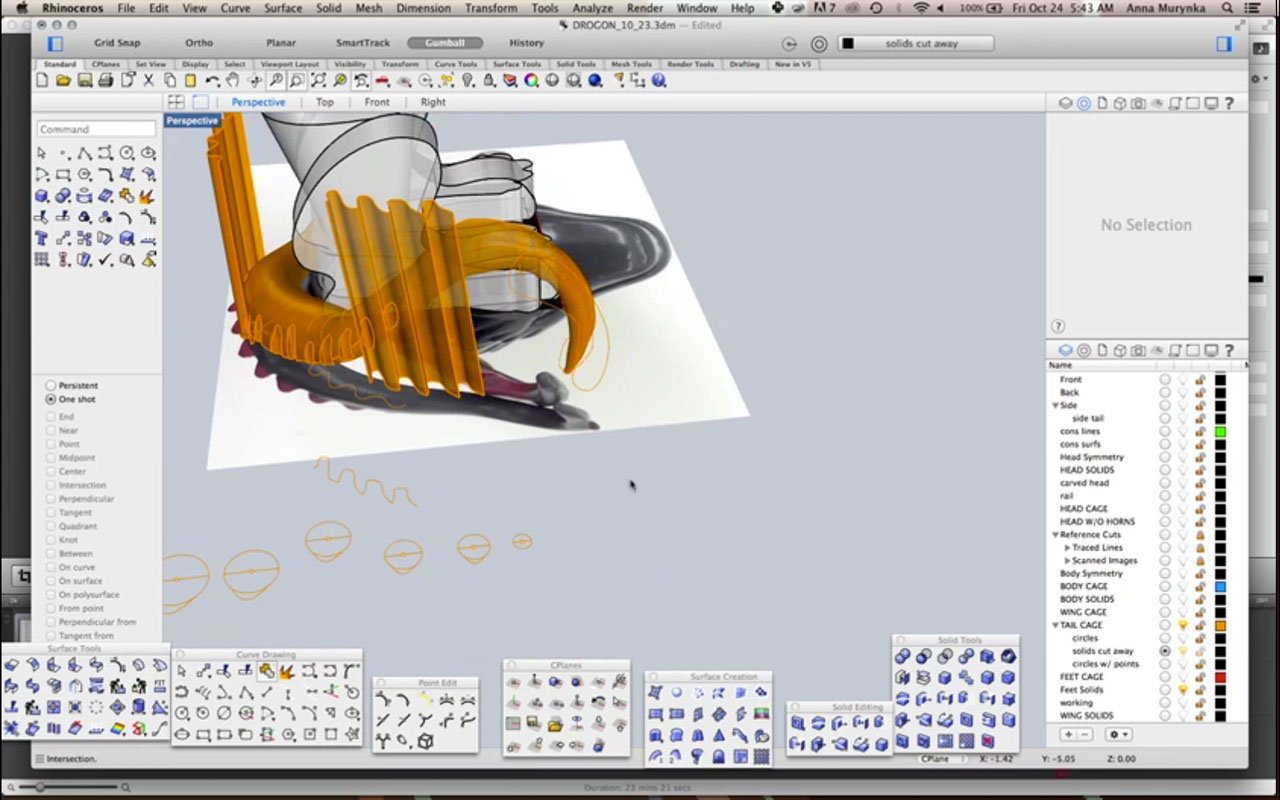
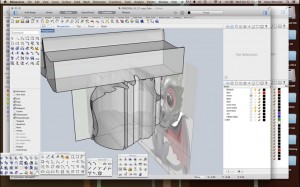
The next step is to work with solids; we experimented with different ways of forming solids and booleaning them.

3

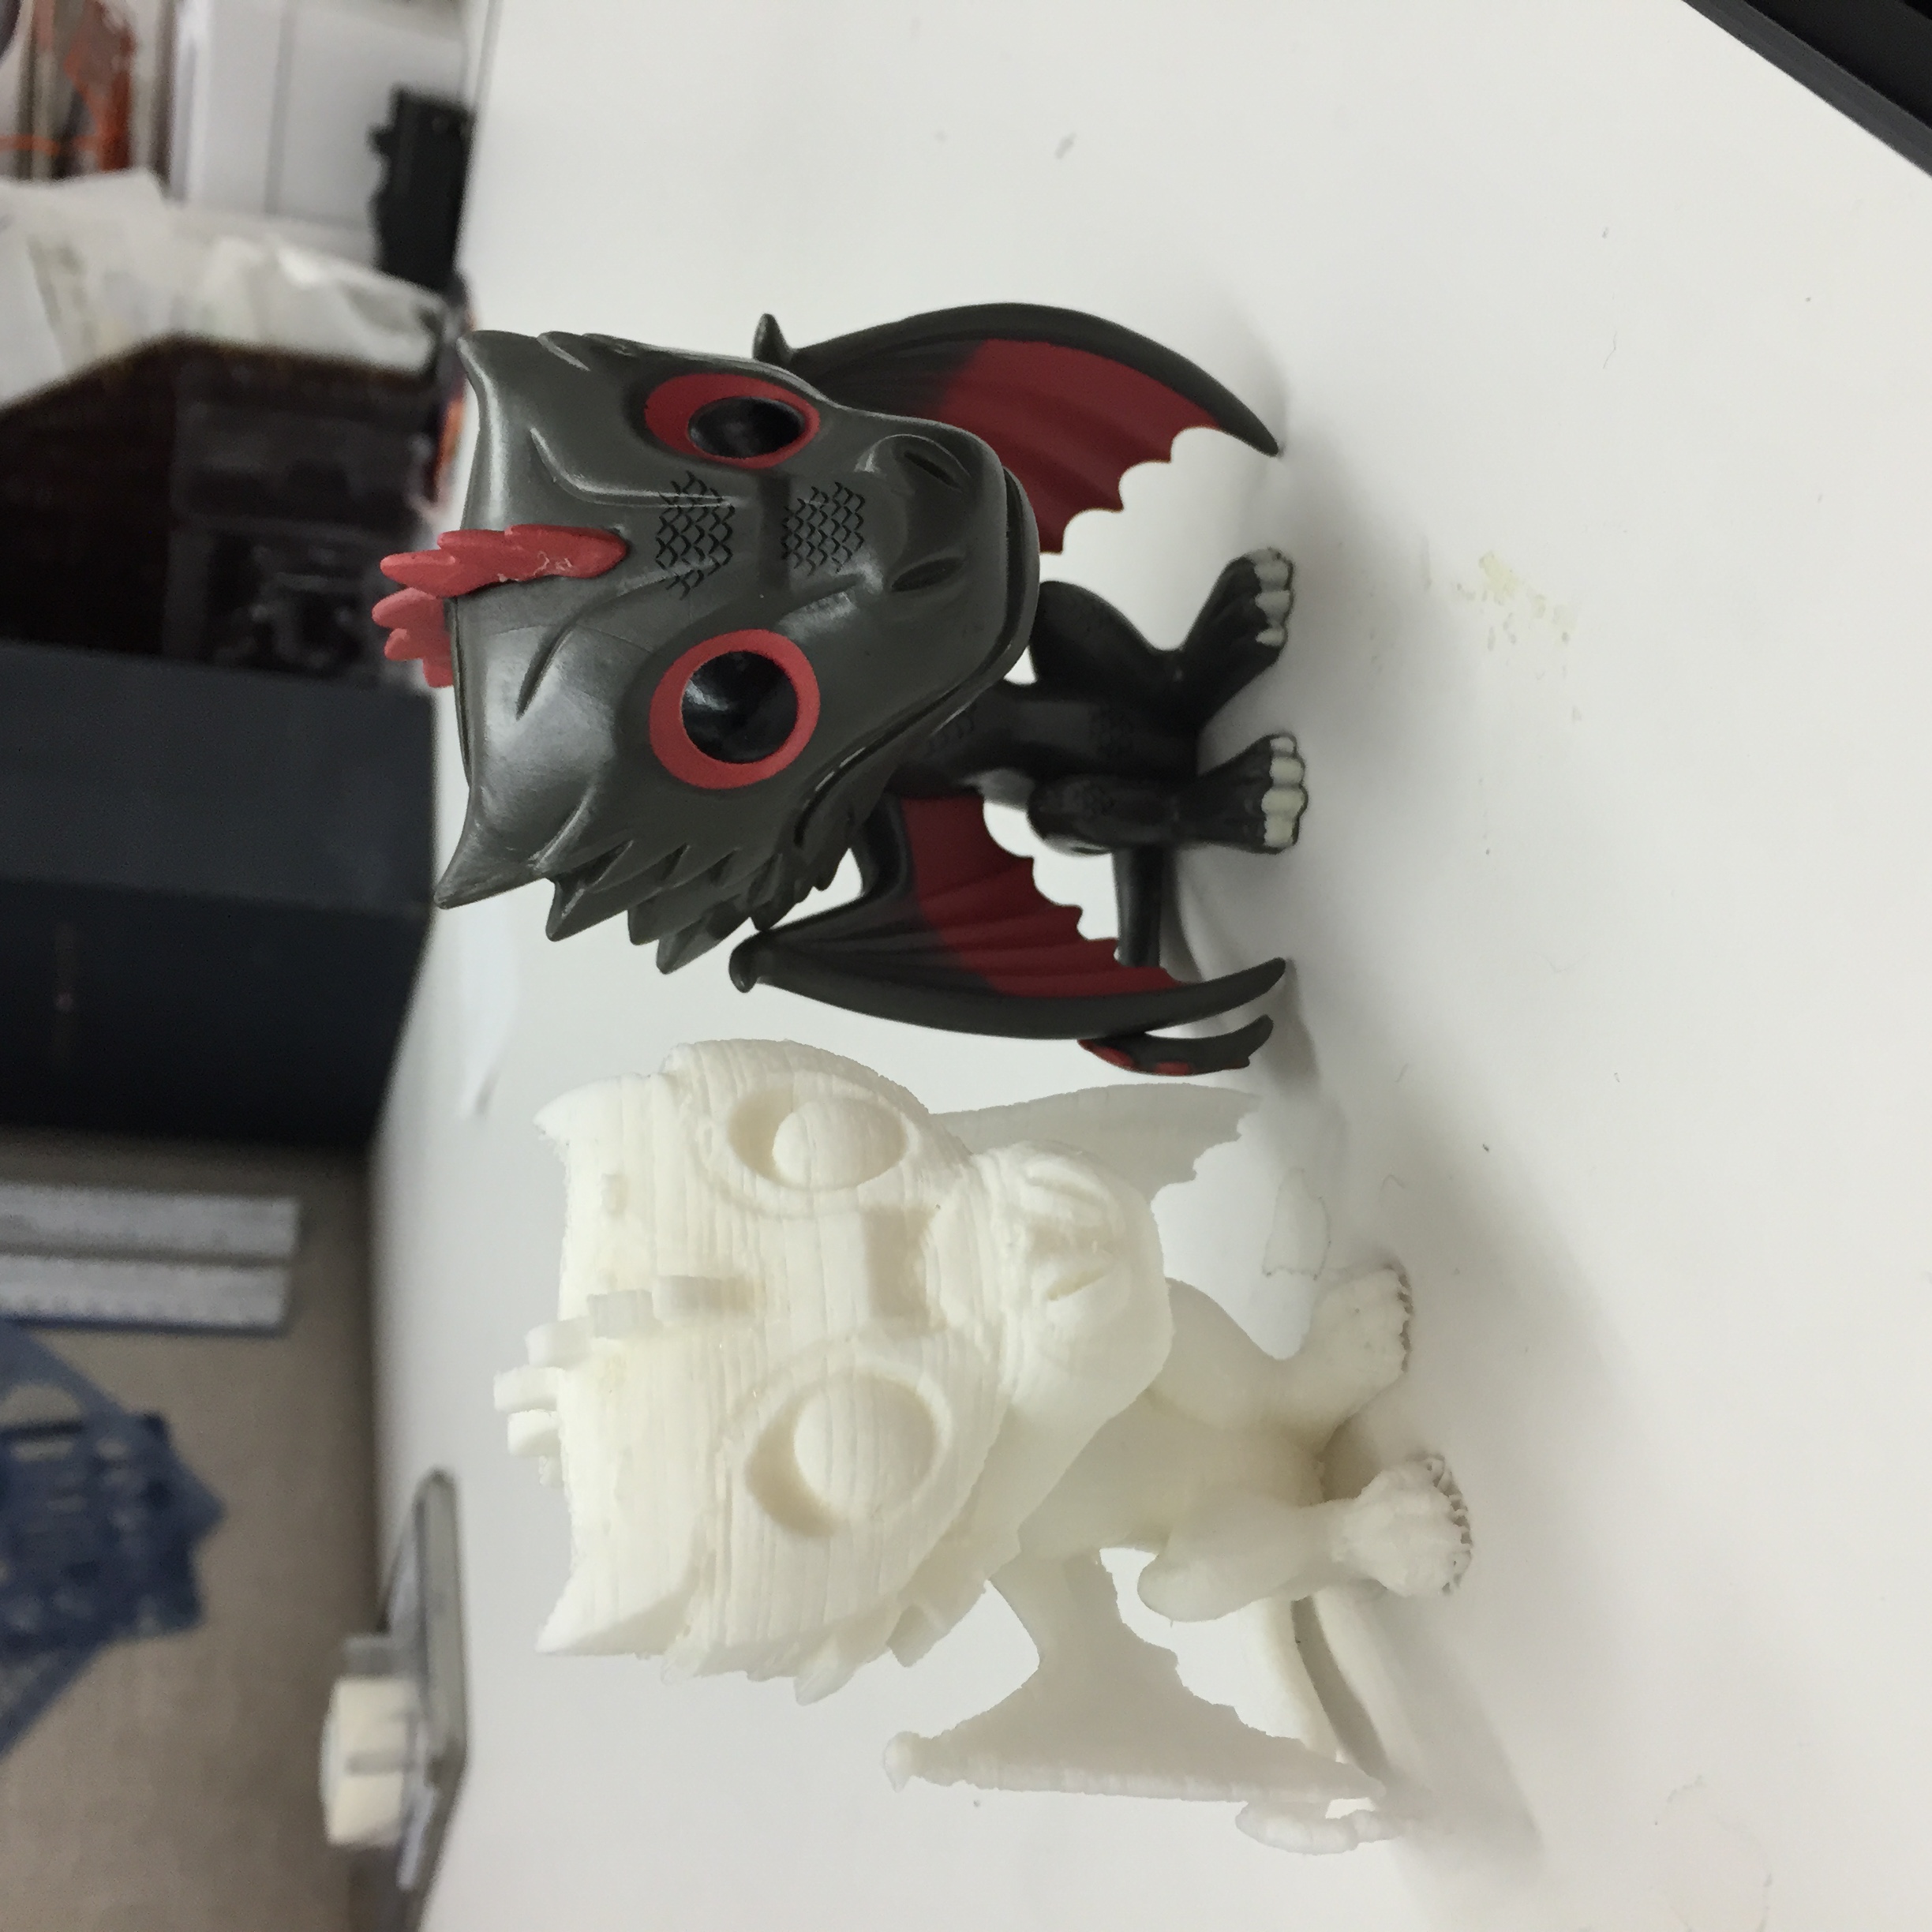
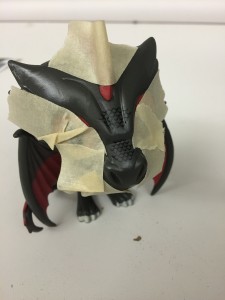
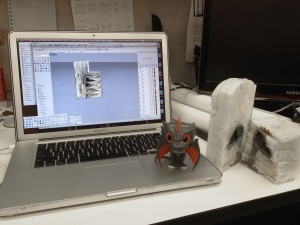
We found that our section cut references were not informative enough on their own, so we supplemented them with imported elevations. We also frequently referred to the physical toy, feeling it and examining it.

4

Other parts of the figure included the torso, feet/legs, wings, and tail.

5

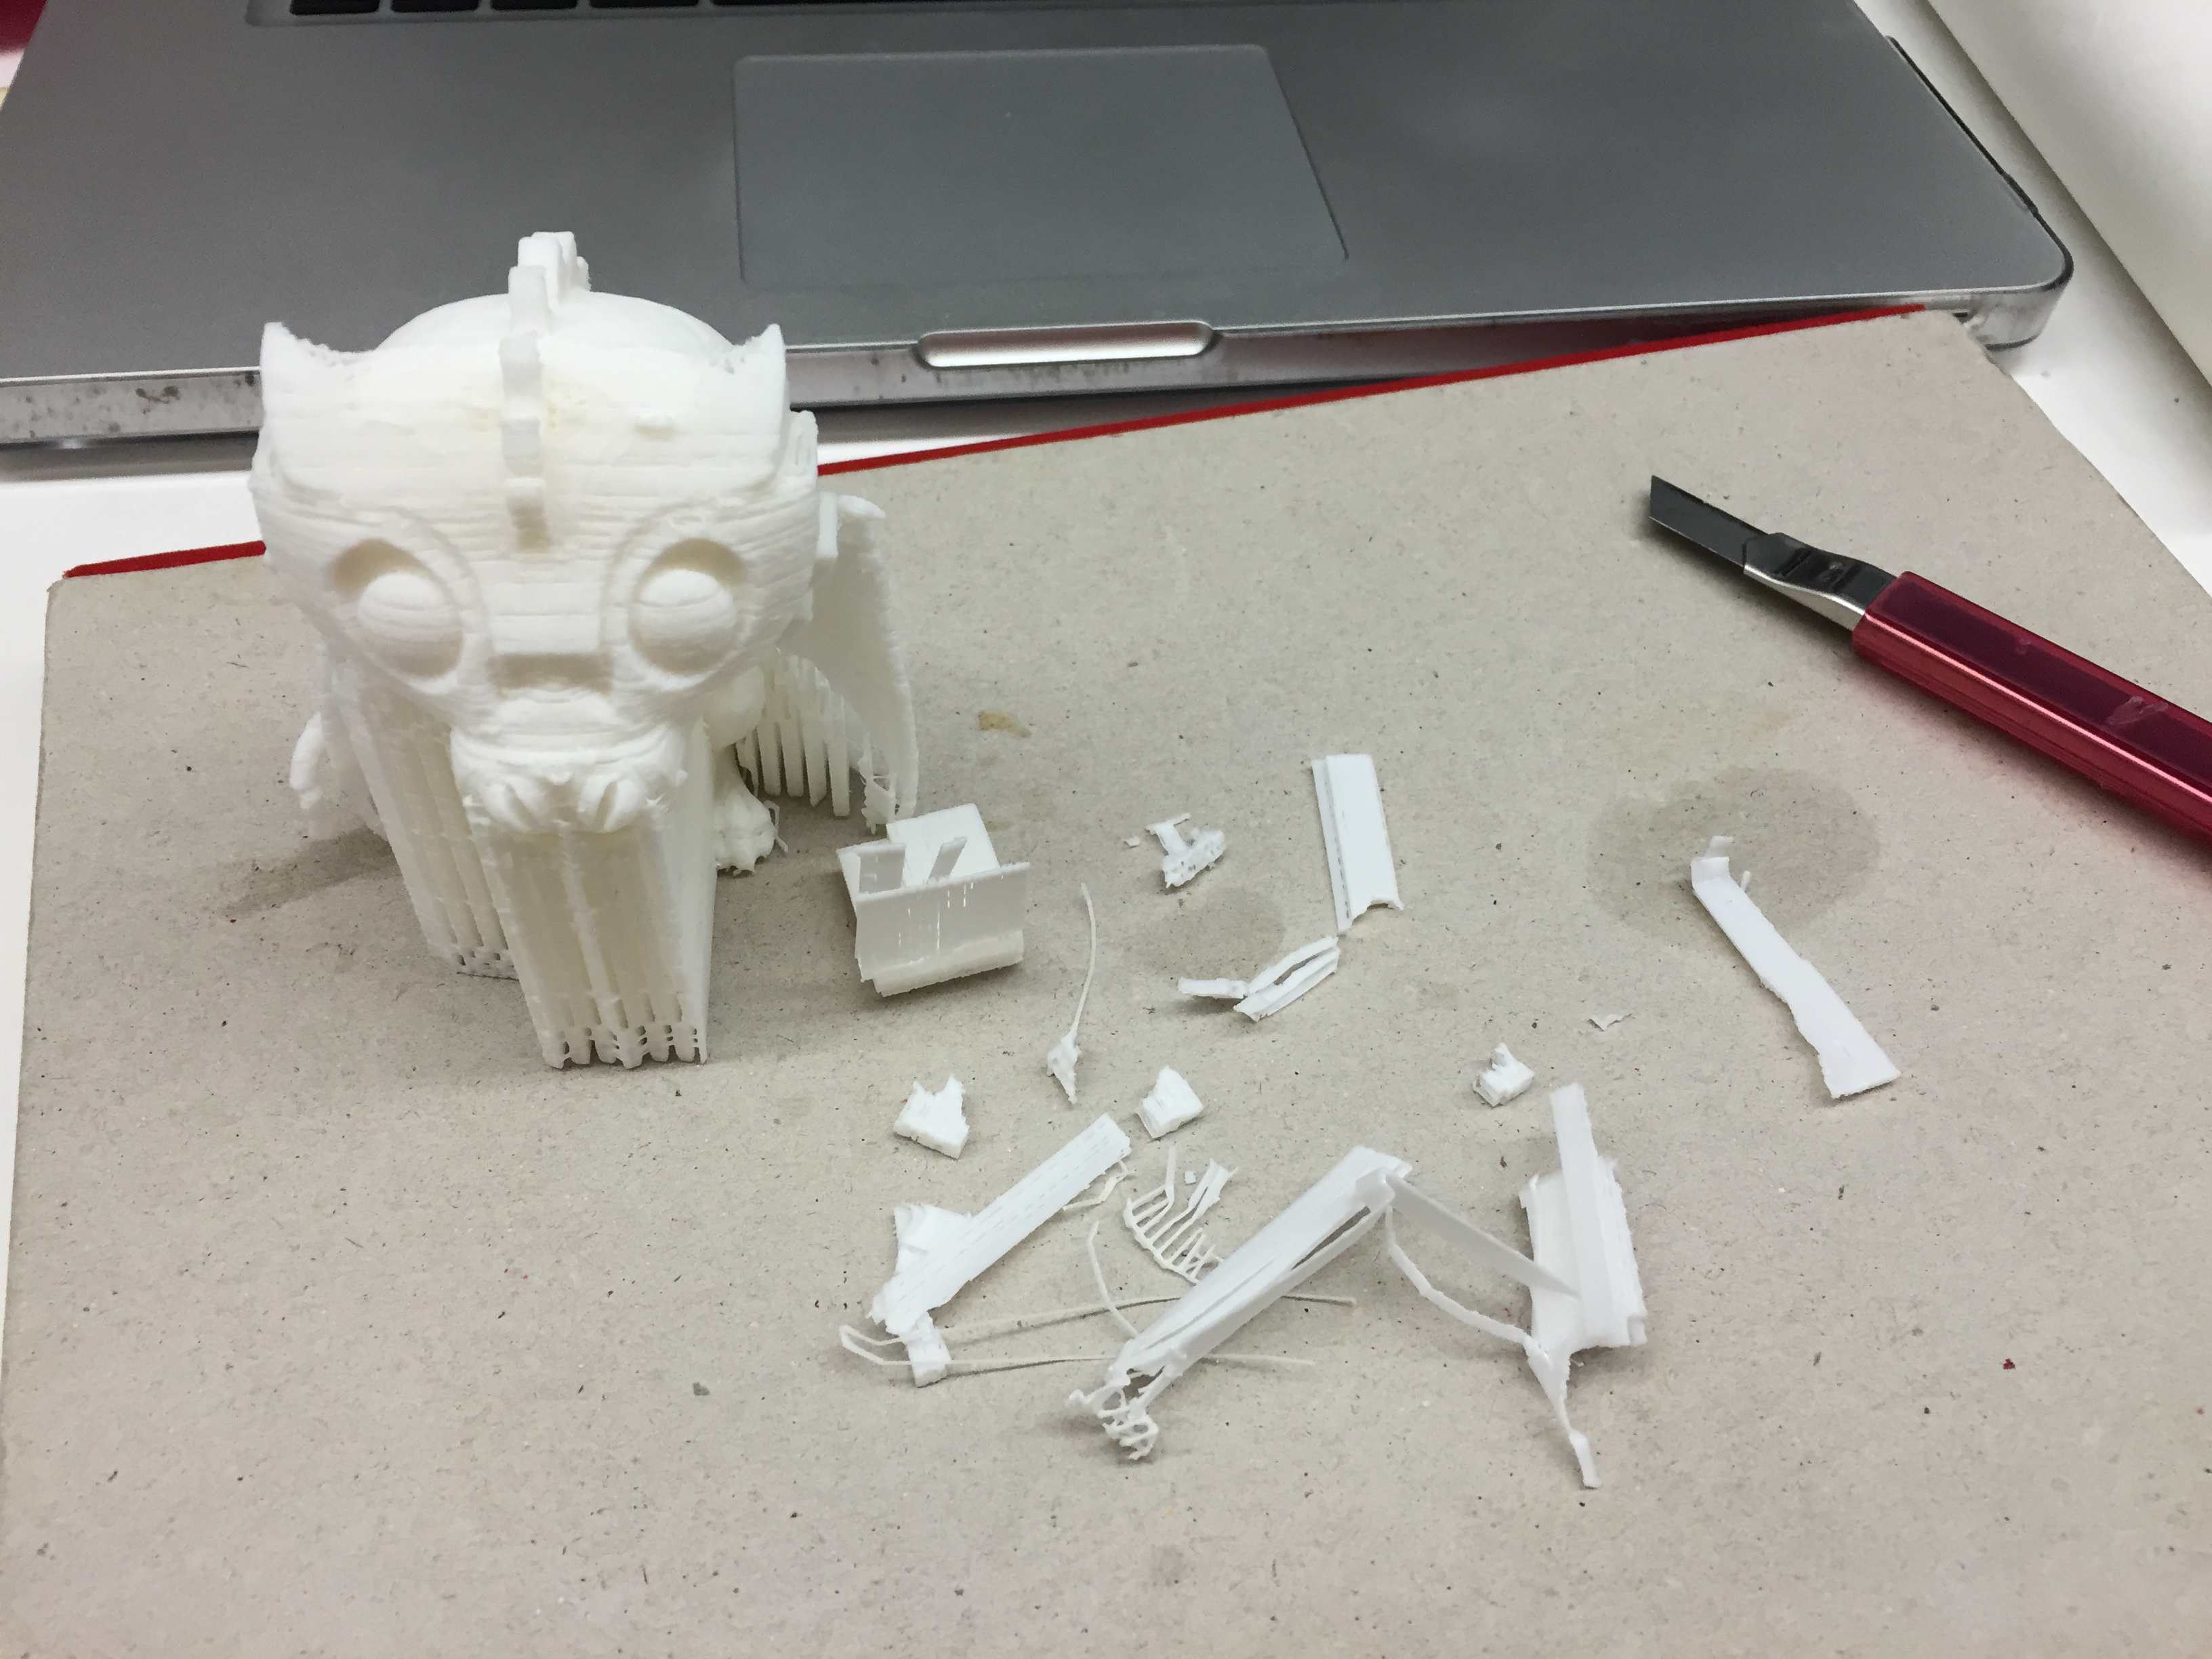
Some methods yielded convoluted results. This is definitely a process of trial and error.

6

Many techniques used in combination lead to the best accuracy and intricacy.

7

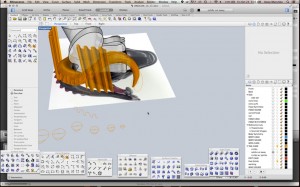
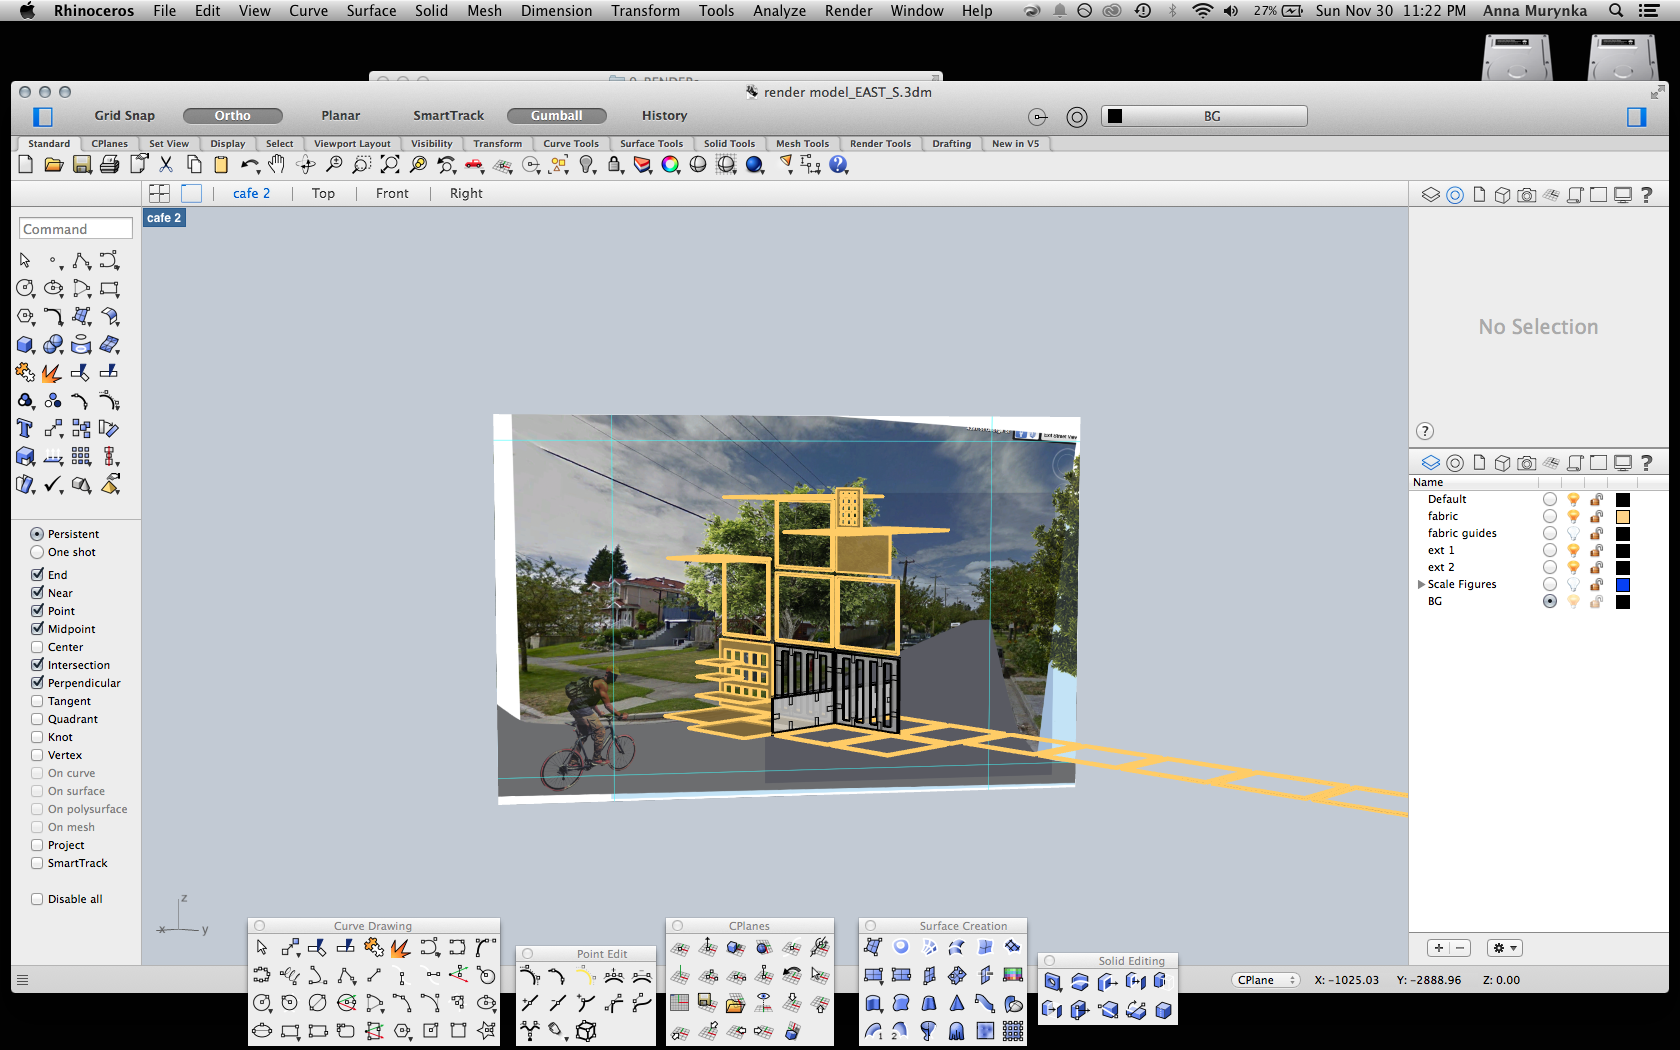
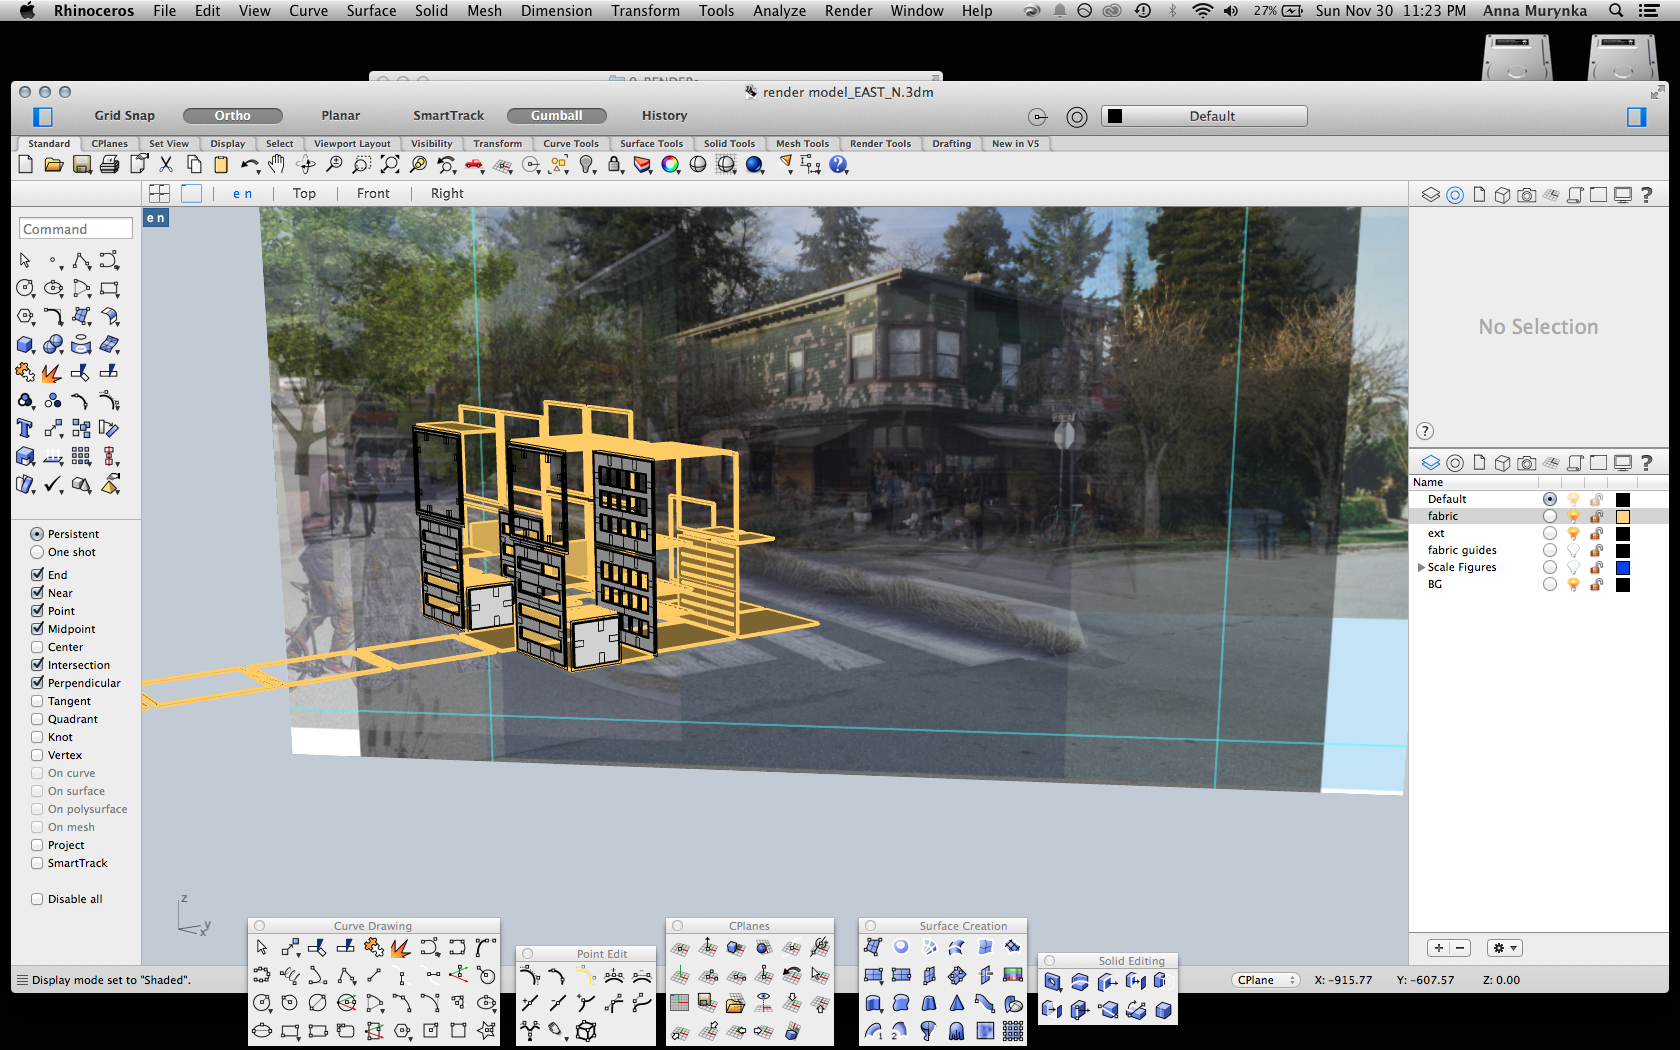
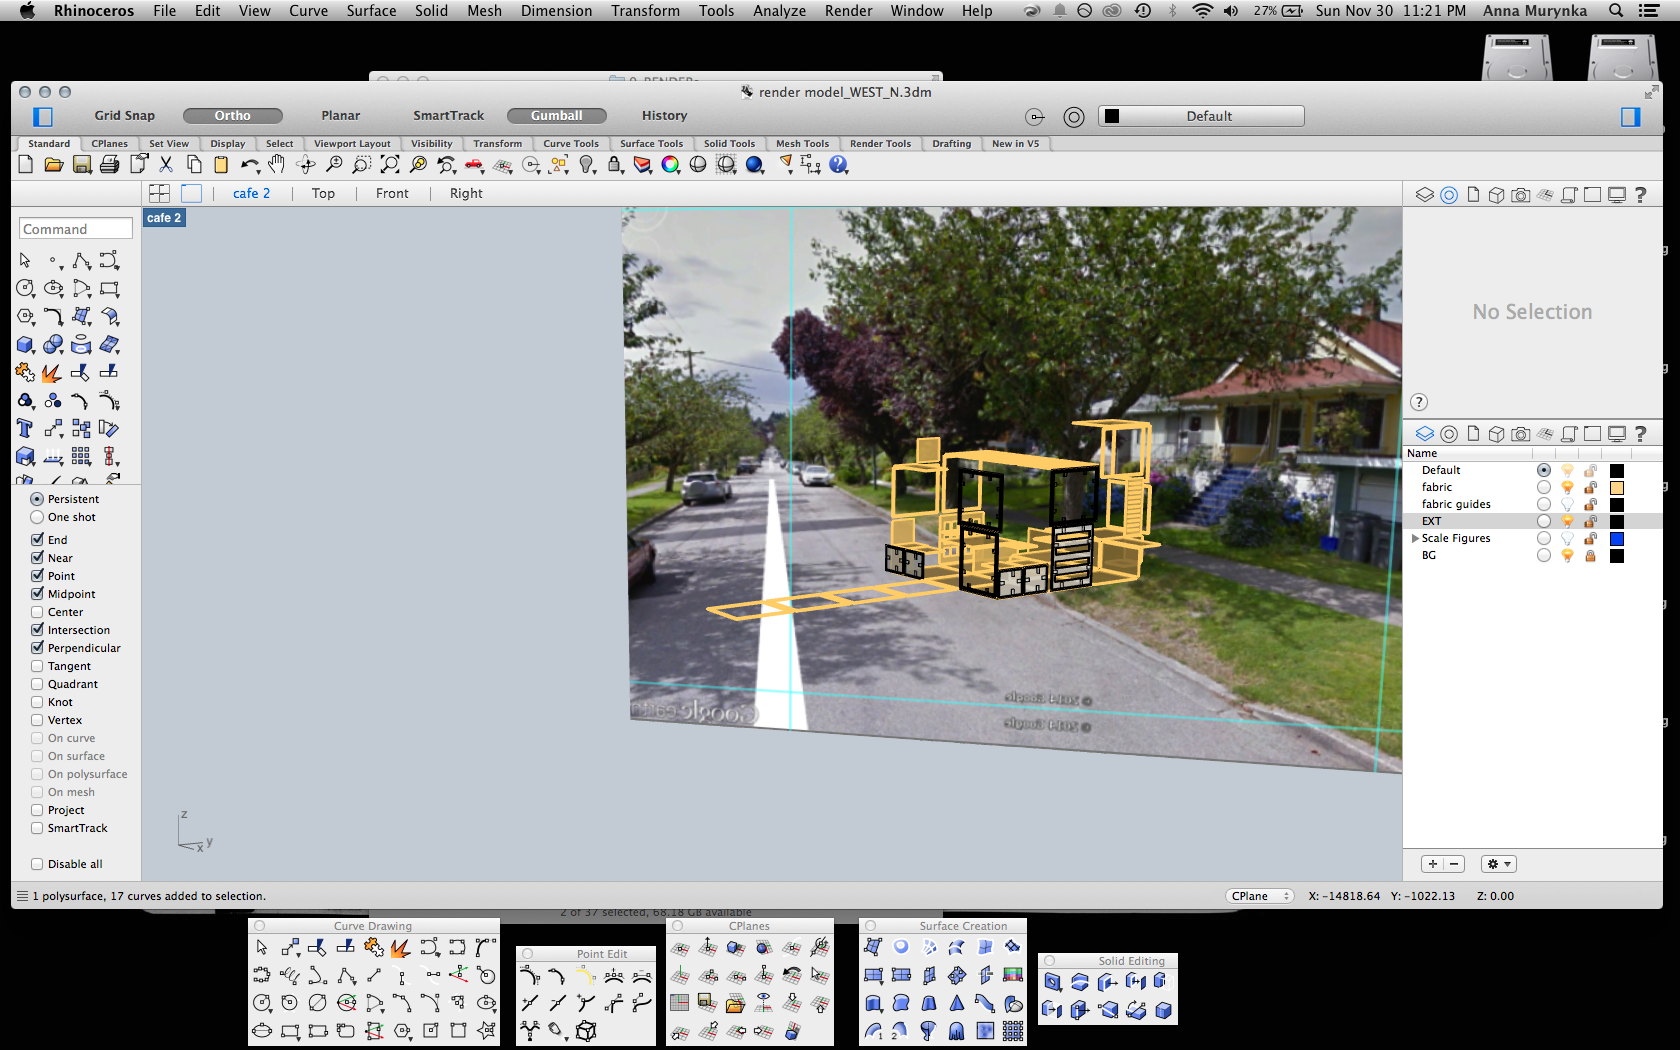
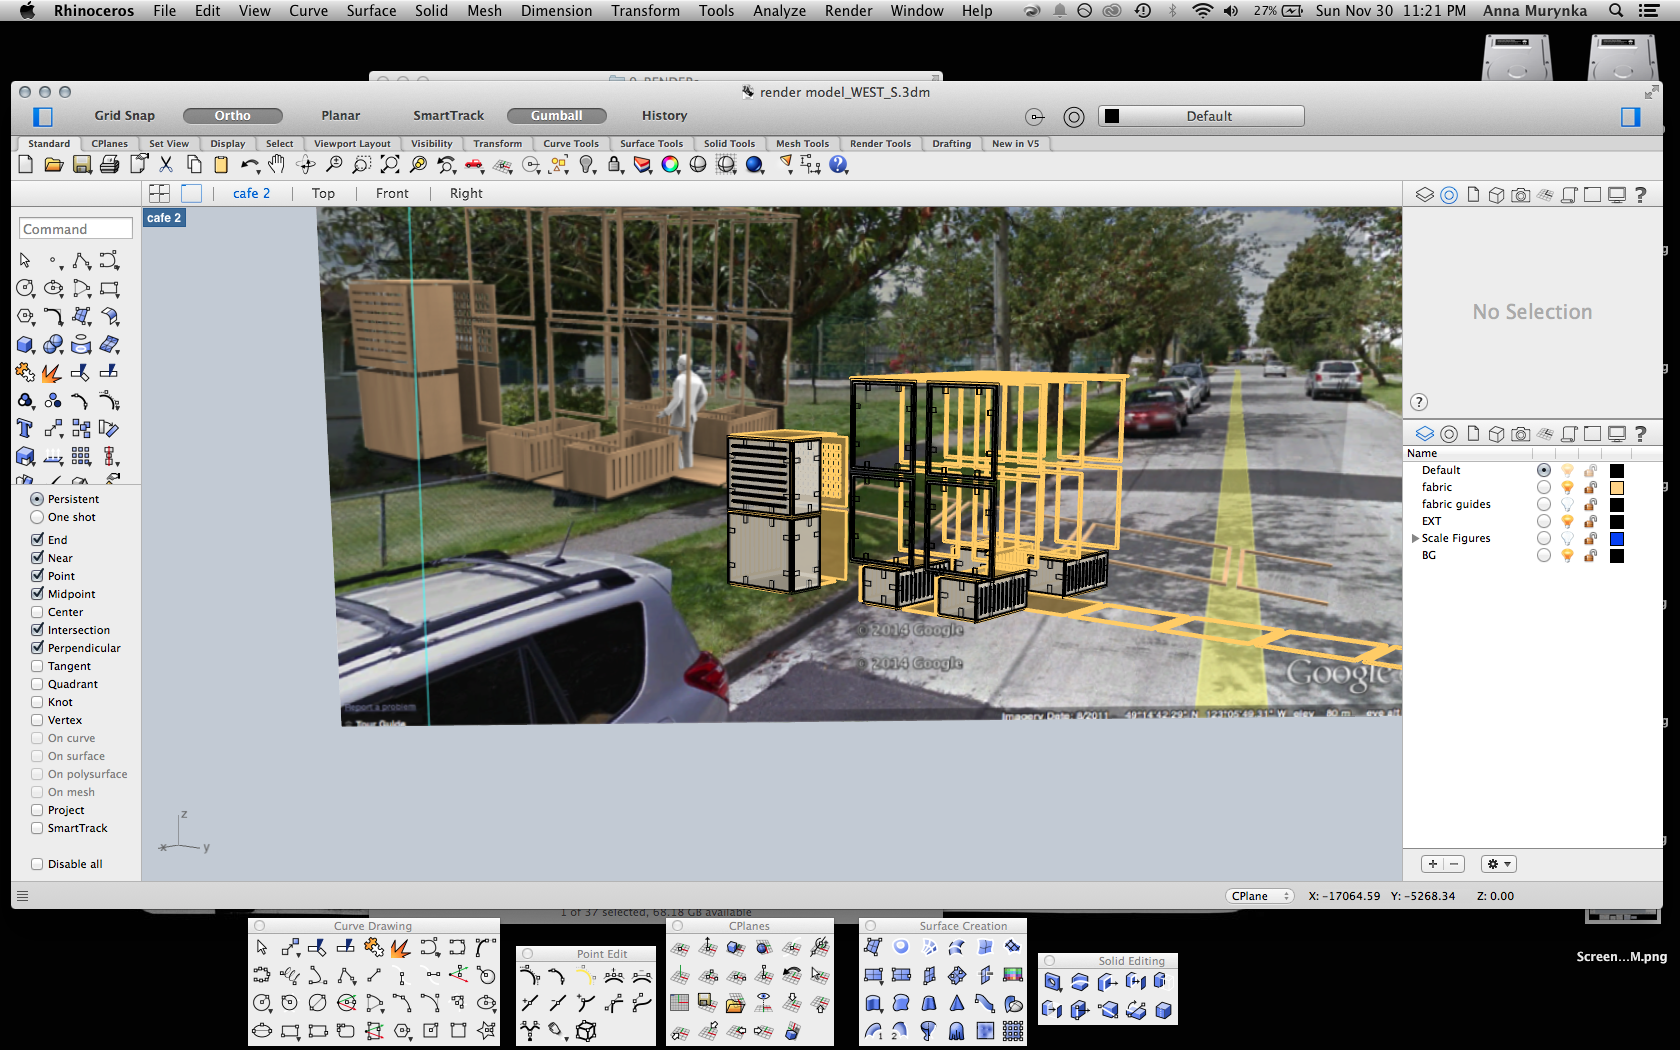
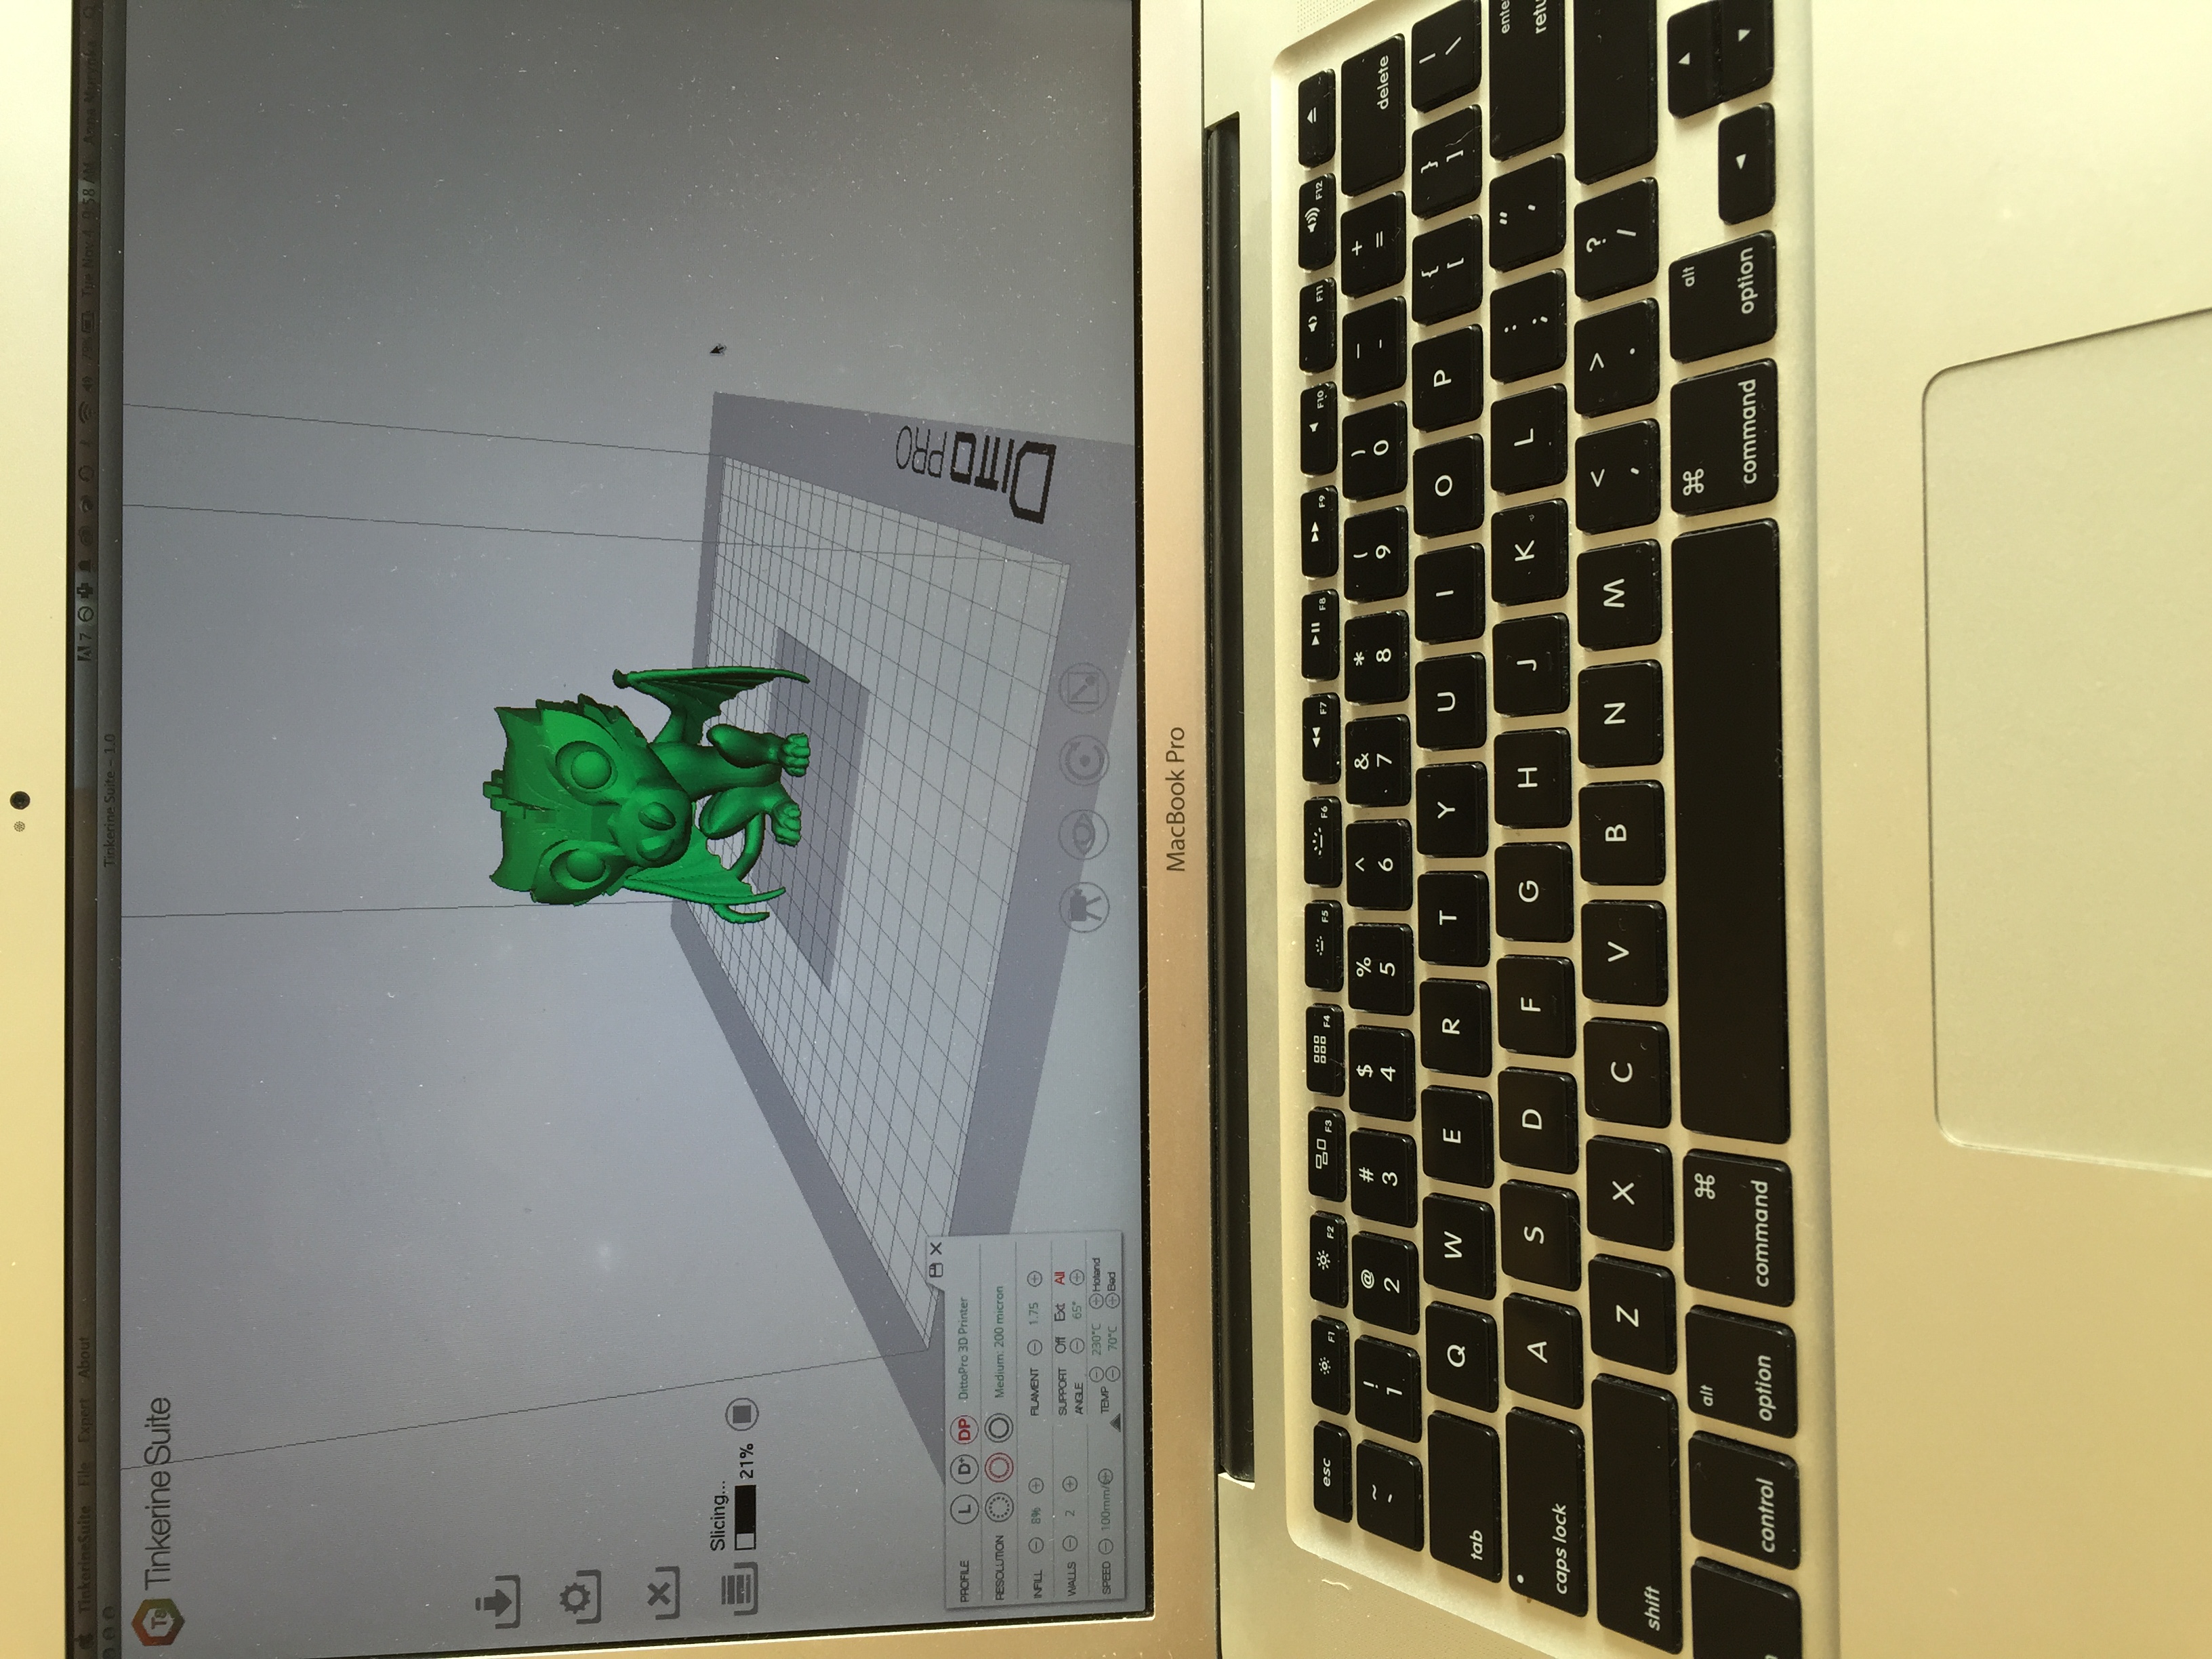
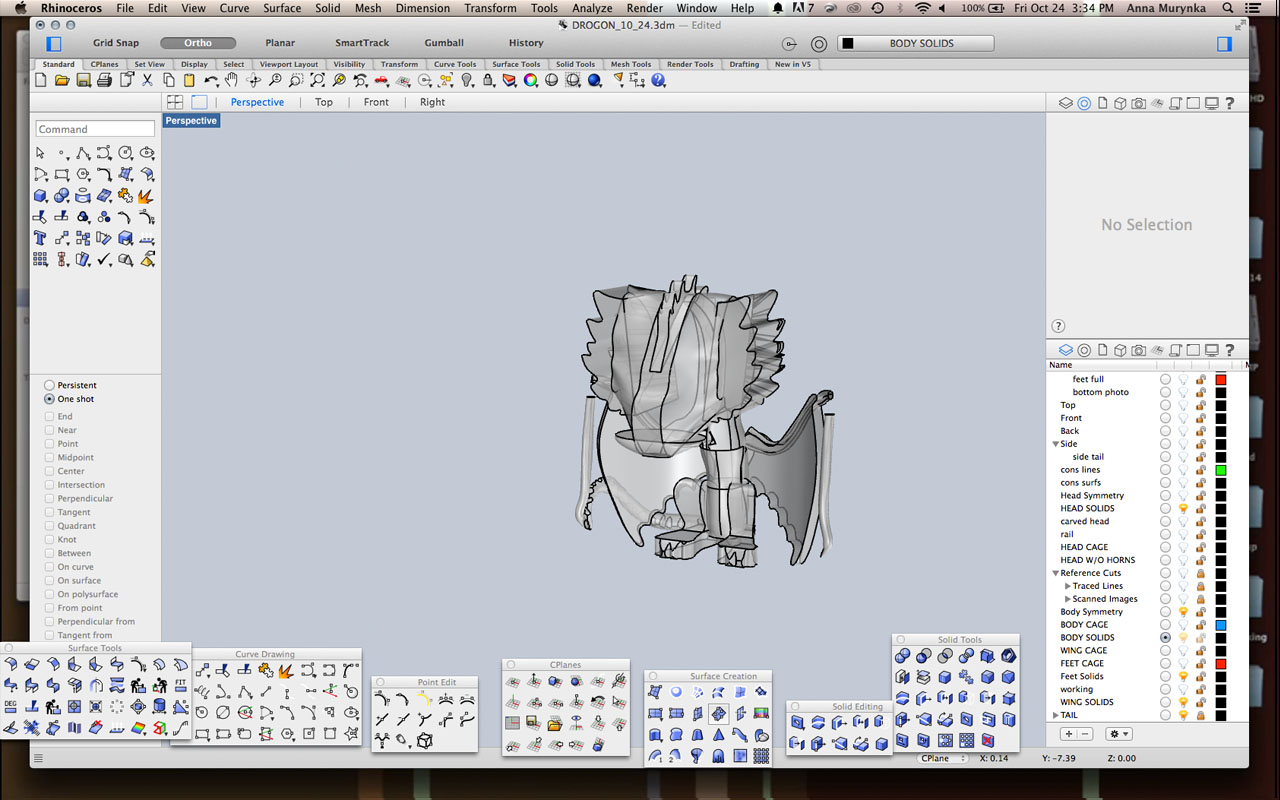
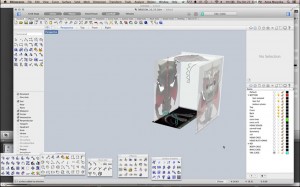
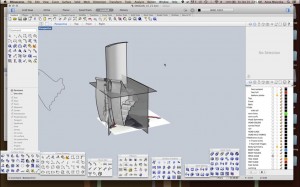
Here’s the screenshot of the current state of the model. Not there yet, but well on the way:

8