All posts by Tamara Bonnemaison

Editing and compositing renders in Photoshop


Below, you can see the basic steps that I took to transform the render right out of Rhino into my final product. I added people, plants, texturing on the cabinetry, and some extra lighting (seen as the white blobs that did not transfer well into GIF form).

undoctored-renderrender-photoshopped-stuff


Then I added a sky, and made many adjustment layers, primarily hue and saturation. Above is the render without adjustments, and below you can see much of the hue/sat taken out of parts of the render that I don’t want people to focus on.

Then I did all of the same for render number two, and that’s that!

render--hue-sat

final-render

Texturing Studio Project, Part 2

When I modeled my studio project scene, I wasn’t always thinking about the use of those modeled objects for my final render. I ended up with quite a few objects that needed to be split so that they could be textured properly. The houses and sheds were some of these – these are really just a background in my project, not important to my actual design. Nevertheless, I found I had to split the buildings from their roofs in order to apply any sort of convincing texture to them. Thankfully, this didn’t take long at all, and once I had textured one, I was able to match the texture for the others, since they are all exact duplicates of each other.


modeling for render 01

I ended up texturing my entire scene in Rhino, then rendering out for editing in photoshop. Rhino’s version of clownpass, material ID, ended up being invaluable for this step.  Here is what the scene looks like as a screenshot, and then actually rendered:

texturing-for-render

undoctored-render


Texturing studio project part 1

I decided to do my texturing and rendering through Rhino and v-Ray rather than Keyshot, for two reasons. One, I really wanted to learn v-Ray. Two, my computer couldn’t handle my scene in keyshot, so I really had no choice!

It ended up not feeling that difficult, although I clearly have much to learn. I found texturing with vismats pretty straight forward, as these are already set up to wrap and tile well. The downfall of the vismats is that I found they gave you a pretty generic texture, tiled evenly over the entire object. For the focal part of my project, the Big Red Anaerobic Digester, I wanted a little more detail, so I created my own texture from an image of a weathered steel panel. This detail took a while, but gave the texture more definition. See below for the bitmap that I used for the colour and bumpmap, compared to the final render of my tank.

brad-texturing

Modelling studio project

Modelling in Rhino became a big part of my final studio project. I modeled as a design tool – to quickly test out spatial ideas – and produced many virtual iterations of my project. The Rhino model then became the basis of many final drawings, including plans and sections, diagrams, vignettes, and of course my final renders.  Below is a screen shot of my final design, as viewed in Rhino shaded mode.

modeling-for-render

Modelling this scene was quite easy in comparison to modelling my Walter White figurine, although I did struggle quite a bit with figuring out how to model sidewalks, pathways etc. that conformed to the sloping topography. I ended up first making my topography as a solid object, then projecting the lines from my paths and sidewalks down onto it. I then used those lines to split the topography, so that the sidewalks and paved areas were separate objects, but still had the same contours as the ground topography.

3-dPrinting

It was finally time to print the figure on our brand new Tinkerine 3-D printers. Unfortunately, I am not thrilled with the results. The clear material feels cheap, and the support material left rough edges that cannot be removed without damaging the figure. I plan to print again using the powder printer, and hope to get better results.

One thing that I will do differently is orient the glasses so that the front of the frames are face down on the ground plane. This should minimize the amount of support material that they need. As you can see, the way that I oriented them in my first attempt resulted in them being completely encased in support material.

10-31-2014-screenshot-01

10-31-2014-screenshot-02

Putting the pieces together


Once I had all of the individual parts of my figure made, it was time to put them together. The commands I used the most for this were join, boolean and blend surface. Below, you can see one of the ‘locks’ of hair being blended to the rest of the hair. I first had to split a hole into the main hair by drawing a curve, projecting it onto the hair and using the split command.

10-23-snapshot-01

Another command that came in useful for the final joining was match surface. I only modeled half of most of my figure, and when it came time to mirror and join the two halves of the torso and head, there was a visible seam running down the middle. Matchsrf made short work of smoothing out the seam. The two halves were then joined.

10-23-snapshot-02

Modeling – loft, box edits, cylinders and more

This week I took a first stab at modeling. I had my curves from the scanned Walter White segments, plus images of front, back, and side to work with.

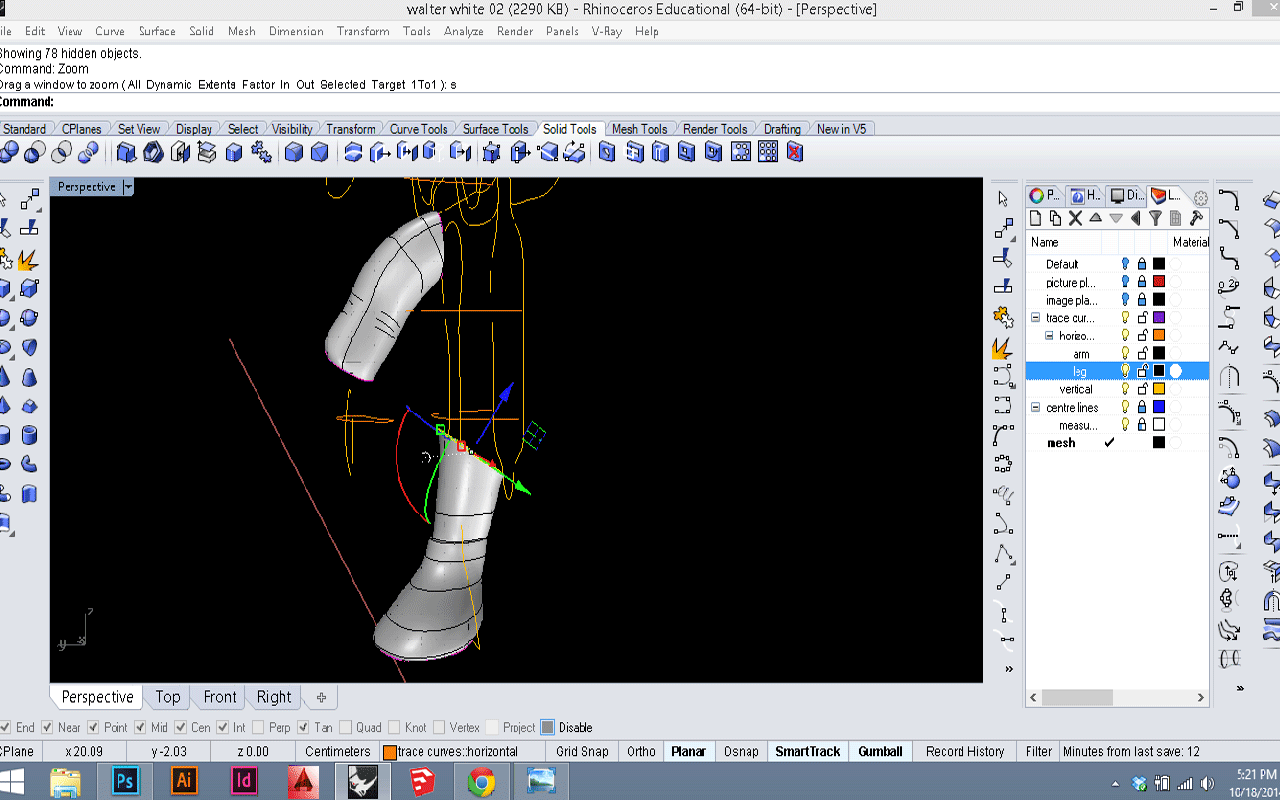
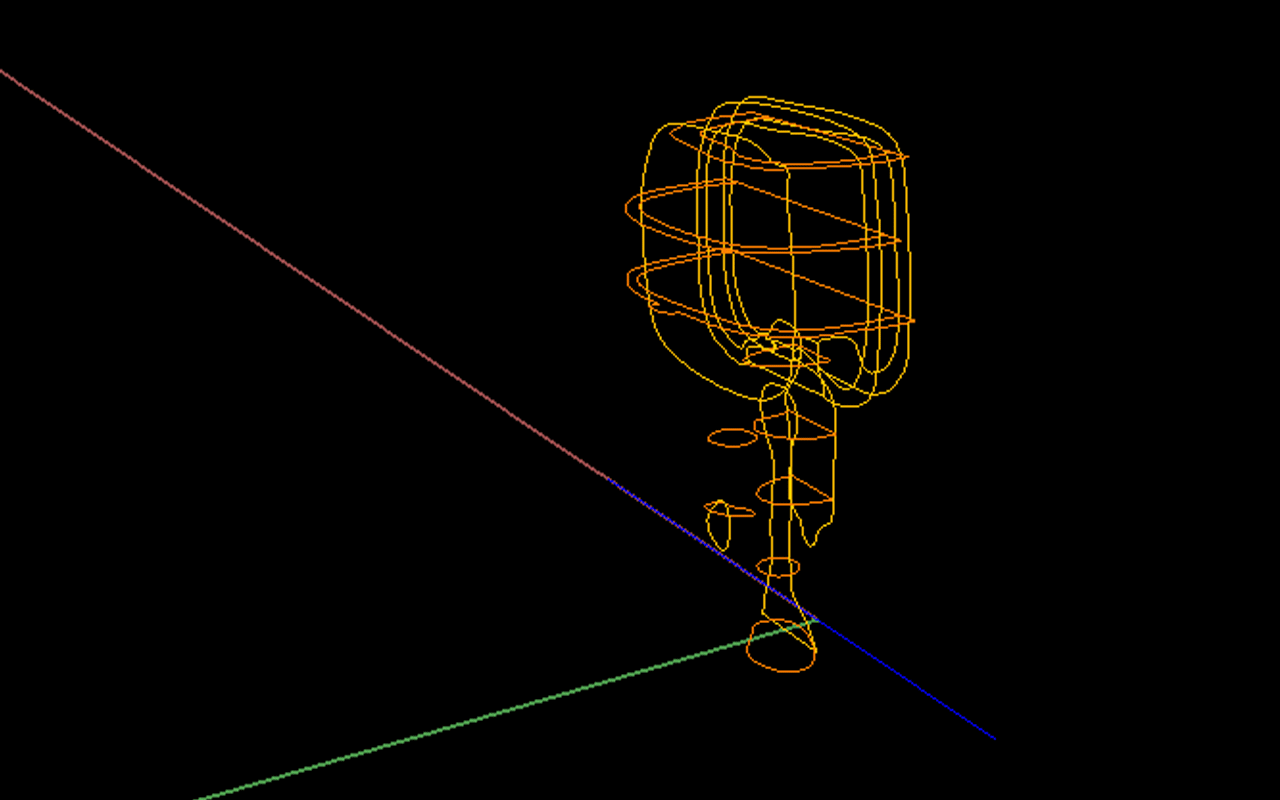
My first attempt was to use the curves I had already drawn, plus any extras I thought would be necessary, and loft them into a surface. I spent a full day modeling a leg and arm this way, and although I eventually got the leg right, I never did manage to get the arm looking good. Below you can see the curves in black.

10-18-screenshot01I

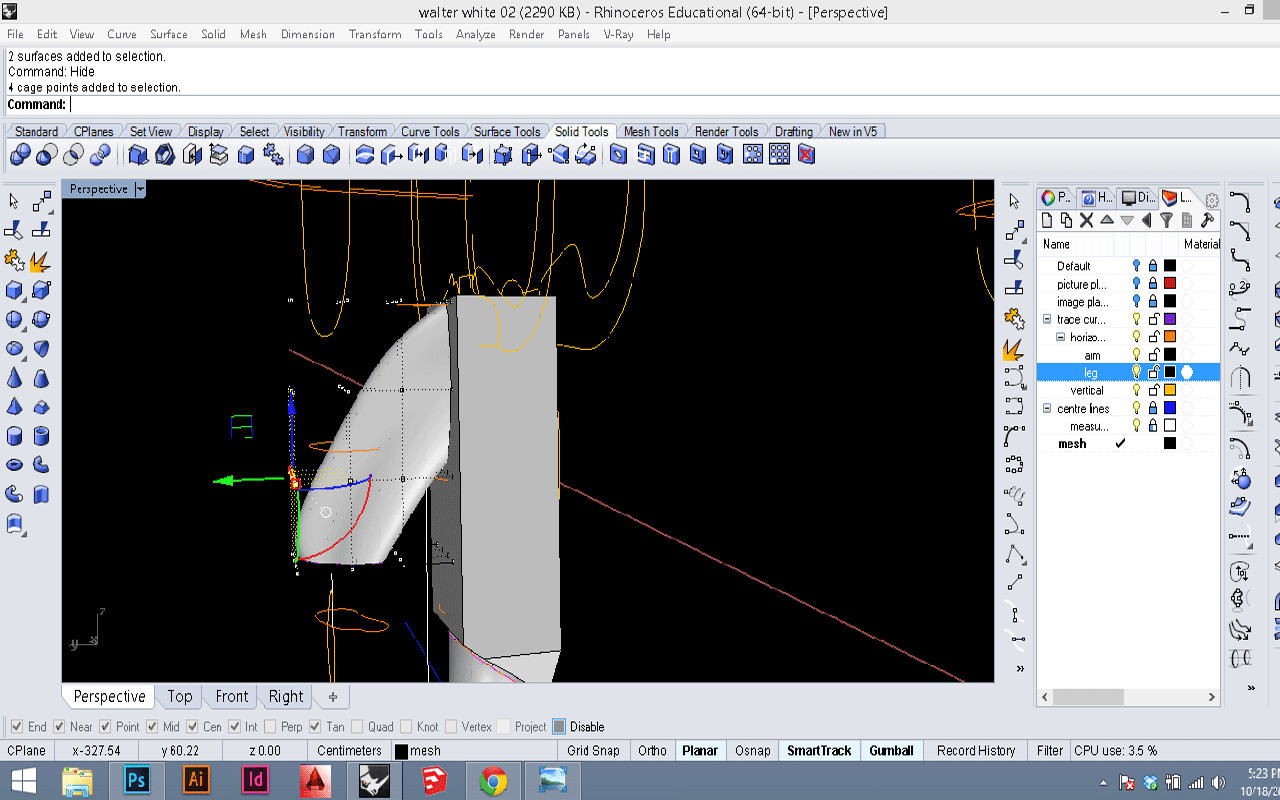
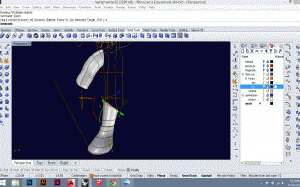
I eventually gave up on the curve-loft method. Now I am working with geometric solids, which I boolean to an approximate shape using other basic solids. Then I soften edges using fillet. Finally, I can tweak the object using box edit to get things just right. This process is working much better! Below, you can see a box for the body that I am starting to shape. It’s still very rough. The arm was started as a cylinder, and is ready to have a cuff added.

10-18-screenshot015


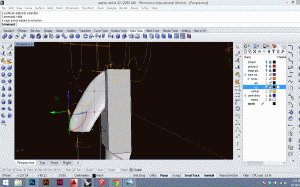
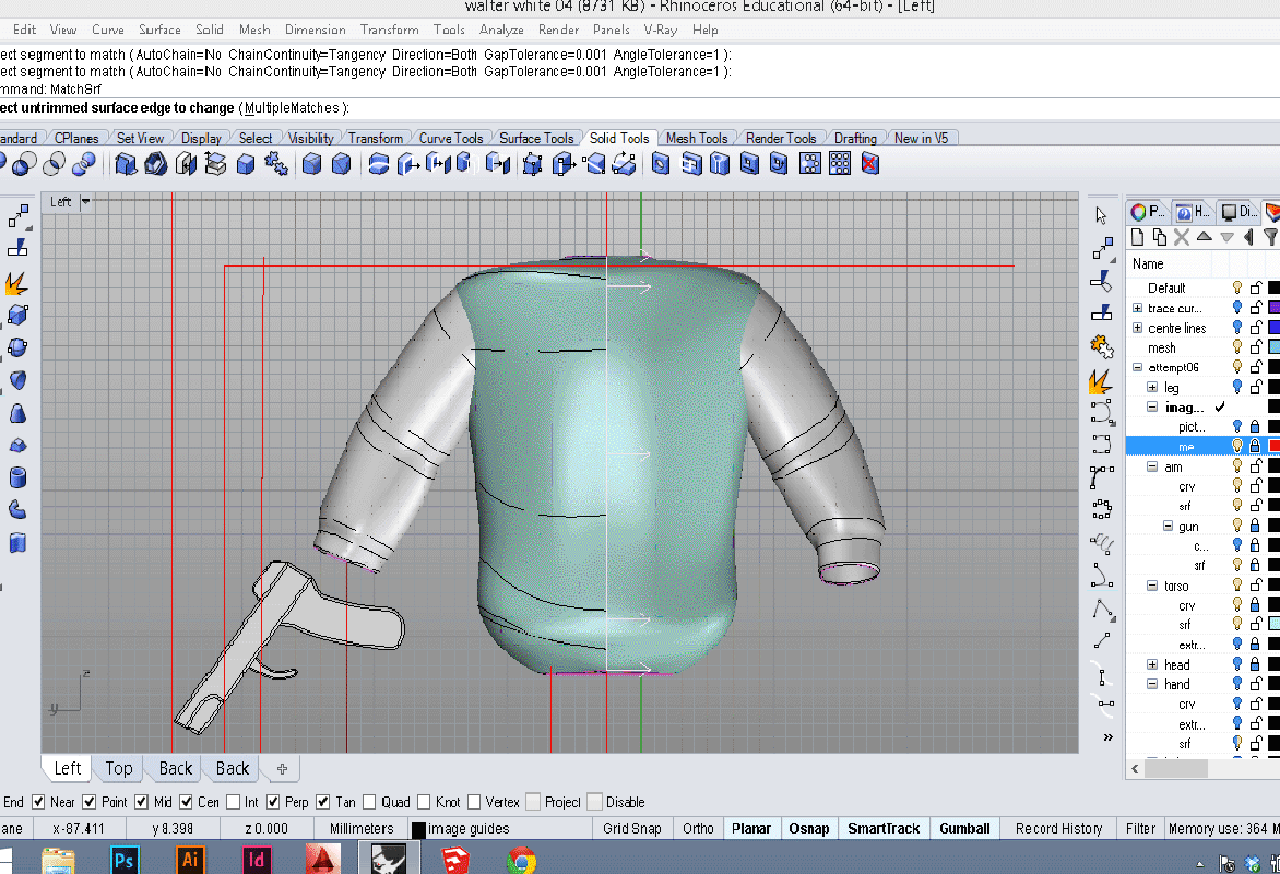
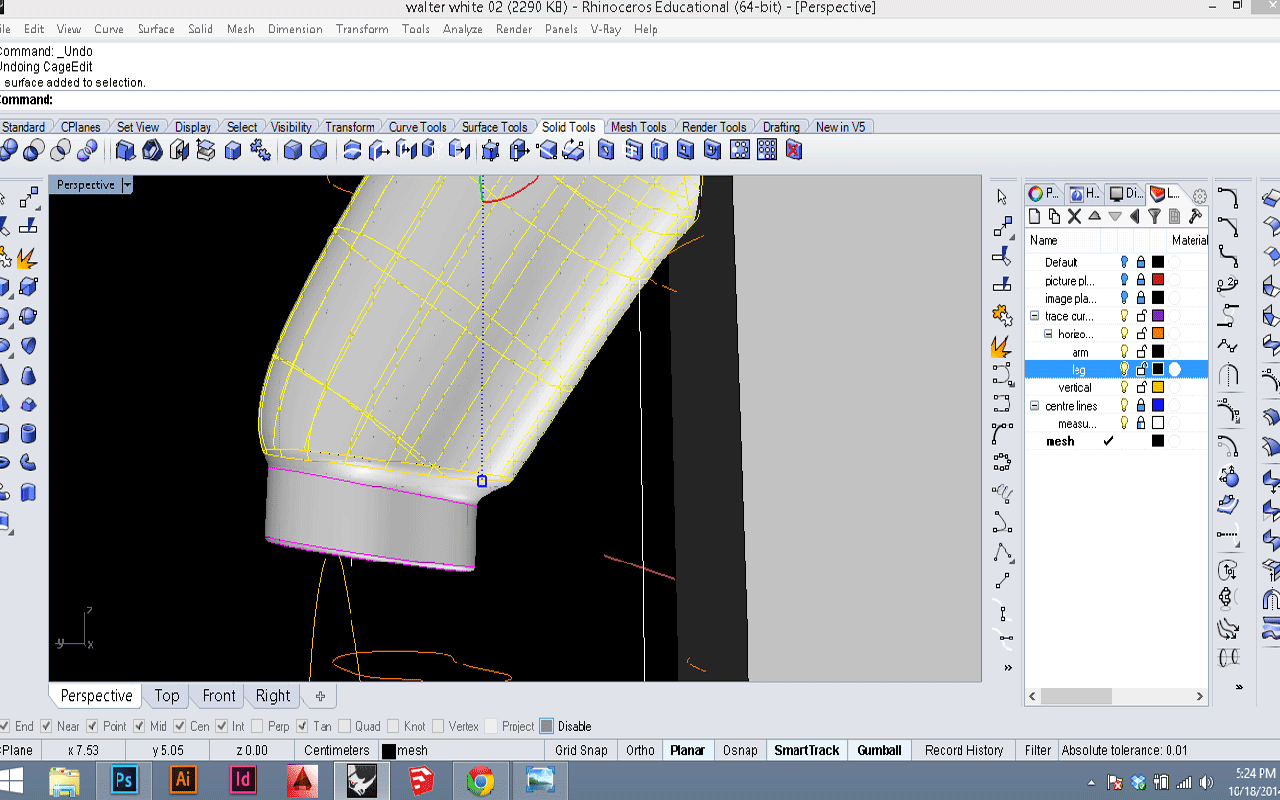
The image below shows the process for adding the cuff detail to the arm. I created a smaller cylinder, and scaled and placed it. Then I exploded the cylinder for the arm and the one for the cuff, and used blendsurface to connect them.  The final step was to join and cap the 3 resulting surfaces, so I could fillet the edge at the bottom of the cuff. I’ll be doing roughly the same for the body next. Stay posted!

10-18-screenshot03


Tracing scans and placing them in 3d space

 Today I traced the slices of my vinyl Walter White in Rhino. Tracing the contours shown by my sections was relatively straight-forward, although there are a few decisions that I had to make which will likely affect the ease of my future modeling. For one, I had to decide which parts to keep as one curve – should the hair, for example, be drawn as part of the same outline as the head? Since the hair and some other sections are not perfectly symmetrical, I opted to trace those separately, but am still not sure that I made the best choice. The first image below shows tracings of the front to back slices.

The more difficult part of this week’s activity was to arrange each of the sections into 3-d space. After some trial and error, I came up with a method to also trace around the image of the foam block encasing each section. This made it much easier to align each section properly, one on top of the other, by snapping each bottom right corner into place and rotating as needed. As I put each section into place in the top view, I then dragged it the appropriate distance upwards or downwards in the side view. I took good notes of where on the model I took each section, but found that I didn’t account for the width of the bandsaw blade. I’ve averaged out each section (knowing the total length between all of them), but am worried about this lack of precision. I would likely have saved myself much fiddling by accounting for and noting the saw’s kerf. 10-13-screenshot02

10-13-screenshot01