Category Archives: week 6

‘zero’ vinyl toy cut

screenshot-oct-15

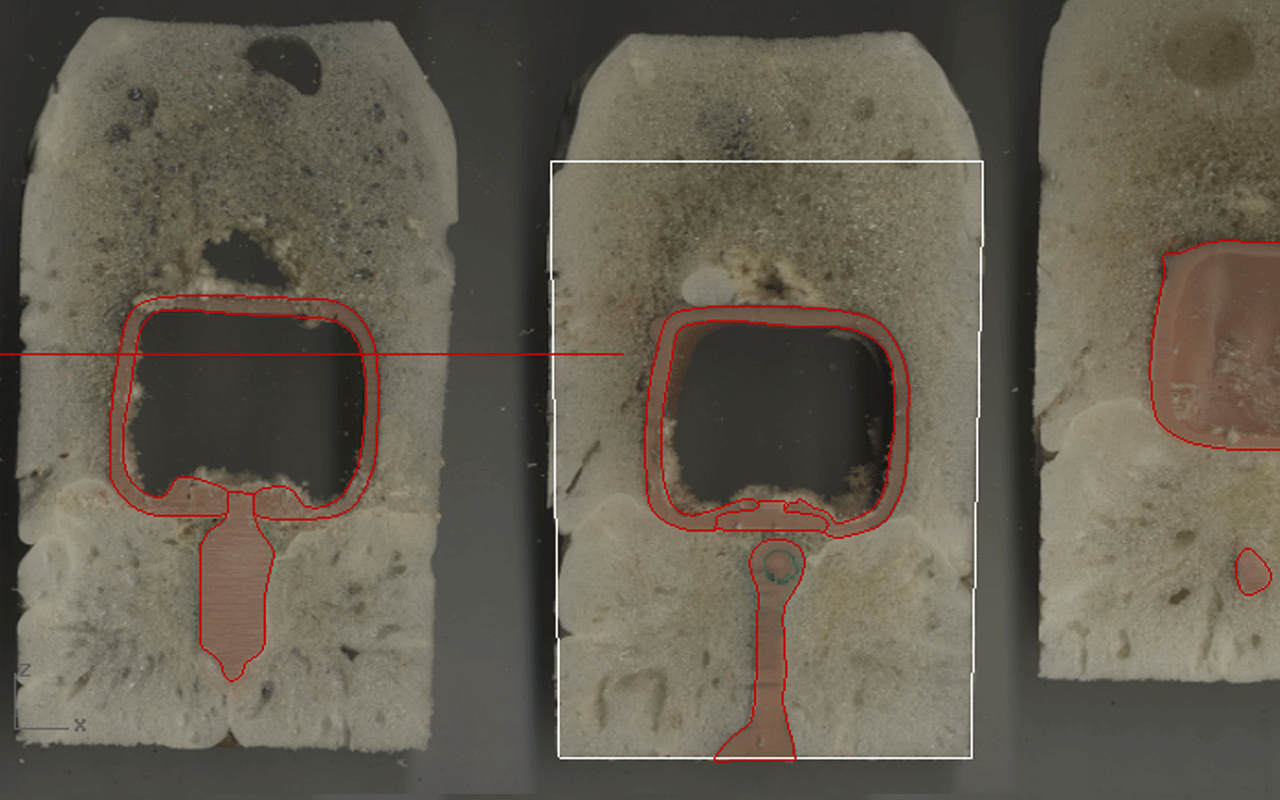
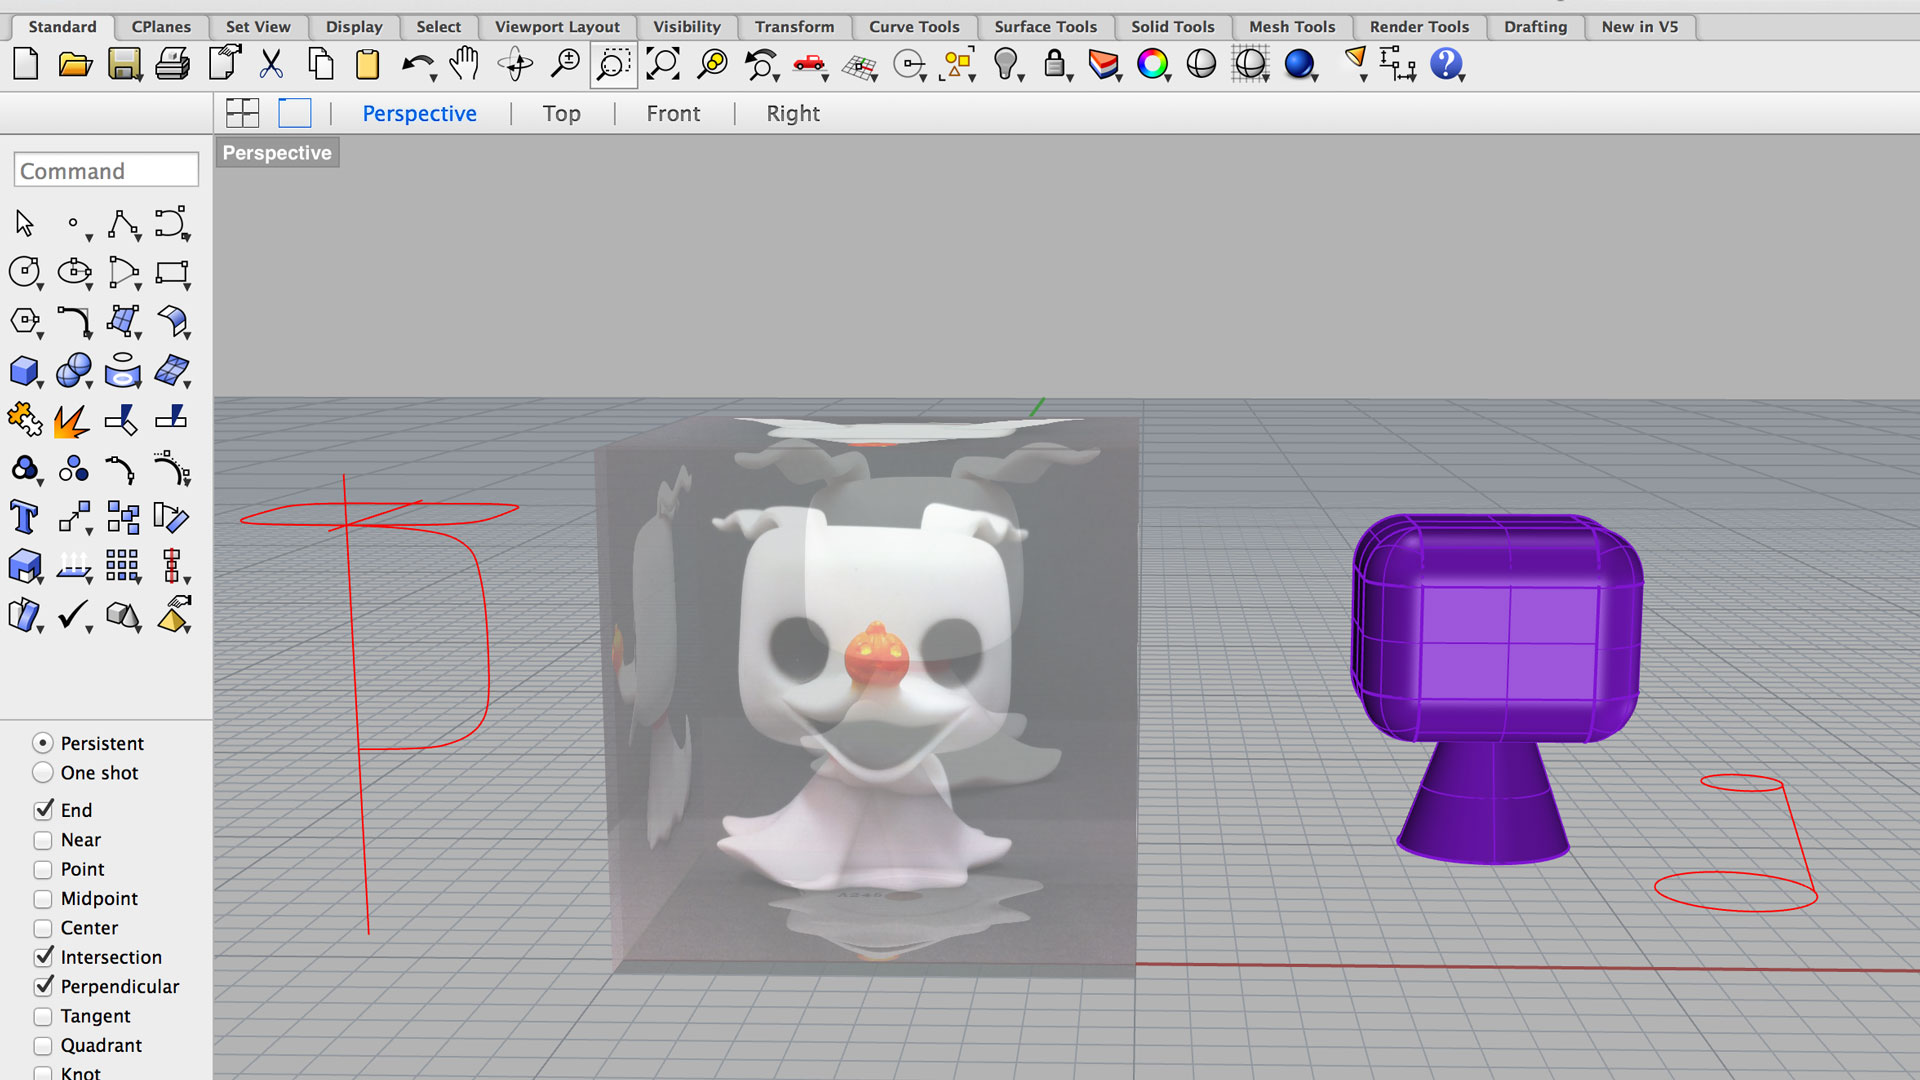
After using PictureFrame to place scaled images of the toy into Rhino, I modelled the basic head shape and used FilletEdge to smooth it out. To try and model it more accurately, I traced some lines as frames to be able to use the Rail command to generate the shape later (the red lines on the left).

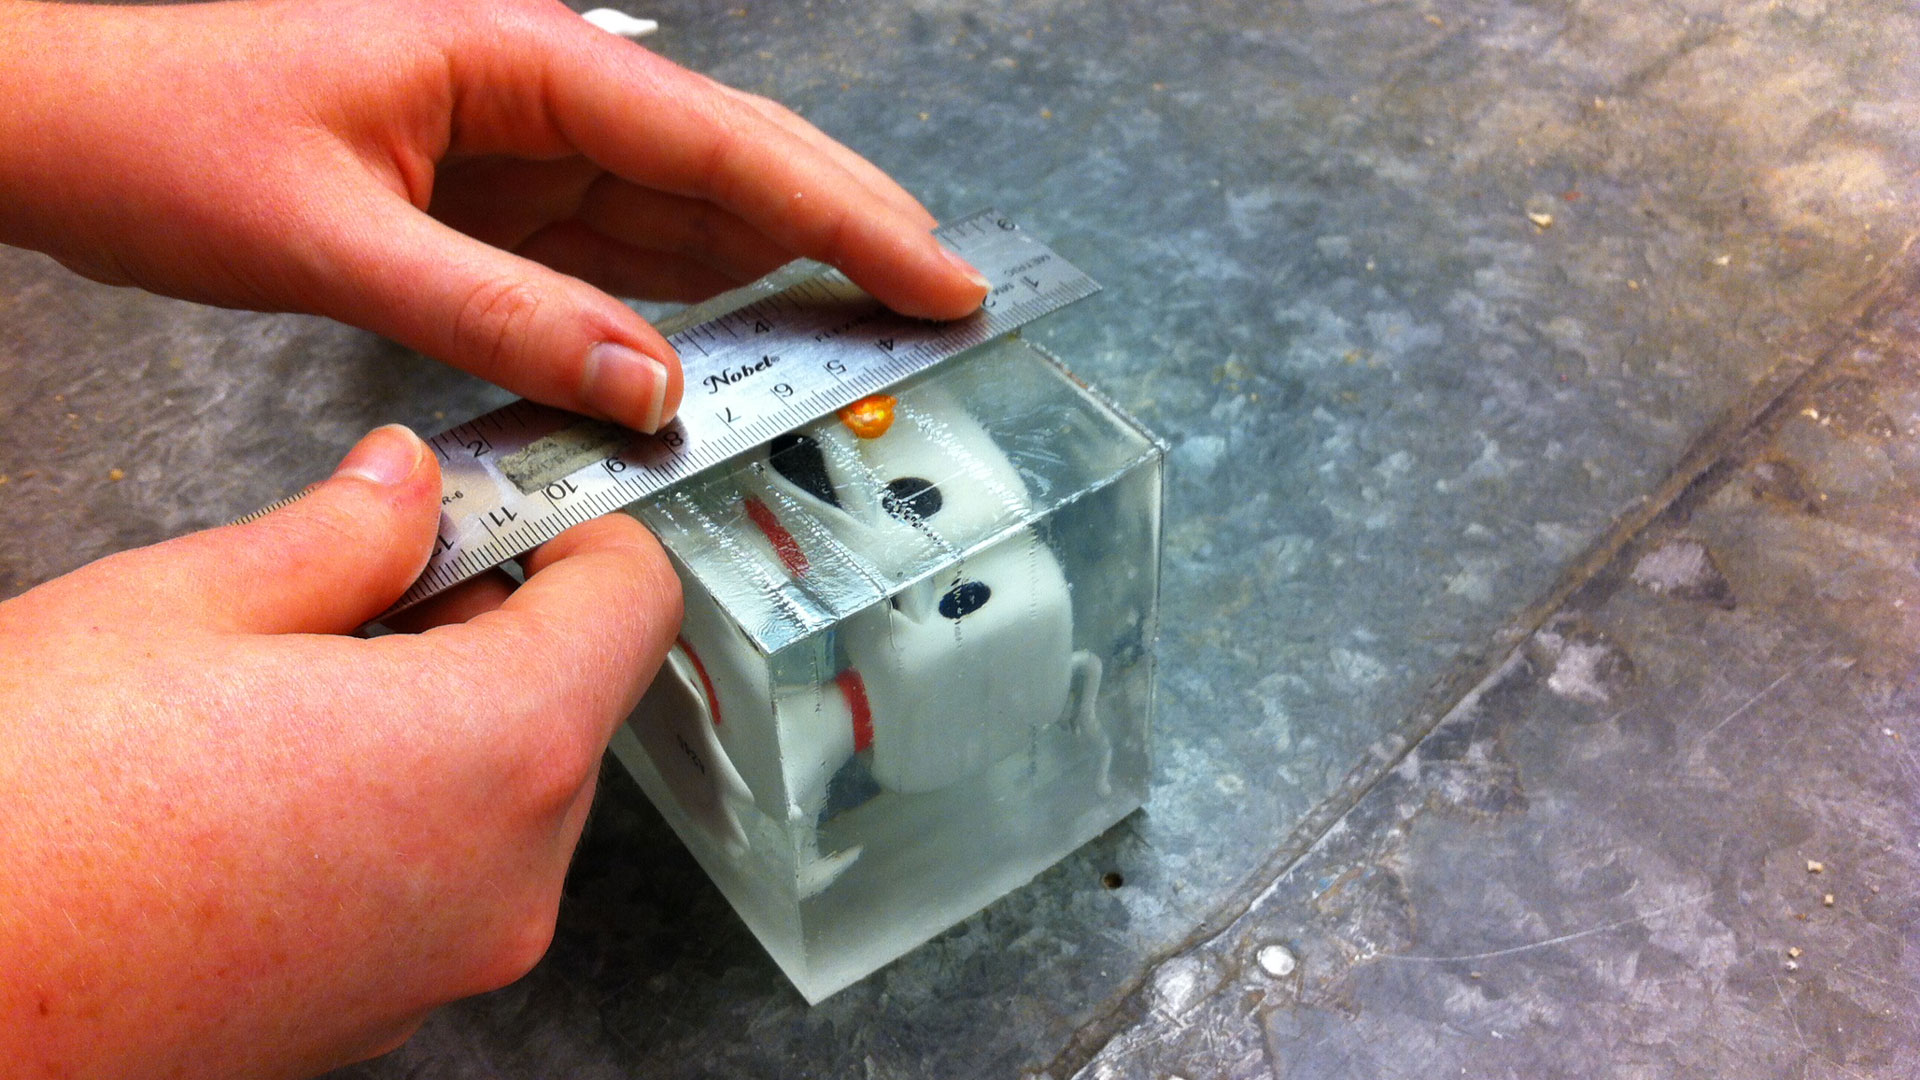
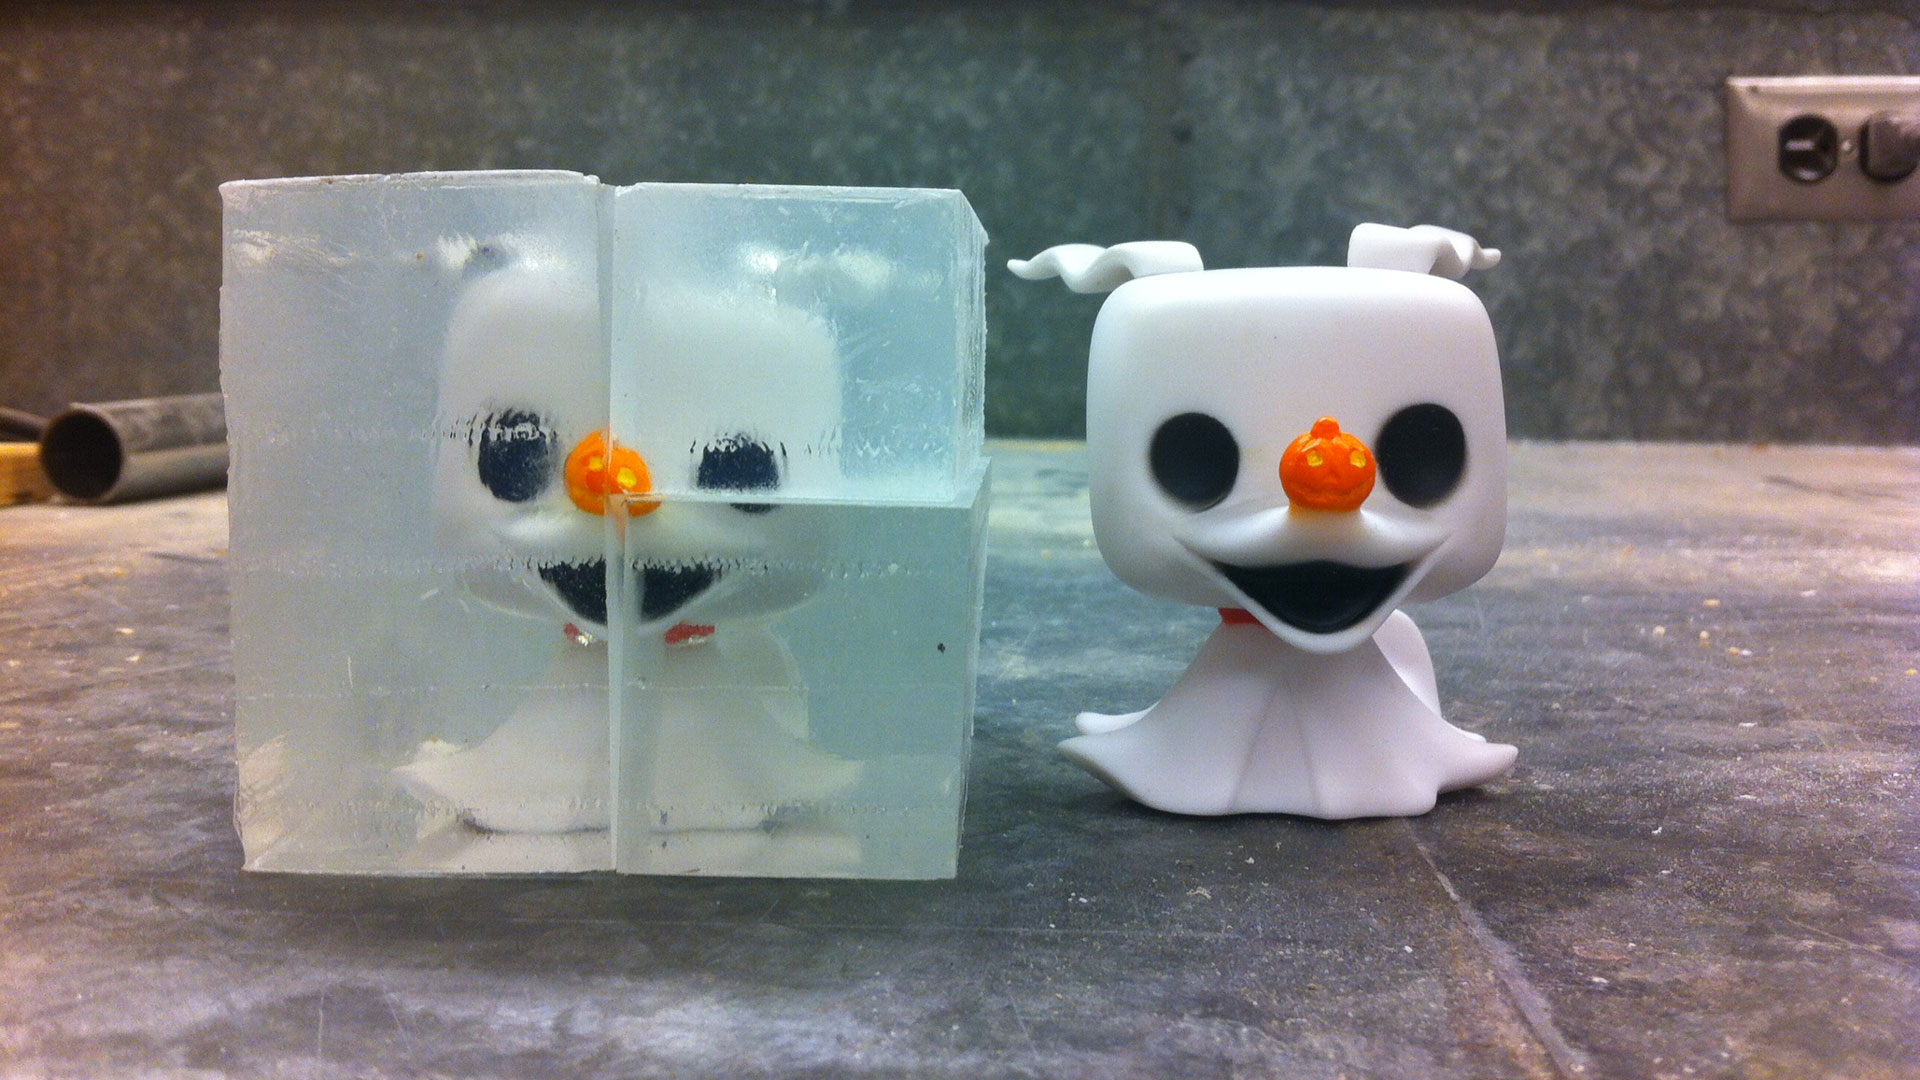
Tonight, my partner and I were able to cut our cast toy into 3 pieces. We were careful to measure where to cut vertically along the middle, and also horizontally through one eye. The acrylic box around the resin was able to peel off and I really like the way the resin pieces turned out. They will be a good guide for measurement of the length of the mouth, the width of the neck, and the width of the base. The next step is to take images of the cuts into Rhino for further reference material.

measuring cut-pieces

Chopping Up Finn

My teammate and I started by gluing Finn to the bottom of the box to prevent him from moving around and we used spray foam directly in the box. In order to reduce misshaping the thin cardboard box we wrapped it in masking tape and marked the centre line for cutting on the exterior before spray foaming (ALSO we left the top open to allow for the inevitable  foam expansion).

We were fairly successful at cutting the toy down the centre and from there we decided on which side would be horizontally or vertically cut based on the arm angle (the one piece which is asymmetrical). Cutting our slices 1 cm each was a decision we made to get enough cuts to get detail but not too many cuts which would lead to too much material loss.

Now we have SCANNED them to reduce scale or angle variations that would come from using a camera (after the fact we are rescanning with a ruler to insure the correct scale).

Now to Rhino tracing!

Screen Shot 2014-10-15 at 11.58.01 AM

Tracing scans and placing them in 3d space

 Today I traced the slices of my vinyl Walter White in Rhino. Tracing the contours shown by my sections was relatively straight-forward, although there are a few decisions that I had to make which will likely affect the ease of my future modeling. For one, I had to decide which parts to keep as one curve – should the hair, for example, be drawn as part of the same outline as the head? Since the hair and some other sections are not perfectly symmetrical, I opted to trace those separately, but am still not sure that I made the best choice. The first image below shows tracings of the front to back slices.

The more difficult part of this week’s activity was to arrange each of the sections into 3-d space. After some trial and error, I came up with a method to also trace around the image of the foam block encasing each section. This made it much easier to align each section properly, one on top of the other, by snapping each bottom right corner into place and rotating as needed. As I put each section into place in the top view, I then dragged it the appropriate distance upwards or downwards in the side view. I took good notes of where on the model I took each section, but found that I didn’t account for the width of the bandsaw blade. I’ve averaged out each section (knowing the total length between all of them), but am worried about this lack of precision. I would likely have saved myself much fiddling by accounting for and noting the saw’s kerf. 10-13-screenshot02

10-13-screenshot01