Everything I Learned at O.U.R. Ecovillage

I cannot possibly sum up everything I learned during my 3 weeks at the Ecovillage. The best I can do is a brief list of the lessons, hoping to cover at least a small part of what was shared with us.

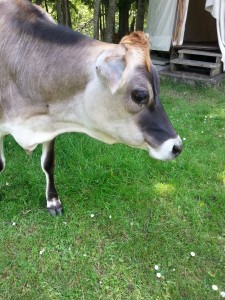
Violet, the Ecovillage's beautiful cow.

Violet, the Ecovillage’s beautiful cow.

  • Mason jars are incredibly versatile, and are accepted at most coffee shops
  • “Pet a cow a day, keep the stress away”
  • You can do almost anything with cob
  • “What goes together grows together”
  • 3 S’s of watering – slow, spread, sink
  • The ideal decline to slow water down is 10 degrees
  • Sometimes sheep act like cows, and cows act like dogs
  • “Action always happens on the edges”
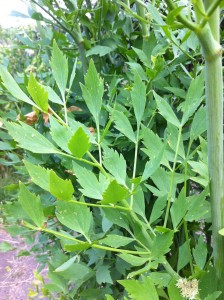
  • Plantains (the leaves, not the miniature bananas) are wonderful plants – you can chew it to make a good poultice.
  • “Right plant, right place, right time”
  • Kambocha is a living, pro-biotic tea, and the SCOBY (symbiotic culture of bacteria and yeast) is also called the “mother

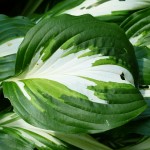
    A plantain leaf - all the veins go to the point of the leaf. The most common version is coloured all green.

    A plantain leaf – all the veins go to the point of the leaf. The most common version is coloured all green.

  • Diversity is the key to sustainability
  • “The problem is the solution”
  • A swail is a dale on a south facing slope
  • It’s always better to over communicate than to under communicate


I know that there are countless things that have not made it to this list yet, many of which I will remember after I post it. I intend to update the list as I recall more, and to always aim to not only remember, but incorporate and utilize all that I’ve learned.

Permaculture and Design Principles

“Permaculture is a creative design process that is based on ethics and design principles. It guides us to mimic the patterns and relationships we can find in nature and can be applied to all aspects of human habitation, from agriculture to ecological building, from appropriate technology to education and even economics.”– David Holmgren


David Holmgren video – How to change the world with permaculture

On one of our last days, we were lucky enough to be introduced to the 12 Permaculture Principles. Below is a brief overview of what we learned.


Principle 1: Observe and InteractDrop Of Water, Drip, Close, Green

By taking the time to engage with nature, we can design solutions that suit our particular situation. It’s amazing how much you can notice and learn when you pay attention.

eco1 (3)Principle 2: Catch and Store Energy

By developing systems that collect resources when they are abundant, we can use them in times of need. At the Ecovillage, they use thermal masses (eg. cob walls) to store heat from the sun or the stoves, which is then redistributed throughout the mass. This design “heats the people, not the space.”

Principle 3: Obtain a YieldLettuce, Salad, Lactuca Sativa, Green

Ensure that you are getting truly useful rewards as part of the work that you are doing.The most obvious example of this principle are the harvests from the gardens and greenhouses at the Ecovillage – part of being sustainable is being able to provide for yourself.

Principle 4: Apply Self-Regulation and Accept Feedback

We need to discourage inappropriate activity to ensure that systems can continue to function well. In order for communities (small- or large-scale) to survive, they need to be aware of the negative feedback that might occur. These results are often not immediate, but become evident in later generations. This also includes understanding the limits of what you have.

Principle 5: Use and Value Renewable Resources and Services

stawMake the best use of nature’s abundance to reduce our consumptive behaviour and dependence on non-renewable resources. One good example of this is the Ecovillage’s composting system. Food scraps and organic waste are all composted – some being fed to the animals, and some used for the plants. This allows the soil to develop a healthy diversity. Another good example is the use of straw as mulch. Like Grant says, 95% of your gardening problems can be solved by mulching – especially when you use available and renewable resources!

Principle 6: Produce No WasteIMG_4369

By valuing and making use of all the resources that are available to us, nothing goes to waste. The waste of one plant becomes food for another, and our food scraps become compost for the gardens or food for the pigs and chickens.

IMG_4576Principle 7: Design from Patterns to Details

By stepping back, we can observe patterns in nature and society. These can form the backbone of our designs, with the details filled in as we go.For example, when designing houses, you can track the sun path over the day and over the seasons in order to build in such a way as to naturally regulate heating.

Principle 8: Integrate Rather Than SegregateHENDRIKUS - IMG_1589

By putting the right things in the right place, relationships develop between them and they support each other. One thing we heard a lot at the Ecovillage was “what goes together grows together.” An example of this is tomatoes and basil – they taste amazing together, and they grow so well in the same beds!

Principle 9: Use Small and Slow Solutions

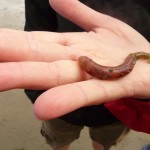
wormsSmall and slow systems are easier to maintain than big ones, making better use of local resources and produce more sustainable outcomes. For example, if you wanted to get a bed ready for planting, you could bring in new soil and prep the bed yourself. Instead, if you lasagna mulch the bed 6 months before you want to use it, the worms will do the work for you.

Principle 10: Use and Value Diversity

Diversity reduces vulnerability to a variety of threats and takes advantage of the unique nature of the environment in which it resides. Diversity creates stability!

Principle 11: Use Edges and Value the Marginaledges

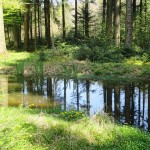
The interface between things is where the most interesting events take place. These are often the most valuable, diverse and productive elements in the system.This was sometimes called the “edge effect” – things always seem to grow better on the edge (for example, the border where the forest ends and the meadow begins).

Principle 12: Creatively Use and Respond to Change

We can have a positive impact on inevitable change by carefully observing, and then intervening at the right time. The most famous tagline we heard at the Ecovillage: “the problem is the solution!”

These descriptions and further explanations can be found on the Permaculture Principles website here.

Recycling and Eagle Yew

One of the big projects we were working on during our stay at the Ecovillage was redoing the current recycling system. Since the MMBC (mixed materials BC) was introduced, a lot of changes have been made as to what can or cannot be recycled. We went on a tour of the Return-It Depot in Duncan in order to get a better understanding of the current recycling system.

image image image image image image image

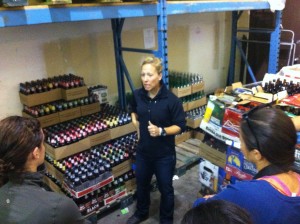
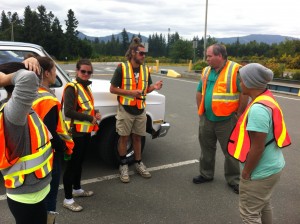
This is the woman who gave us the tour. She was so full of information! At this point, she was explaining that not all glass bottles are recycled – some are refilled. These require a lot less energy and resources than melting down bottles to create new ones. We also learned that the little dots on the bottom of some glass bottles indicate how many times that bottle has been refilled.


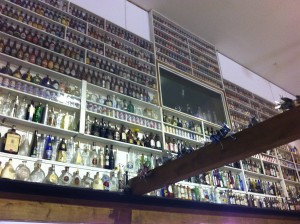
The recycling depot had walls that were full of old, interesting bottles, as well as many air planes made of pop cans – a great example of salvage art, a great concept to bring into the classroom!


We then went to the dump to see what sorts of systems they had in place for recycling. Turns out they had a lot more than we thought! It was hopeful to see so many changes that had been implemented in order to better help with recycling.


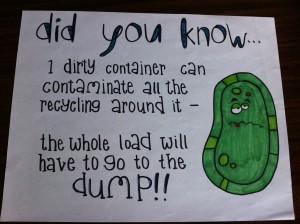
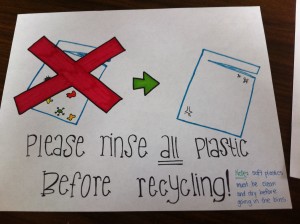
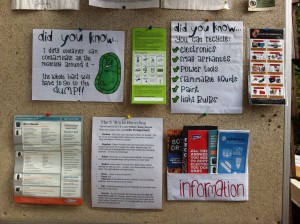
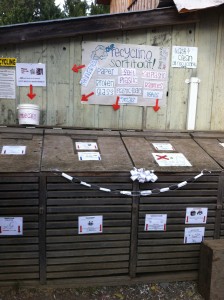
After we got back, we needed to revamp the current recycling program at the village. I had no idea there were so many different sorting categories that needed to be put in place – metal, glass, soft plastic, hard plastic, light bulbs, batteries, flammables… One of the most important lessons we learned is that the recycling (especially the soft plastic that food comes in) needs to be rinsed before it can be mixed in with the other recycling. Otherwise, the entire contents of the bag will be contaminated. We got to work making signs, labels, and informative posters to put with the recycling bins. We hoped that by clearly labelling the different sections, people would be much more likely to participate in the sorting. These were some of my posters!


Our finished information board, complete with signs and pamphlets from local recycling depots.


The final product! Signs, labels, arrows, separate containers… a work of art.


Other things I learned through the recycling project:

  • Butter wrappers are considered a metal and can be recycled (so can tinfoil)
  • Some brands that use refillable glass bottles: OK Springs, Growers, Sleemans, Steam Whistle, Granville Island, Dead Frog, Tree Brewings, O’Douls… way more than I thought!
  • The 2010 Olympic medals were partially made from precious metals collected from recycled computer towers
  • Anything you drink out of (except for milk and milk alternatives) can be recycled for profit
  • Styrofoam peanuts cannot be recycled – this is because styrofoam peanuts can be made of 2 different things. Some of them are made from corn starch, which is water soluable. This starts to break down in the machine that compresses the styrofoam and ruins the machine. They can’t yet differentiate between the two types of peanuts, so for the sake of the machine they won’t accept any.
  • Bubble wrap can also not be recycled – we still aren’t sure why
  • Old fridges and freezers can have the CFCs (chlorofluorocarbons) removed and can then be used for food storage on farms, which protects animal feed from mice and rats. CFCs were made illegal in the Montreal Protocol – they were widely used as refrigerants but, when released, would gravitate to the poles and deplete the ozone layer.


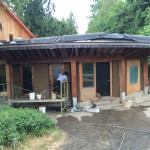
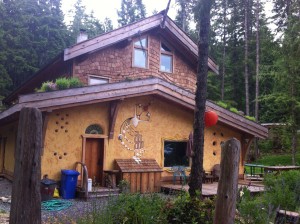
We were also lucky enough to experience a tour through an amazing timber-framed cob house close to the village, called Eagle Yew. The owner is friends with some of the members of the village, so he was generous enough to show us around.

image image image image

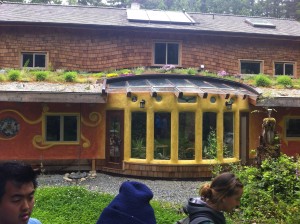
The house was amazing. It had beautiful designs build right into the plaster layer of the walls. The owner was part of the building process from the beginning, and said that it took about 2 years to get the whole house finished. I really liked the shingle patterns done on the upper level of the house.


I also really liked the designs done around the windows and doors on the lower level. The sun room was amazing from the inside, and had a wonderful view of the forest behind the house.


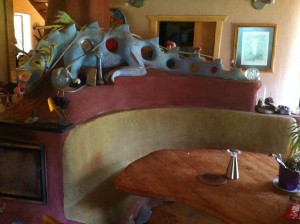
The mason stove was in the centre of the house, and was built inside the cob seating area. When fires are lit in the stove, the smoke travels back and forth through tunnels in the cob bench before working its way up the main pipe. This allows for heated seating! The main chimney can then redistribute the heat through the cob to the rest of the house.


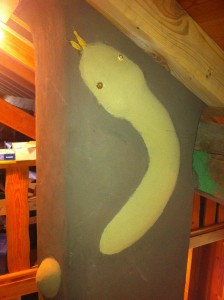
This is some of the detail work on the main cob chimney. I really like how creative you can get when you’re building with cob, whether its adding sculptures in with the plaster, or placing glass bottles right into the cob itself.


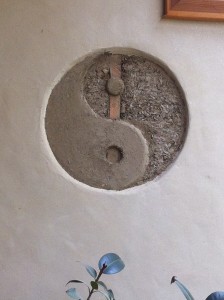
This is a truth window, located in the sun room. It gets its name from the idea that imageit reveals the true nature of the wall itself. You can see all the various components – the cob, the support beam, the brown plaster, and finally the top plaster. This particular window was done in the shape of a yin yang to promote a sense of balance within the home.


We were so fortunate to have been able to see such an amazing house. It was incredible to see what can be accomplished with cob – through the same process that we had been a part of, something this beautiful can be made.

Day 9 – Timber Framing, Cobbing, and Basket Weaving

One of the projects I mentioned earlier has really been coming along, so I thought I would try to document what’s been accomplished so far. When we got here, a timber framing project had been started.
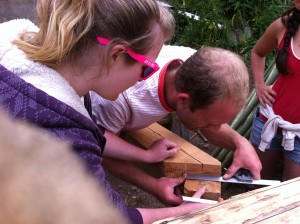
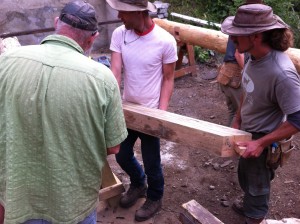
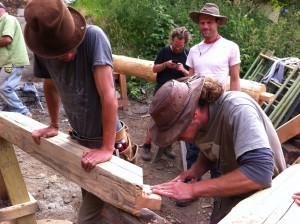
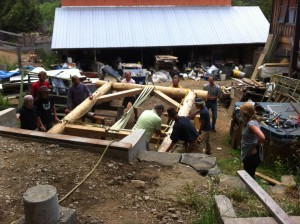
eco3 (4)eco3 (2)eco3 (3)eco3 (5)eco3 (6)eco3 (7)eco4 (1)eco4 (3)eco4 (4)eco4 (5)eco4 (7)eco4 (8) A bunch of people taking the timber framing class had begun chiseling the logs. Lots of measuring had to be done before hand (measure twice, cut once). These logs were huge, and had to be transported from where they were being worked on to the site where they would go up.

We jumped right in to help bring the logs down. We used a bunch of ropes and 2x4s to distribute the weight better. Moving them this way was a lot easier than trying to carry them. It was slow going because we had to time the walking between all of us, and we were moving downhill.


After that, it was more measuring. The holes had to be drilled in the logs and the support beams so that wooden pegs could be inserted.

A bit of last minute chiseling was needed to make sure the pieces fit together. There are some very talented builders here!


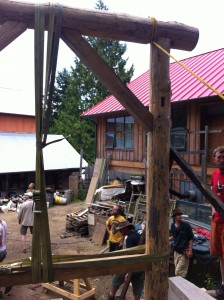
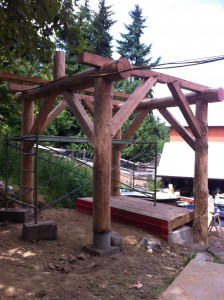
After the holes were drilled, all the wooden posts were hammered in. A top piece was added, and the support pieces were put into the corners. All those pieces together are called a “bent.” This completed bent weighed approximately 1,000 lbs, and needed to be hoisted into place.

We all grabbed on and waited for instructions. Together with a team of people pushing the bent up from below, we were able to get it standing in place. Each post had a piece of rebar in it to hold it in the concrete sections (the cylindrical chunks of concrete at our feet are for the second bent).

A few 2x4s were nailed on to make sure the bent didn’t move around at all before we got the other one connected to it.


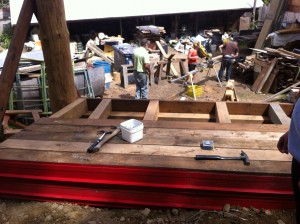
After it went up, we got to hammer down the floor boards. This will end up being – believe it or not – an outhouse. It most definitely be the nicest outhouse I’ve ever seen!


After the floor was finished, the second (smaller) bent was assembled and raised. The top pieces were added as well, and the building really began to take shape. This meant it was time to start cobbing!


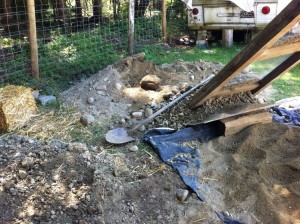
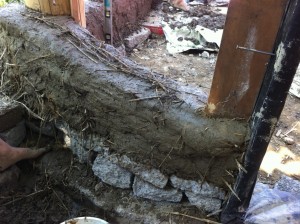
Cob is a mixture used to create walls. It is made from an aggregate, a binder, and something for tensile strength. In most cases, cob is made with sand (aggregate), clay (binder), and straw (tensile strength). The sand was sifted to get out most of the bigger rocks.


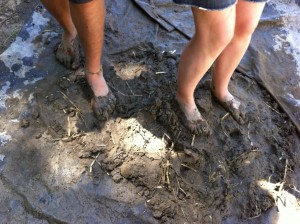
The best way to mix cob is with your feet! We used some water to hold everything together and stomped away. I can’t remember the last time I was barefoot in the mud, especially with this much intention.


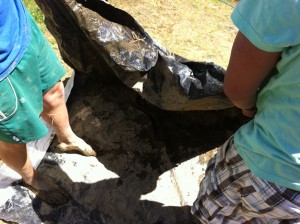
We also used the tarps to sort of roll the cob together. Essentially, you want to make a “cob burrito” – the consistency should allow the cob to sort of hold it’s shape when you roll it in the tarp. Once you get your burrito,  you’re ready to start building!

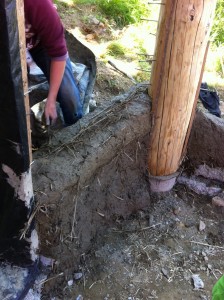
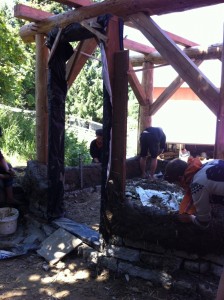
This is how much cobbing we got done in a few hours. It’s a bit slow-going, but it’s an amazing feeling you get, knowing you’ve built something. It’s still hard to believe that the “mud” we were dancing in is strong enough to make walls. We literally built (part of) a wall out of cob that we mixed ourselves!


It’s important not to make this first layer smooth at all. More layers will be added to the outsides of these walls, followed by a final brown plaster (made from a different ratio of straw, sand, and clay). If the walls are made too smooth, the new layers won’t stick to it.

Nails were hammered into the posts of the bent so that the cob would have something to hold on to for more structural support.
 

eco4 (6)


I’m really excited to see this building progress. It’s amazing how much has already been accomplished in the short time we’ve been here!


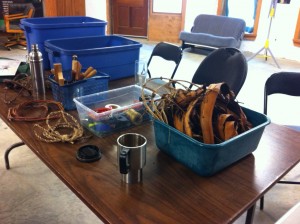
Yesterday we got to participate in a basket weaving workshop – yet another great eco4 (10)experience of creating with our own hands. These are some of the materials we were able to choose from – the circular branches near the bottom of the picture are for making the initial circles, and the bog iris leaves, bulrushes, and cattails are for the weaving.
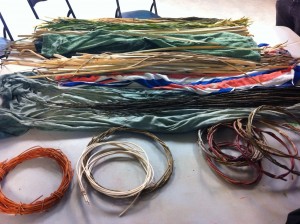
There was also cedar bark, some vines, and cordage made from twisting the bog iris leaves. Some of eco4 (9)the residents made the cordage a few days earlier. All the bulrushes, cattails, bog iris leaves, and cedar bark was harvested on or near to the site.
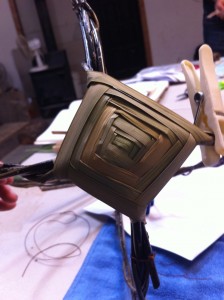


eco4 (11)


After you make two rings out of twigs, you need to create the lashing. This attaches the rings, and will eventually hold the spokes of the basket. We learned two ways of lashing – I tried the God’s eye – just like the ones I used to make out of popsicle sticks and yarn.
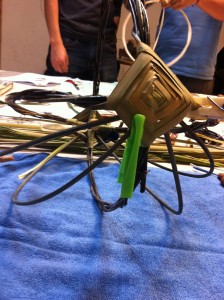


eco4 (12)


After that, the spokes are cut and added in to the frame in order to give the basket its shape. Then the weaving can begin. I chose to alternate between the cattails and the bog iris leaves, so that it would look sort of striped once it dried. The clips are used to hold the weaving in place if necessary.
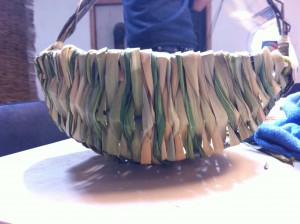


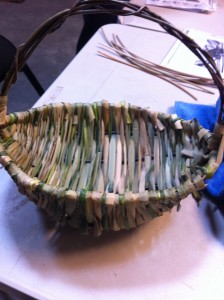
eco4 (15)My finished basket! It was so relaxing to do, once I got into a rhythm. I found it to be a lot like knitting – something that can keep your hands moving in a pattern, very relaxing. I thought basket weaving would be much more complicated, but we had a wonderfully laid-back instructor.


I think this would be a really interesting activity to bring into the classroom! The weaving part itself is not difficult, and I think students would get the hang of it very quickly. The circles could always be made eco4 (14)ahead of time if need be. This could connect to all sorts of curriculum: First Nations, natural resources, life cycles of plants… I hope that I can bring this activity back to share with a class one day.


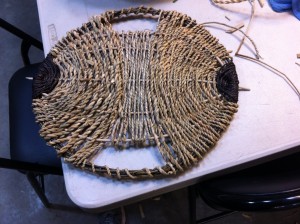
I finished my first basket with some time left over, so I decided to try something different. I wanted to do a very shallow basket, and I wanted to try out making handles in the basket. I chose willow branches again for the circles, and this time I used the bog iris cordage for the weaving. It sort of flattened itself out as I wove it, so now it’s more of a serving plate. I guess it could also double as a hot plate for a large dish.eco4 (16) Either way, it felt really good to be able to visualize something and then create it.
Day 6 – Edible Plants and Vegan, Gluten-Free Baking

Grant has been teaching us so much about different flowers and leaves that we can eat. These are some of my favourite ones so far.

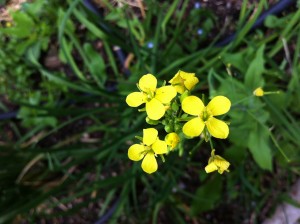
eco2 (1)This is a flower from a plant in the Brassica family – kale, cabbage, broccoli, etc. Every plant in the Brassica family will have these flowers: 4 yellow petals, 4 large stamen and 2 smaller stamen.When you see these flowers, that means that the entire plant is edible.

eco2 (4)


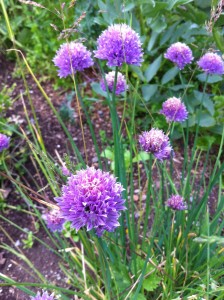
This purple flower grows on chives. These are really great for clearing your sinuses if you’re sick  – the flower heads taste like garlic!

A lot of the people here have allergies to things in the air and have been eating these flowers fairly often so that they can breathe for a little bit.


eco2 (5)


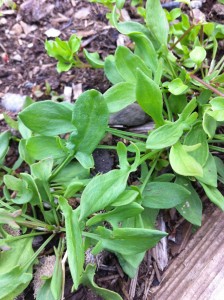
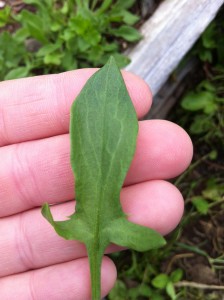
This is my favourite plant so far. It doesn’t look like much, and it’s easy to miss. This is the sorrel plant, which we have been eating as often as we find it. Each time, the taste seems to change a little bit. Sometimes it’s very lemony. When I had some yesterday, it tasted exactly like huckleberries.


eco2 (6)


They’re pretty easy to identify. The leaves on the sorrel plant are long and narrow, with two small sections on the bottom. I think it looks like a sword.


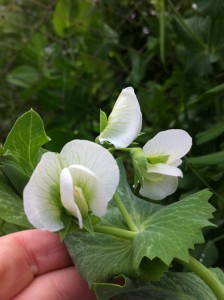
eco2 (3)This is a flower from a bean plant. This flower has a very distinct pattern, with outer and inner leaves. Any plant that has this sort of flower is in the same family and is a “nitrogen fixer.” One of the things that plants need to grow is nitrogen.

When nitrogen is found in the air, it is triple bonded and is not readily available for plants to use. Nitrogen fixers have the ability to break down the bonded nitrogen in the air into a usable form and release it back into the soil for other plants.


eco2 (2)


This plant is called lovage. It can grow up to 2.5 meters tall. The leaves are edible, and there is some discrepancy on what exactly they taste like. Some people say it tastes very similar to cilantro, while others say it tastes more like celery. Personally, I think it tastes like celery too.


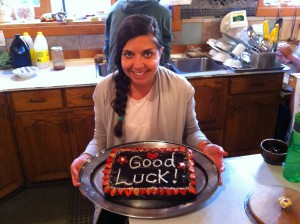
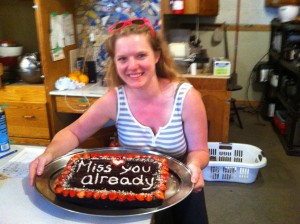
Yesterday, Melissa and I decided to try our hand at Ecovillage baking. One of the people from another program had his last day yesterday, and someone suggested that we make a cake for the occasion. They only request was that it be made gluten-free and vegan, so that everyone would be able to try it. Neither of us had tried gluten-free or vegan baking before, but we were excited to try it out.

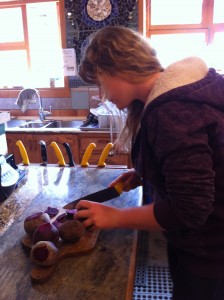
We found a delicious sounding recipe (http://www.coffeeandquinoa.com/2014/03/fudgy-chocolate-beet-cake-with-chocolate-avocado-frosting-vegan-and-gf/) and got right to work. We had to first roast beets to mash up and put in the cake, which made it really moist. eco2 (7)We did have to run out to grab a few ingredients that we didn’t have on hand at the village, but almost everything we needed was there already. I figured that baking with beets would be similar to baking with zucchini, which I’ve done before, and which keeps the cake nice and moist.

I think my favourite part was the chocolate avocado icing. The avocados made it so creamy! The finished products looked (and tasted) amazing. Melissa and I were really proud of ourselves for trying something new, and it was really satisfying to see everyone enjoying it.

eco2 (8)

eco2 (9)


Day 3 – Pictures!

Now that I’ve figured out how to add pictures without them turning upside-down, I can share some of the pictures I’ve been taking.

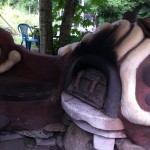
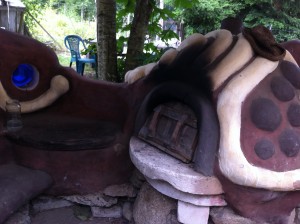
eco1 (3)This is an example of a cob structure. Cob is made of sand, clay, and straw. We haven’t had a chance to make any of our own yet, but we most definitely will during our time here. This is a bench with an oven attached to it. The cob retains heat – essentially, this is a hand-made heated bench that you can cook pizzas in.

eco1 (4)

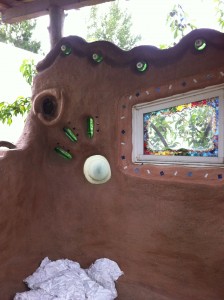
This is another example of a cob structure. All sorts of things can be put into these as you make them.This wall has glass wine bottles, decorative pieces, and a beautiful window. All the items that they put into the structures are recycled, turning “waste” into art. This small wall was built in order to aid in gardening. The cob wall faces south and is heated throughout the day. The plant (currently an orange tree) is on the north-facing side of the wall. When the temperature drops overnight, the wall then “exhales” the heat and keeps the plant warm. This is a great example of natural temperature regulation – the same concept is used in building houses here!

Today we got to see and help with a timber framing project. The posts had been carved from solid, round pieces of wood over the past 9 days, making carefully measured pockets and joints so that the pieces can be fit together. The braces were put into the posts, and holes were drilled in order to put wooden pegs through.

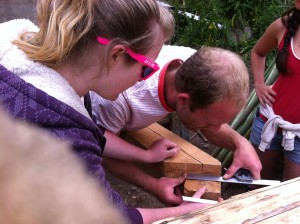
eco1 (7)We were able to help with some of the measuring, as well as lots of the heavy lifting. Over the next few days, we hope that the frame of the structure will be up. The final structure will have a living roof on it. It was such a unique experience to be part of the building process. You can tell that community is a huge focus at the village, and it’s amazing how much can be accomplished when everyone is so determined and supportive.

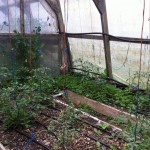
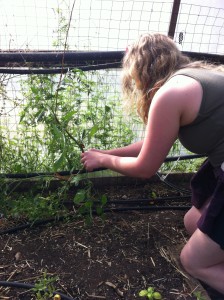
eco1 (5)We also spent a lot of time gardening over the past two days. We’ve weeded old, grown-over beds, pruned and strung up tomatoes, harvested snap peas, and eaten more leaves and flowers than I have in most of my life combined. It has been amazing to learn all about the different plants that grow and how to tell what you can eat – so far my favourite is sorrel, which tastes like lemons!

One of my favourite experiences so far has been to see how all the food that we eat came from here. There are huge salads for lunch and dinner everyday, accompanied by something else delicious, and it’s so satisfying to eat what you’ve just seen growing a stone-throw away. I’m trying to remember as much as I can so that I’ll be able to (try to) grow some food of my own once I get home! At the very least, I’ll be able to recognize some edible plants around home.

Day 1 – Arrival

What a whirlwind first day of CFE! As soon as we turned down the road heading into O.U.R. Ecovillage, the excitement took over. We grabbed all of our things and were shown to the building we’d be staying in – a nice house/future B&B. It was really nice to have some time to get settled.

We went on a condensed version of the site walk. First, we saw the sanctuary – a warm building with a living roof and “breathable walls.” It was amazing to find out that the walls of the building were made by hand using only straw, clay, and sand. We were told that we would get to participate in building structures like this.

We were then shown a “cold room,” another handmade building – this time made by grade 3 students! They built the structure on a south facing slope, so as to use the landscape itself to keep it cool.

We had dinner with some students visiting from a nearby high school, who are leaving tomorrow. After we are, we were thrown right into the pan and were asked to lead this group in ice breakers for an hour! Being the eager, prepared individuals we are, this was no problem. After some games, we ended the night with ping pong, card games, and karaoke.

Tomorrow I look forward to seeing the grounds more entirely, as well as getting a better feel for what sorts of things we’ll get to experience during our 3 weeks here.