One of the projects I mentioned earlier has really been coming along, so I thought I would try to document what’s been accomplished so far. When we got here, a timber framing project had been started.
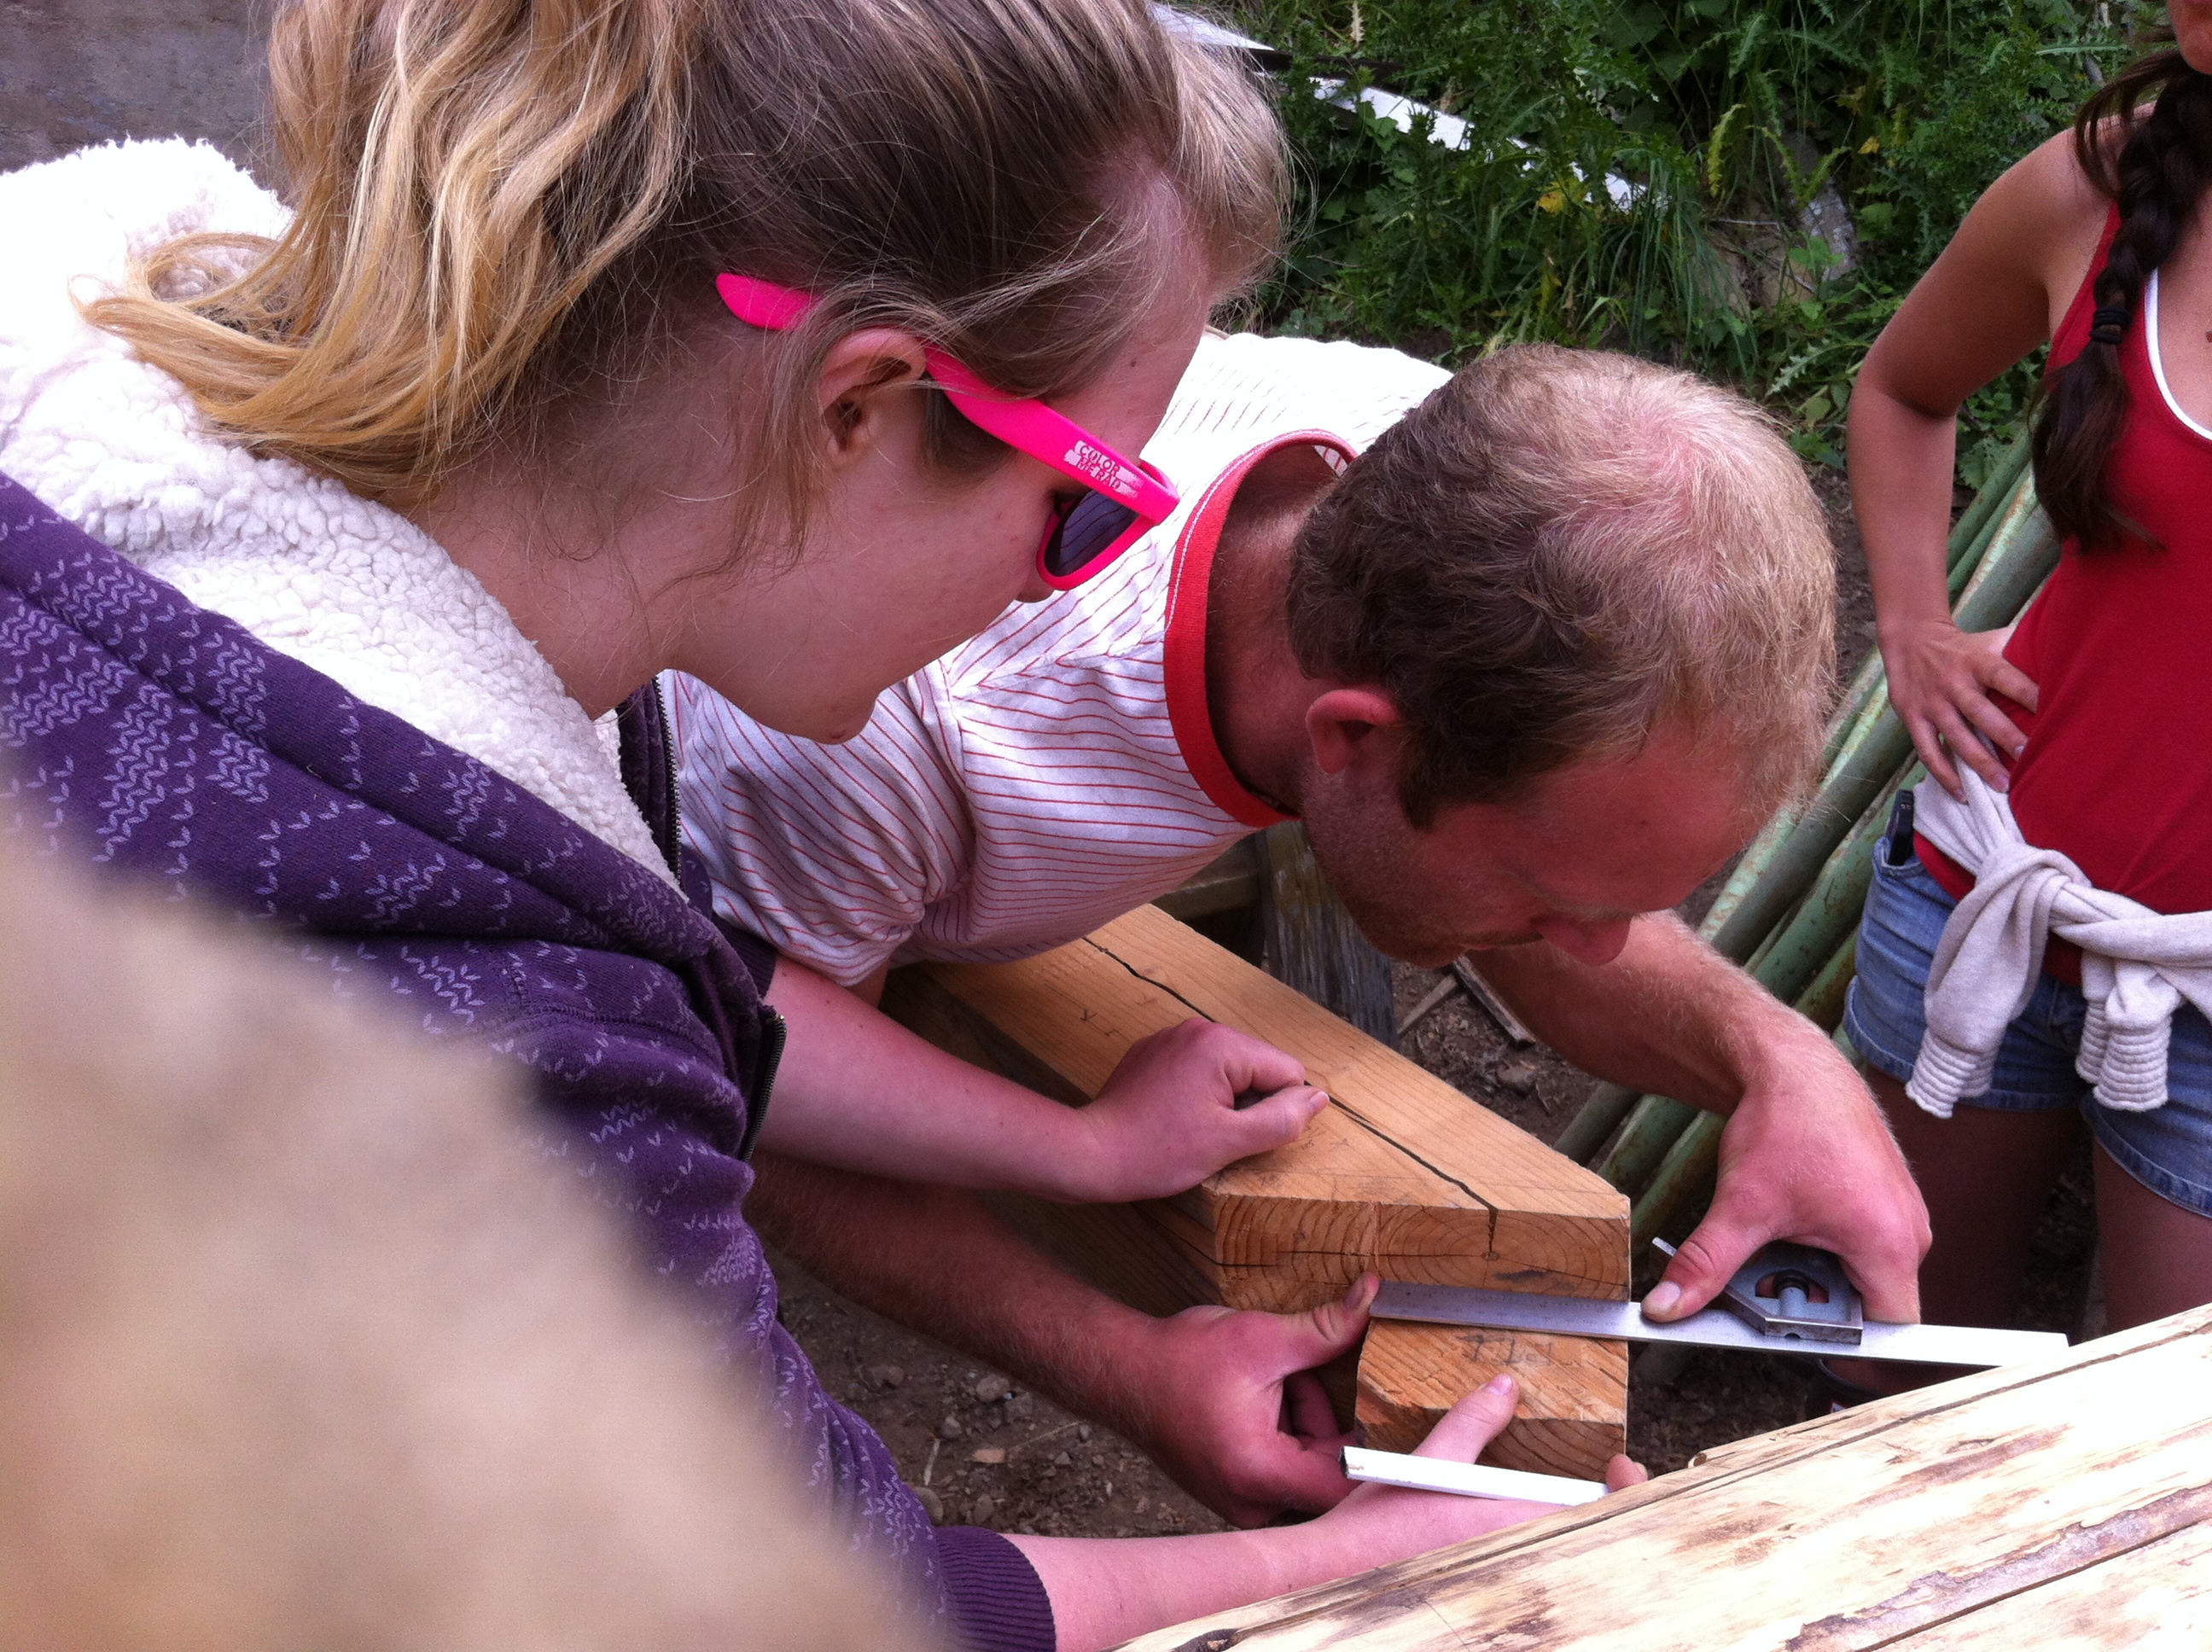


 A bunch of people taking the timber framing class had begun chiseling the logs. Lots of measuring had to be done before hand (measure twice, cut once). These logs were huge, and had to be transported from where they were being worked on to the site where they would go up.
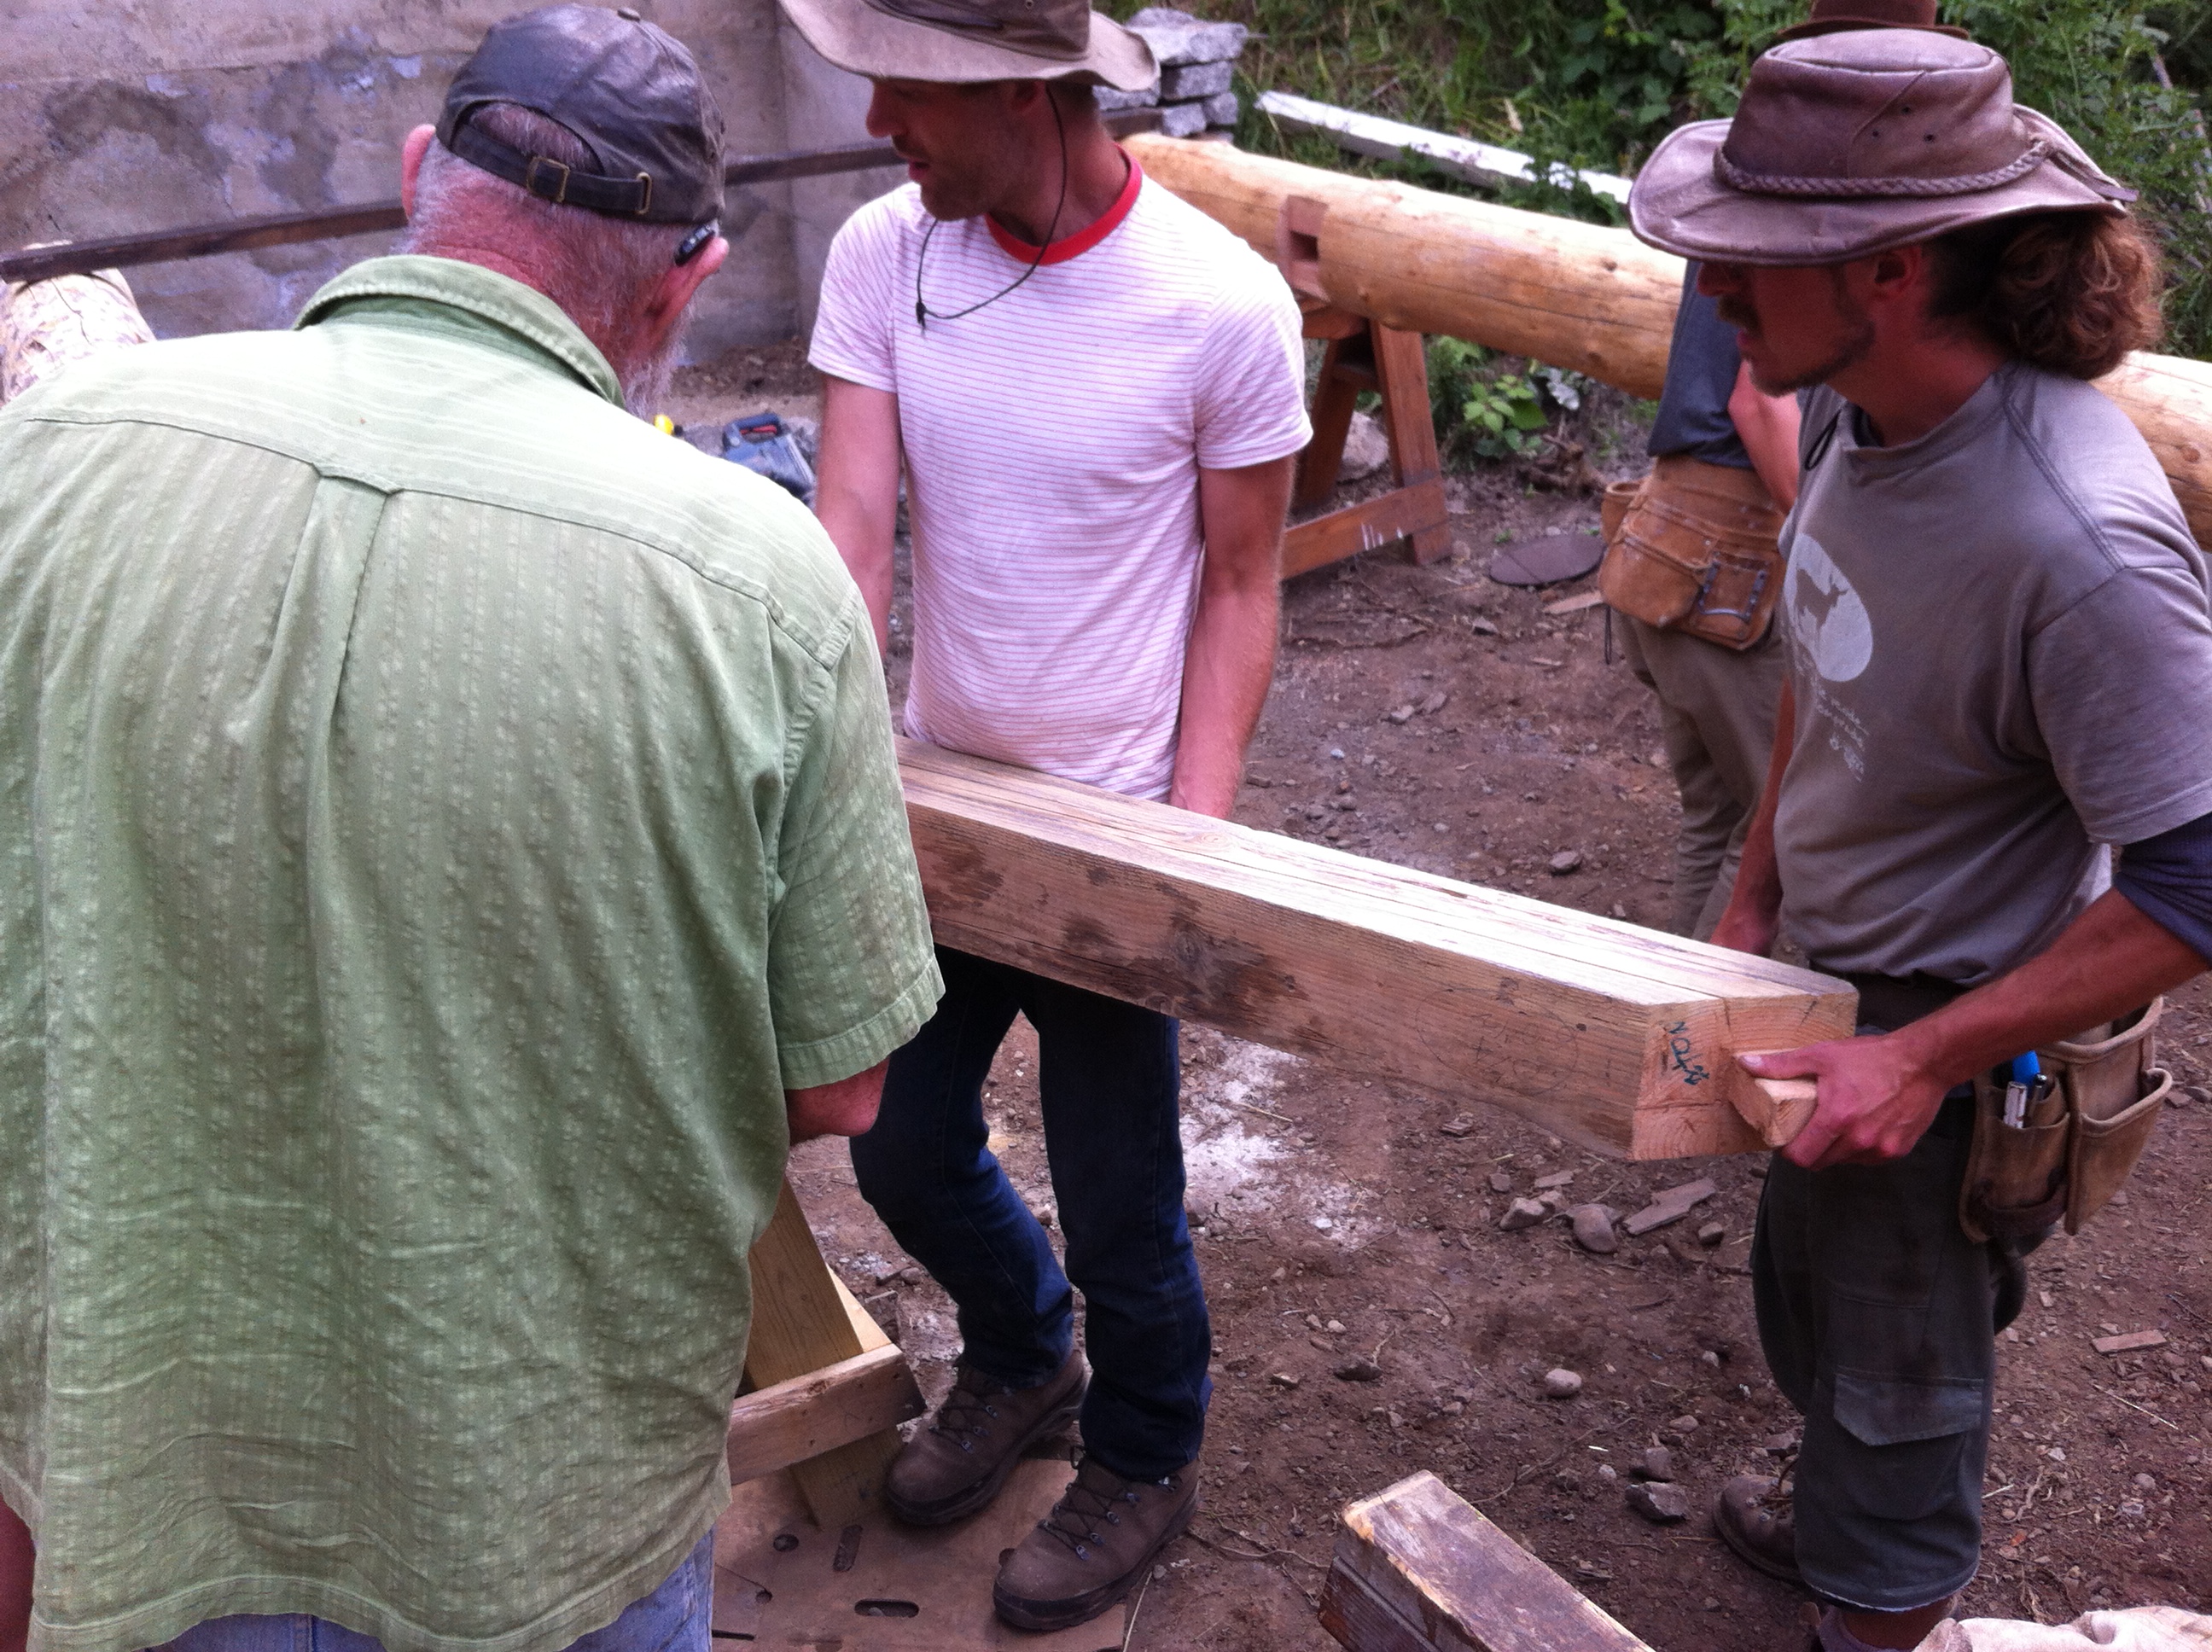
We jumped right in to help bring the logs down. We used a bunch of ropes and 2x4s to distribute the weight better. Moving them this way was a lot easier than trying to carry them. It was slow going because we had to time the walking between all of us, and we were moving downhill.
After that, it was more measuring. The holes had to be drilled in the logs and the support beams so that wooden pegs could be inserted.
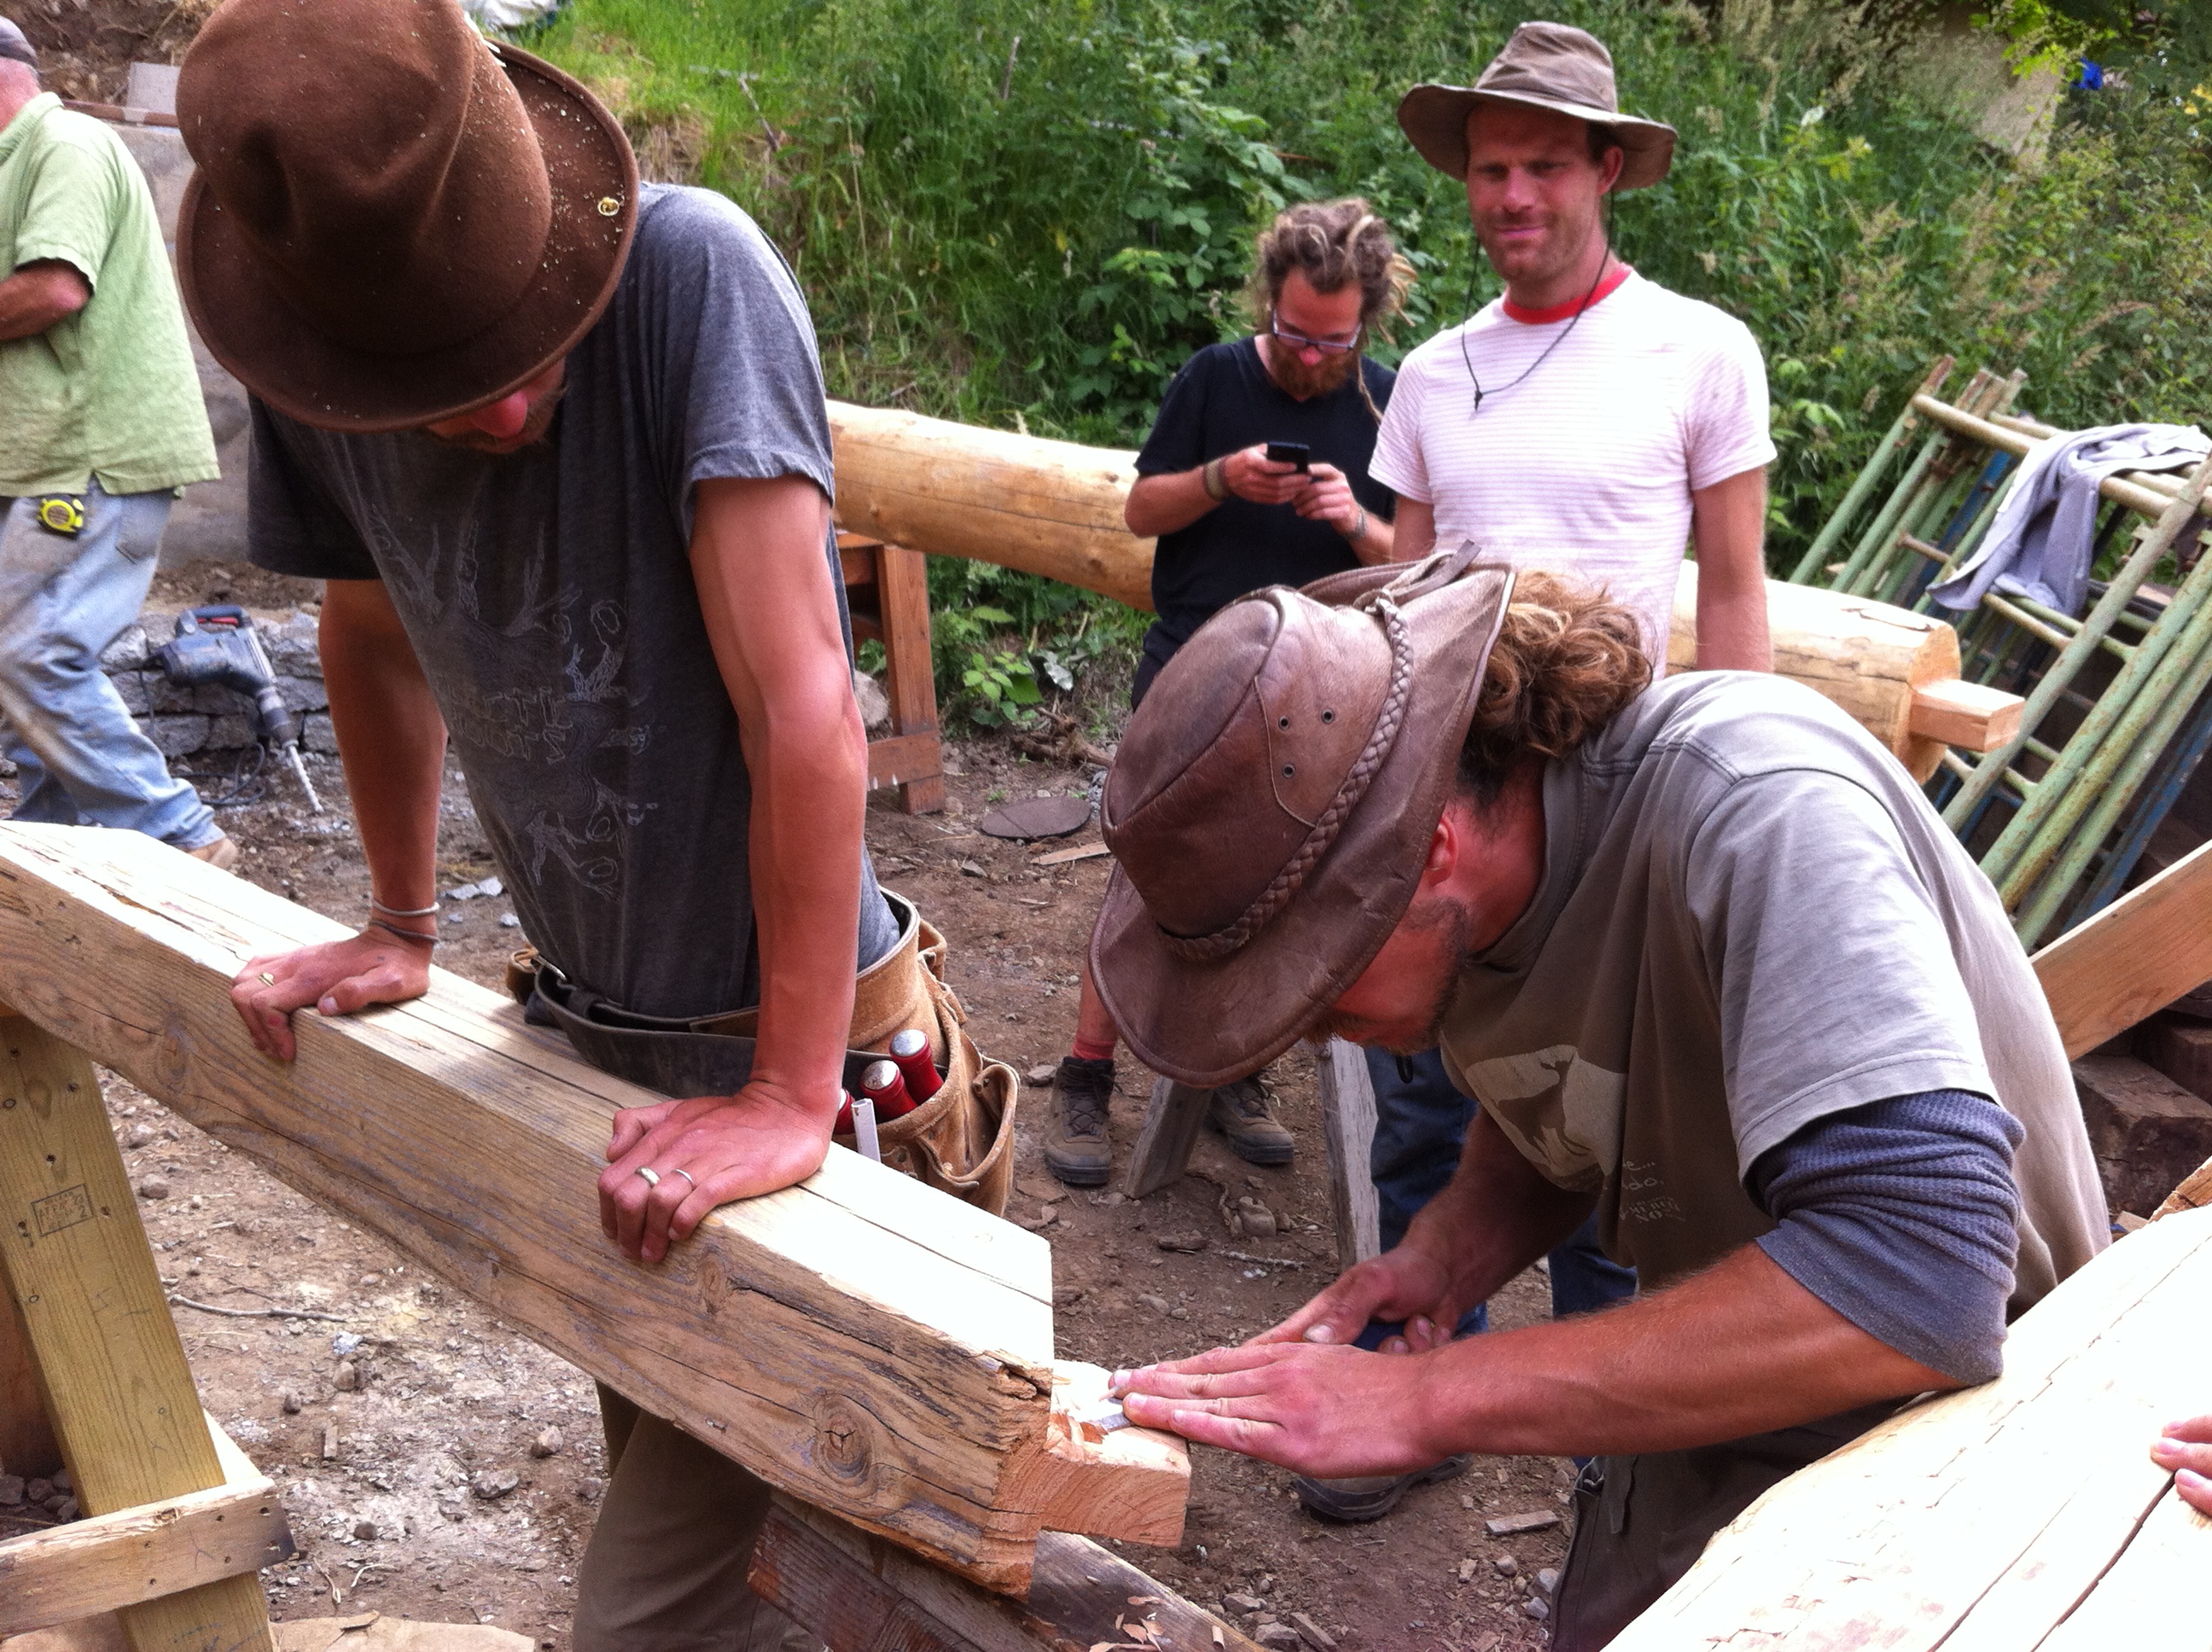
A bit of last minute chiseling was needed to make sure the pieces fit together. There are some very talented builders here!
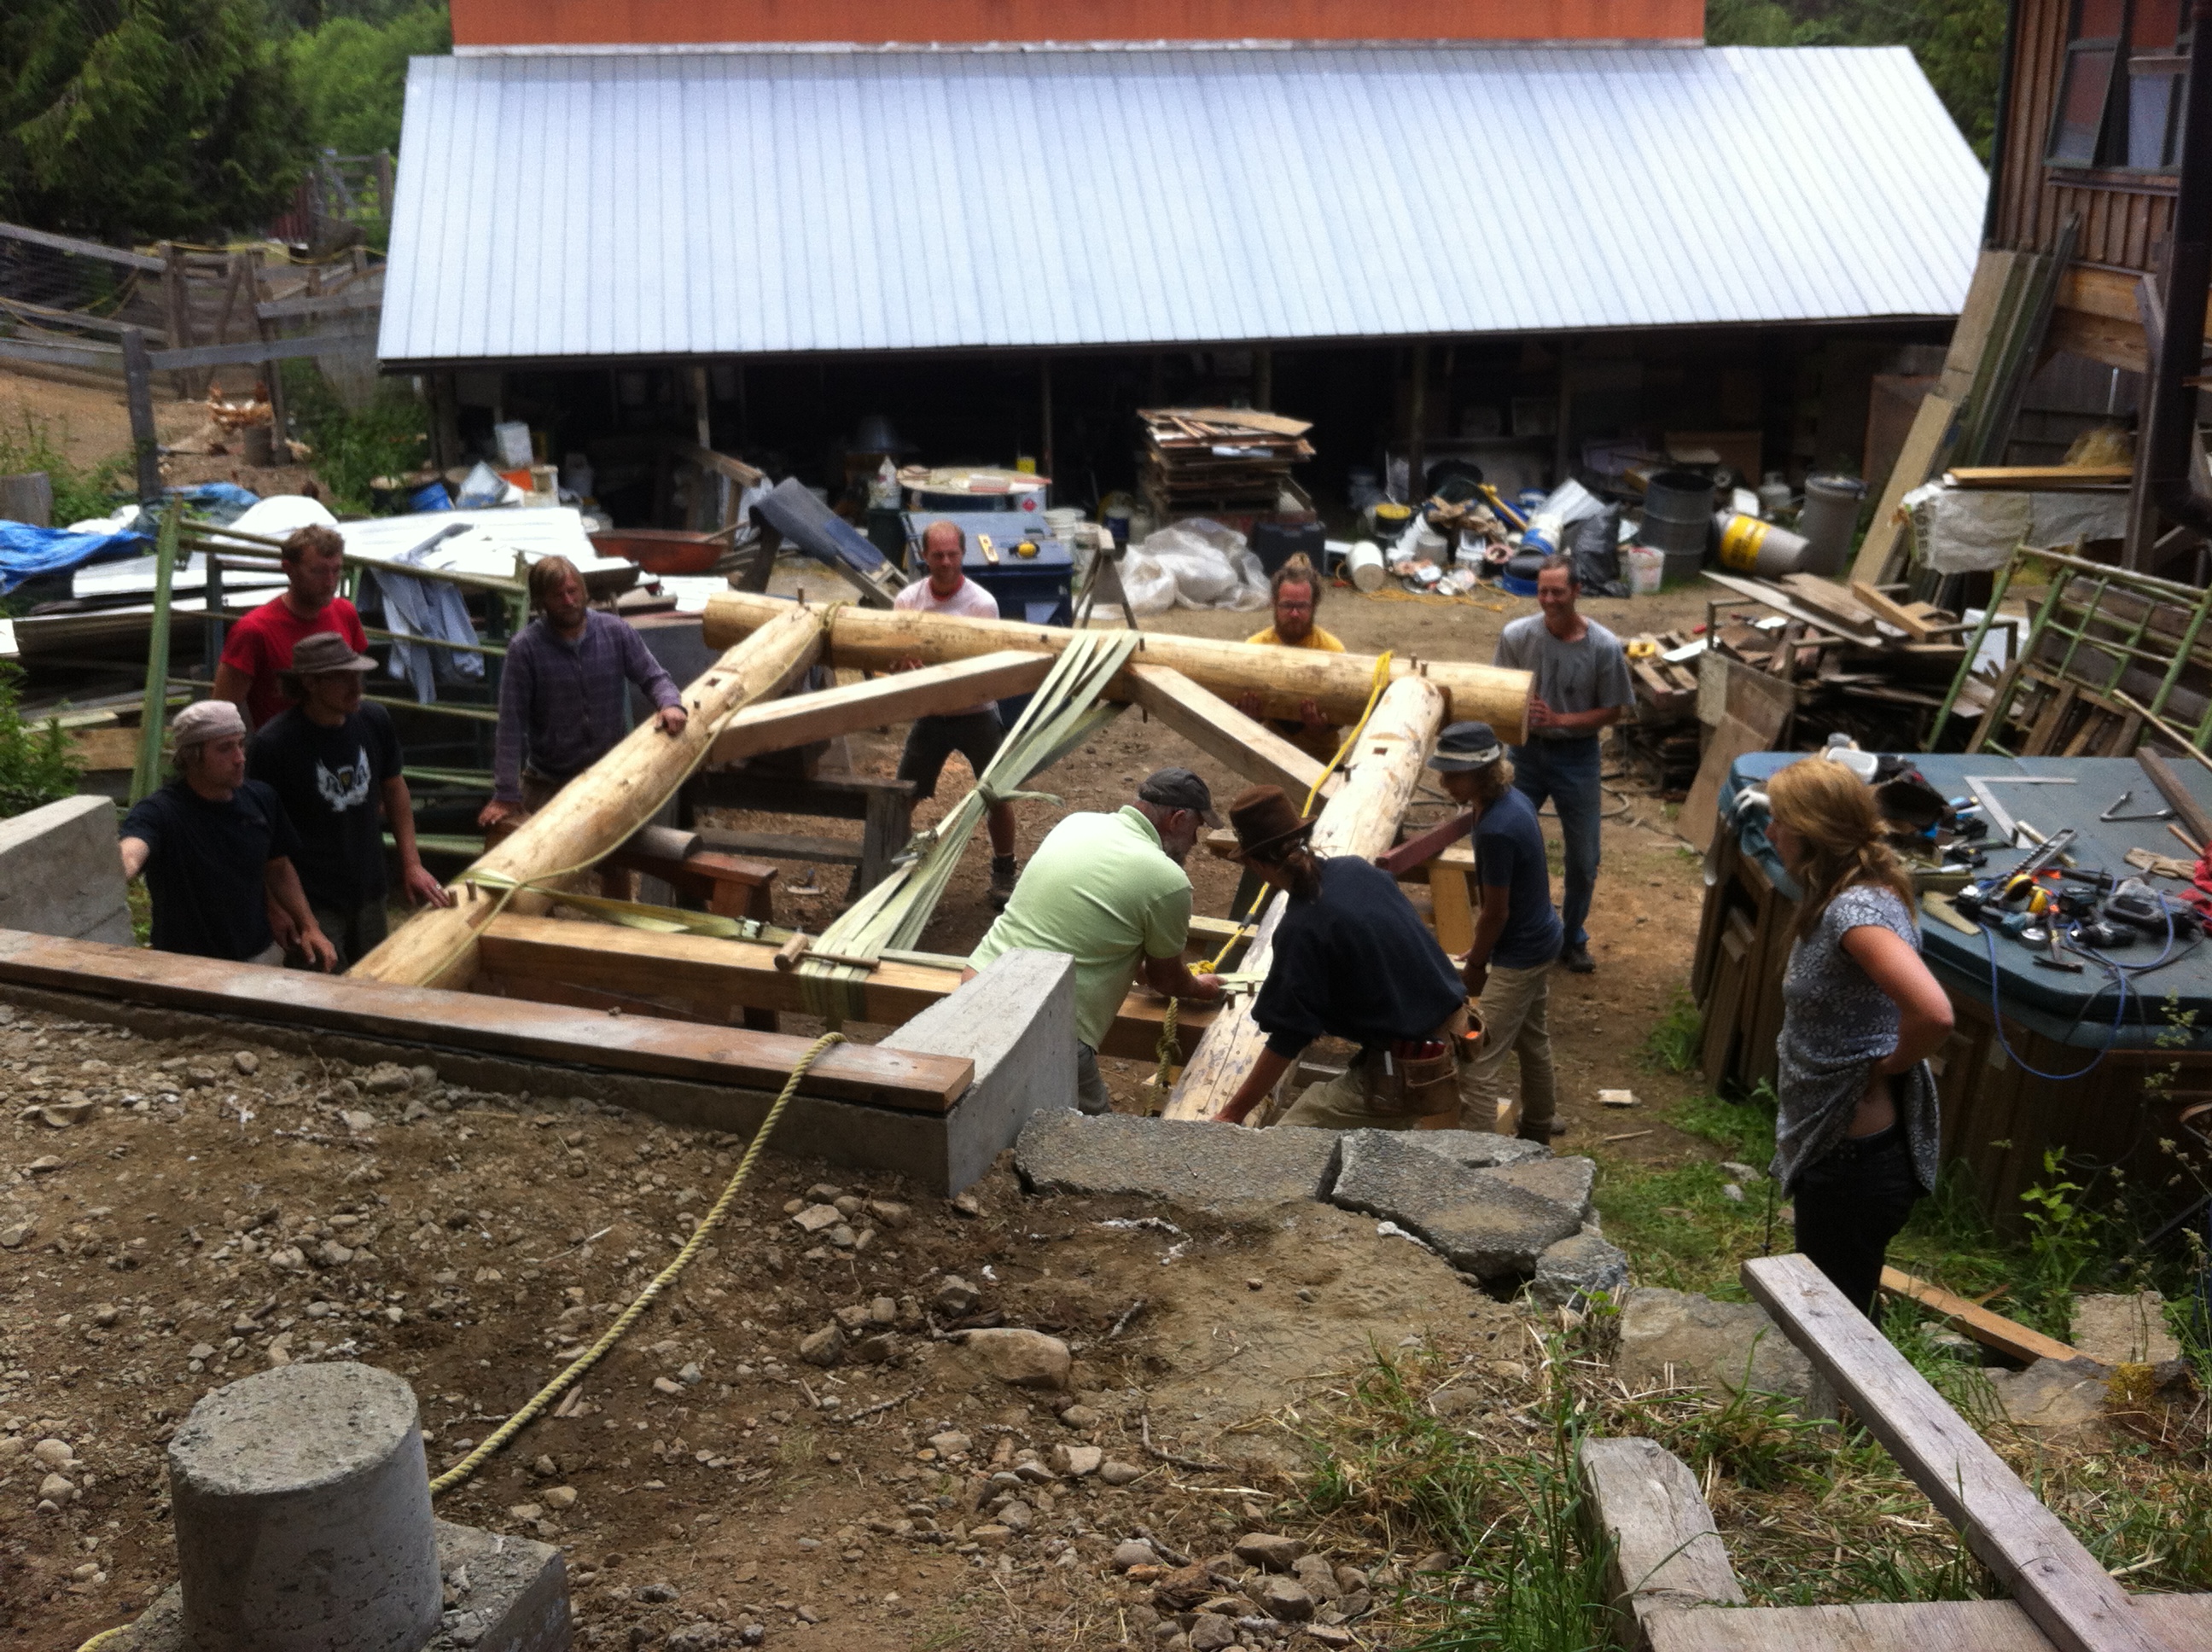
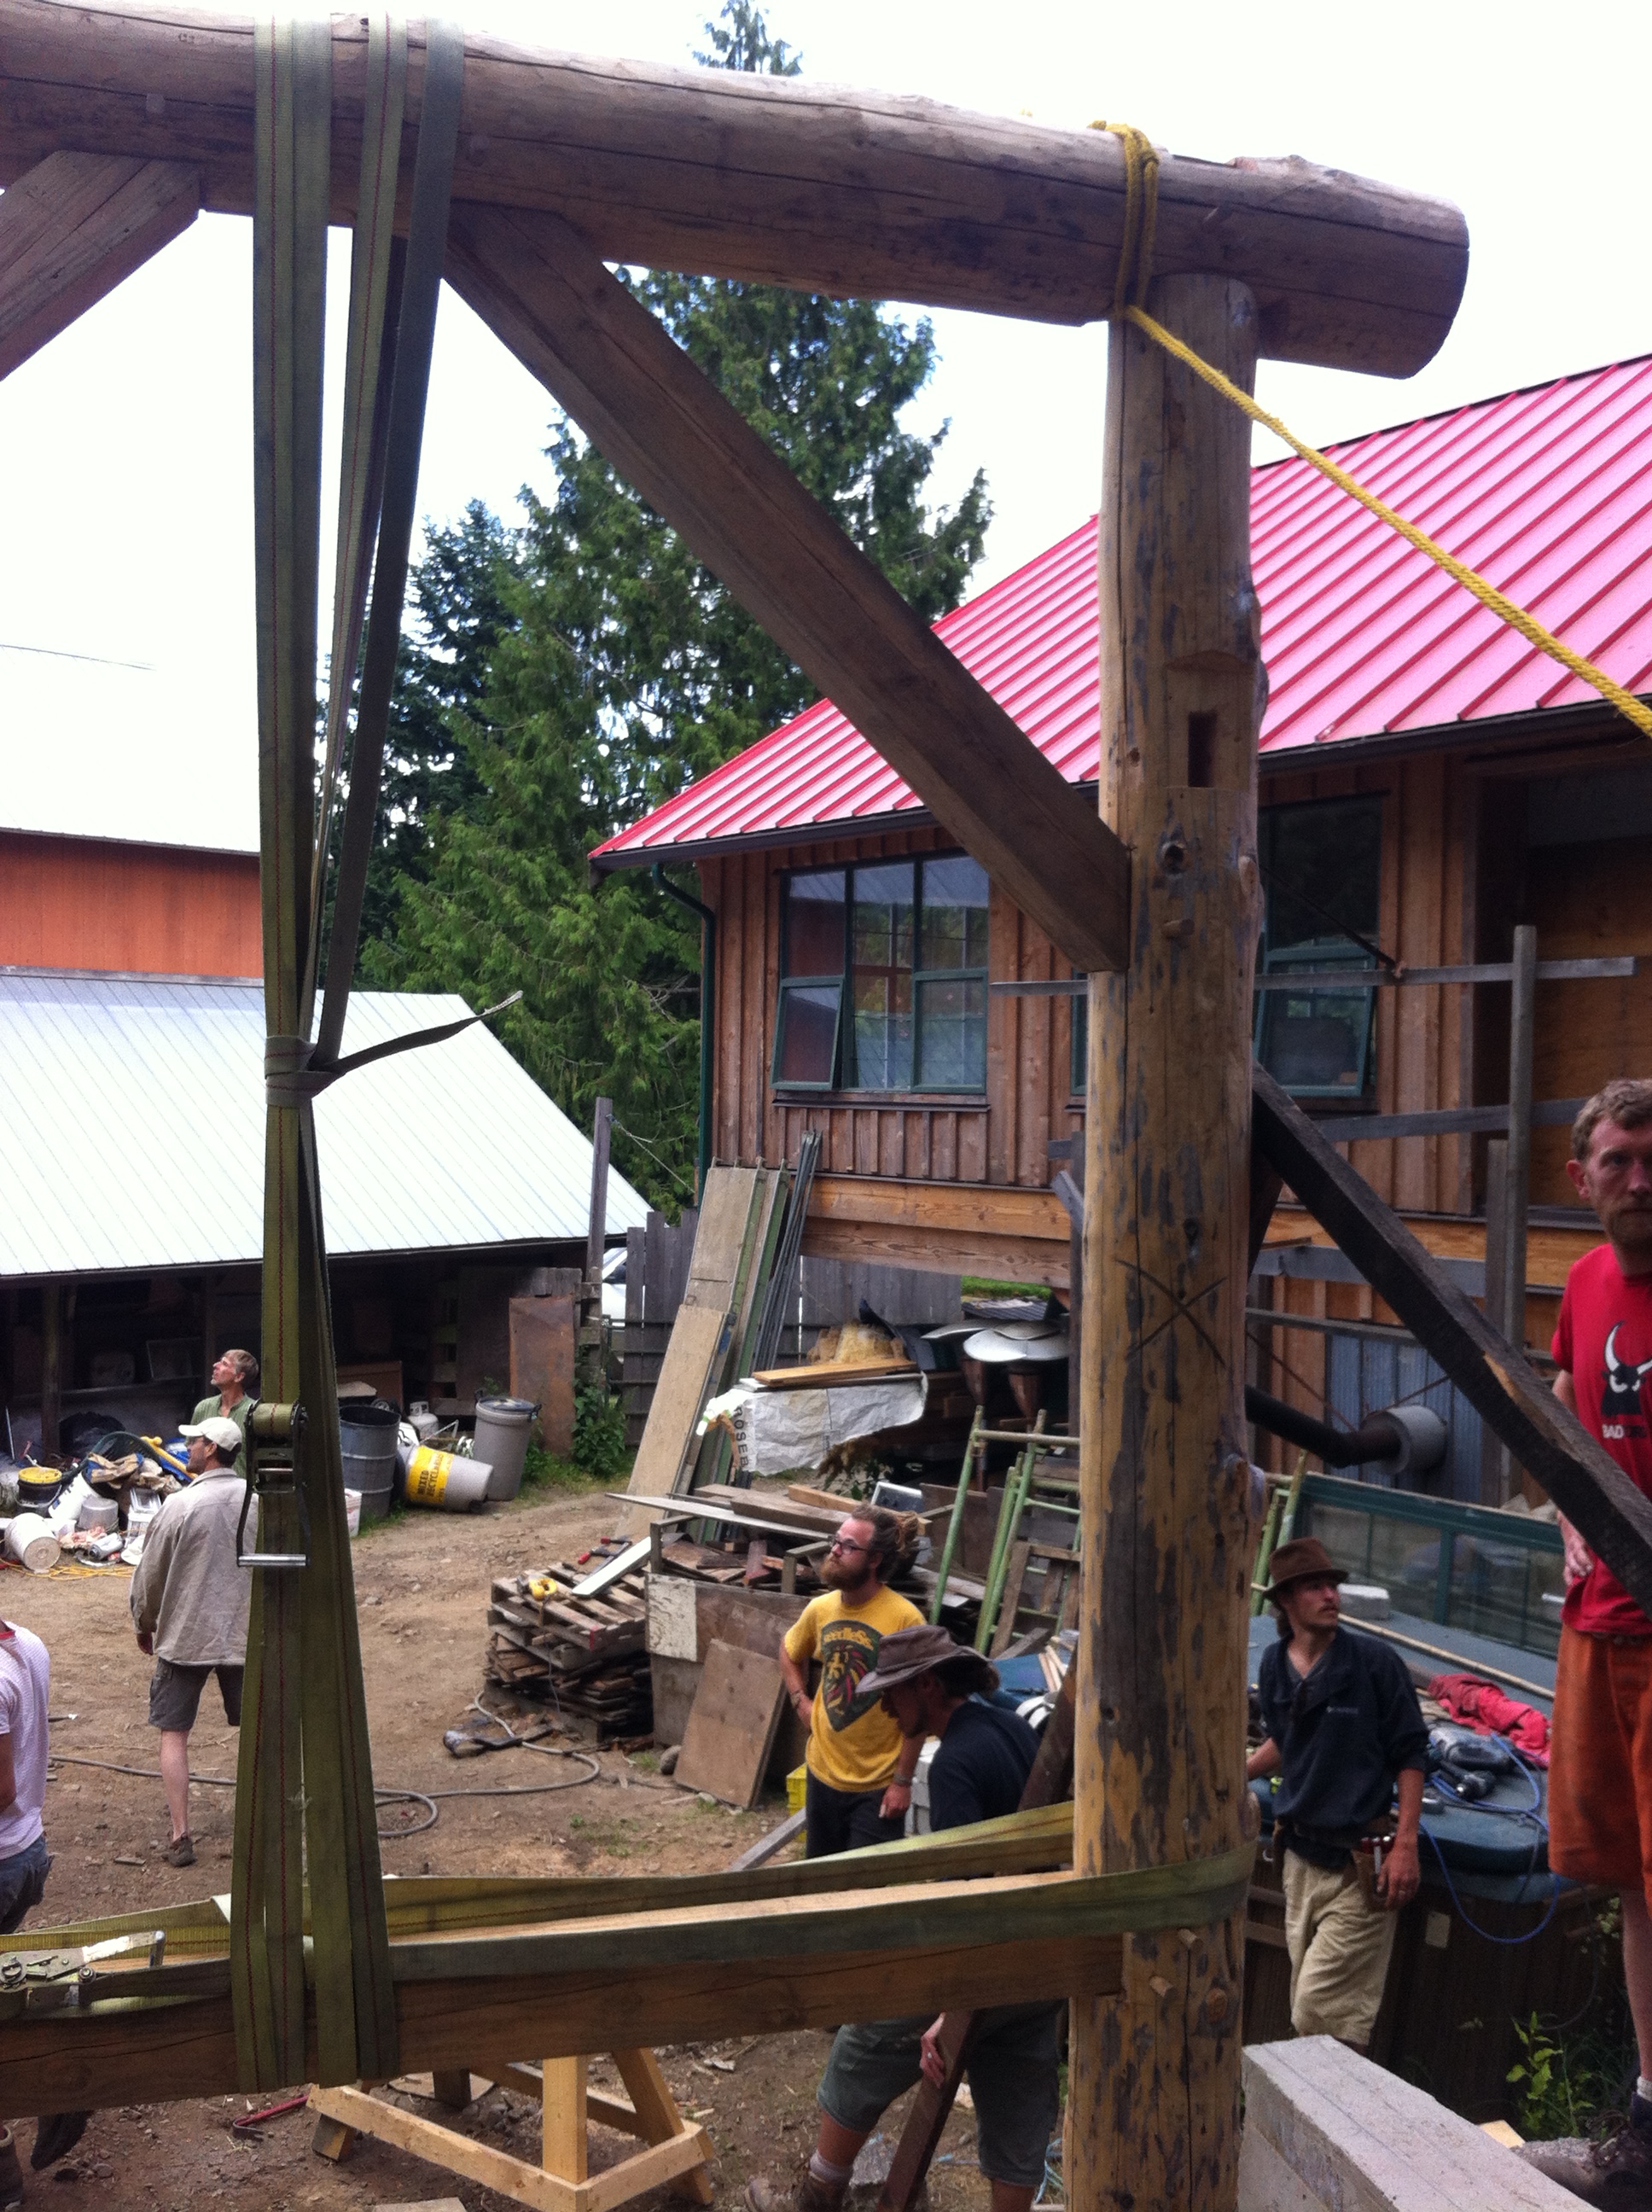
After the holes were drilled, all the wooden posts were hammered in. A top piece was added, and the support pieces were put into the corners. All those pieces together are called a “bent.” This completed bent weighed approximately 1,000 lbs, and needed to be hoisted into place.
We all grabbed on and waited for instructions. Together with a team of people pushing the bent up from below, we were able to get it standing in place. Each post had a piece of rebar in it to hold it in the concrete sections (the cylindrical chunks of concrete at our feet are for the second bent).
A few 2x4s were nailed on to make sure the bent didn’t move around at all before we got the other one connected to it.
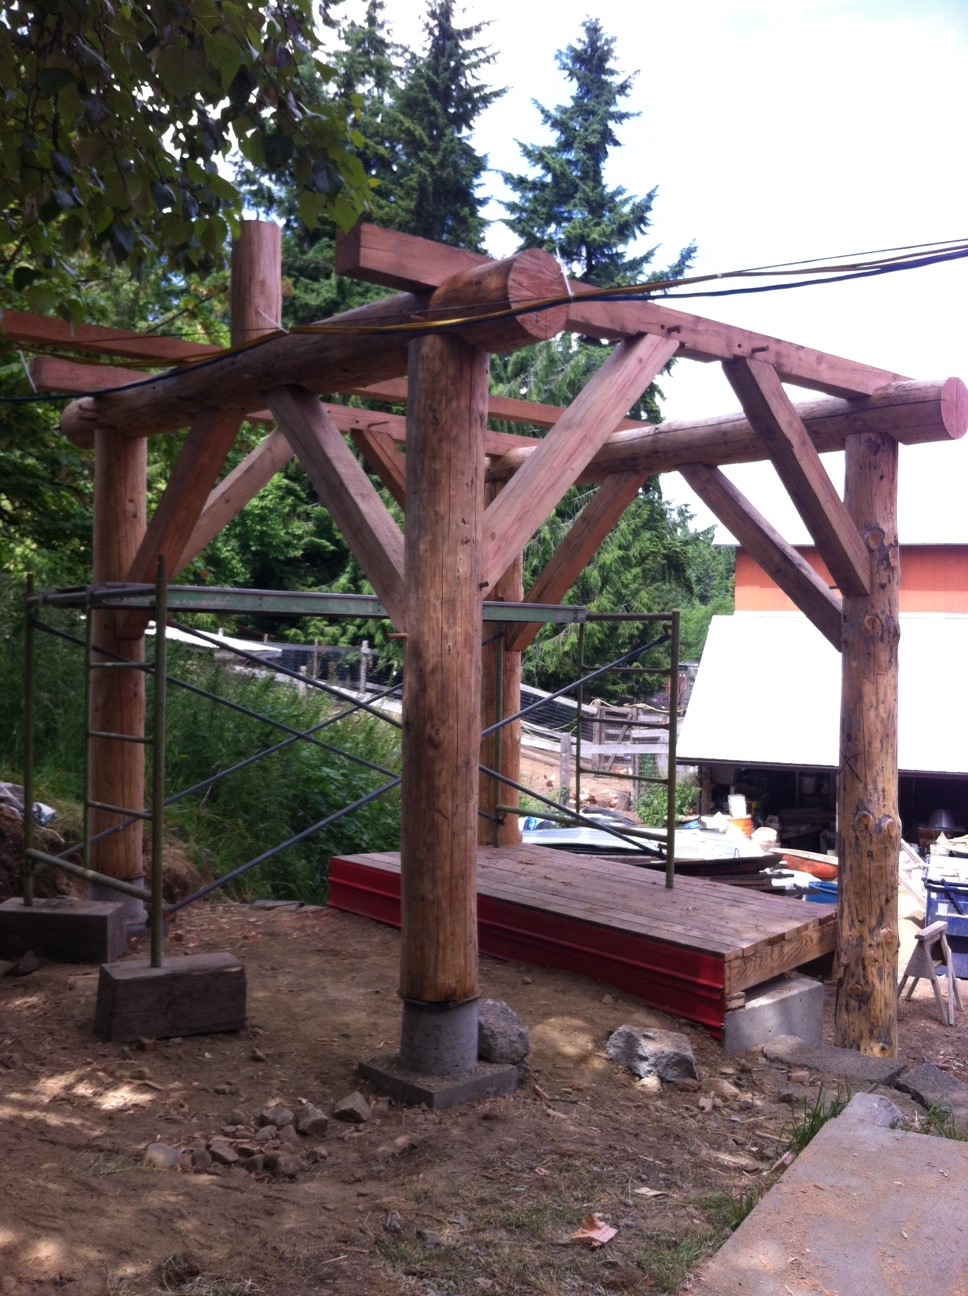
After it went up, we got to hammer down the floor boards. This will end up being – believe it or not – an outhouse. It most definitely be the nicest outhouse I’ve ever seen!
After the floor was finished, the second (smaller) bent was assembled and raised. The top pieces were added as well, and the building really began to take shape. This meant it was time to start cobbing!
Cob is a mixture used to create walls. It is made from an aggregate, a binder, and something for tensile strength. In most cases, cob is made with sand (aggregate), clay (binder), and straw (tensile strength). The sand was sifted to get out most of the bigger rocks.
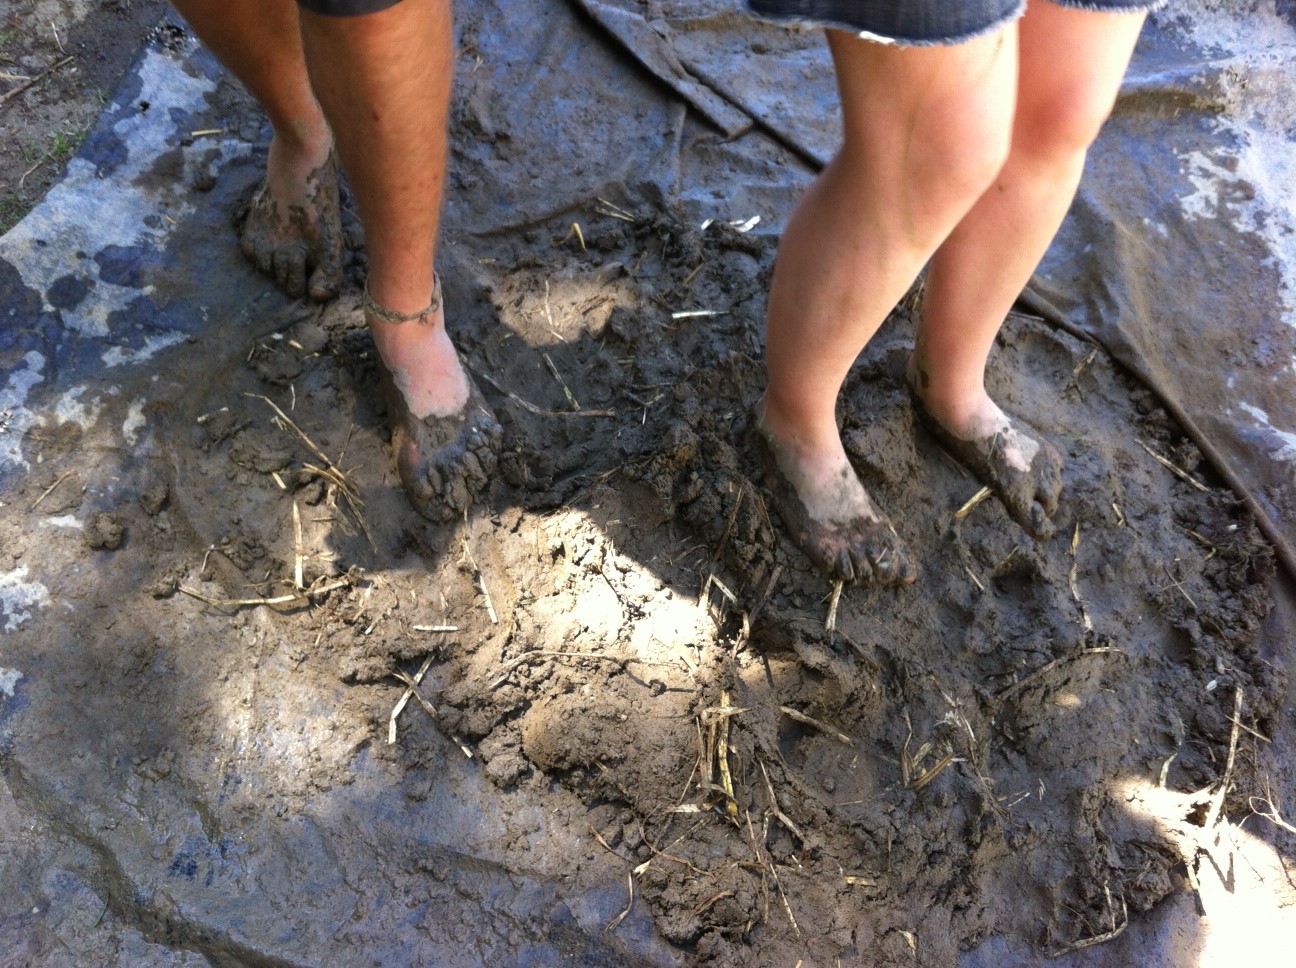
The best way to mix cob is with your feet! We used some water to hold everything together and stomped away. I can’t remember the last time I was barefoot in the mud, especially with this much intention.
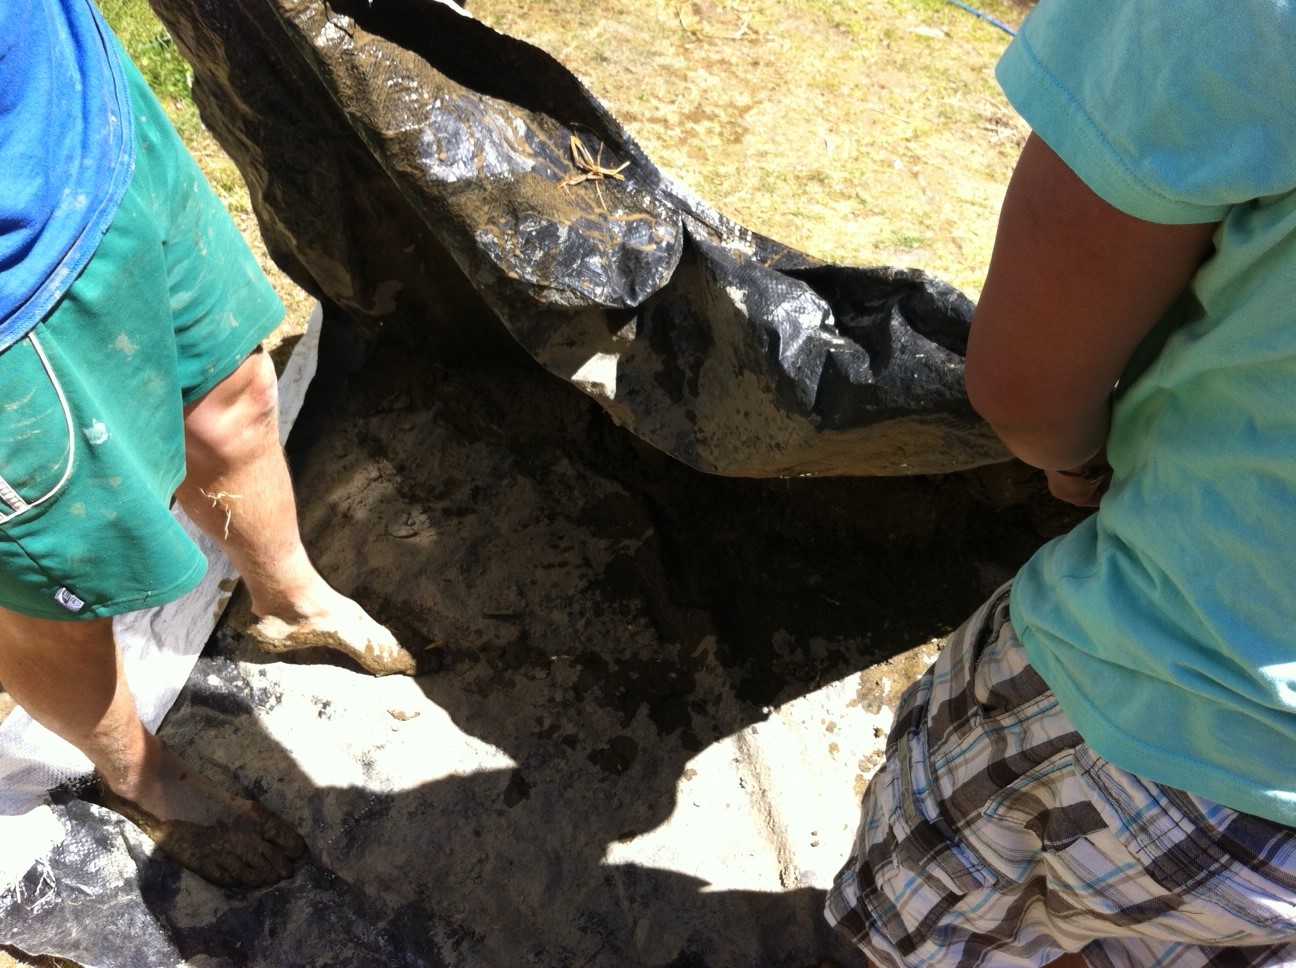
We also used the tarps to sort of roll the cob together. Essentially, you want to make a “cob burrito” – the consistency should allow the cob to sort of hold it’s shape when you roll it in the tarp. Once you get your burrito, you’re ready to start building!
This is how much cobbing we got done in a few hours. It’s a bit slow-going, but it’s an amazing feeling you get, knowing you’ve built something. It’s still hard to believe that the “mud” we were dancing in is strong enough to make walls. We literally built (part of) a wall out of cob that we mixed ourselves!
It’s important not to make this first layer smooth at all. More layers will be added to the outsides of these walls, followed by a final brown plaster (made from a different ratio of straw, sand, and clay). If the walls are made too smooth, the new layers won’t stick to it.
Nails were hammered into the posts of the bent so that the cob would have something to hold on to for more structural support.
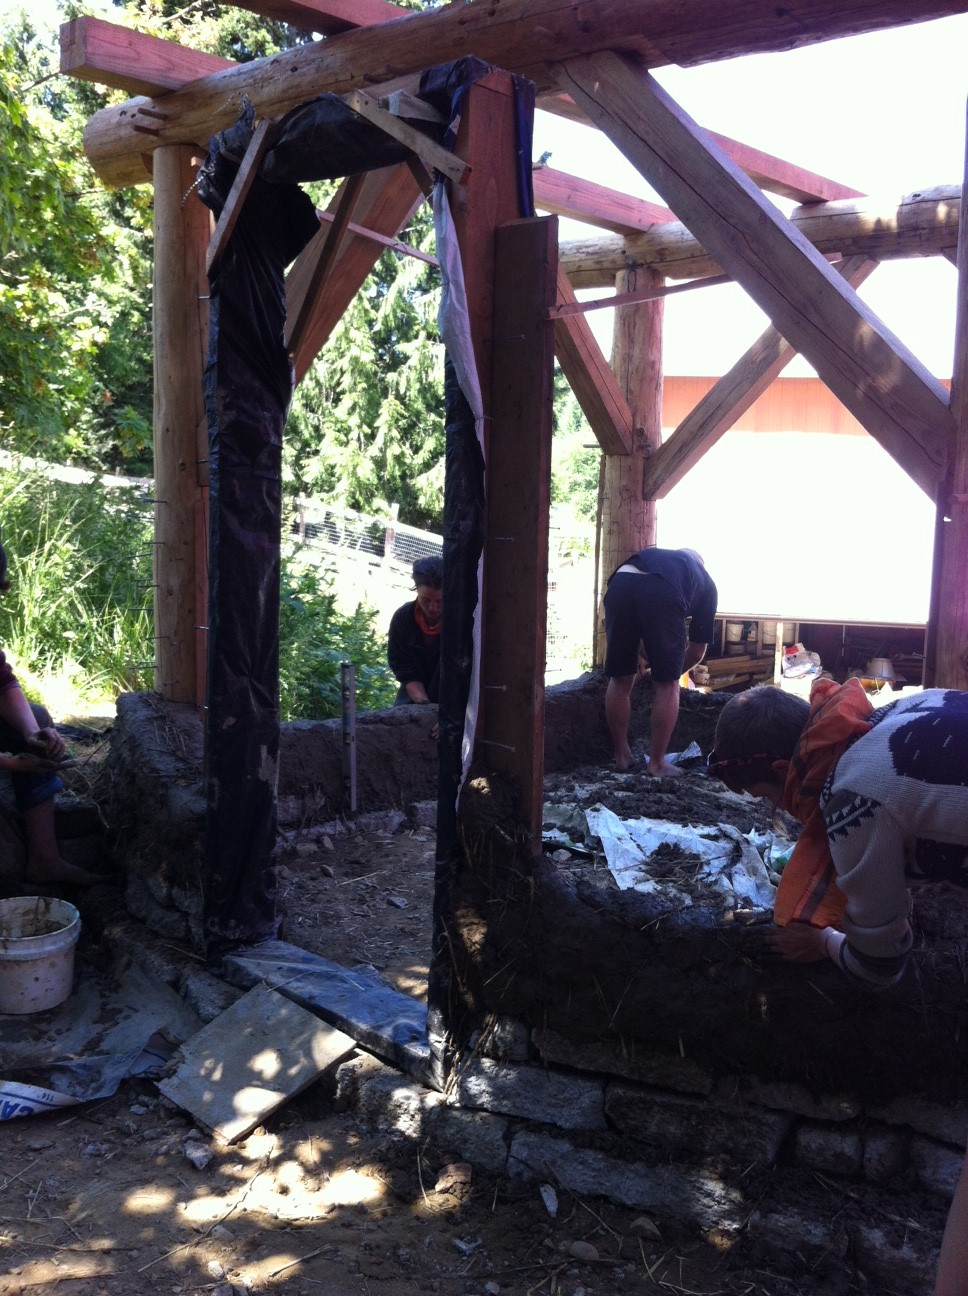
I’m really excited to see this building progress. It’s amazing how much has already been accomplished in the short time we’ve been here!
Yesterday we got to participate in a basket weaving workshop – yet another great 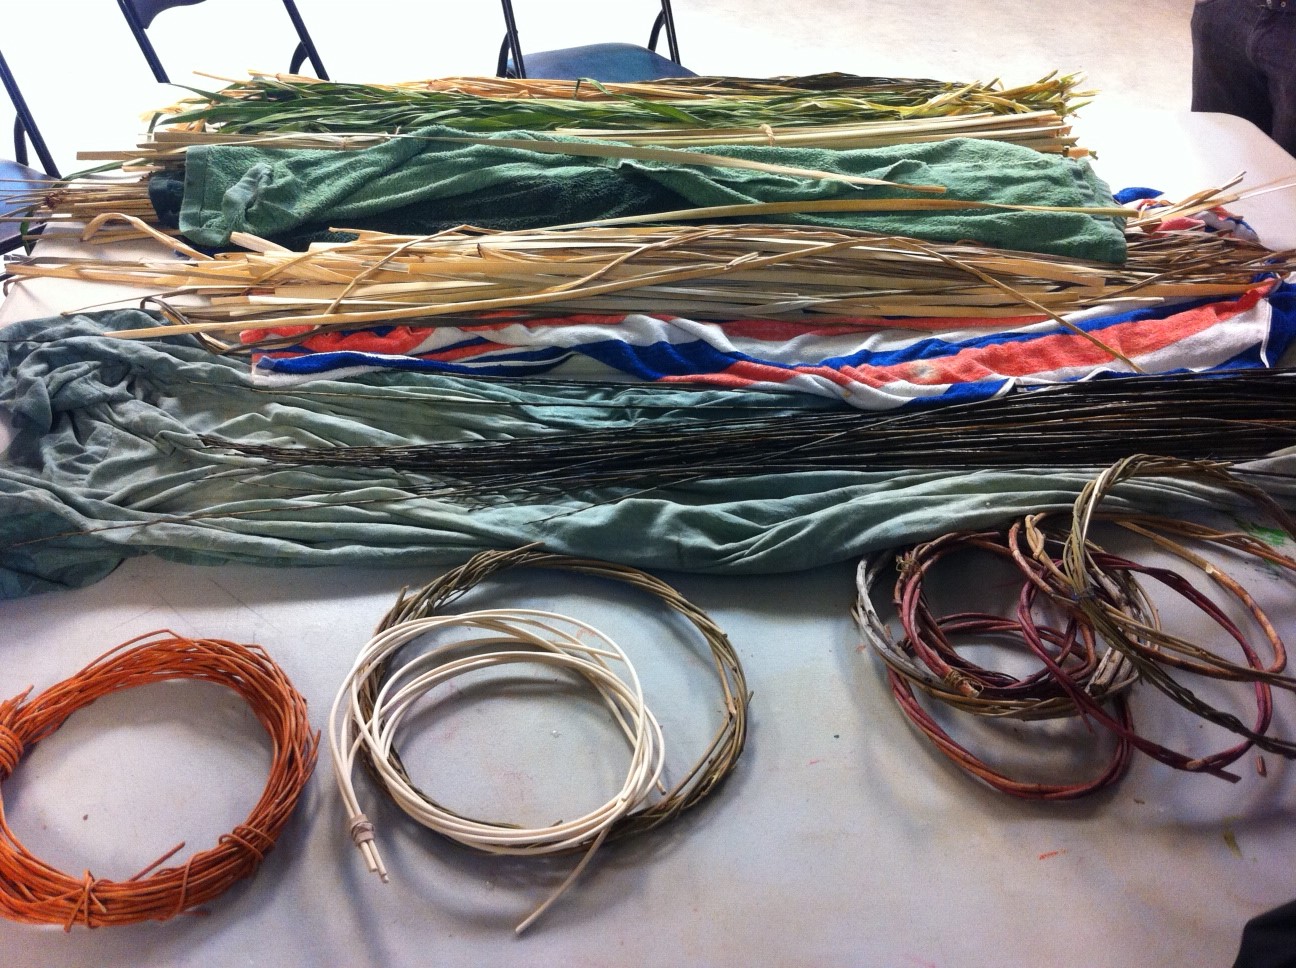 experience of creating with our own hands. These are some of the materials we were able to choose from – the circular branches near the bottom of the picture are for making the initial circles, and the bog iris leaves, bulrushes, and cattails are for the weaving.
There was also cedar bark, some vines, and cordage made from twisting the bog iris leaves. Some of 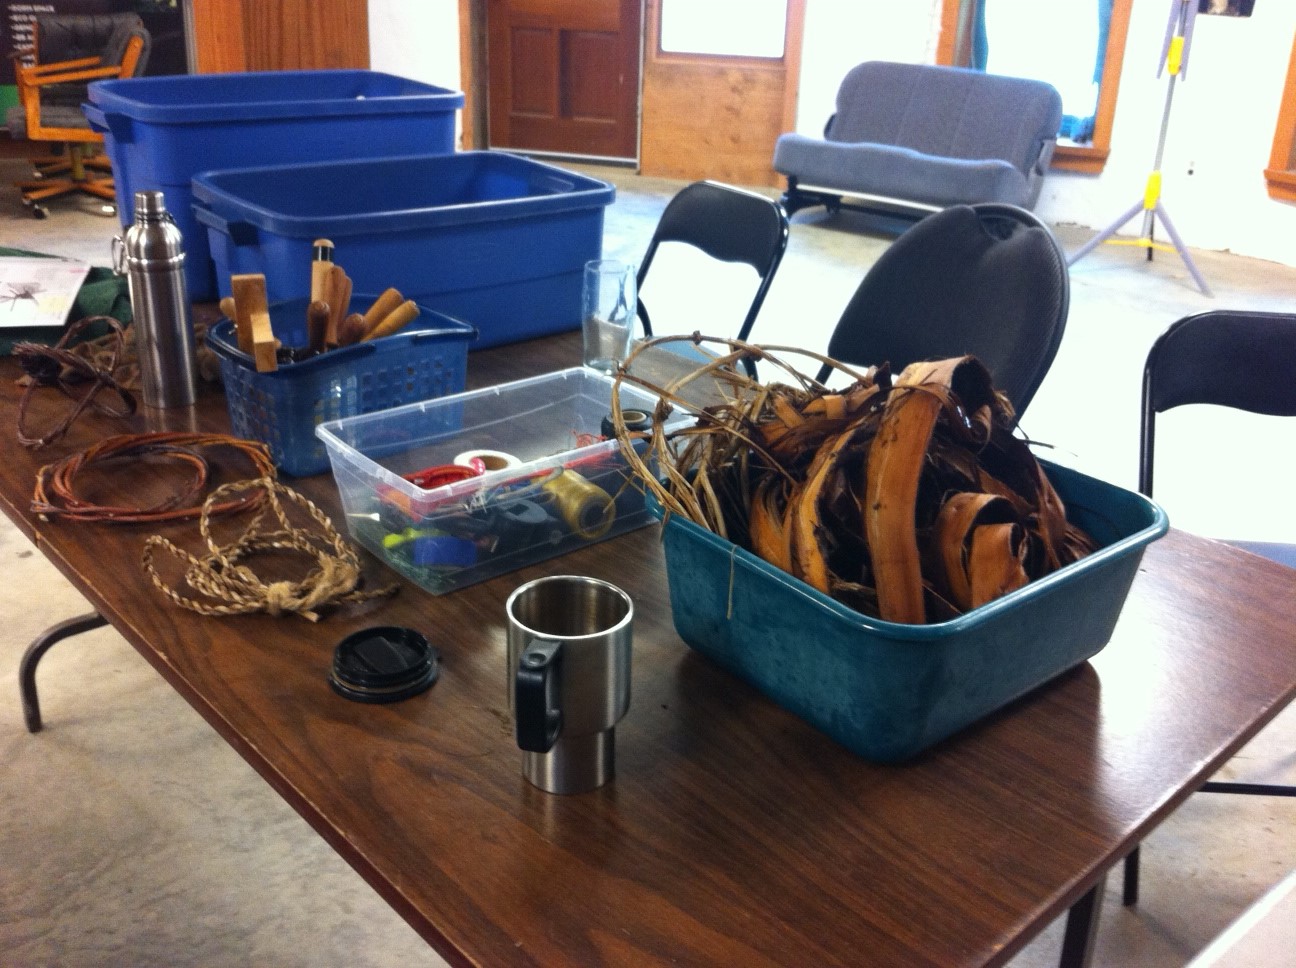 the residents made the cordage a few days earlier. All the bulrushes, cattails, bog iris leaves, and cedar bark was harvested on or near to the site.

After you make two rings out of twigs, you need to create the lashing. This attaches the rings, and will eventually hold the spokes of the basket. We learned two ways of lashing – I tried the God’s eye – just like the ones I used to make out of popsicle sticks and yarn.

After that, the spokes are cut and added in to the frame in order to give the basket its shape. Then the weaving can begin. I chose to alternate between the cattails and the bog iris leaves, so that it would look sort of striped once it dried. The clips are used to hold the weaving in place if necessary.
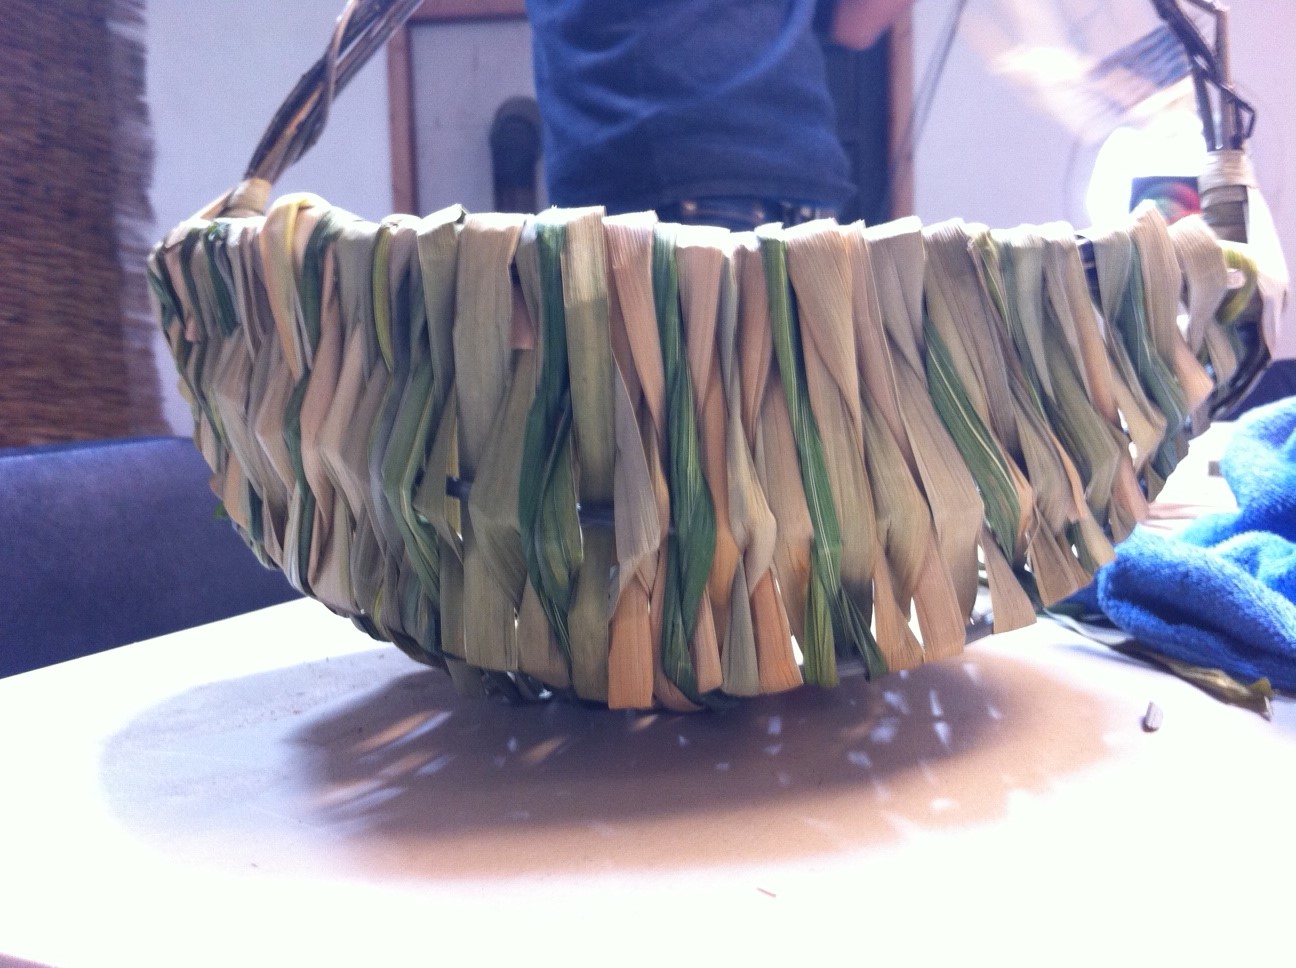 My finished basket! It was so relaxing to do, once I got into a rhythm. I found it to be a lot like knitting – something that can keep your hands moving in a pattern, very relaxing. I thought basket weaving would be much more complicated, but we had a wonderfully laid-back instructor.
I think this would be a really interesting activity to bring into the classroom! The weaving part itself is not difficult, and I think students would get the hang of it very quickly. The circles could always be made 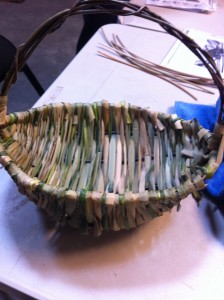 ahead of time if need be. This could connect to all sorts of curriculum: First Nations, natural resources, life cycles of plants… I hope that I can bring this activity back to share with a class one day.
I finished my first basket with some time left over, so I decided to try something different. I wanted to do a very shallow basket, and I wanted to try out making handles in the basket. I chose willow branches again for the circles, and this time I used the bog iris cordage for the weaving. It sort of flattened itself out as I wove it, so now it’s more of a serving plate. I guess it could also double as a hot plate for a large dish. Either way, it felt really good to be able to visualize something and then create it.