This example has been adapted from a tutorial on H5P.org
In this demonstration, we will walk through the creation of a Question Set content type. This is how it will appear:
Use Cases
Question sets serve as a valuable tool for structuring a series of related problems for learners to tackle as a cohesive unit, rather than presenting them as separate challenges.
Question sets are particularly useful for evaluating a learner’s grasp of fundamental concepts within a complex learning module. They are suitable for applications like end-of-chapter assessments or summative course exams. Within Question sets, you can incorporate diverse quiz types, such as Multiple Choice, Fill in the Blanks, and Drag and Drop questions.
It’s important to note that Question sets are designed to be used standalone, offering a focused and comprehensive approach to assessing and reinforcing learning outcomes.
Step 1: Topic
The topic for this demonstration will be berries and will use various wikis to source our content. In this demonstration, we will be creating multiple-choice, drag and drop and fill-in-the-blank style questions to build one question set.
Step 2: Creating a Question Set
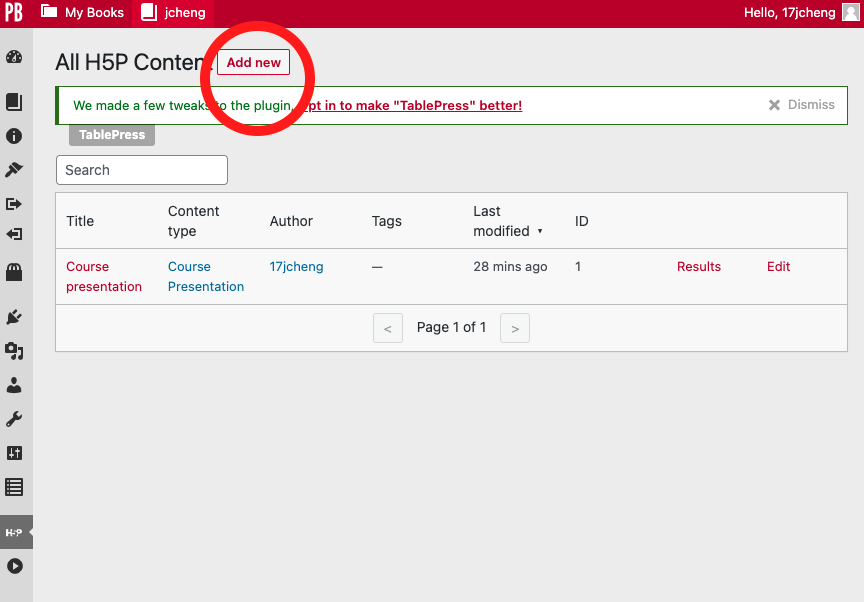
If you are using Pressbooks, navigate to the H5P menu on the left sidebar and click Add new.
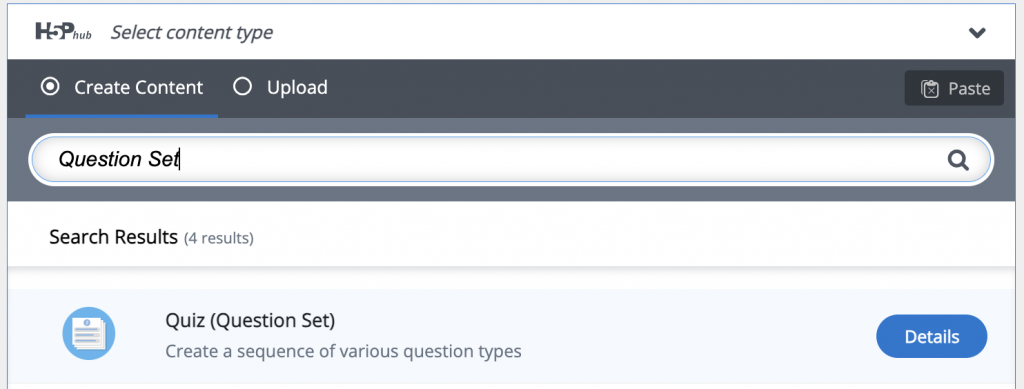
Search for Question Set and select Details
If you are using H5P.com, you will be prompted to Create New Content. Search for Question Set and click Details
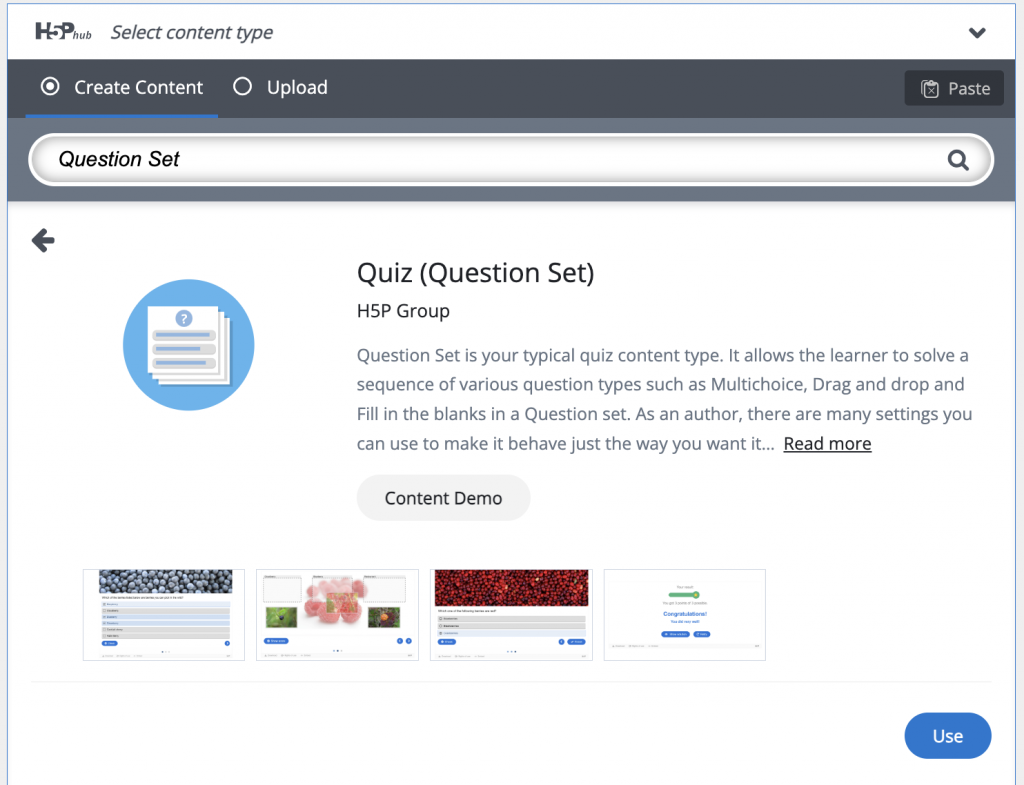
Select Use
Step 3: Title and Quiz Set editor
Enter a unique Title for your Question Set. This title will be used to distinguish other H5P Question Sets and content types you create.
In this example, let’s use the title Berries – Quiz Set.
The Question set editor appears as this:
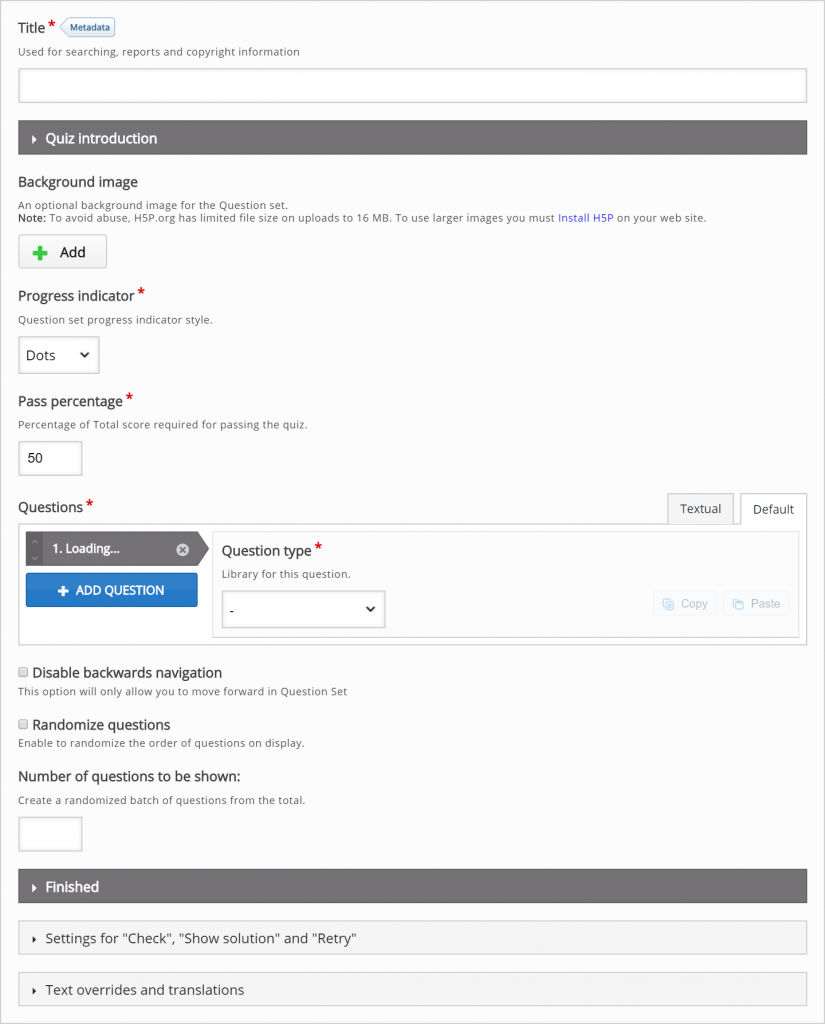
The top part of the Question set editor consists of:
- General settings at the top including Background image, Progress indicator, and Pass percentage
- A Questions sections in the middle, where we add the various quiz tasks
- Customizable text fields at the bottom, including Quiz introduction and Quiz finished: Your result:
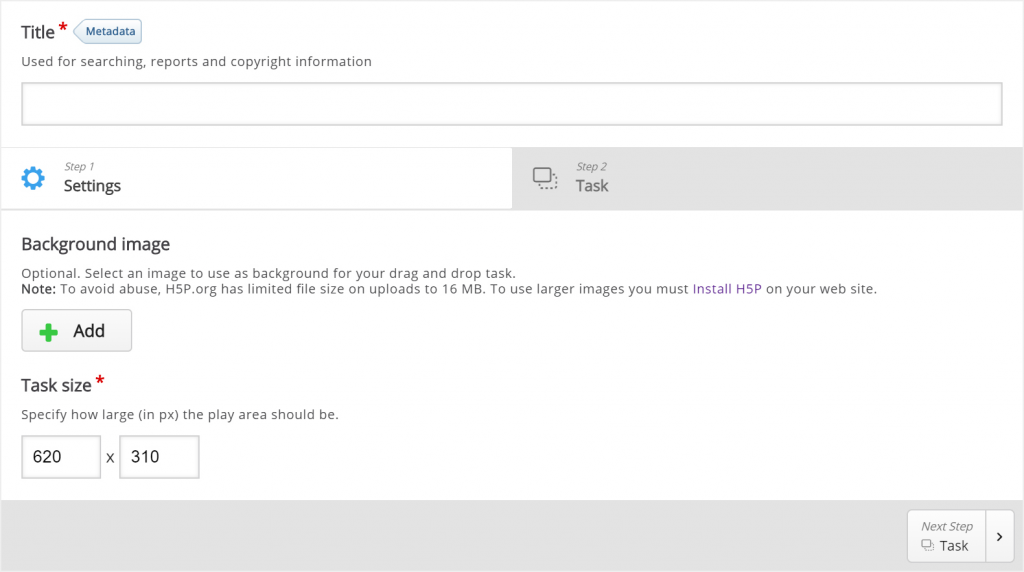
Step 4: Background image
You can add a Background image that is displayed behind the various quiz tasks included in your Question set.
Let’s use this background image of raspberries found through Wikimedia.
When you click on the link above, it will open into a new window. Right-click the image and save it onto your computer. Note the license information and URL for each image.
Select +Add and upload the raspberries file from where you saved it on your computer. Add any copyright information to the image.
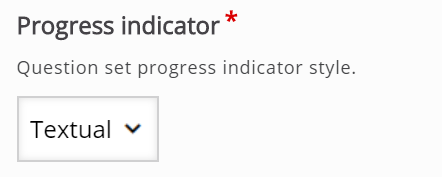
Step 5: Progress indicator
You can choose between a textual indicator and dots. We’ll use Textual in this tutorial:
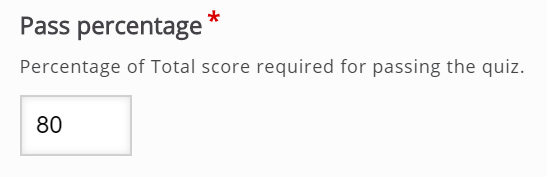
Step 6: Pass Percentage
Here you define the percentage of points the learner will need to achieve in order to pass the Question set. More about score points later in this demonstration. We’ll set this to 80 for now:
Step 7: Questions
Here, we’ll add the actual questions that the Question set consists of. In this demonstration, we’ll add three quiz questions:
- A Multichoice question
- A Drag and drop question
- A Fill in the blanks
When the Question set editor is launched, only one undefined question type is displayed below the Questions header:
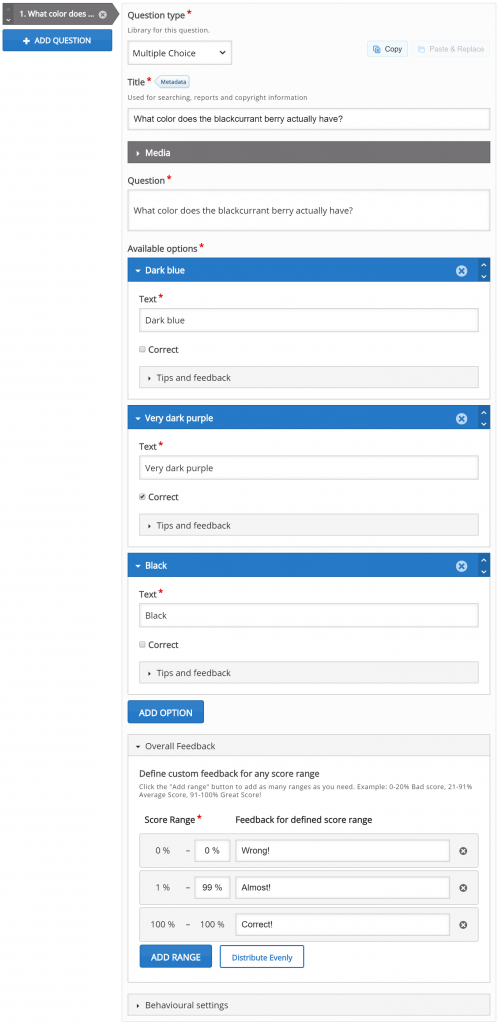
Step 8: Add Multiple Choice Question
In the Question type dropdown, select a Multiple Choice question. This will load the Multiple Choice question editor:
Use the following text to populate the Multiple choice question editor. This example is sourced from the original H5P.org Multichoice Tutorial:
Title: What color does the blackcurrant berry actually have?
Question: What color does the blackcurrant berry actually have?
Available Options. Click Add Option to add more options in the editor:
- Very dark purple
- Dark blue
- Black
Mark the check next to the Correct checkbox for Very dark purple
In the Overall Feedback panel below, use the following criteria:
- Score Range: 0%-0%; Feedback for defined score range: Wrong!
- Score Range: 1?%-99%; Feedback for defined score range: Almost!
- Score Range: 100%-100%; Feedback for defined score range: Correct!
Also, review any of the Behavioural settings to configure any specific details about how this Multiple Choice question should appear to the user.
You should by now have something like this:
Step 9: Add Drag and Drop Question
Press the Add question button to add another question to the Question set.

This time, we’ll choose Drag and drop question from the dropdown menu. The Drag and drop question editor will now appear.
Step 9a: Title and Drag and Drop editor
Enter a unique Title for your Drag and Drop. This title will be used to distinguish other H5P Quiz Sets and content types you create.
In this example, let’s use the title Strawberry – Drag and Drop.
The Drag and Drop editor appears as this:
There are two steps in creating a Drag and drop question: Settings and Task. You can press the Settings and Task tabs at the top of the editor at any time to navigate between the views.
Step 9b: Drag and Drop Settings
Settings deals with general settings such as background image and size.
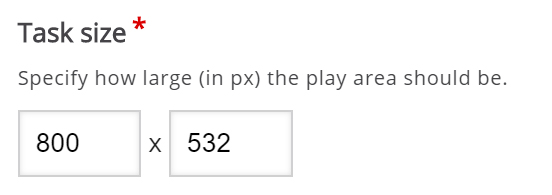
Let’s use this background image of a strawberry found through Wikimedia.
When you click on the link above, it will open into a new window. Right-click the image and save it onto your computer. Note the license information and URL for each image.
Select +Add and upload the raspberries file from where you saved it on your computer. Add any copyright information to the image.
Now that we’ve added a background image, I can define the size of the Drag and drop question. Since the image has a width of 800 px and a height of 532 px, I’ll use this size for the task.
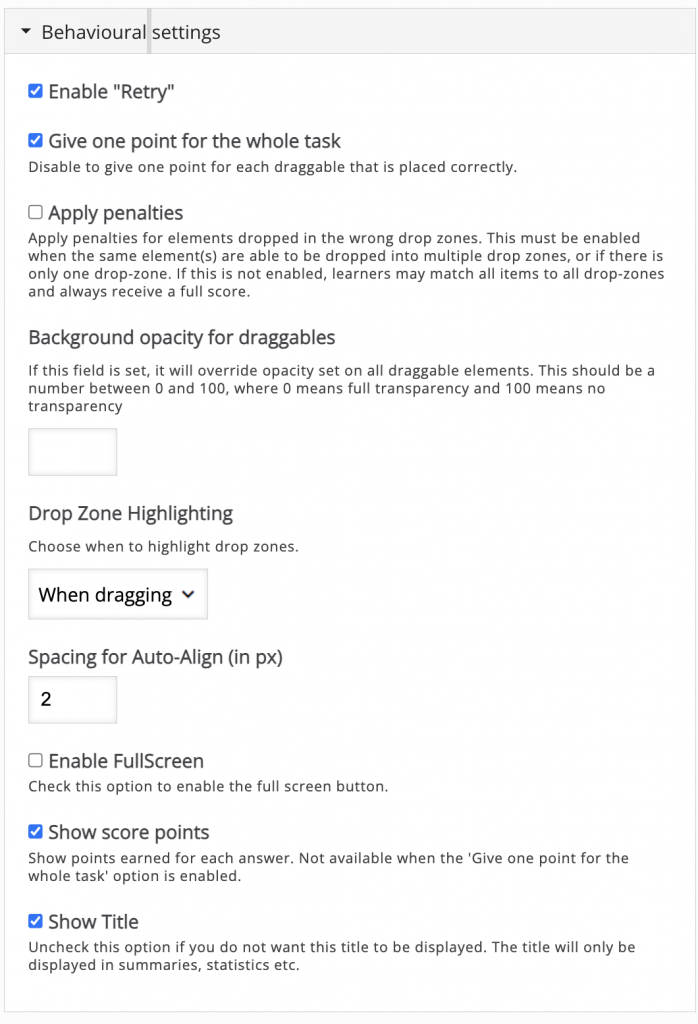
Since we want learners to be able to try to solve the Drag and drop question multiple times, as opposed to only have one go, we’ll check the Enable “Retry” option.
The Give one point for the whole task option is more relevant when we add Drag and drop question to Question sets, Interactive Videos or Presentations. This option controls the score the learner gets for solving the Drag and Drop question when it is placed in a sequence of multiple tasks. Since this is part of a question set, let’s leave this option as checked. Leave the remaining options defaulted to the original settings as below.
Step 9c: Drag and Drop Task
Press the Task tab in the top right half of the editor to start creating the task itself.
You’ll see that the background image is displayed with the size defined in the Settings tab.
We’ll create a Drag and drop question where the user tries to associate the strawberry with its corresponding genus name. According to Wikipedia, a genus is a taxonomic rank used in the biological classification of living and fossil organisms.
From the example text above, we know that the strawberry belongs to the Fragaria genus. Other examples of berry genuses are Rubus (e.g. Raspberries) and Vaccinnium (e.g. Blueberries). We’ll use these last two examples as false alternatives.
You will see a toolbar above the background image.
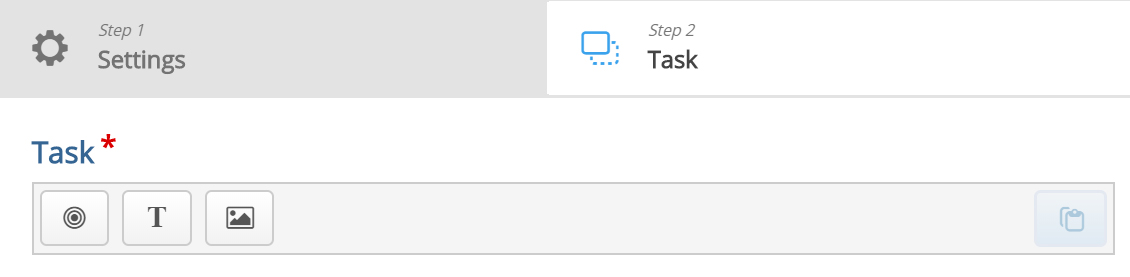
The toolbar allows you to insert:
 | Dropzones |
 | Texts |
 | and Images |
Dropzones are areas on which Text and Image draggable elements can be dropped.
Step 9d: Dropzone
We start off by adding a Dropzone over the strawberry shown in the background image. Press the Dropzone button in the toolbar, drag it onto the background image and drop it somewhere above the strawberry.
Dropzone options appear when you drop it. We add the Label Fragaria, which is the name of the genus the Strawberry belongs to. Set the opacity to 50 to make it semi-transparent.
You will have something like this:
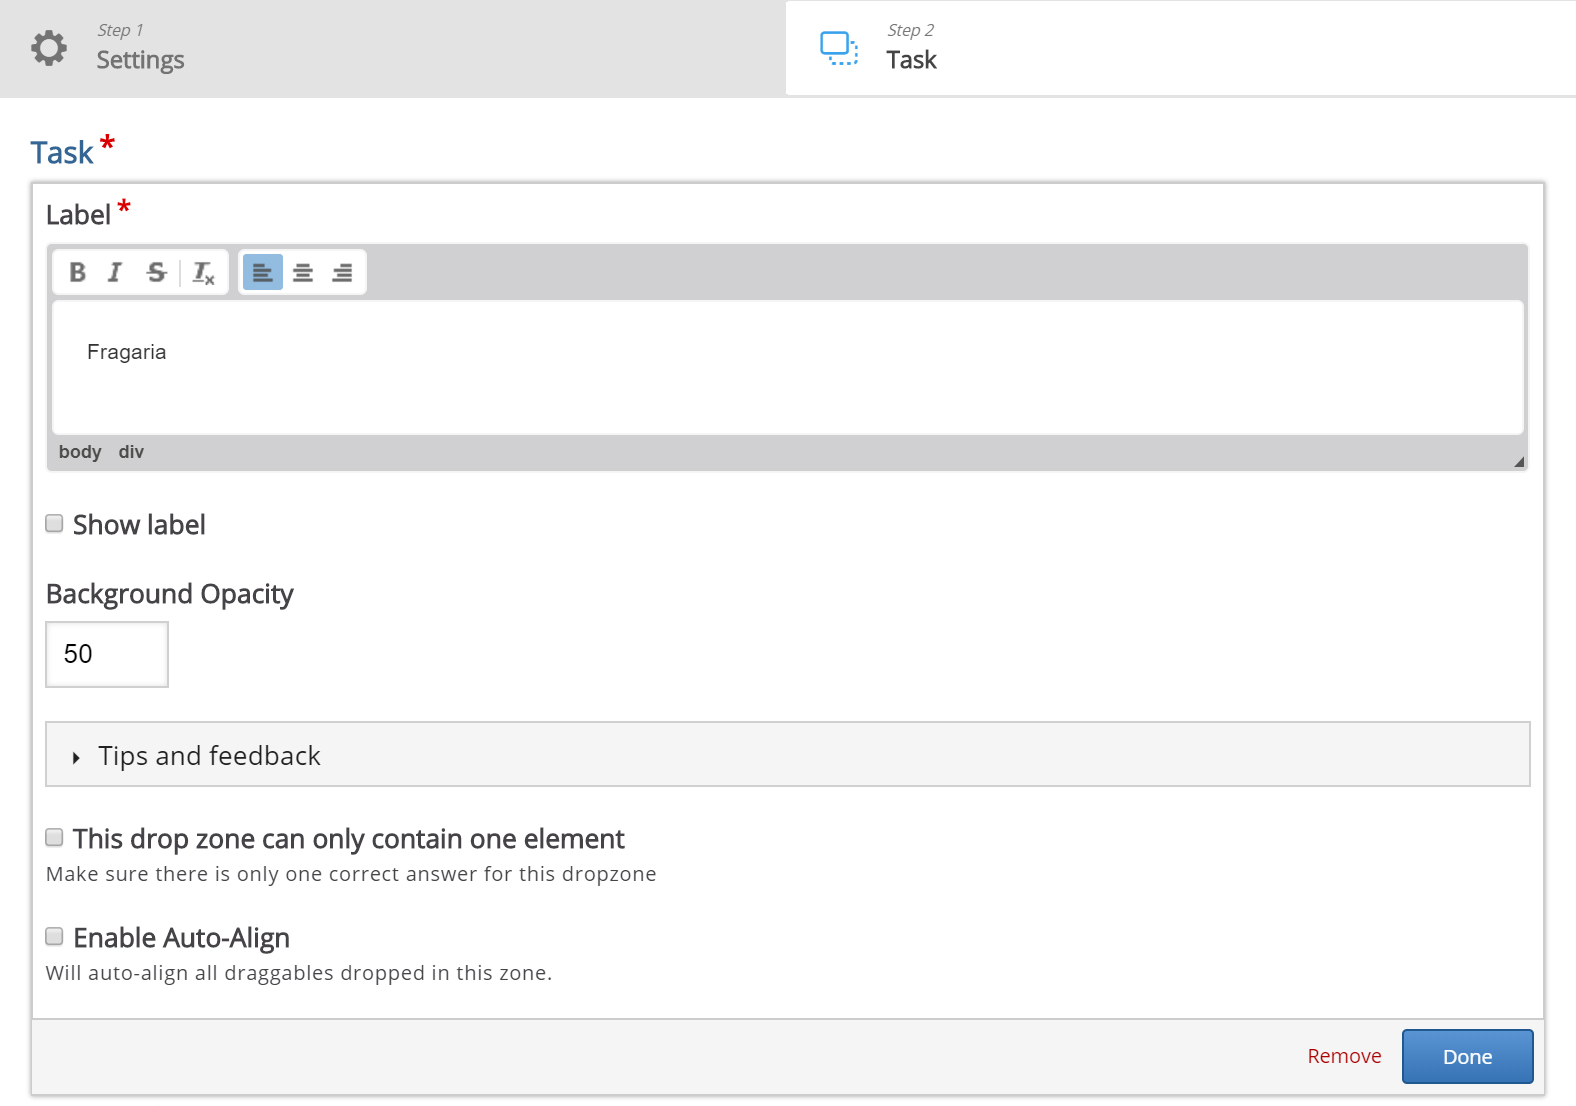
Press Done.
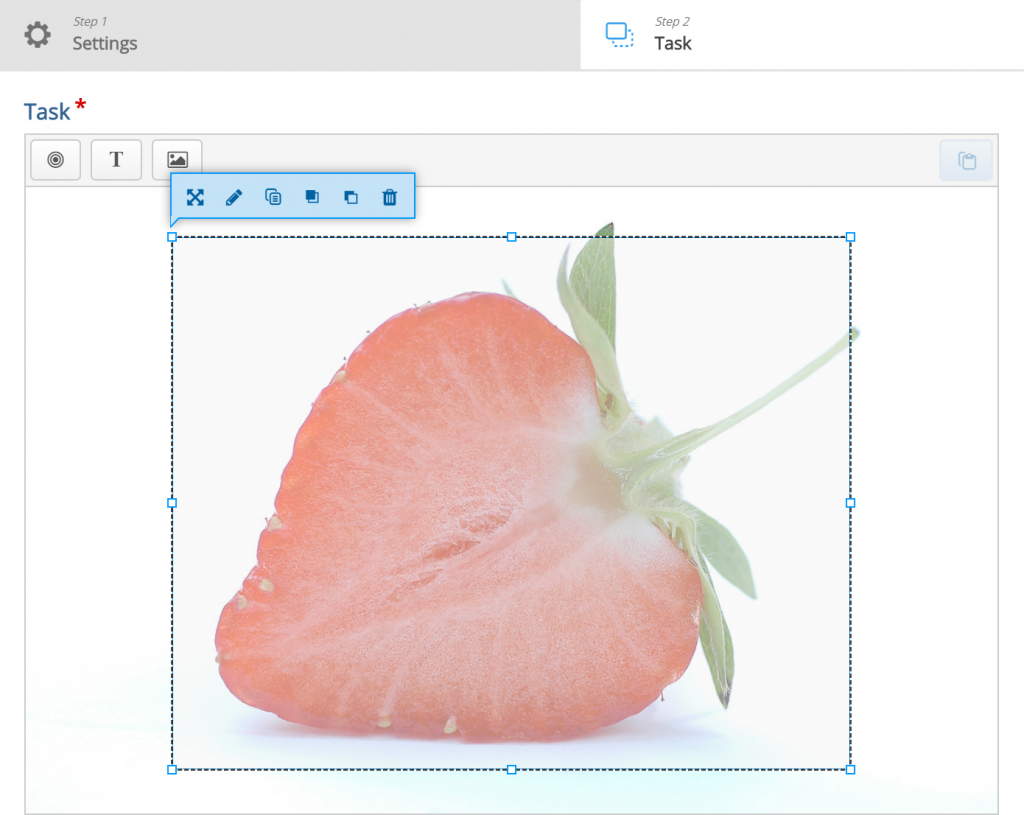
You will now see a white dropzone placed over the background image. Move and resize the dropzone so that it is placed roughly over the Strawberry in the background image. You move the dropzone by pressing and dragging it to where you want it placed. You resize the dropzone by pressing the lower right corner of the dropzone and dragging up/down or left/right to scale the dropzone to the right proportions.
Note: Double-press the dropzone to edit it at any time.
You should now have something like this:
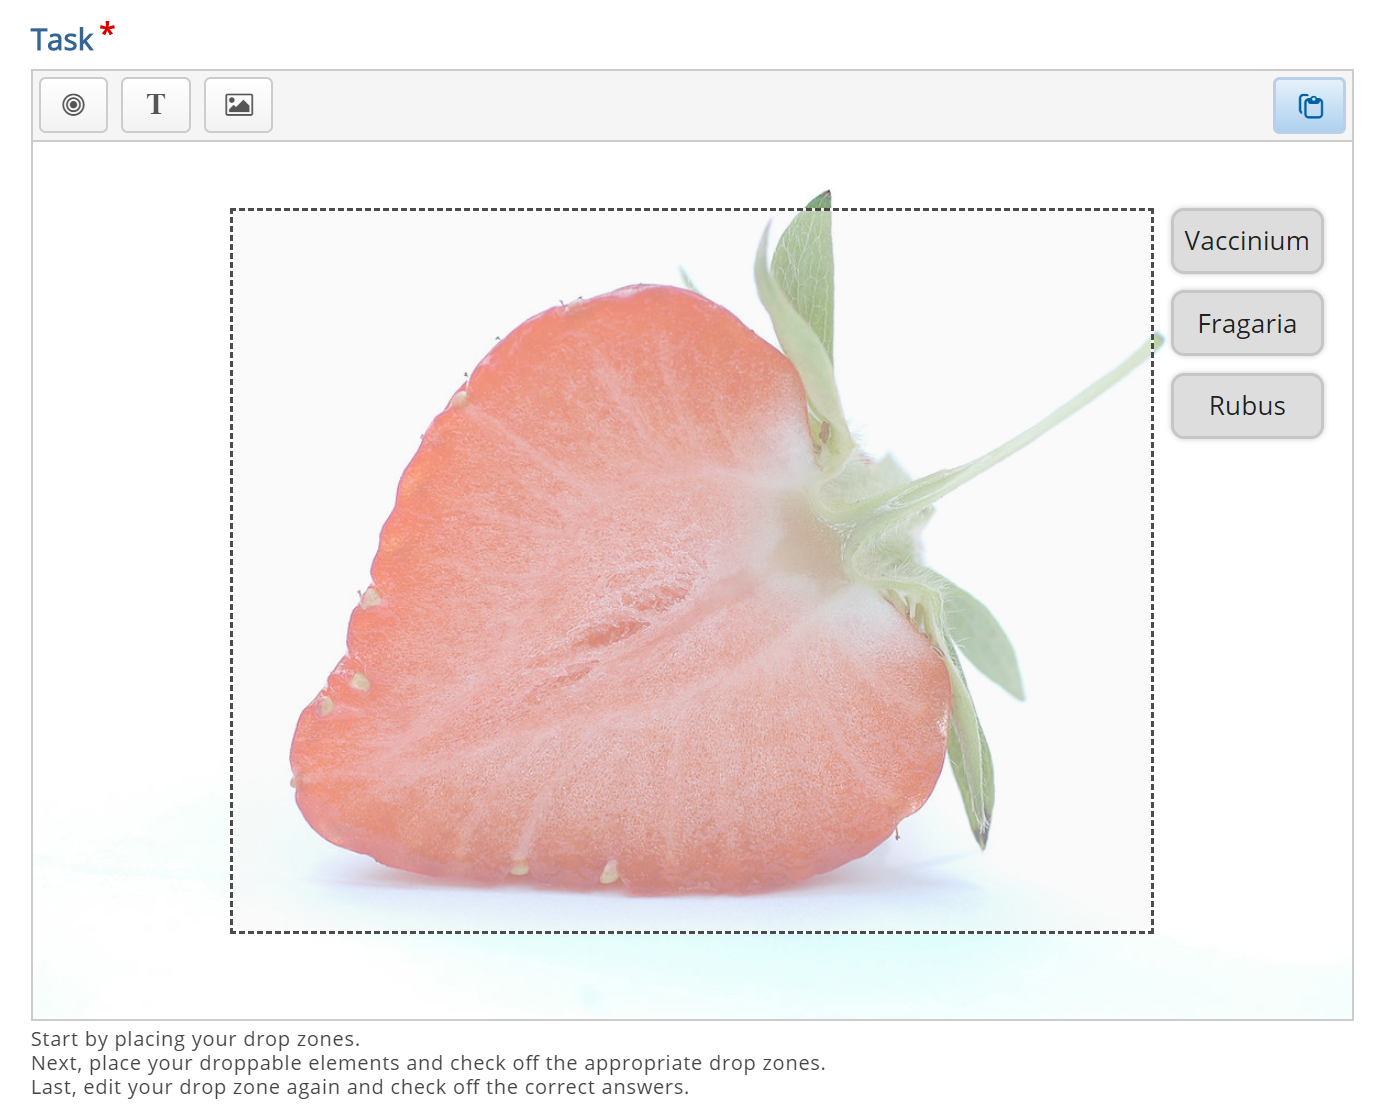
Step 9e: Add Text
In this demonstration, we’ll add three Text draggable elements; one correct and two incorrect. Images can be used as draggable elements in the same way as Text.
Press the Text button in the toolbar and drag it onto the background image. You can place it to the right of the strawberry. Text options appear when you drop it.
In the Label field, type in Vaccinium. Under Select drop zones, check the Fragaria checkbox. We know this is an incorrect match, however, we want the learner to be able to drop the Vaccinium object on the Fragaria dropzone. If this option was unchecked, the learner would not have been allowed to drop the object on the dropzone. This is more relevant in cases where you have more than one dropzone.
Leave the opacity to 100 and press Done. You will now see the Vaccinium draggable object where you placed it.
Move and resize the draggable object as you please. You move it around by pressing on it and then drag it to where you want it. You resize by pressing in the lower right corner of the object and then pull in any direction to scale.
Add two more Text draggable elements by following the exact same procedure as above. However, label these elements Fragaria and Rubus respectively. Place them in a neat alignment to the right of the Strawberry.
Hopefully, you will now have something like this:
Step 9f: Define the correct match
In order to define which match between dropzone and draggable elements is correct, you double-press on the dropzone. This will bring up the same dropzone options as in Step 5.
Since you have defined an association between the three draggable elements and the Fragaria dropzone in the previous step, you will now see a Select correct elements option. Check the Text: Fragaria checkbox to define this draggable object as the correct match.
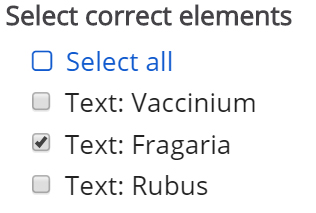
Now, set the opacity to 0 (zero) and press Done.
Note: Multiple correct elements can be placed on a dropzone.
Step 9g: Add Instructional Text
We are now more or less finished. We might want to add an instructional text such as: Which genus does the Strawberry belong to? Drop the correct genus name on the Strawberry.
This is done by adding a Text element and type in our instructions in the Label field.
As instructional text should not be a draggable element, we do not select a corresponding dropzone.
Place the instructional text in the top right corner and resize it as you please.
You should now have something like this:
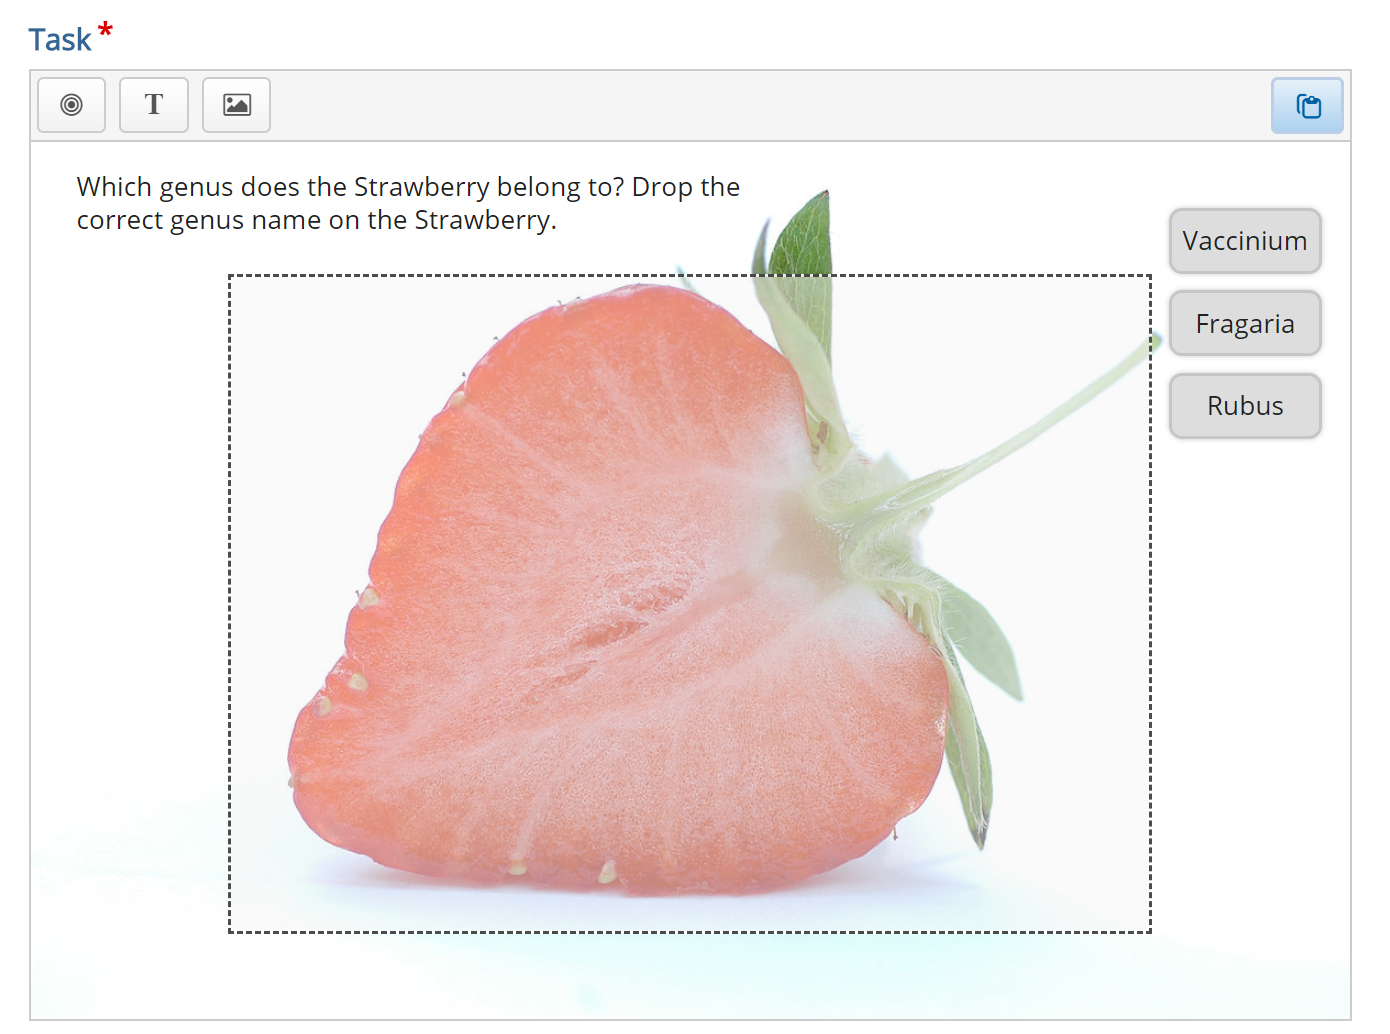
After adding content to the Drag and drop question you should have something like this:

Step 10: Add Fill-in-the-blank Question
Press the Add question button to add another question to the Question set.
As our final question for this question set, we’ll choose the question type Fill in the blanks from the dropdown menu. The Fill in the blanks editor will now appear.
Use the following text to populate the Multiple choice question editor. This example is sourced from the original H5P.org Fill-in-the-blank Tutorial.
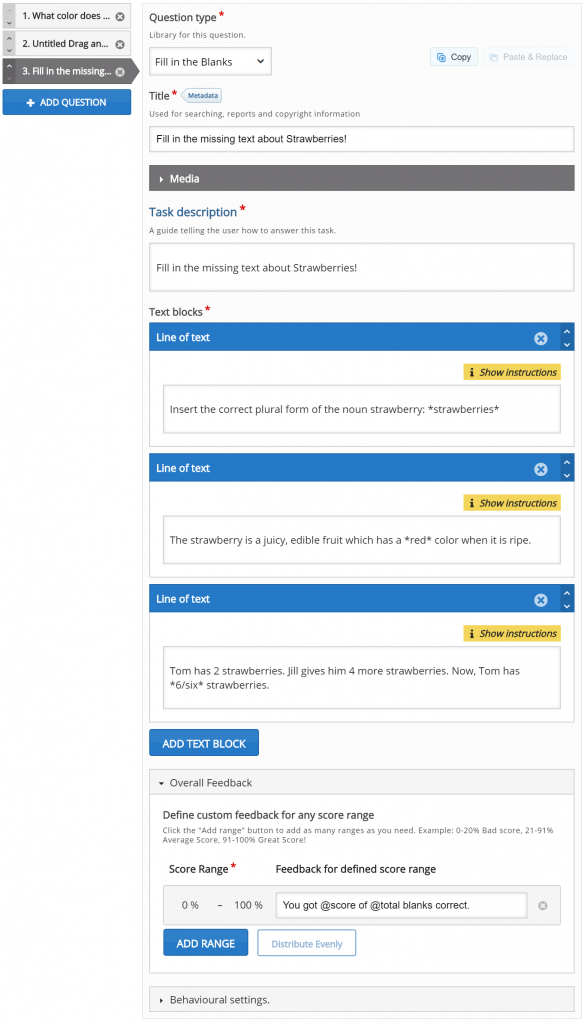
Step 10a: Title and Fill-in-the-blank editor
Title: Fill in the missing text about Strawberries
Task description (in this field we give the learner basic instructions or introduce the problem to be solved): Fill in the missing text about Strawberries
Step 10b: Text blocks
Under Text blocks, we add our three sentences and define which words are to be removed for the learner to identify.
We can add multiple text blocks, and we can remove multiple words in each text block.
By default, only a single Text block is displayed when you create a new Fill in the blanks.
Because we have three sentences, we would like to add two more Text blocks. Press the Add text block button twice to add two more Text blocks.

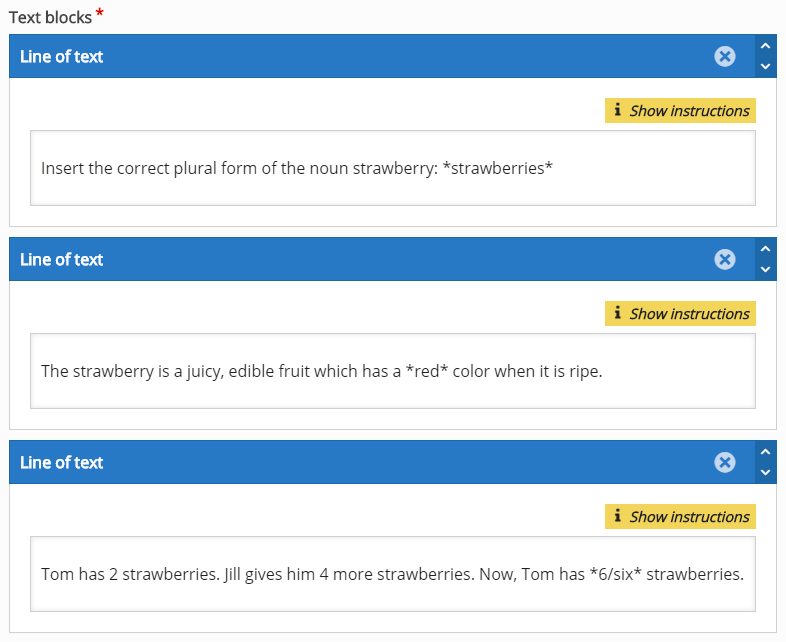
In the top Text block, we add the following sentence under Line of text:
Insert the correct plural form of the noun strawberry: strawberries
We insert asterisks before and after the word, we would like to remove, like this:
Insert the correct plural form of the noun strawberry: *strawberries*

Add the following text in the second Text block, under Line of text:
The strawberry is a juicy, edible fruit that has a *red* color when it is ripe.
In the third and bottom Text block, we add the following text under Line of text:
Tom has 2 strawberries. Jill gives him 4 more strawberries. Now, Tom has *6* strawberries.
In this last sentence, we want to allow the learner to insert both the number 6 as well as the word six.
We can define alternative answers by using a slash to separate the accepted alternative answers inside the asterisks, like this:
Tom has 2 strawberries. Jill gives him 4 more strawberries. Now, Tom has *6/six* strawberries.
You should now have something like this:
After adding content to the Fill in the blanks question type, you should have something like this:
You can add as many Text blocks as you want. You remove Text blocks by pressing the
button in the top right corner of the Text block. You change the order of the Text blocks by pulling the
button in the top left corner of the Text block.
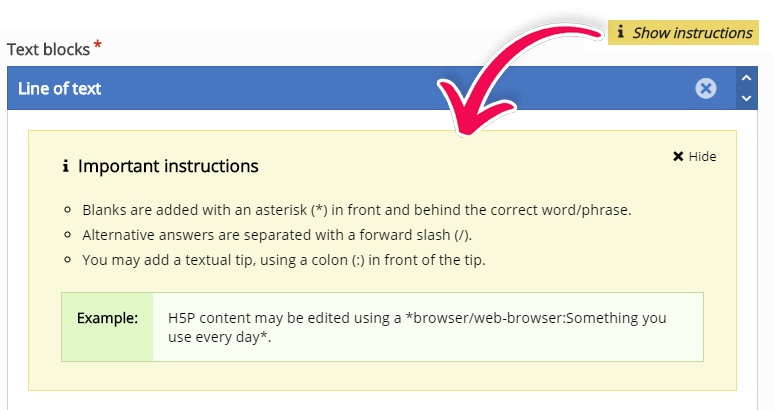
If you need instructions on how to create content you can press the “Show instructions” button at any time and the instructions block will open. It looks like so:
Step 10c: Behavioural Settings
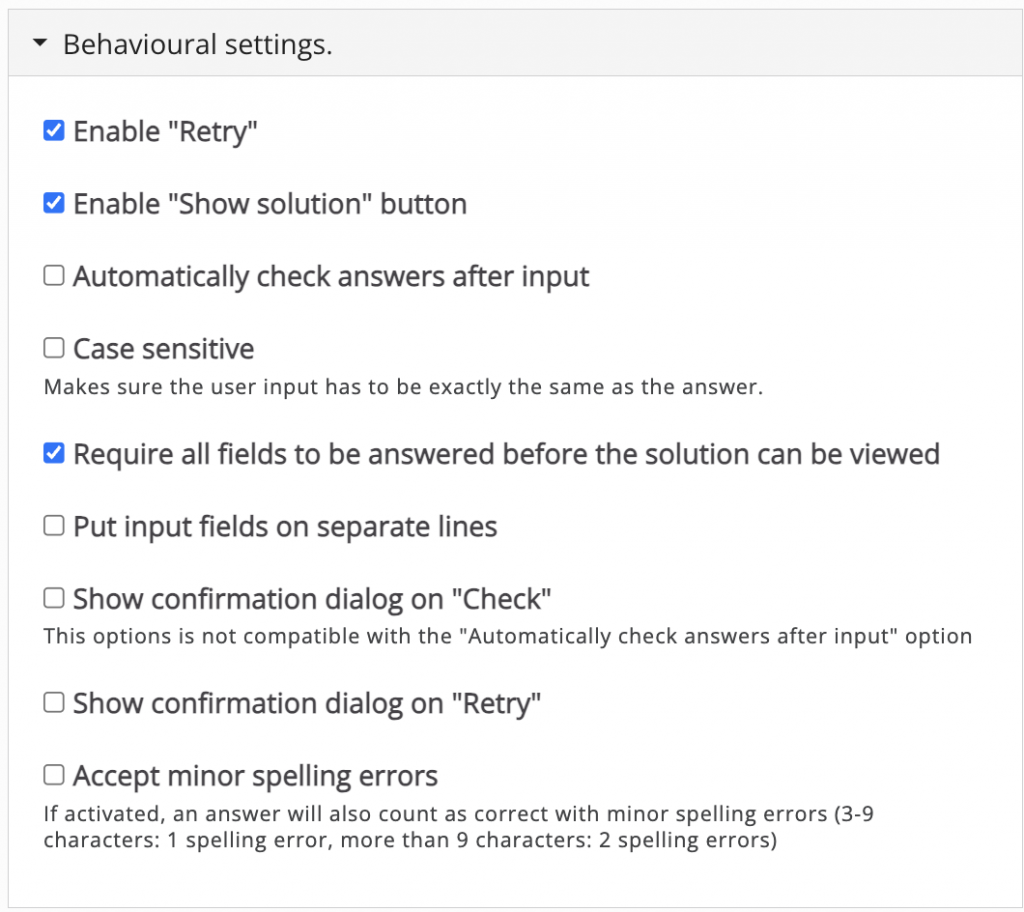
Under the Behavioural Settings box, check the Enable “Retry” checkbox to allow the learner to try to solve the Fill in the blanks multiple times.
If you include Fill in the blanks in Question sets, Interactive videos or Presentations, you might want to consider whether you want the user to only get one chance to solve the task.
In this demonstration, we are not concerned whether the learner uses capital letters or not when inserting the missing text.
We, therefore, uncheck the Case sensitive checkbox. Example: The learner will get the correct answer when inserting both Strawberries and strawberries in the first sentence
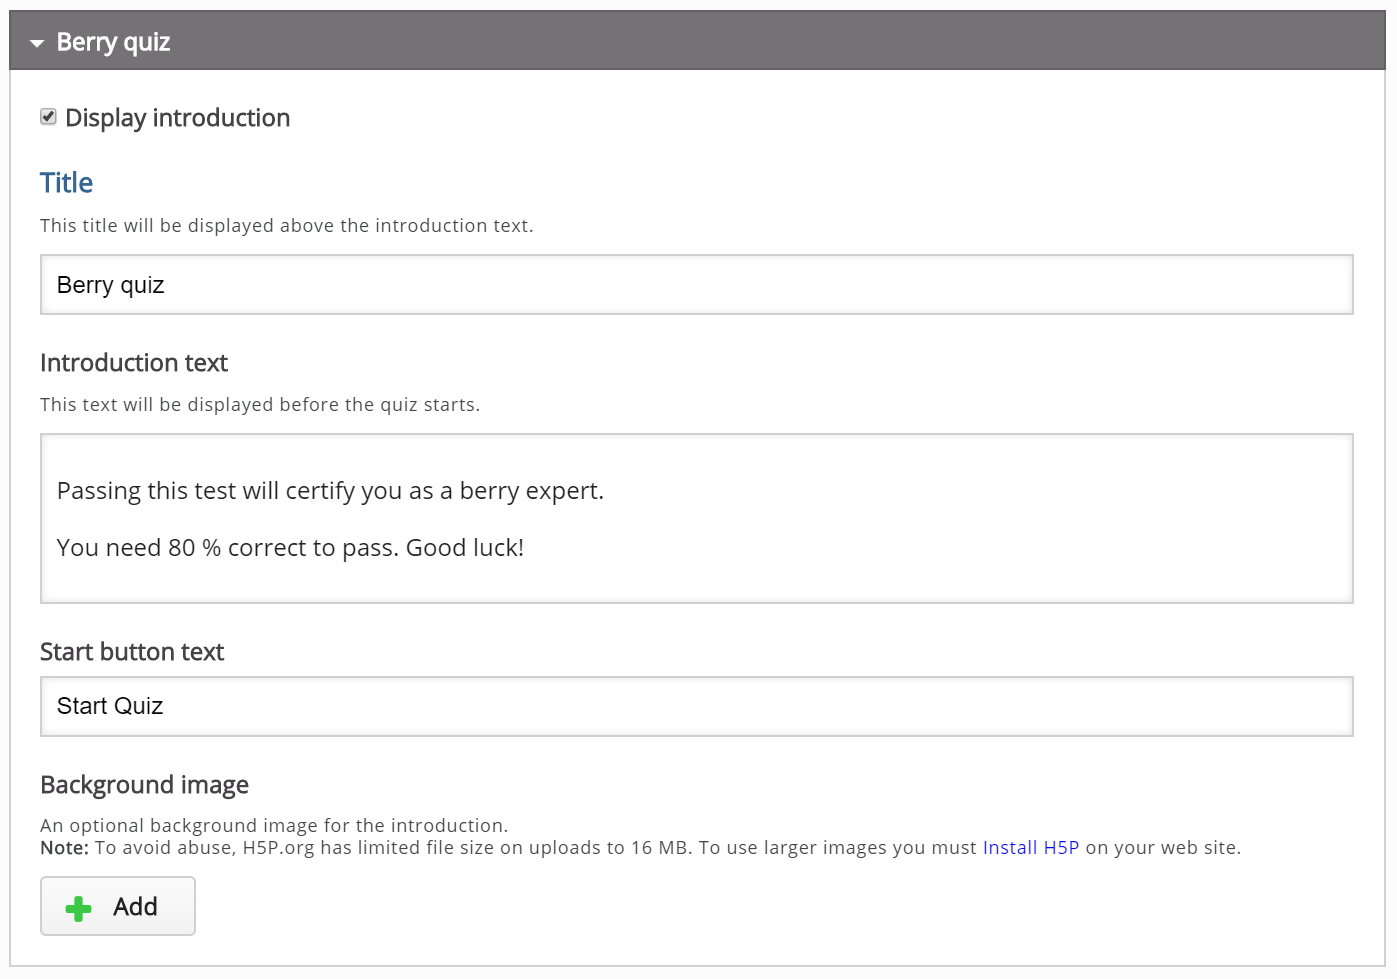
Step 11. Quiz Introduction
Select the Quiz Introduction dropdown box and check, Display introduction. By doing this, the user shown an introduction text and must press a Start quiz button to start solving the Question set.
Check the Display introduction checkbox. Then, add the following text in the Title field: Berry quiz
In the Introduction text insert this text:
Passing this test will certify you as a berry expert.
You need 80 % correct to pass. Good luck!
Leave the Start button text as it is, or change it to your own liking.
You should now have something like this:
Step 12: Quiz finished: Your Result
Under the Quiz finished: Your result: header you have options related to how the quiz results are shown to the learner at the end of the Question set.
You will also find several text fields where you can customize or adapt the text being used to your own liking.
Make sure that the Display results checkbox is checked, as we want the learners to evaluate their own performance:
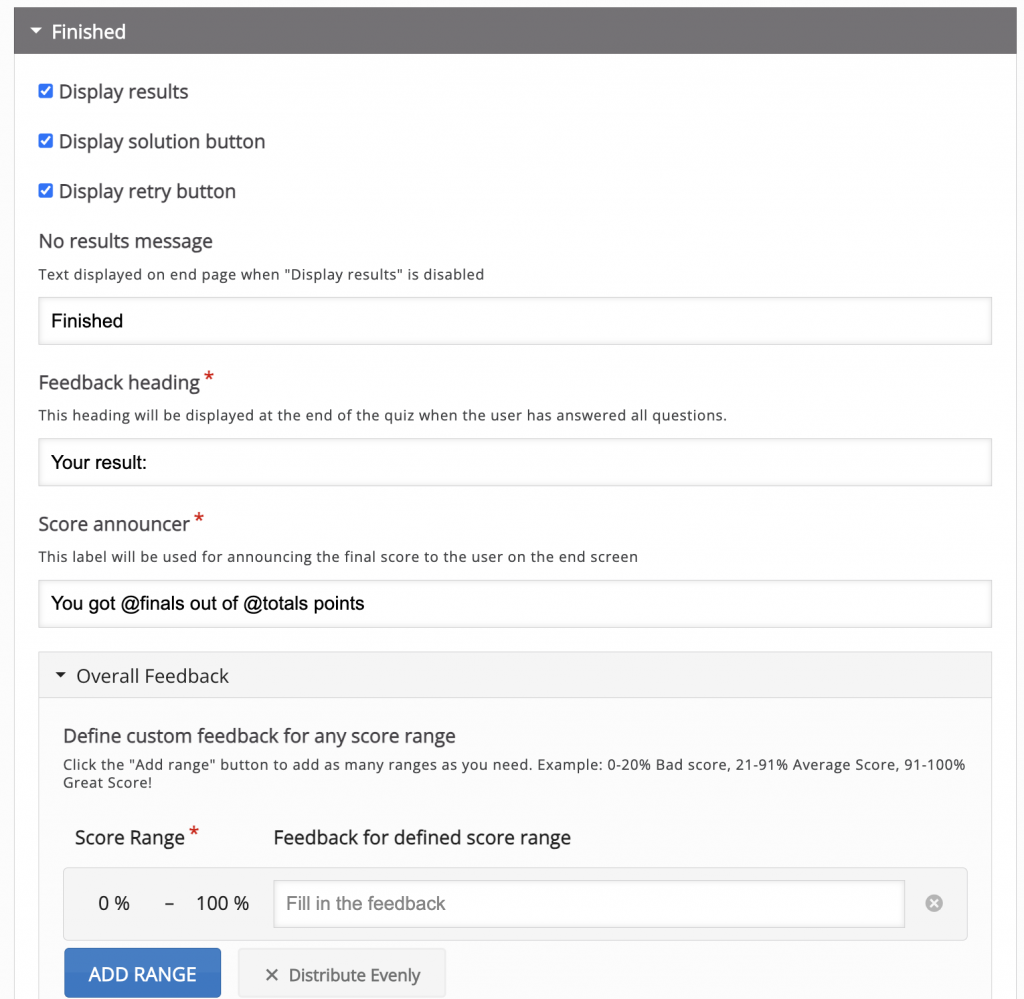
At the bottom of this field, you can also choose to Display video before quiz results. Here you can upload a video clip which is shown to the learner after completing the Question set, but before the results are displayed. You may choose to display one video clip if the learner passes the Question set, and another video clip if the learner fails. However, we’ll skip adding video feedback in this tutorial, as this is entirely optional.
Step 13: Wrapping Up
Reminder
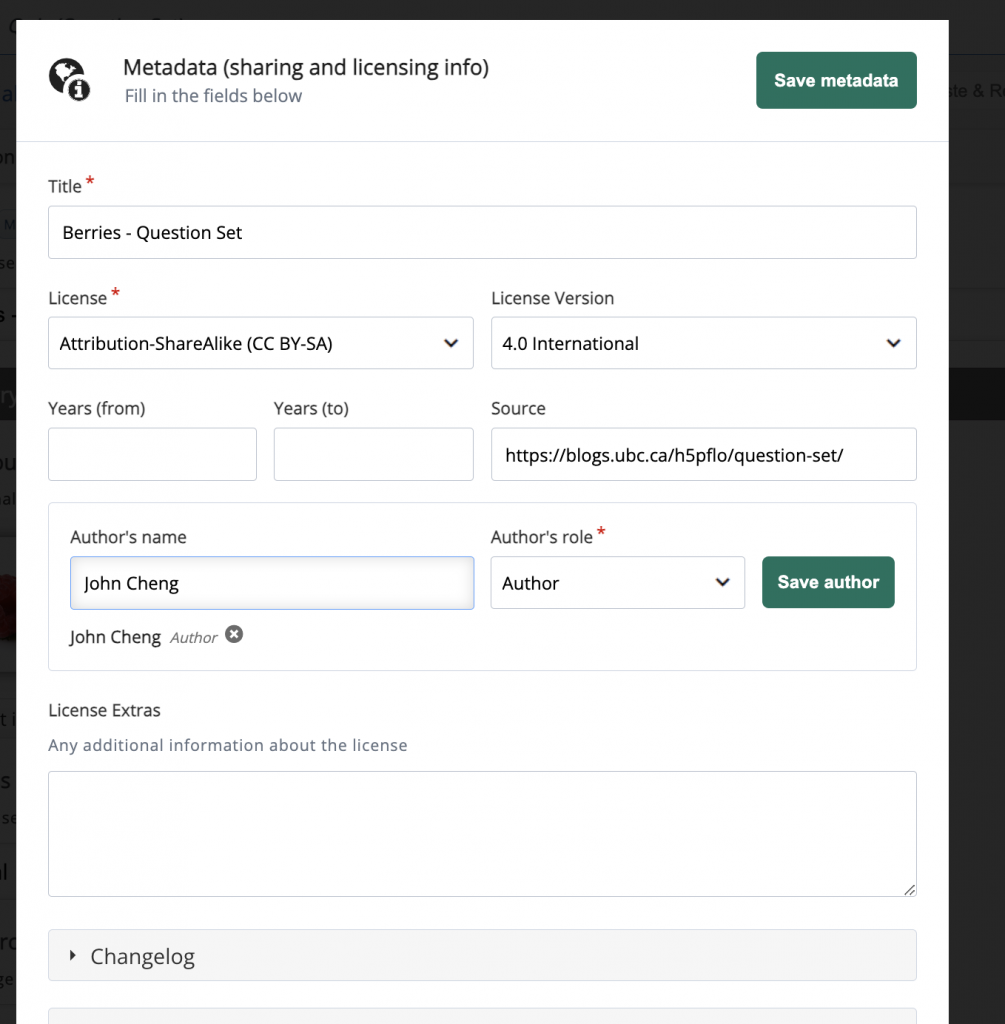
Add Metadata to your H5P content. This is key to determining how your H5P creations can be adapted, shared and reused. Select Metadata next to the Title of your content and add any relevant information including Title, License, License Version, Source and Author’s name and role.
Let’s add Metadata to this Course Presentation. Select Metadata next to the Title and add some to your example.