Radishes – A review
I did a companion planting experiment where I planted quick-growing radishes with slower-growing beets. The idea is that the radishes will be ready to harvest about a month before the beets, therefore loosening the soil for the beets when the radishes are harvested.
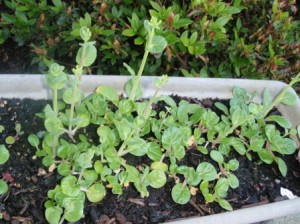
While the radishes have been successful, I don’t know if it’s the best idea to broadcast sow the two seed varieties as I did. When I was pulling the radishes, some of the beet seedlings were coming out with them because the roots were tangled together. I have tried again with baby carrots (similar to these) and radishes in another container, and this time I planted them in more orderly rows, about one seed per inch.
The radish variety I planted this year is Amethyst, which should mature in 25-30 days. This variety is meant to be slow to go woody, which seems to be true in my case. At 45+ days, the larger ones are just starting to get a bit fibrous.
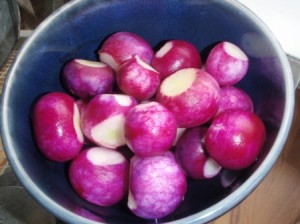 June 3, 2012
(49 days since planting)
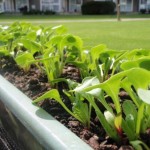
4th Harvest – 23 radishes in this harvest. After this, we still have one more harvest to go. In total, I think we will have harvested 50-60 radishes grown in one 24″ x 6″ x 8″ planter.
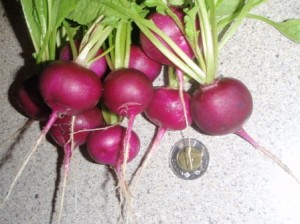
May 27, 2012
(42 days since planting)
3rd Harvest – Approximately 10 radishes in this and past harvests. Many of them are larger than a twoonie.
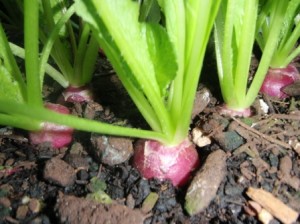
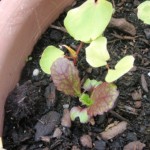
May 18, 2012
(33 days since planting)
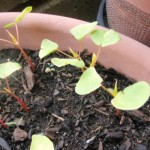
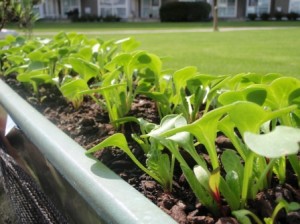 May 5, 2012
(20 days since planting)
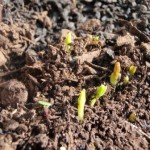
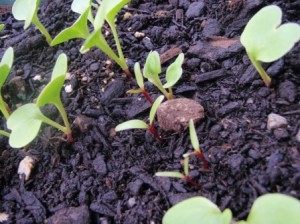 April 27, 2012
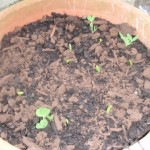
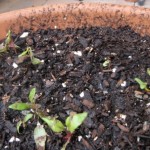
(12 days since planting)
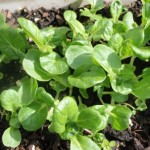
Heart-shaped leaves.
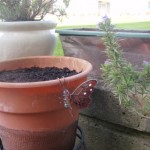
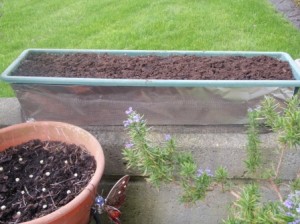 April 15, 2012
(Seeds planted)
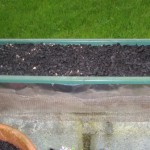
24″ l x 6″ w x 8″ h planter
Time for something new!
The weather has warmed up significantly and we’ve had a good stretch of sunshine. I was able to harvest my Toy Choy twice before it bolted. Now I have to think of what to plant in this pot, since I think it may be too warm for bok choy.
I could plant more radishes, since the ones I planted with the beets are growing incredibly fast! We already harvested 2 (but I didn’t take a photo of those). The lot of them will be ready to be picked pretty soon!
Many of the other leafy greens like spinach and lettuce tend to bolt easily, but I may try one of the slow-bolting lettuces, such as: Red Deer Tongue, Merlot Organic, or Lovelock.


Patio overview
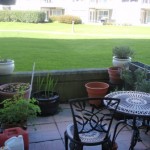
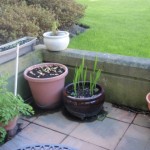
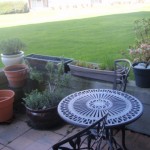
I should have posted overview pictures of my patio at an earlier date to show the space that I have to work with. My patio is roughly 8′ x 12′ in the inner courtyard of our ‘U’-shaped building on the main floor of the east arm of the ‘U’ (the top of the ‘U’ faces north). I only get about 6 hours of direct sun at the height of summer on the outer half of my patio.
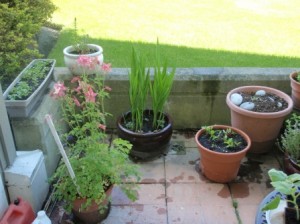
These pictures were taken 3 weeks ago on April 20th (facing west). The first photo is taken from inside my bedroom looking out toward the patio.
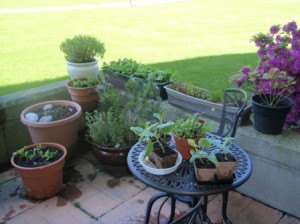
Three weeks later on May 13th, pots have moved a bit and things are a lot more green!
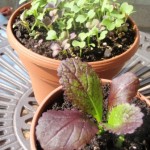
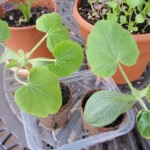
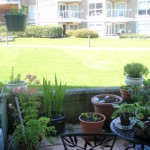 Moving from left to right on the patio (and in the photos): 1. Toy choy is in the long grey-brown container on the ledge; 2. hanging in the top left is the trailing Oregon Sugar Pod peas; 3. butterfly bush is in the white ceramic pot on the ledge on the left; 4. columbine are the pink flowers; 5. crocosmia are the tall spiky leave in the dark brown ceramic pot; 6. Swiss chard are in the smaller clay-coloured pot; 7. the larger clay coloured pot (with white rocks sitting on top of soil) is the future home of butternut squash; 8. the smaller clay-coloured pot sitting on a pedestal is the Little Marvel bush peas; 9. lavender is in the white ceramic pot on the ledge on the right; 10. rosemary, thyme and oregano are in the dark brown ceramic pot; 11. above the herbs in the long container sitting on the ledge are beets and radishes; 12. the grey-brown long container sitting next to it holds chives and mint; 13. the black pot at the very right of the ledge holds Skimmia; 14. on the patio table are mescluns and squash seedlings that will go to my dad’s garden.
General Update – Busy week
I’ve been pretty busy this week and didn’t get to post as much as usual, but I did take some photos. Temperatures have warmed up to consistently above 10 degrees Celsius and have had some very sunny days, as well as some very rainy days! Ah springtime in Vancouver! But we also had several days where the wind was blowing in from the west and there was a salty sea air that is so refreshing! That’s one of my favourite things about living on the coast!
It’s about 5 1/2 weeks into Spring and since I started working on my outdoor vegetable garden. I have seedlings galore and can’t wait to start harvesting!
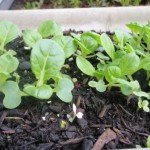 Toy Choy – At 5 1/2 weeks, my baby bok choy is about 2 inches tall. I’ll wait until they get a little bigger before I harvest them, as I really like them in stir fry! I initially spread seeds all over the container, then 2 weeks later added more to the right-hand side of the planter, then 2 weeks after that I reseeded the left-hand side. Next year, I will seed one side, then seed the other, and alternate… that makes more sense.
Buckwheat – At 5 1/2 weeks the buckwheat seems to be suffering. We’ve had a pretty cold spring and quite a bit of rain, so I think that’s why the buckwheat is still so small and yellow. It does tell me that I need to add some more sand to the container to improve drainage, though, before I plant my squash in the same soil. However, I have a rogue mesclun lettuce seed that grew from last year (the purply plant). This is what the mesclun in my small patio table container will eventually look like.
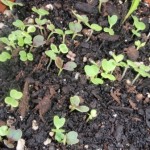 Mesclun – About 11 days after planting the mesclun seed mix, I have a lot of tiny seedlings. They benefited from being covered for two days under a plastic produce bag to create a greenhouse effect. The planter was uncovered for several days after sowing with no movement, then I covered it over and within a day they sprouted. Just providing the extra few degrees of warmth really seems to make a difference. I will have to thin these out soon, but when they are a little bigger.
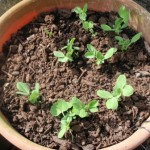
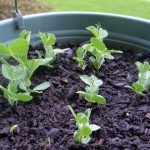 Peas – Both the Little Marvel and Oregon Sugar Pod are doing well after their second sowing. The Oregon Sugar Pod seems to have done well even with the cool Spring, though it is placed much closer to the building and likely got more ambient warmth to help with germination. The Little Marvel has been less successful and I think I may need to re-sow a third time to fill in some gaps. However, that planter was further from the building and was exposed to more cold, wind
  and rain. It’s very possible that, even though I didn’t soak the seeds prior to sowing, they could have gotten water-logged with all the rain we’ve had. I also didn’t plant them very deep, so that could have also exposed the seedlings a bit too early. In any case, the Little Marvel seems to be doing better and I still think they’ll flourish soon.
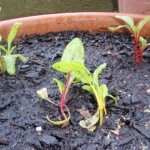
 Swiss chard – About 6 days after I transplanted the Swiss chard outside, I seem to have had a planter mis-hap… or more accurately, a planter misplacement. I inadvertently had placed the planter under the corner of the balcony above my patio. We had some heavy rainfalls this week and the rain gathered at the point right above my chard planter and continuously dripped on my poor fragile seedlings (and made a big splashy mess on the patio floor!). So I’ve moved the
  planter and planted some backup seeds in case my seedlings don’t make it. I also went over to a friend’s house (she is the one who gave me the chard seeds) and found that she has over 10 plants growing really well in a much shallower container! Even if all of my transplants survive and the new seeds sprout, I think I’m safe to keep them all!
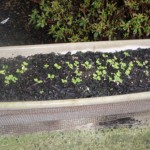
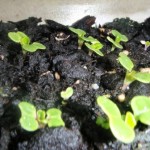
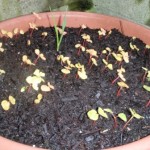
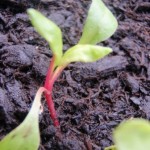
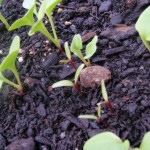 Beets & Radishes – The beets and radishes have also already sprouted and they’re not kidding that radishes grow fast! These seeds were sown about 14 days ago. The bigger seedlings with heart-shaped leaves are radishes, while the seedlings with the thin red stems are beets. They look similar to the Swiss chard seedlings because they are closely related.
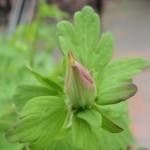 Columbine – Aside from the Skimmia, the first of my flowers to bloom will be the columbine. It has had foliage most of the year, but it did die back in the winter. It has about 5 flowering stalks this year with multiple buds on each. Can’t wait for it to open!
Growing pet treats
 I recently came across an organic seed mix for cat grass that includes oats, barley, rye and wheat. I had never really thought to feed my cats any kind of plant as they usually left our houseplants alone and I assumed that they get enough fibre from their dry and wet food. However, I am a doting cat owner and, since I like to container garden, I was sold on this cat grass seed mix immediately.
Upon further reading, there are mixed reviews as to whether or not it is necessary to make edible grasses available to your cat. One side says that it can help with kitty’s digestion and supplement her diet with fresh greens. Some even claim that cats crave grasses, though it may just be dependent on the individual likes and dislikes of your kitty. On the other hand, some argue that cats are carnivores and have no need for additional fibre in their diets.
Still others take a more moderate view and note that edible cereal grasses like oats, barley, rye, wheat and flax may not be particularly harmful or beneficial, but if it prevents your cats from eating potentially toxic houseplants or outside grass that may have been treated or fertilized with synthetic substances, then why not?
However, please do not confuse this with catnip, which is like a psychedelic drug for your kitties.
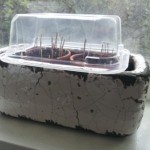 This is a picture of my cat grass planter; seeds were planted 5 days ago. I used small 2″ clay pots and filled the bottom of the planter with small gravel to catch and disperse excess water evenly. The planter is quite heavy, as my cats are quite clumsy and rambunctious, and a lighter-weight planter could easily be knocked off the window sill. The plastic dome is a recycled 7-layer dip container from the grocery store.
If you want to start growing cat grass for your kitties, here are some tips:
1) Fill a pot with growing medium (as for everything else, I use Sea Soil), tamp it down and lightly water it.
2) Sprinkle seeds to almost cover the soil.
3) Cover with approximately 1/4″ of soil and water lightly.
4) Place pot in window sill and ensure the soil is consistently moist, but not soggy. It can help to put a plastic bag or cover of some sort over the soil to keep the temperature up and soil moist until the seeds germinate.
5) Plant another pot about 1-2 weeks before you plan to discard the existing batch to ensure you have a constant supply.
For further investigation of your own, here are some sites to get you started:
Is cat grass healthy or harmful for cats? This article seems like a balanced consideration of pros and cons of making cat grass available to kitty.
How to grow oats for pets inside
 Just as an aside, this is one of my favourite cat pictures. It’s from the West Coast Seeds page for catnip seeds. Follow the link for more info on catnip.
Drooping Swiss chard seedlings
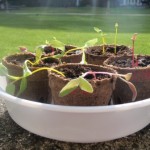 As I had mentioned in previous posts, I am starting Swiss chard seedlings indoors before I transplant them into a container outside. Two days ago, my chard seedlings went from bright and healthy to pale and droopy.
I think the Aerogarden may have created too ideal light conditions for them and they grew too tall and the leaves too heavy for their slender stems to hold up. The only other mention I could find on the internet about 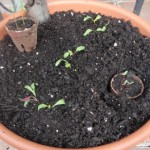 droopy Swiss chard seedlings was in this post. The picture is almost exactly the same as my picture. Some of the comments suggested that this means the chard is screaming to be moved to its permanent home outside, so this is what I did this afternoon.
Although I swore I would not add another container to my patio this year… I have… added two. My Swiss chard container 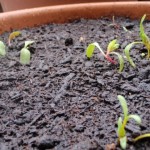 is one of them. It is 24″ diameter by about 26″ tall.
I mixed together Sea Soil, some small aquarium gravel and eggshells for increased drainage, and bone meal and organic fertilizer. All five peat pots with chard seedlings were planted with only their leaves popping up above the soil. This means the pots were about one inch below the soil surface.
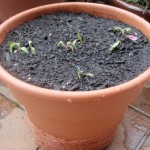 Usually, you would let the transplants get used to ‘living’ outside over the course of a week by gradually increasing the amount of time the plants are set outside. This way they can slowly get used to the wind, direct sunlight, and changing temperatures. I had set out the larger seedlings yesterday and today, but didn’t feel I could really wait much longer because they were so floppy.
Now I wait and see how they do. If they all survive the transplanting, I will eventually have to thin each clump to the strongest plant.
Light reflection for lower light areas
I was looking through the West Coast Seeds catalogue at the books they carry, and one caught my eye because it mentioned techniques to reflect light for small gardens. Although you should first and foremost make sure you can meet the light requirements of the plants you are growing and not rely on reflected light, reflecting additional light to your plants can help boost the intensity of the light that is available. A quick web search turned up a number of suggestions:
- Use light coloured mulch (including white river rocks, pine shavings, white plastic) or large white pavers or stones around the base of plants to reflect light upwards.
- Place white coloured garden decorations or pots throughout your garden, strategically positioned to reflect light to the plant (be careful not to create more shade).
- Paint surrounding areas white, such as walls and fences, if possible. Because I live in a condo, I do not have control over the colour of our building exterior. However, I do wonder if the sunlight reflected from the windows on the other side of our courtyard make a difference in my garden.
- Try mirrors or foil to reflect light, but be careful as these can focus sunlight too much and burn your plants. I am using the flat side of tin foil behind my peas to try to reflect light and warmth to them
- Plant white, yellow or light green flowers and foliage around your garden which can also help to reflect light to other plants.
I have lined the outside of a long, dark green planter with the matte side of tin foil and a white pot surrounding my container of Little Marvel peas.
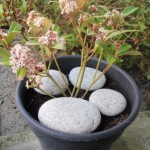 I also have a number of larger, light coloured stones that I collected from a river and that were once decoration in my fish tank. I have scrubbed the algae off and will use these around the base of my butternut squash plant. I know that I marginally have the minimum light requirements to grow a butternut squash plant, so I went into this with the mindset that this would be a bit of an experiment.
Some resources to check out:
.
Fresh Food from Small Places book
General Update – I’m addicted!
I’m officially addicted and can’t seem to stop planting things. This weekend I even went over to my dad’s garden (dragging my accommodating hubby along with me) to weed, till, and plant some side beds. Now he’ll have some buckwheat and a blend of wildflowers that will attract bees to pollinate his garden.
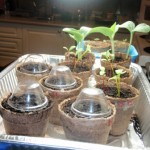
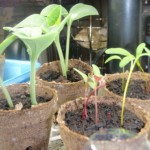
Below is an updated shot of the seedlings in my Aerogarden. The butternut squash (at the back) and Swiss chard (in the middle) were planted on Easter Monday night (9 days ago). I need to get larger peat pots because the butternut squash seedlings are quickly outgrowing these small ones. I already see roots poking out the side walls! About 2 days ago, I planted two more pots of swiss chard (1 ‘Bright Lights’ and 1 rhubarb chard) and two pots of baby blue hubbard squash (which will go to my dad’s garden). Those are the pots with the little domes over top to help keep the soil moist. In the close up shot you can see the different colours of the Swiss chard stalks.
The Toy Choy sprouts continue to grow. You can see some smaller seedlings coming up from when I had thrown more seeds into the right-hand side of the planter 2 weeks ago. Yesterday I added some more seeds to the left-hand side of the planter. This is so that I hopefully have some good successive crops because I really do love baby bok choy stirfry!
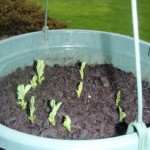
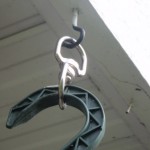
My peas are really starting to do well. The Oregon Sugar Pod in my hanging basket is doing great! I think I may pop in a couple more seeds to fill in the gaps. It will be a good time to top up the soil too! I also found this great swivel connector that will allow me to spin my hanging planter around to share the sunshine evenly.
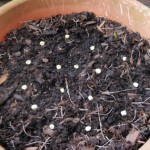
I posted a few days ago that I replanted my Little Marvel peas because only one out of about twelve seeds sprouted. That was a little disappointing and I still don’t know what happened. However, just a few days later and I can already see some sprouts beginning to pop out (the white things in the foreground below) in front of the lone seedling from the first round of planting.
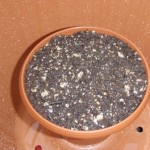 I wasn’t supposed to add another container to the patio – this is what I said last week after I bought a 24″ pot for the Swiss chard – but I’ve added another one. But in my defense it is small (8″) and is meant to be a decorative but edible feature that will sit on our patio table. And I had the seeds already from last year, so I couldn’t let them go to waste, could I? I’ve planted a mesclun mix of mustard greens with a few spinach seeds thrown in for good measure. These will be ‘cut-and-come-again’ salad greens for when I have a hankering for fresh salad.
Below are photos of the buckwheat (29 days) and beet & radish (4 days) progress.
Update – Container Peas
There have been some positives and negatives with the container peas.
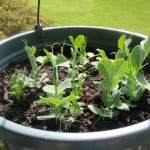
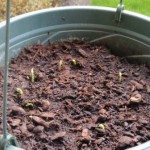 The Oregon Sugar Pod that I planted in the hanging basket has done well. This photo was taken a few days ago and the seedlings are already over an inch tall and have started to develop another set of leaves. There are about 10 seedlings so far. I will have to add some soil when they are a little bigger because I forgot that the soil compacts after watering.
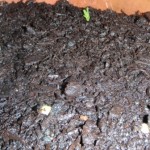
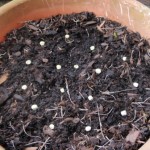 The Little Marvel on the other hand has not germinated as well, and I have only one seedling in 20 days, so I am reseeding the pot and just adding soil on top. I poked around to see if there were any seedlings on their way that just hadn’t broken through the surface yet, but there was no sign of life. I didn’t add inoculant as I had already put some in during the first sowing, so when the roots reach that level the inoculant should take effect. Let’s hope it works better this time! Perhaps I put too much soil on top… or perhaps the seeds were eaten?
