Five Practices for Rapid Course Design and Development

Start with Backward Course Design Approach

If you start your course design with content selection, you are likely to spend a lot of time but making little progress. Backward course design approach is outcome-based and therefore efficient. It also helps us to align assessment plans to learning outcomes, and align content and activities to assessment plans.

Here are the simplified steps for backward course design:

    • Step 1 Learning outcomes: identify what students should get out of the course
    • Step 2 Assessment: determine how to assess learning outcomes
    • Step 3 Activity and Content: select content and design activities around assessment

Here is a Course Plan Template that supports backward design.

Design a Proper Syllabus

Even with tight deadlines, a syllabus should at least contain 1) Instructor information, 2) Course description, 3) Course learning outcomes, 4) Required texts and materials, 5) Course schedule, 6) Assessment plan, 7) Assignment descriptions and expectation, and 8) Course policies. A good syllabus helps everyone (SME, Instructional Designers, and Program Managers) to imagine how the final product will look like.

From a backward design perspective, it is critical to be clear on the assessment plans and assignment descriptions. For example, if you are asking students to post threads in discussion forums, you should elaborate on your expectations in the syllabus such as the length of the post, whether or not they should reply to other students, and when they should complete the tasks.

Build an Effective Process for Content Development

Course design and development usually requires strong collaboration between multiple parties. Here is what makes the process effective based on my experience and observation.

  • Use cloud tools such as OneDrive and Google Drive where possible (please check your organizational privacy policy first).
  • Adopt a clear and consistent structure for content and asset organization. Assets could include images, videos, documents, and any other files for course design and development.
  • Design your content document purposefully. The more your content document resembles the final product, the more efficient everyone could be.

Be the Product Manager

Put on your Product Manager’s hat and be clear on the requirements! Your final product is most likely a course that lives in a learning management system (LMS). To avoid surprises, here are some of the questions for you to think:

  • Is the design for a new course or integration into an existing course? A new course design usually starts from scratch while integration is a redesign based on what is already in the course. This is particularly important for online courses because the design process and the final product could look very different.
  • How will the course menu look like in the learning management system (LMS)? Is there a particular structure that everyone needs to know?
  • How is everything named in the LMS? Will your students and instructors be able to understand and tell the difference? Do the naming of your assignments align with what is in the syllabus?
  • How are your learning modules built? Simple file upload into LMS, customized HTML and CSS pages, or designed in e-authoring tools such as Articulate Storyline and Rise 360? 
  • How do learning modules open in your course? Pop-up in a new window or opens within the LMS? Open within LMS often means less on-screen space for content presentation. This may look minor but it could have a huge impact on student learning experience, especially for those who use mobile devices or tablets.
  • How do your courses move into LMS? Are they in a test environment before they go live? Are there any components that need to be imported as SCROM packages or HTML pages into your LMS? How are other departments such as IT and Scheduling involved?
  • Can you be agile? Do you have to wait for the SME to develop everything and then design the course? Think about the modules that you can design already.

Some of these questions may sound technical but it is what makes a good product manager great.

Make Technology Work for You and Students

There are multiples ways to success in life and at work. The same to technology.

  • For video recordings, Kaltura is recommended at many institutions, but if it doesn’t work for you, use your phone, your webcam, or any tool that works for you.
  • For synchronous online learning, Collaborate or Zoom is commonly used but it doesn’t mean that you or your students have to be in synchronous sessions all the time. Why not blend asynchronous and synchronous learning?
  • For courses delivered through LMS, is there any flexibility for course completion? For example, do students have to complete everything within the day if it is a 1-day course? Can the course be available for a longer period, particularly the asynchronous components? Maybe you just opened this course to more students who couldn’t register previously by doing that.
  • And lastly, always ask for help when it comes to technology.

Presentation at ETUG: Co-creating XR Application for Education

What is ETUG?

Educational Technology Users Group (ETUG) is a community of BC post-secondary educators focused on the ways in which learning and teaching can be enhanced through technology.

What is this presentation about? 

In the ETUG Fall 2018 Workshop, I proposed to present. And here is the abstract:

Most educators get to access AR/VR/MR applications when they are well-developed and ready to use, but they are missing in the design and development process. To most people, the design and development process remains mysterious, but educators need to be involved in the process and become co-creators. Sharing the process and challenges will be an important first step.

What was presented?

Developing HoloLens Application for Aircraft Maintenance Engineers

Just in case you don’t know, our project is basically to translate an existing desktop Helicopter Rotor Head application into Microsoft Hololens application. In addition, we are adding voice control and multiple user network.

(Image Credit: John Bondoc, UX Designer)

Sounds interesting? It’s actually quite scary because none of our team members had experience developing HoloLens application previously. So we learn as we do it.

We just finished Sprint #6 and entered into Sprint #7.

(Credit: Junsong Zhang, Project Manager)

In Sprint #5, we created a prototype based on the concept art below and started adding voice control into the application. The main changes were: 1) we added a voice control command board, and 2) the controls were moved below the rotor.

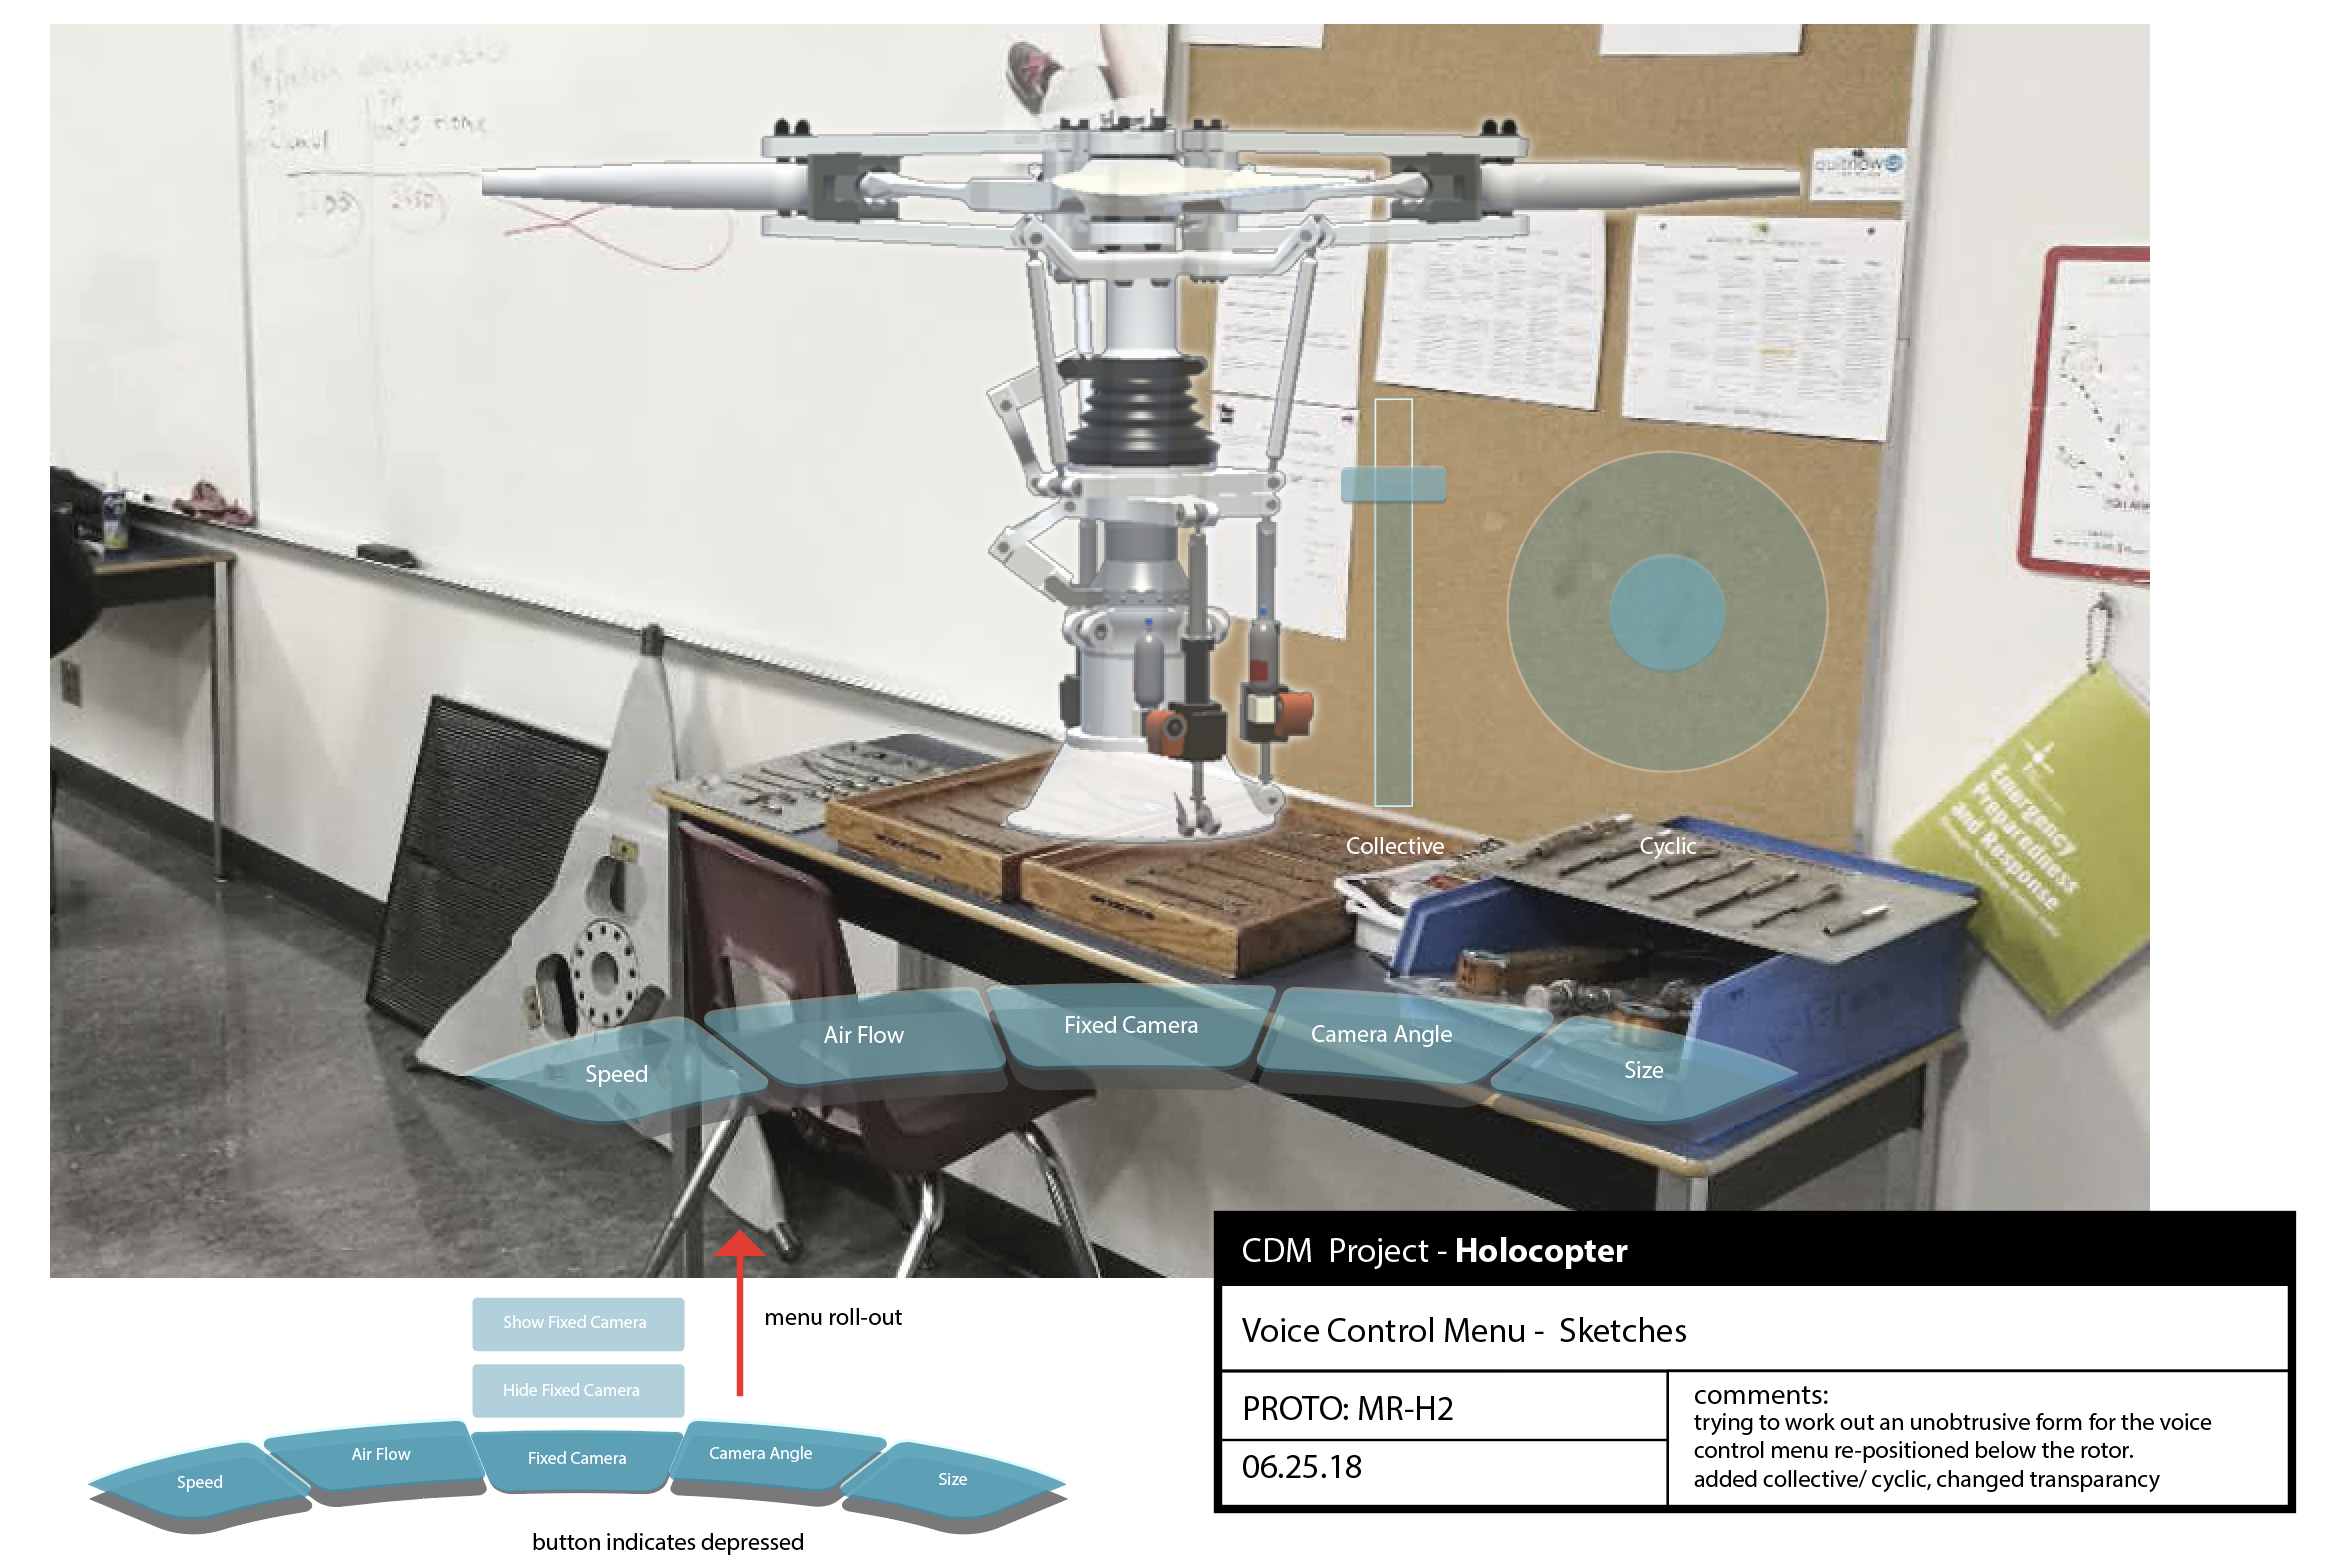
(Image Credit: John Bondoc, UX/UI Designer)

However, in Sprint #6, we tested the prototype and found that the main problems are

  • Difficulties with collective/cyclic controls.
  • Difficulties to see the effects such as airflow & swashplate movement.
  • Difficulties in looking at the rotor while moving the cyclic/collective controls.
  • Slow response with voice control.
  • Confusion about voice control menu.
  • Insensitivity of voice control in noisy environment.
  • There are no indications when “make bigger/smaller” voice controls hit the limits.
  • Not enough training/instructions with regard to how to use HoloLens.
  • Users tend to take it as a 2D object instead of 3D.

Considering scope, we decided to work on the ones that are critical to the functionality of this application:

  • Improve cyclic function
  • Resize/reposition cyclic & collective controls
  • Resize the whole field of view so users don’t need to move their heads too much at the beginning.
  • Change how the model scale up and down: keep the rotor in the background while it grows bigger or smaller instead of jumping to the front.
  • Redesign the voice control menu: instead of a command board, the new voice control menu will be interactions that give users instructions when they gaze/hover over the buttons.

(Credit: the entire team)

Based on that, we came up with a new sketch that reflects that our new interface and interaction. The main changes are the positioning of controls and voice control menu, as well as how the interactions work. We’ll have to prototype and test it. 

(Image Credit: John Bondoc, UX Designer)

From this week on, we will spend more time developing a multiple user network. The idea is to enable instructors to broadcast their views and modifications in the application to students in real-time.

Why retrospective is so important in Agile project management? Example From My Project Team

If you ask me what are the most important things I learned from this whole Agile project management method, I would say it is probably how it helps my project teams to build a shared culture that allows everyone to provide critical feedback and solve problems in a safe and creative environment through sprint planning, sprint review, stand up and particularly retrospective.

No matter what team you are in, there will always be different personalities, different backgrounds and different approaches to get things done. On one hand, diversity lays a good foundation for creativity. On the other hand, it means potential conflicts and misunderstanding.

What Agile method provides is a systematic but nimble approach to align team members and resolve conflicts together. It is safe, transparent, and therefore everyone in the team is productive.

Here is an example of retrospective with my team.

In case you are not familiar with these symbols, the plus symbol means things we did well; the triangle symbol means what we need to improve; and the light bulb symbol means suggestions for improvement.You might wonder why we had so many items under “△”. On one hand, it was because we had accomplished more that week. But more importantly, it was because our team ignored the importance of retrospective in previous weeks, leaving some important issues unattended.

The fact is not everyone in my team values retrospective the same way, particularly when the team is seemingly doing a good job. There were times when retrospective was almost omitted and I had to explain why we still need retrospective. One reason is that it could be a perfect opportunity to recognize the great work the team has accomplished, if the team is indeed doing a wonderful job. But the truth is that there are always some feelings or misunderstanding that need to be addressed, and I am a big believer in creating space for every team member to speak out.

Sensing that we need a proper retrospective, I asked everyone to write down their thoughts silently on post-its in 5 mins, and then stick them on the wall when they finished writing.

The next step is simple: team members took turns to explain their post-its and occasionally we had small conversations about certain issues. I tend to let conversations flow as long as it is reasonable and relevant, and then find the right time to lead to the next topic or the next person.

Facilitating team retrospective is not just about taking a mark pen in team meetings and telling the team to have a retrospective. It’s more about observing and seeing where potential problems are, and finding the right time and place to speak about it even before the meetings. But having a formal process in which everyone is encouraged to speak up is extremely valuable.

So here are the themes of issues we had, and the circled one was identified as the most important issue we committed to improve.

Now we have an extra thing to do in the next retrospective: reviewing the commitments we made. 

Getting Ready for a Virtual Reality Training Simulation Project

First of all, yah!! Why? Because I get to work on a Virtual Reality training simulation project. What could get better than this?

Super excited as this is totally the area I want to explore: learning design with cutting-edge technology. Having the experience working directly with doctors to design next-generation learning experience is going to be extremely valuable too.

Plus the team I am with looks awesome! We are starting to build the team and figure out who would fit what role(s) within Agile/Scrum method.

So let the learning journey commence! Here are the resources I am gathering through my team to get ready for the project:

Sprint Books

VR Learning Resources

CPR Content

American Heart Association

CPR & AED at School Part 1

CPR & AED at School Part 2

Existing VR Training Demonstration

VR – Realistic Immersive Storytelling

VR – First Aid Training with Dummy

VR – Virtual CPR Training

VR – High Voltage Switching Training

VR – Mining
https://www.youtube.com/watch?v=lVuosTgc1pk

VR – Oil and Gas Training

VR – Process, Energy, Naval

VR – Oil Platform

VR – Safety Training (Height)

VR – Orthopedics
https://www.youtube.com/watch?v=2Jk7zs3ES5k

VR – Crane Operation

Existing VR Companies

(More learning resources to be added as the project goes.)

Project Management Lessons Learned in Project 1 at Centre for Digital Media

Through rounds of sketches and debates, our team finally agreed to prototype a functioning text-based AI chat/counseling app for young adults who are going through a hard time in their lives, in 9 weeks. 

At the beginning, our team decided that the project manager role should be rotating so that everyone could learn how to manage projects and apply agile method. However, we soon figured out that it was not effective, and I was encouraged took the project manager role because of my ability to organize projects and manage deadlines. Throughout the 9-weeks project, I have learned:

  • Using sprint planning, sprint review, stand up, and retrospective to facilitate the team collaboration process.
  • Negotiating and scoping MVP but also allow some flexibilities for changes.
  • Aligning team is the key to collaboration because everyone could interpret things differently.
  • Setting reasonable expectation and communicate not only in team meetings but also through 1 on 1 check-in.

In retrospective, there are many things that I could have done better as a project manager and as a team member:

  • I underestimated the power of my non-verbal language. Sometimes my body language shows what I dislike and I am not aware of it.
  • I underestimated the depth of my frustration when things didn’t work or when things were not proceeding as deadline approaches. I shall be more cognizant and find a better way to speak about it and address the issue.
  • I didn’t build mechanisms for critical feedback and conflict resolution into our team culture. It seems to me that our team tends to avoid conflicts which accumulate problems or take critical feedback personal which aggravates team dynamics. In the future projects, I will lead the team to better deal with critical feedback and conflicts, and put more effort in facilitating better collaboration and identifying potential conflicts.

Throughout the project, I intended to facilitate more peer learning as we are a team of diverse background and skill sets.  However, the team basically ignored the peer learning aspect of the project as we were all busy finishing our work. In the future, I should find a better way to facilitate learning and actively implement plans to share knowledge with each other.

Here is a self-portray that illustrates what the project turned me into: