Learning Creative Learning

Nine months ago, Dr. Sandrine Han suggested that I should check out Learning Creative Learning created by Lifelong Kindergarten at MIT Media Lab.

I hesitated for a moment because I was not sure if I would be able to complete this open online course. After all, the average completion rate of MOOC courses is about 15%. To my surprise, not only did I finish the entire course, but also go back and review some of the articles and resources provided by Mitchel Resnick and his lab team.

Learning Creative Learning is now officially a source of inspiration for me. The course materials are fun to read, the course structure is well-designed with 6 easily digestible modules, and the principles and strategies can be applied to any discipline at any school or university. I would recommend every educator to take the course if time allows.

However, if you do not have the time to finish the entire course, these are the things I would like to share with you:

  • The spiral process of creative learning
  • The core concepts of 4P’s: Project, Passion, Peers, and Play
  • Strategies to foster creativity

1. The Spiral Process of Creative Learning 

In the first chapter of his most recent book Lifelong Kindergarten: Cultivating Creativity through Projects, Passions, Peers, and Play, Mitchel illustrates the spiral process of creative learning: an iterative process when someone engages in a creative activity.

Creative Learning Spiral (Courtesy of Mitchel Resnick)

According to Mitchel, IMAGINE is usually the first step, followed by actions to CREATE things. PLAY refers to a stage where people experiment or tinker. SHARE create spaces for collaboration and peer feedback. Reflect basically means “how might we improve,” typically guided by a teacher or facilitator.

As a spiral process, the creative learning cycle is iterative in its nature. That means students need to try out different ideas and approaches to solve problems and improve their solutions. In order to support the creative learning process, Mitchel introduced 4P’s: Projects,  Passion, Peers, and Play. 


2. Projects, Passion, Peers, and Play

Projects

In chapter 2, Mitchel suggests that project-based learning is critical because it is the key to fluency, a similar concept to mastery.

“… When you learn to write, it’s not enough to learn spelling, grammar, and punctuation. It’s important to learn to tell stories and communicate your ideas…  Imagine trying to learn to write just by working on crossword puzzles. It could improve your spelling and vocabulary, and it could be fun, but would you become a good writer, able to tell stories and express your ideas fluently? I don’t think so. A project-based approach is the best path to fluency, whether for writing or coding.”

Mitchel also argues that learning by doing is not enough. Students should engage in  learning by making, which is the process of designing, building, and creating something:

“in the culture of the Maker Movement, it’s not enough to do something: You need to make something. According to the maker ethic, the most valuable learning experiences come when you’re actively engaged in designing, building, or creating something—when you’re learning-through-making.”

The idea of learning by making can be challenging to many of us. If you are wondering where to start, I would suggest thinking about these questions:   

  • How do your current activities, feedback, and assignments support or do not support the “making” process?
  • How can you create authentic projects that support the acquisition of 21st-century skills?
  • And more importantly, are you willing to try out new approaches?

Passion

In chapter 3, Mitchel introduces the idea of “wide walls” building on Seymour Papert’s concepts of low floor” and high ceiling.” “Low floors” means technology should provide easy ways for novices to get started. “High ceiling” means technology should also provide ways for people to work on increasingly sophisticated projects over time.

According to Mitchel, “wide wall” adds that technology should support a wide range of different types of projects because people have different passions. He also suggests that passion leads to a phase of immersion in learning.

“Developmental psychologist Edith Ackermann described the process in terms of diving in and stepping back. When people work on projects they’re passionate about, they’re eager to dive in and immerse themselves. They’re willing to work for hours, or longer, and hardly notice that time is passing… But it’s also important for people to step back and reflect on their experiences. Through reflection, people make connections among ideas, develop a deeper understanding of which strategies are the most productive, and become better prepared to transfer what they’ve learned to new situations in the future. Immersion without reflection can be satisfying, but not fulfilling.”

He points out that we need to encourage “hard fun” instead of believing the misconception that students want learning to be easy.

“Too often, teachers and educational publishers try to make lessons easier, believing that children want things to be easy. But that’s not the case. Most children are willing to work hard—eager to work hard—so long as they’re excited about the things they’re working on.”

Although it is obvious that people learn the best when they are led by passion, it is not easy to implement when students just need certain courses in order to complete their degrees. However, whenever possible, it is our job to create space for flexibility and agency that ignite passion.  

If there is not much you can change in your course content, how about giving students choices to decide the format of their assignments? If they enjoy creating videos, can they submit a video instead of a writing assignment? And even before that, do your students know that they can talk to you about their interests or preferred ways of learning?  

Peers 

Mitchel suggests that we need to shift from think-it-yourself to make-it-together.

“This approach is more aligned with the needs of today’s society, where almost all jobs require collaborative effort, and the most important social issues require collective action.”

With peers, students collaborate with and learn from each other to create prototypes and artifacts. They seek for team members offline and online and develop communities by themselves. These meta-cognitive strategies enable them to become more self-sufficient.

But how should we support this? In chapter 4, Mitchel addresses it by discussing the shifting role of teachers:

  • Catalyst: The best way for a teacher to provide a spark is to ask questions. By asking the right types of questions, a teacher or mentor can catalyze exploration and reflection, but the learner remains that active agent, in charge of the activity.
  • Consultant: The goal is not to “deliver instruction” or “provide answers,” but to understand what people are trying to do and figure out the best way to support them.
  • Connector: An important part of teachers’ job is to connect learners with other people who they might work with, learn with, and learn from.
  • Collaborator: Teachers or mentors don’t simply provide support or advice. They work on their own projects and invite people to join in.

Play

Why is play even relevant or essential? In chapter 5, Mitchel explains that play helps students to explore the unknown and the uncertainty.

However, not all types of play are equally valuable. Citing work from Marina Bers, he agrees that there is a difference between playpen and playground.

“The playground promotes, while the playpen hinders, a sense of mastery, creativity, self-confidence, and open exploration.”

“Playpen” indicates limitations and restrictions, whereas “Playground” is open and encourages social interactions. With that, he suggests that the tinkering process combines the value of “playing” and “making.”

“The tinkering process is messier. Tinkerers take a bottom-up approach: They start small, try out simple ideas, react to what happens, make adjustments, and refine their plans. They often take a meandering, circuitous path to get to a solution. But what they lose in efficiency they gain in creativity and agility. When unexpected things happen and when new opportunities arise, tinkerers are better positioned to take advantage.”

Tinkering is inherently an iterative process, similar to the process of design thinking.

“Tinkerers believe in rapid prototyping and iteration. When working on a design project, they build something quickly, try it out, get reactions from other people, then make a new version— over and over.”

In order to cultivate creative thinkers, he cautions that teachers need to understand that step-by-step instructions should be a stepping stone, not a final destination. Teachers also need to encourage students to try out different approaches and styles so that they can switch strategies as situation warrants.


3. Strategies to foster creativity

In chapter 6, Mitchel lists 10 tips for parents and teachers to support the development of creativity based on the spiral process of creative learning. You may also find the 10 Tips here.

Contextualizing Learning Creative Learning for learning design in general, I think there are a few things we could implement effectively with some reasonable efforts:

  • Low floor: A course should be designed in a way that is fun and provides a strong sense of achievement at the beginning. For example, you could gamify your first class by introducing a trivial game with a leader board, and everyone wins something.
  • High ceiling: When possible, learning tasks should be designed with a gradual increase in difficulty.  A simple way to increase difficulty is to provide less support or aids. For example, your students may be provided step-by-step instruction at first. As the course progresses, students are asked to perform a task with less or no instructional aids. Sometimes it just means you talk less. 
  • Wide wall: Consider the needs and interests of your students. Give students chances to choose projects or assignments. Empower them to figure out a topic they are interested in within the subject. An example I provided previously is to think about the format of your assignments, can students submit video assignments rather than writing assignments? Are they given the opportunities to discuss with you about their preferred ways of learning?
  • Allow play and mistakes: High-stake assessments do not usually afford mistakes. Consider “drop the lowest grade” if you have multiple projects in one course so your students could experiment different approaches, or consider allowing students to submit assignments a few more times to make improvements (iterations) based on formative feedback they receive.
  • Room for unknown: Use worked-out examples with purpose. Depending on your objectives, you may provide step-by-step instruction first, or you could give students opportunities to imagine and explore the possibilities of solving problems first. The key is that students need to understand that unknown is constant in the real world and the only way to deal with it is to try different approaches
  • Build the habit of reflection: Establish a process for reflection. Provide opportunities and tools for your students to reflect as an individual and as groups. A simple tool like KFC (keep, fix, change) will make the reflection process much easier for new students. Also, encourage your students to document their process and iterations for reflection.

So, how about some creativity with your course design and teaching practices?  

Facilitating Synchronous Online Learning

A few weeks ago I developed and facilitated a workshop around facilitating synchronous online learning for the Learning Center at Kwantlen Polytechnic University. Initial assessment showed that the main challenges of teaching synchronous online classes are:

  • Communicating with each student during the session
  • Converting face-to-face activities to online sessions
  • Audio or video technical issues
  • Using interactive tools

At first glance, these challenges seem to be technical. However, it may be a combination of beliefs and skill gaps. For example, I wonder why instructors need to engage with “each” student in a synchronous online session. Is it a need derived from learning objectives or a perception driven by the fear of losing sight to each student?

In order to address these beliefs and skill gaps, the workshop is designed and delivered to cover these learning outcomes:

  • Identify elements that influence synchronous online learning experience
  • Recognize the affordances and constraints of synchronous online learning platforms
  • List different phases and best practices in a synchronous online session
  • Apply multimedia learning principles in the selection and use of tools for interaction and assessment

A Sneak Peek of the Workshop Activity

What are the best practices for synchronous online learning?

It is obvious that best practices in teaching and learning largely depend on the learning objectives and the tool you selected within the platform.

We will go through the first page of Suggestions for Using Synchronous and Asynchronous Communication from the University of Calgary, Werklund School of Education, and work in groups to adapt it based on your synchronous online learning classes.


At the end of this workshop, not only participants learned the technical side of using synchronous online learning tools for content delivery and assessment but also formed a better understanding of relevant strategies to engage and interact with students.

Presentation at ETUG: Co-creating XR Application for Education

What is ETUG?

Educational Technology Users Group (ETUG) is a community of BC post-secondary educators focused on the ways in which learning and teaching can be enhanced through technology.

What is this presentation about? 

In the ETUG Fall 2018 Workshop, I proposed to present. And here is the abstract:

Most educators get to access AR/VR/MR applications when they are well-developed and ready to use, but they are missing in the design and development process. To most people, the design and development process remains mysterious, but educators need to be involved in the process and become co-creators. Sharing the process and challenges will be an important first step.

What was presented?

Developing HoloLens Application for Aircraft Maintenance Engineers

Just in case you don’t know, our project is basically to translate an existing desktop Helicopter Rotor Head application into Microsoft Hololens application. In addition, we are adding voice control and multiple user network.

(Image Credit: John Bondoc, UX Designer)

Sounds interesting? It’s actually quite scary because none of our team members had experience developing HoloLens application previously. So we learn as we do it.

We just finished Sprint #6 and entered into Sprint #7.

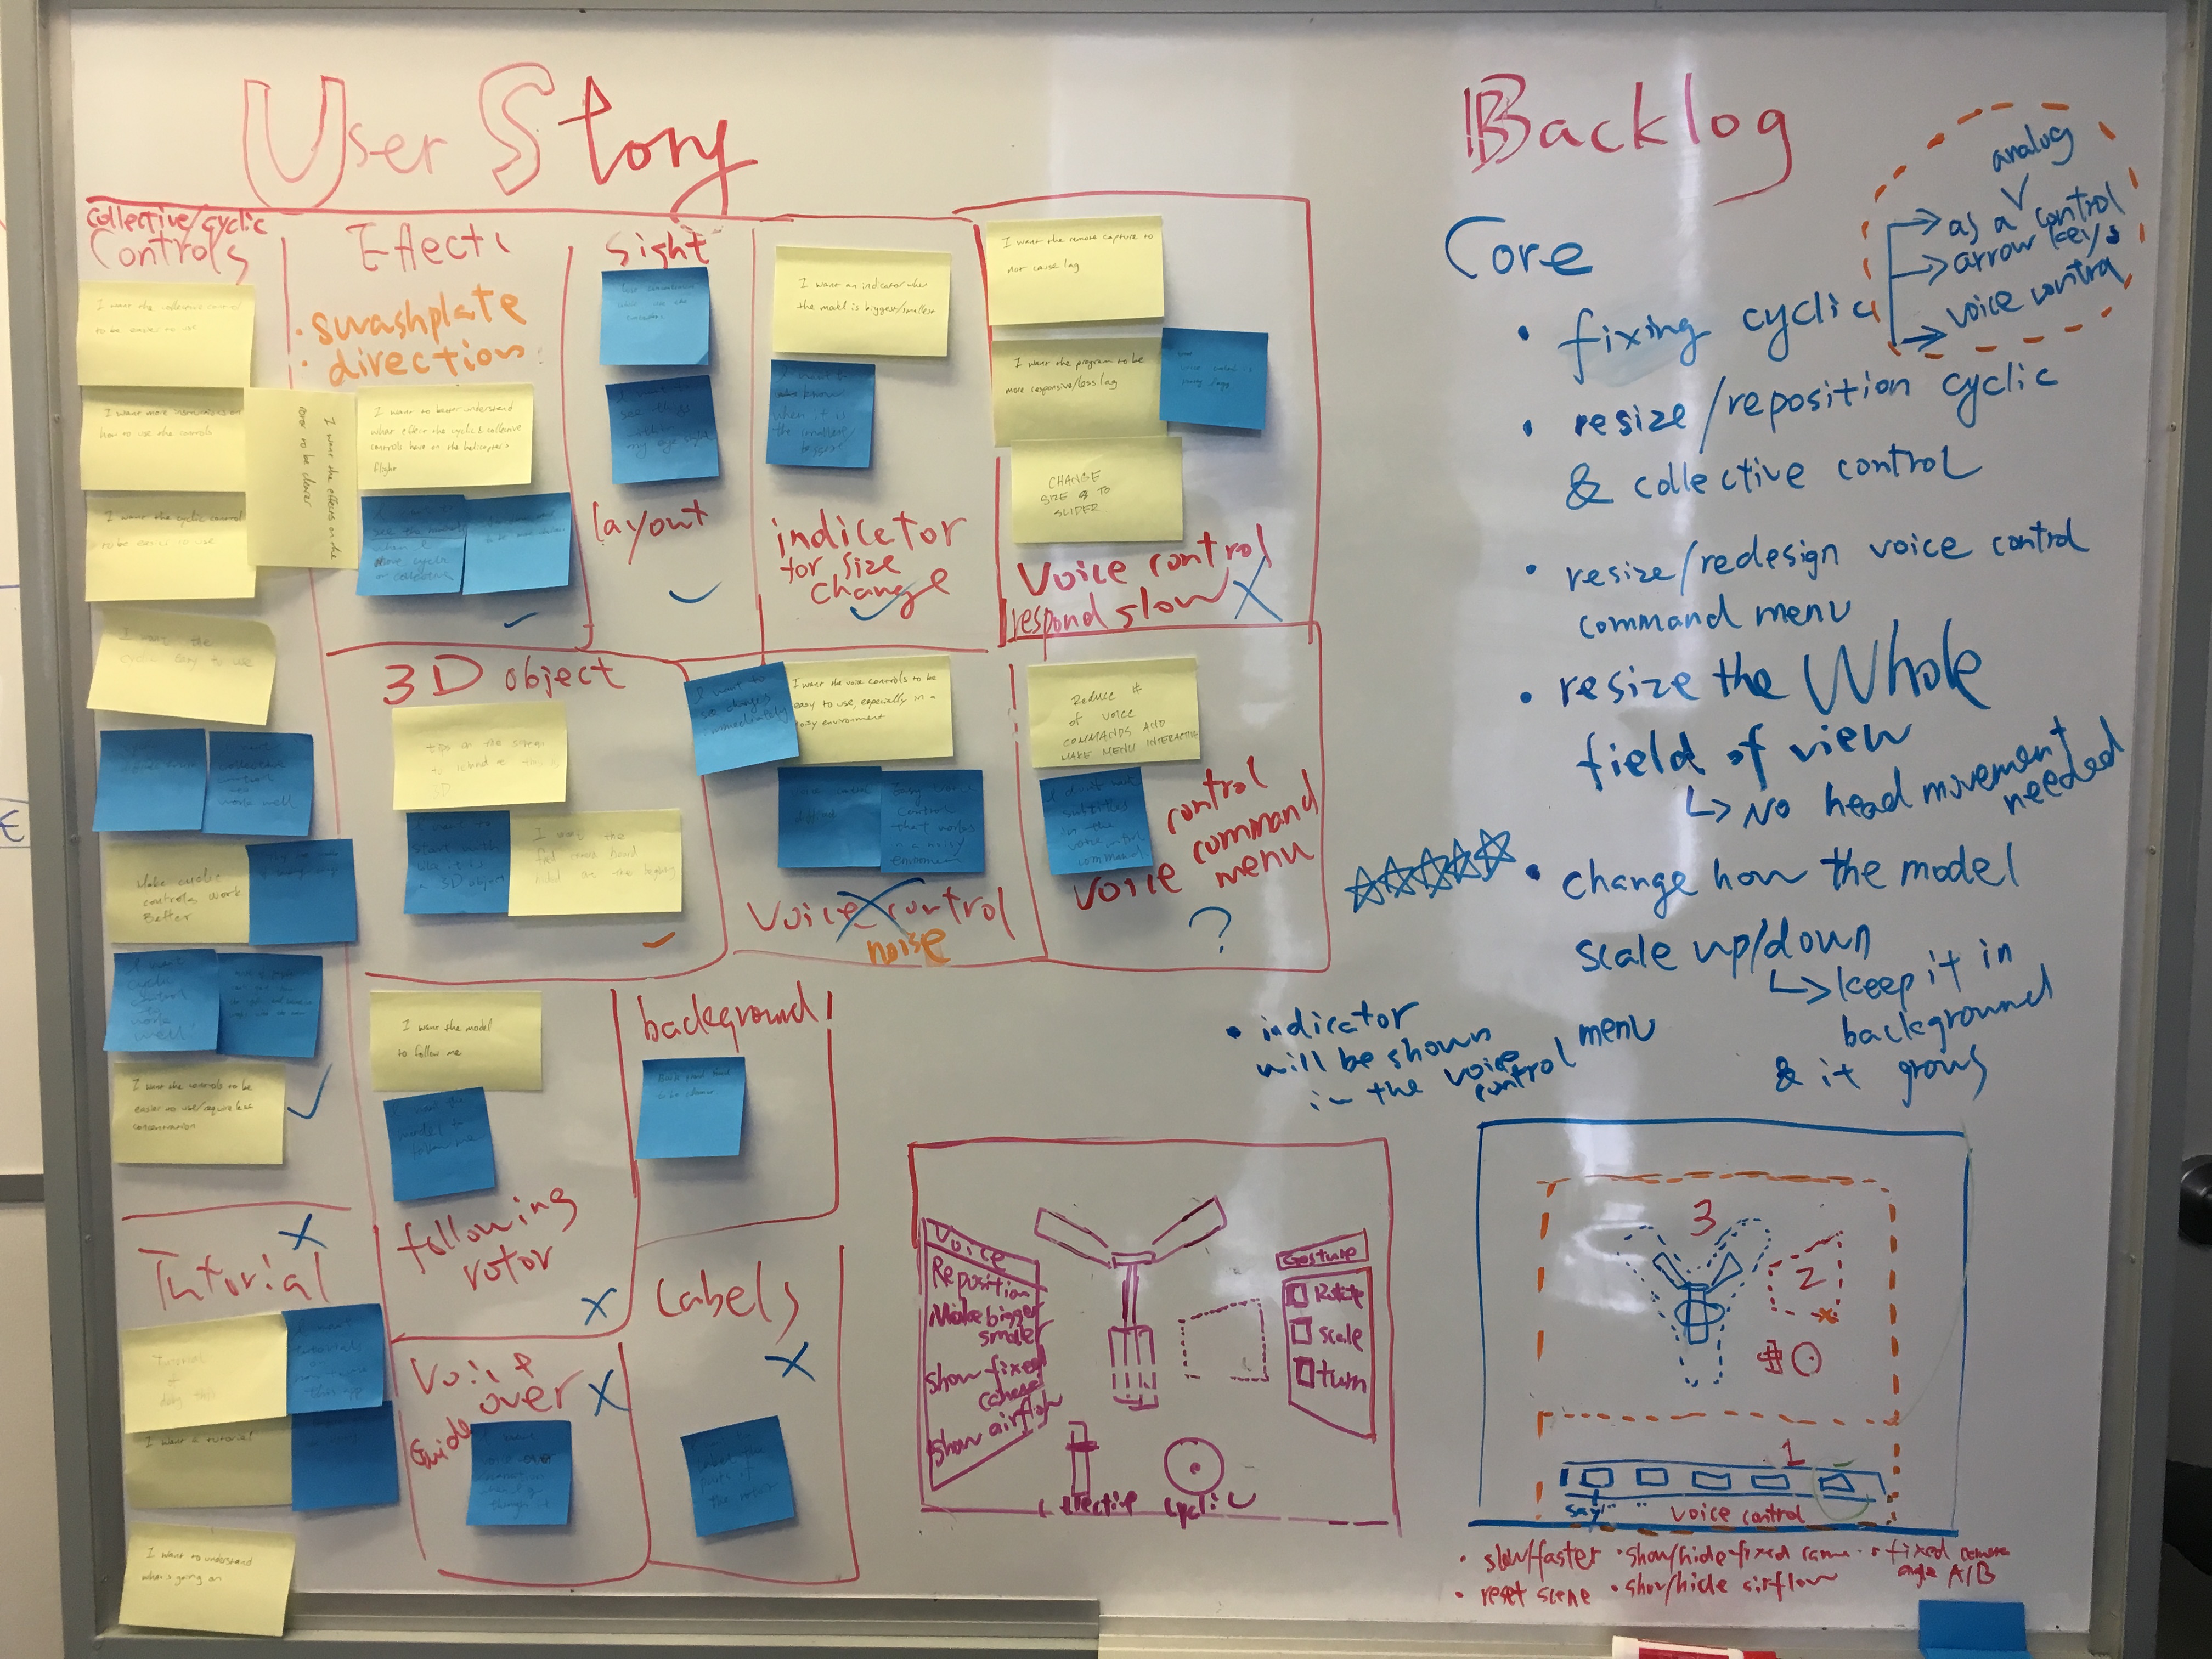
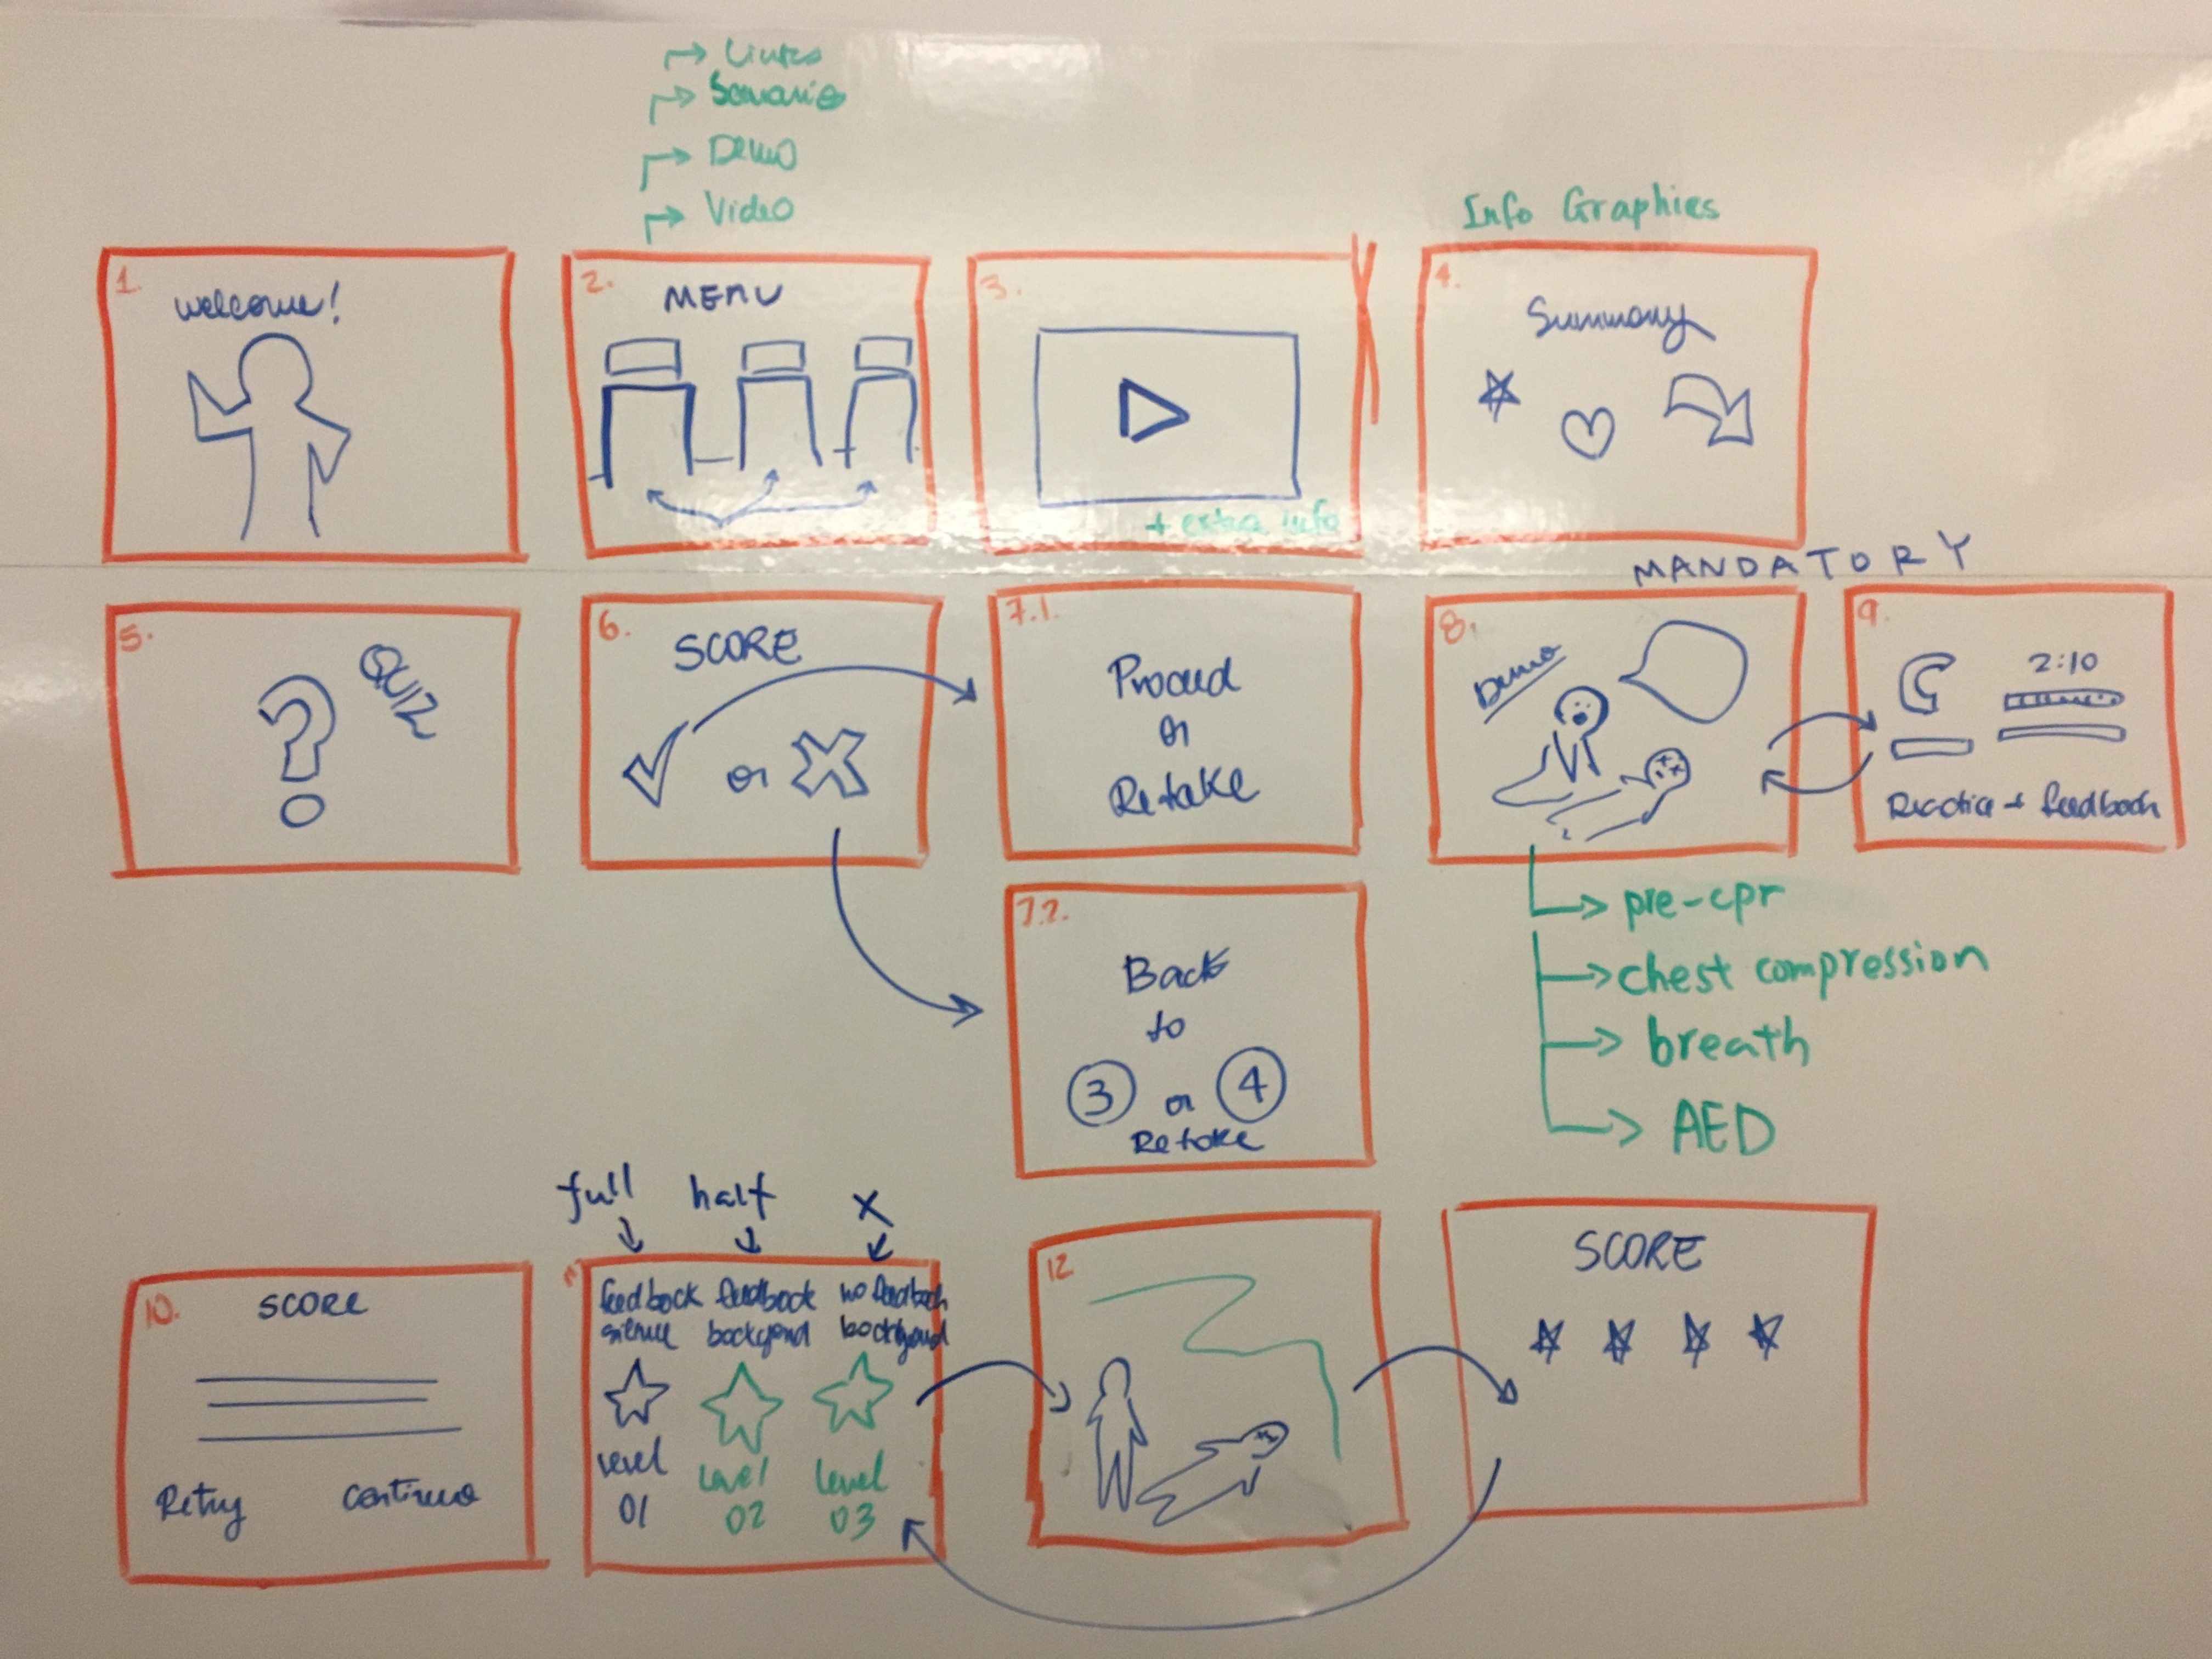
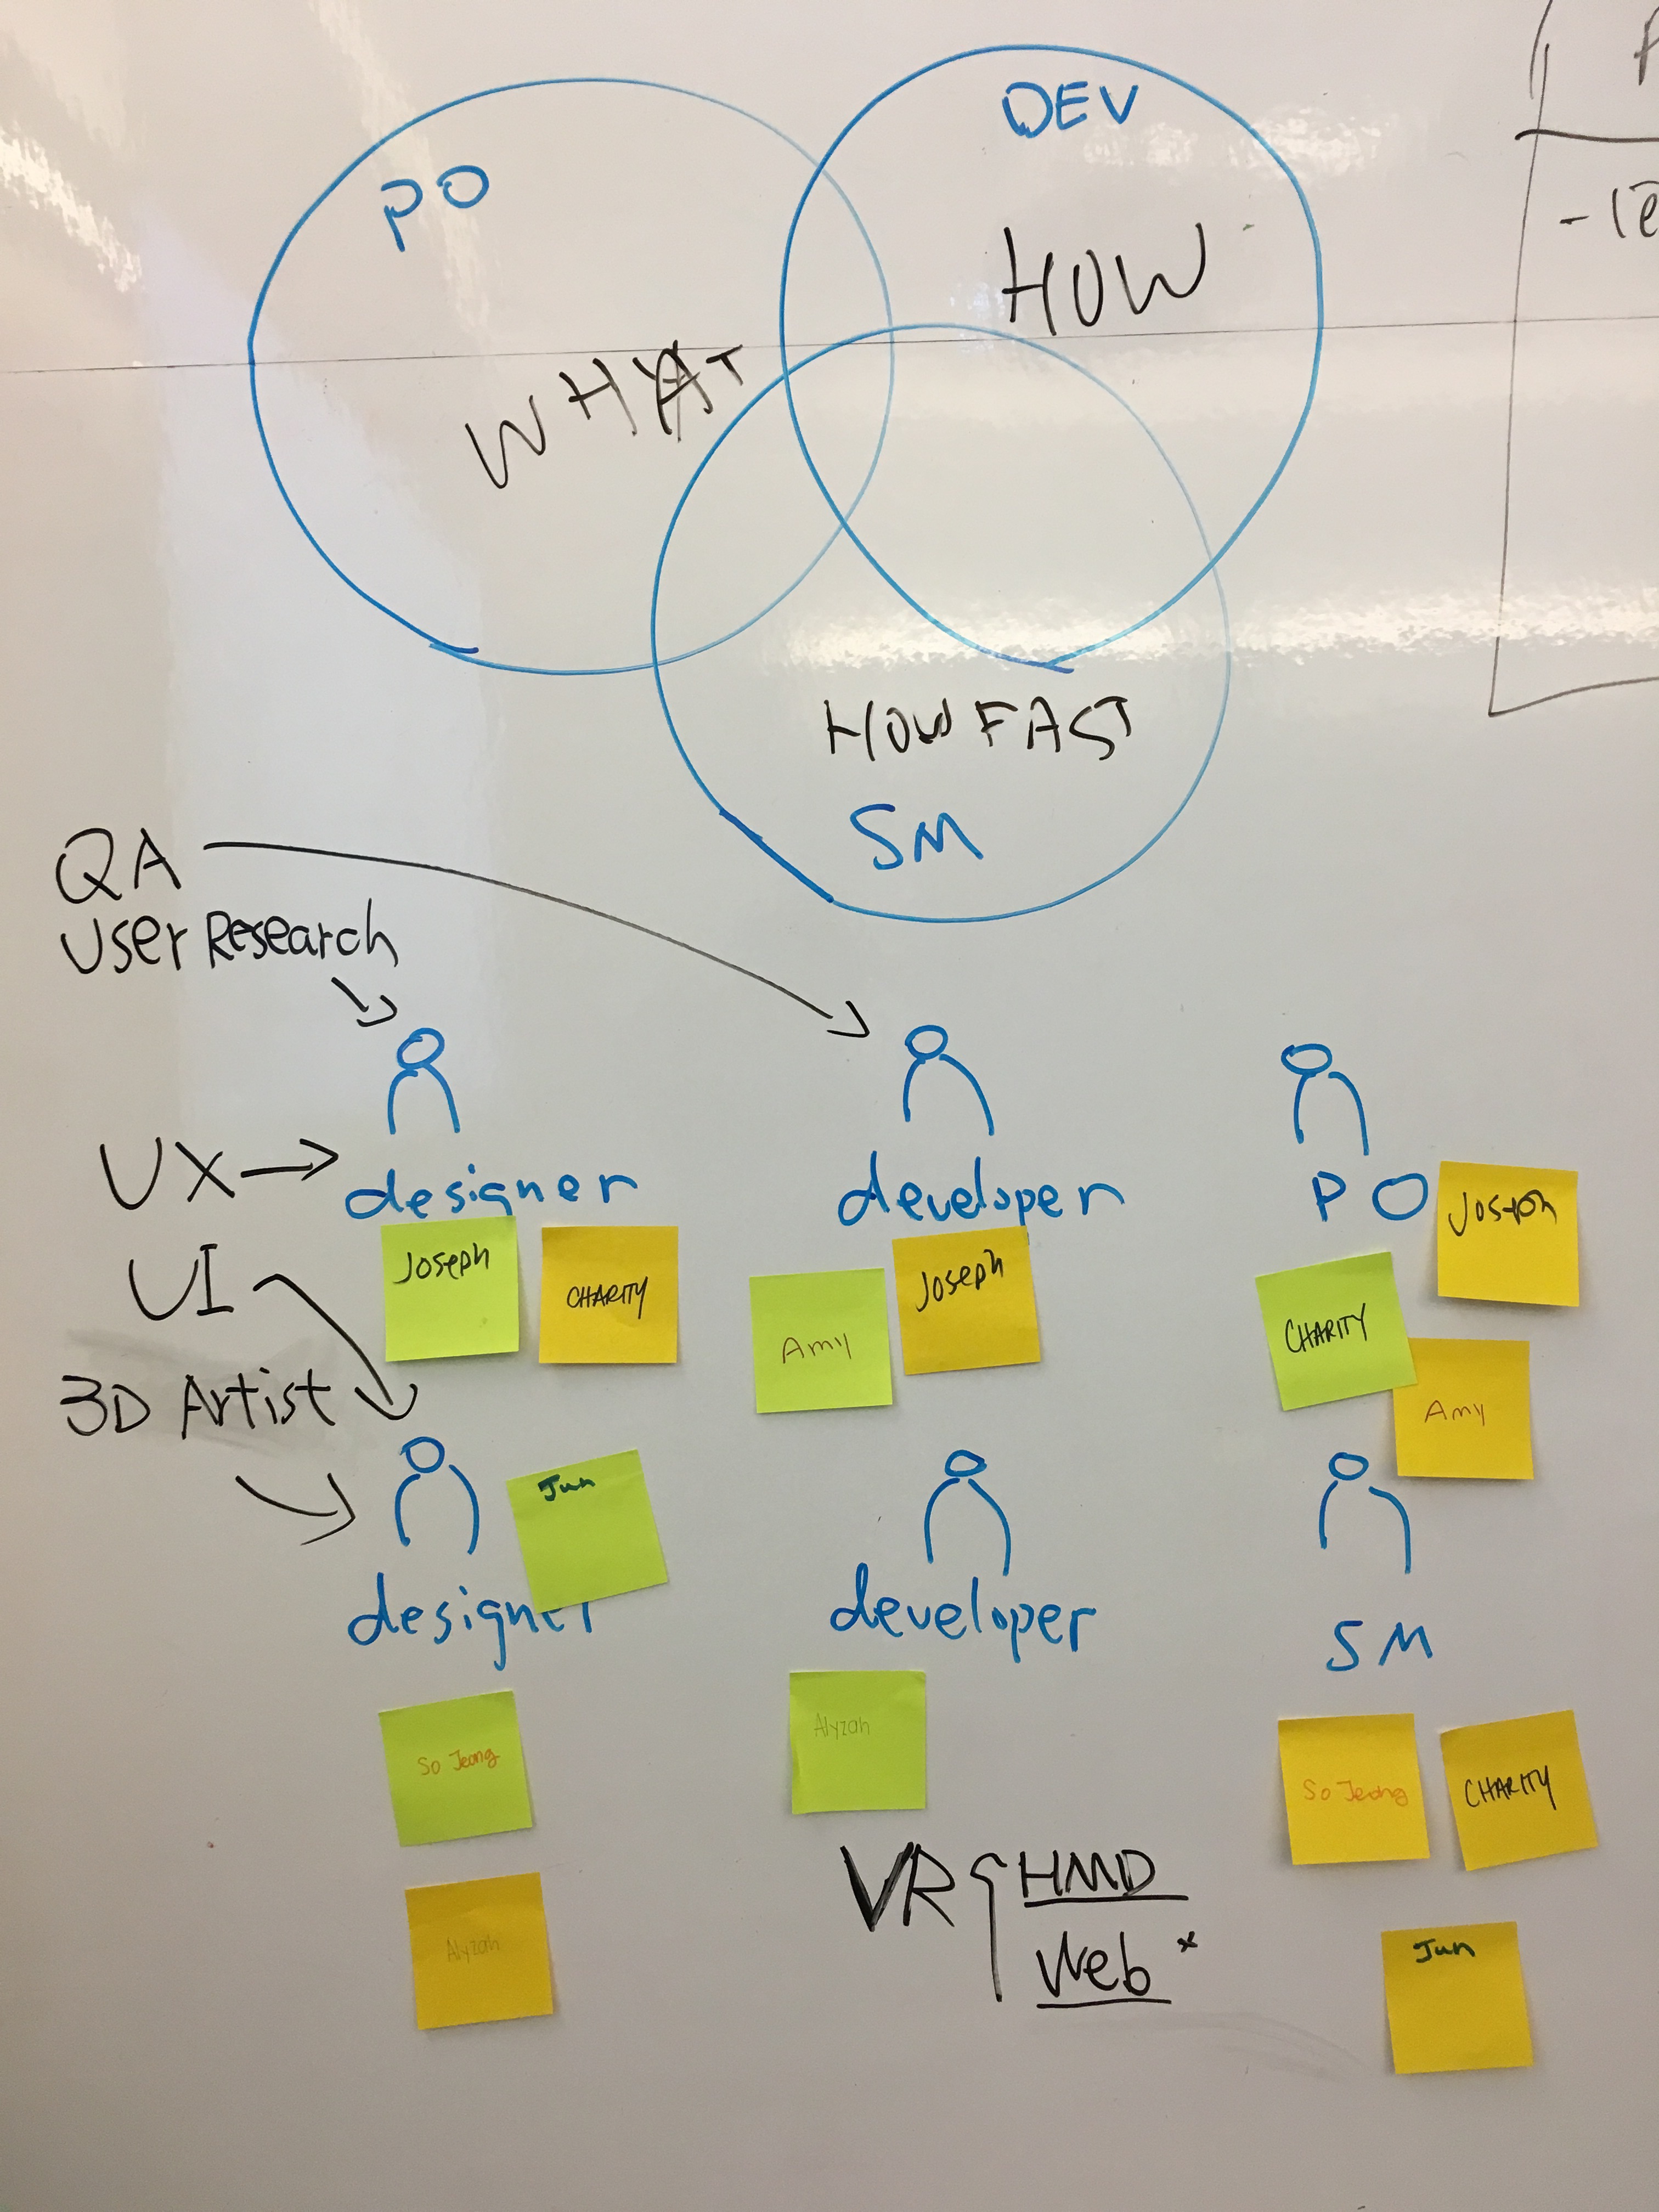
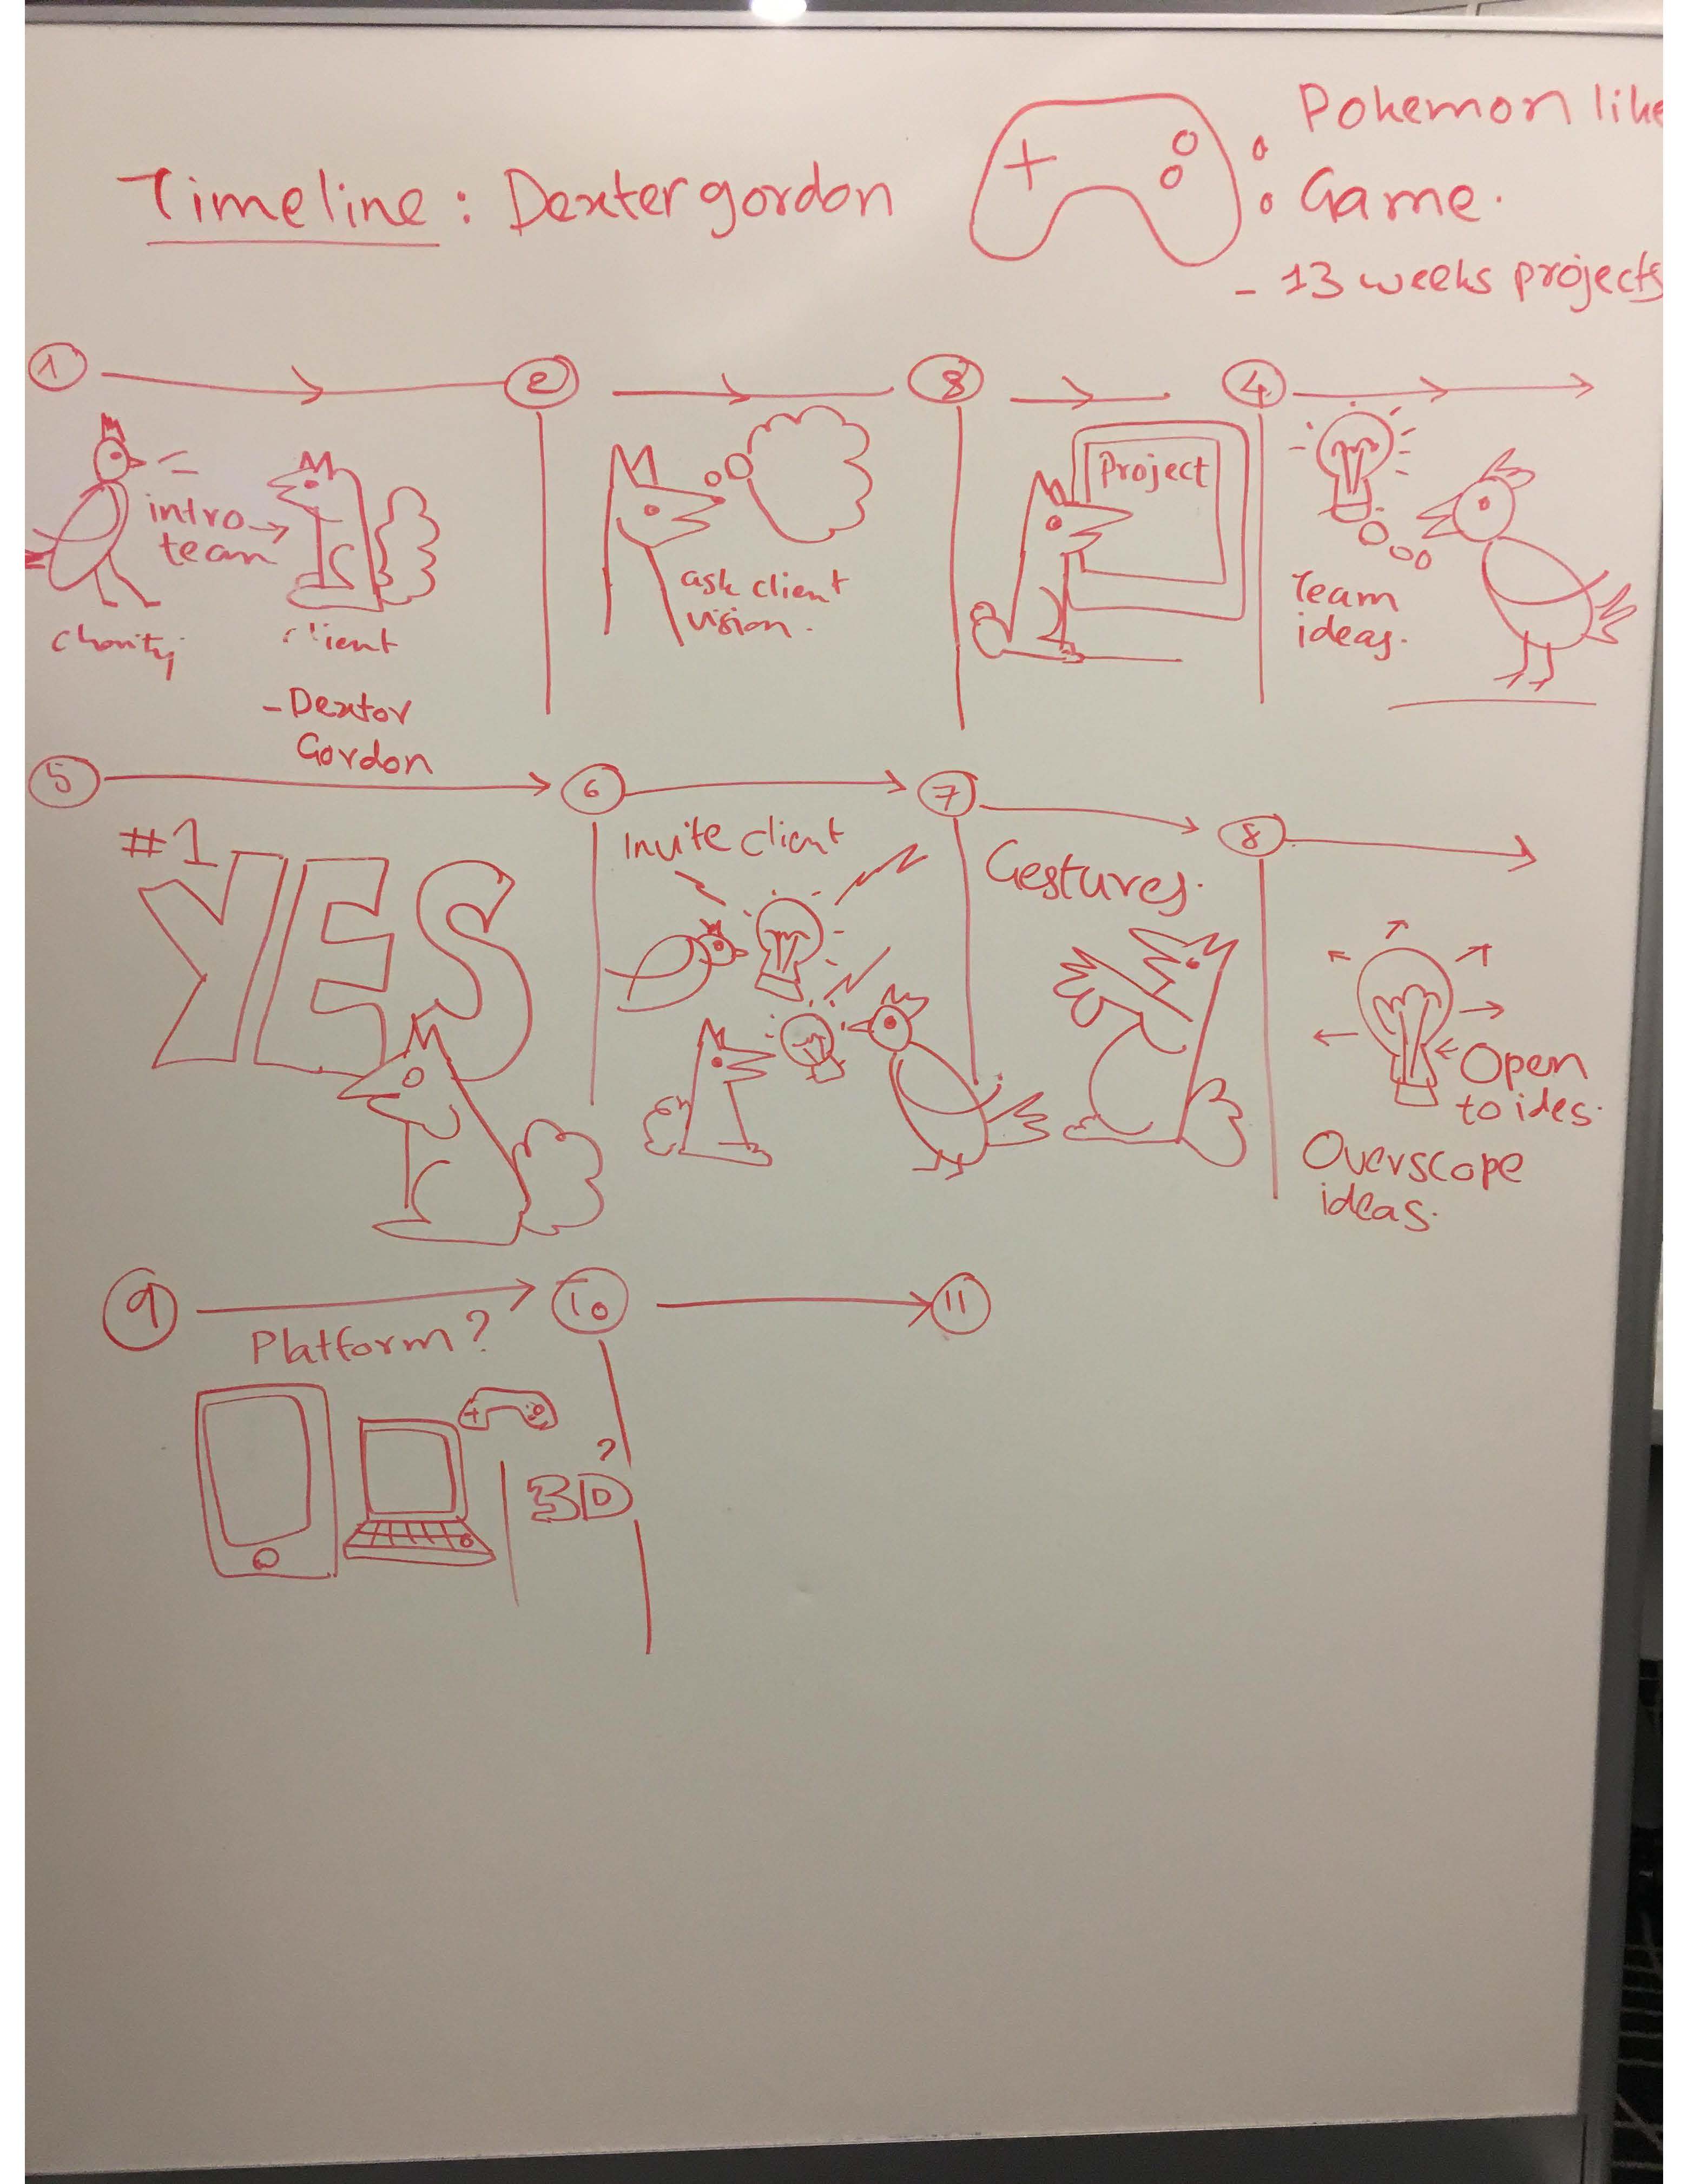
(Credit: Junsong Zhang, Project Manager)

In Sprint #5, we created a prototype based on the concept art below and started adding voice control into the application. The main changes were: 1) we added a voice control command board, and 2) the controls were moved below the rotor.

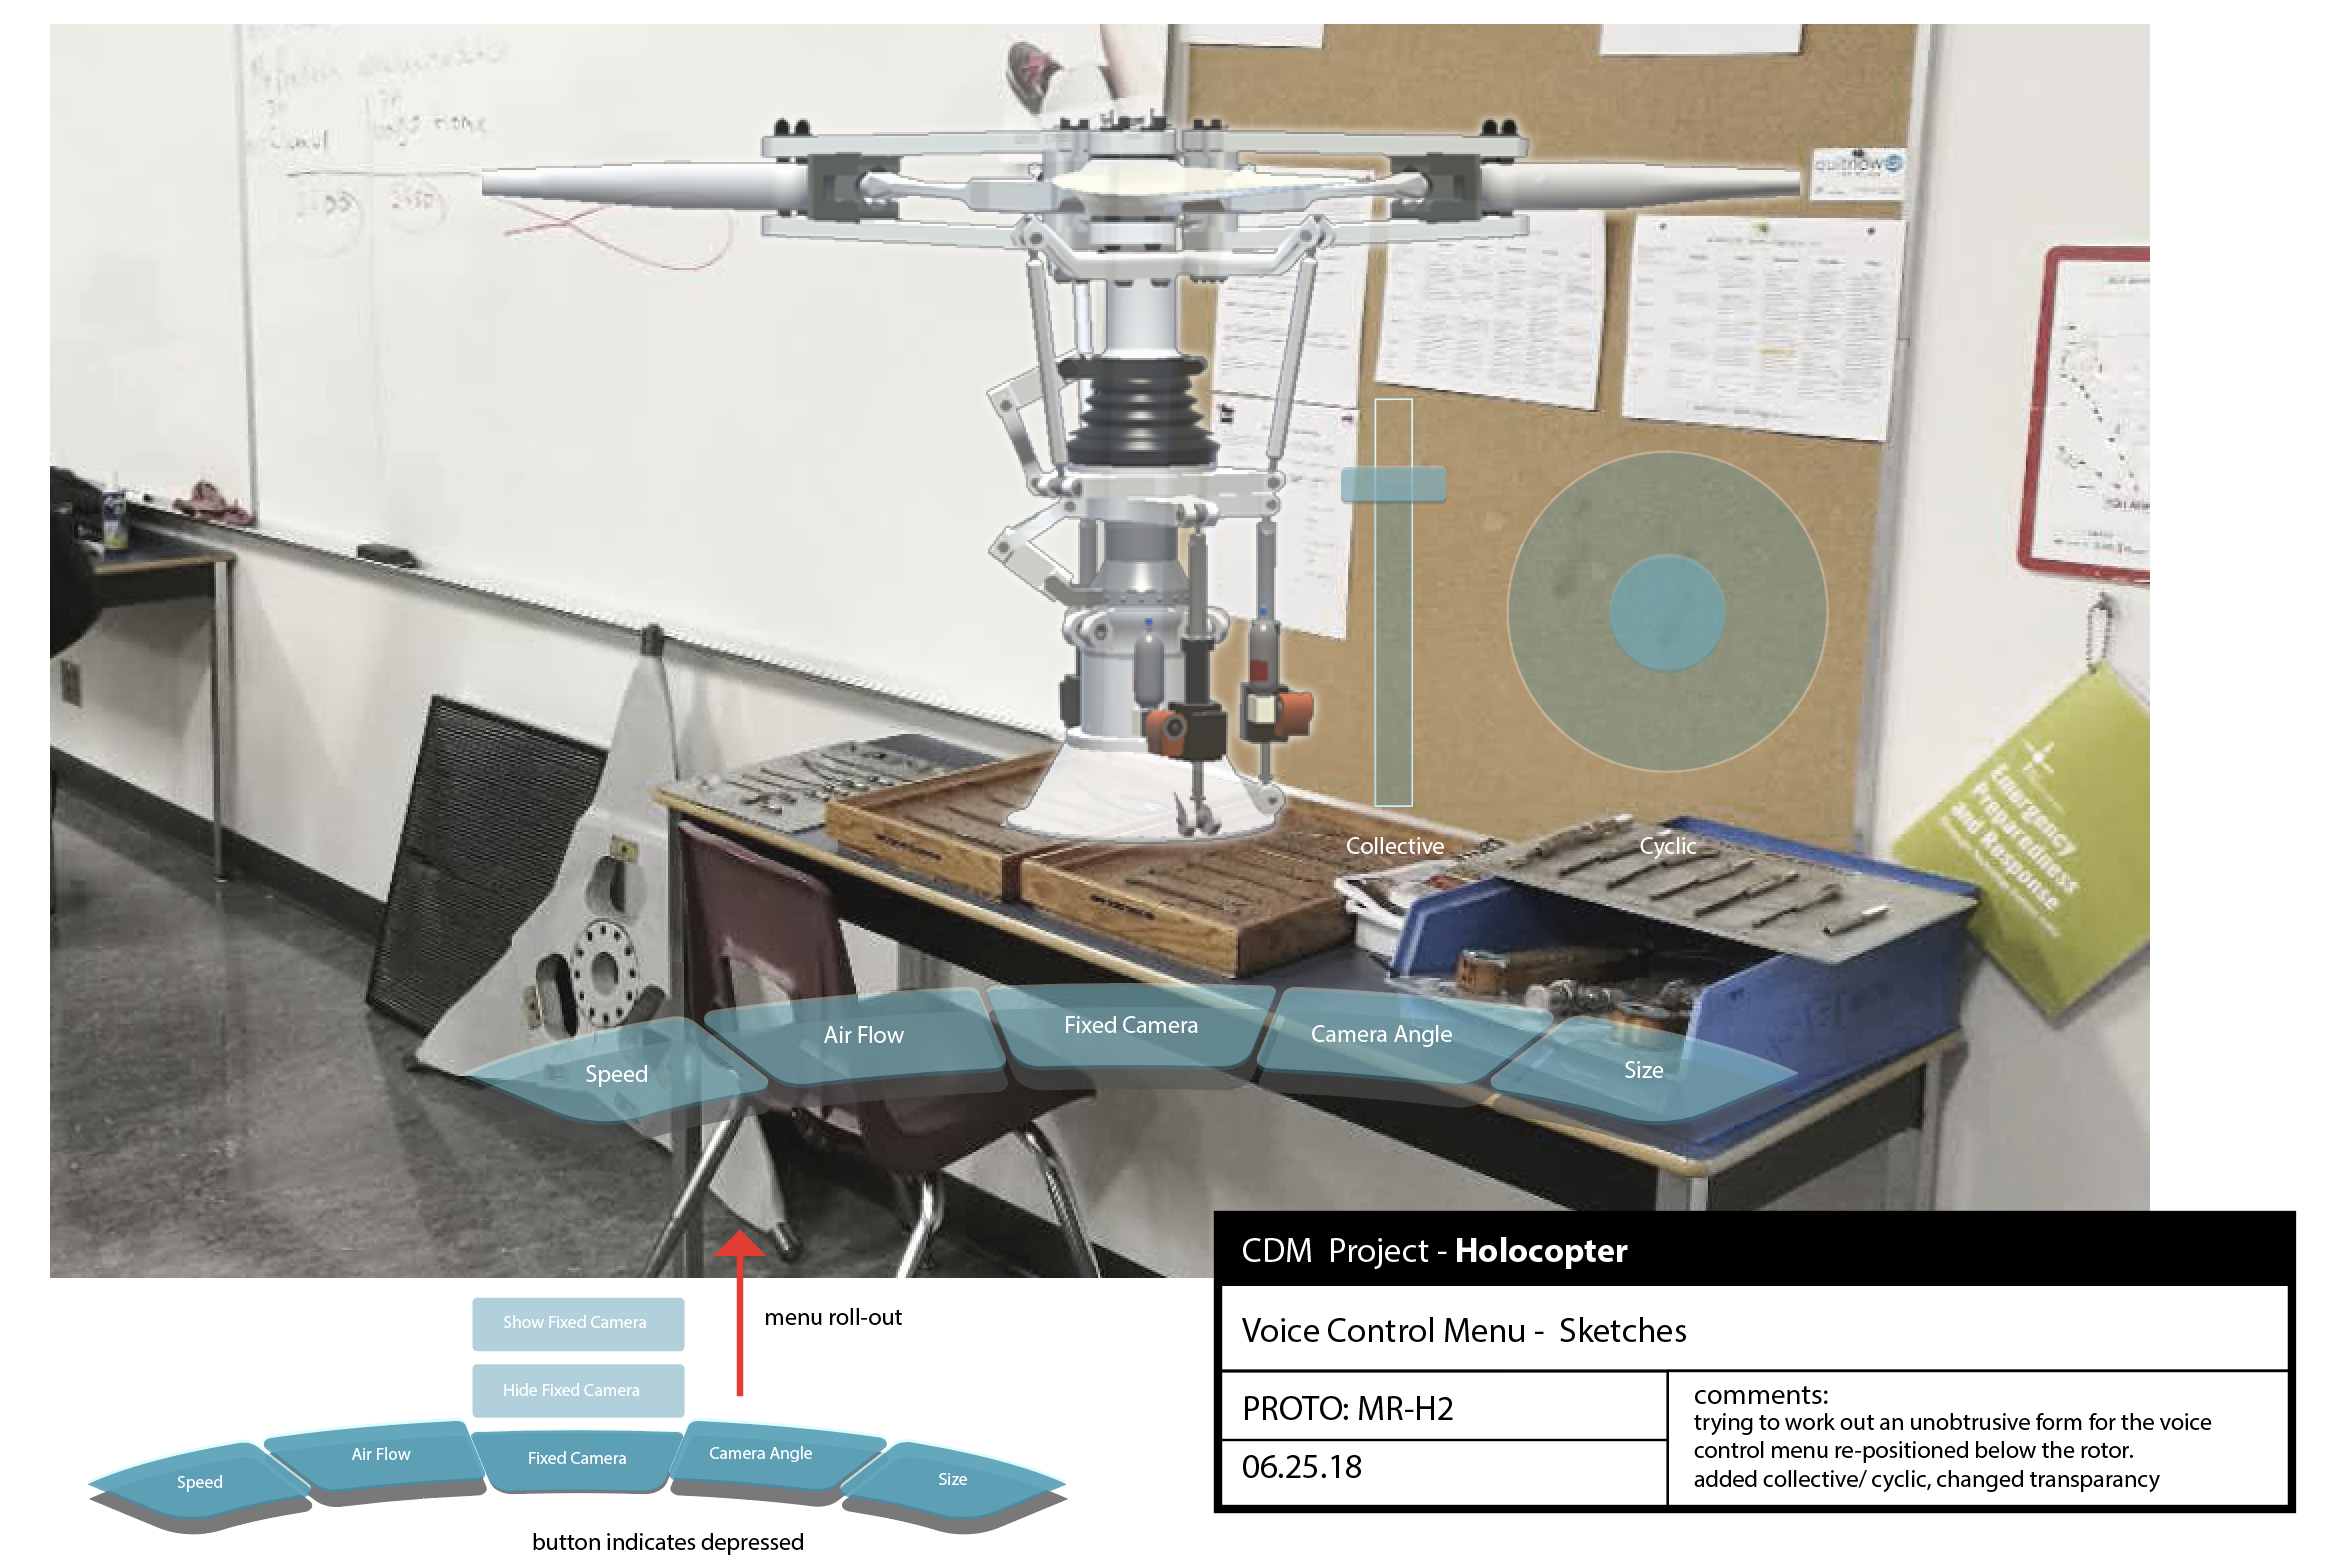
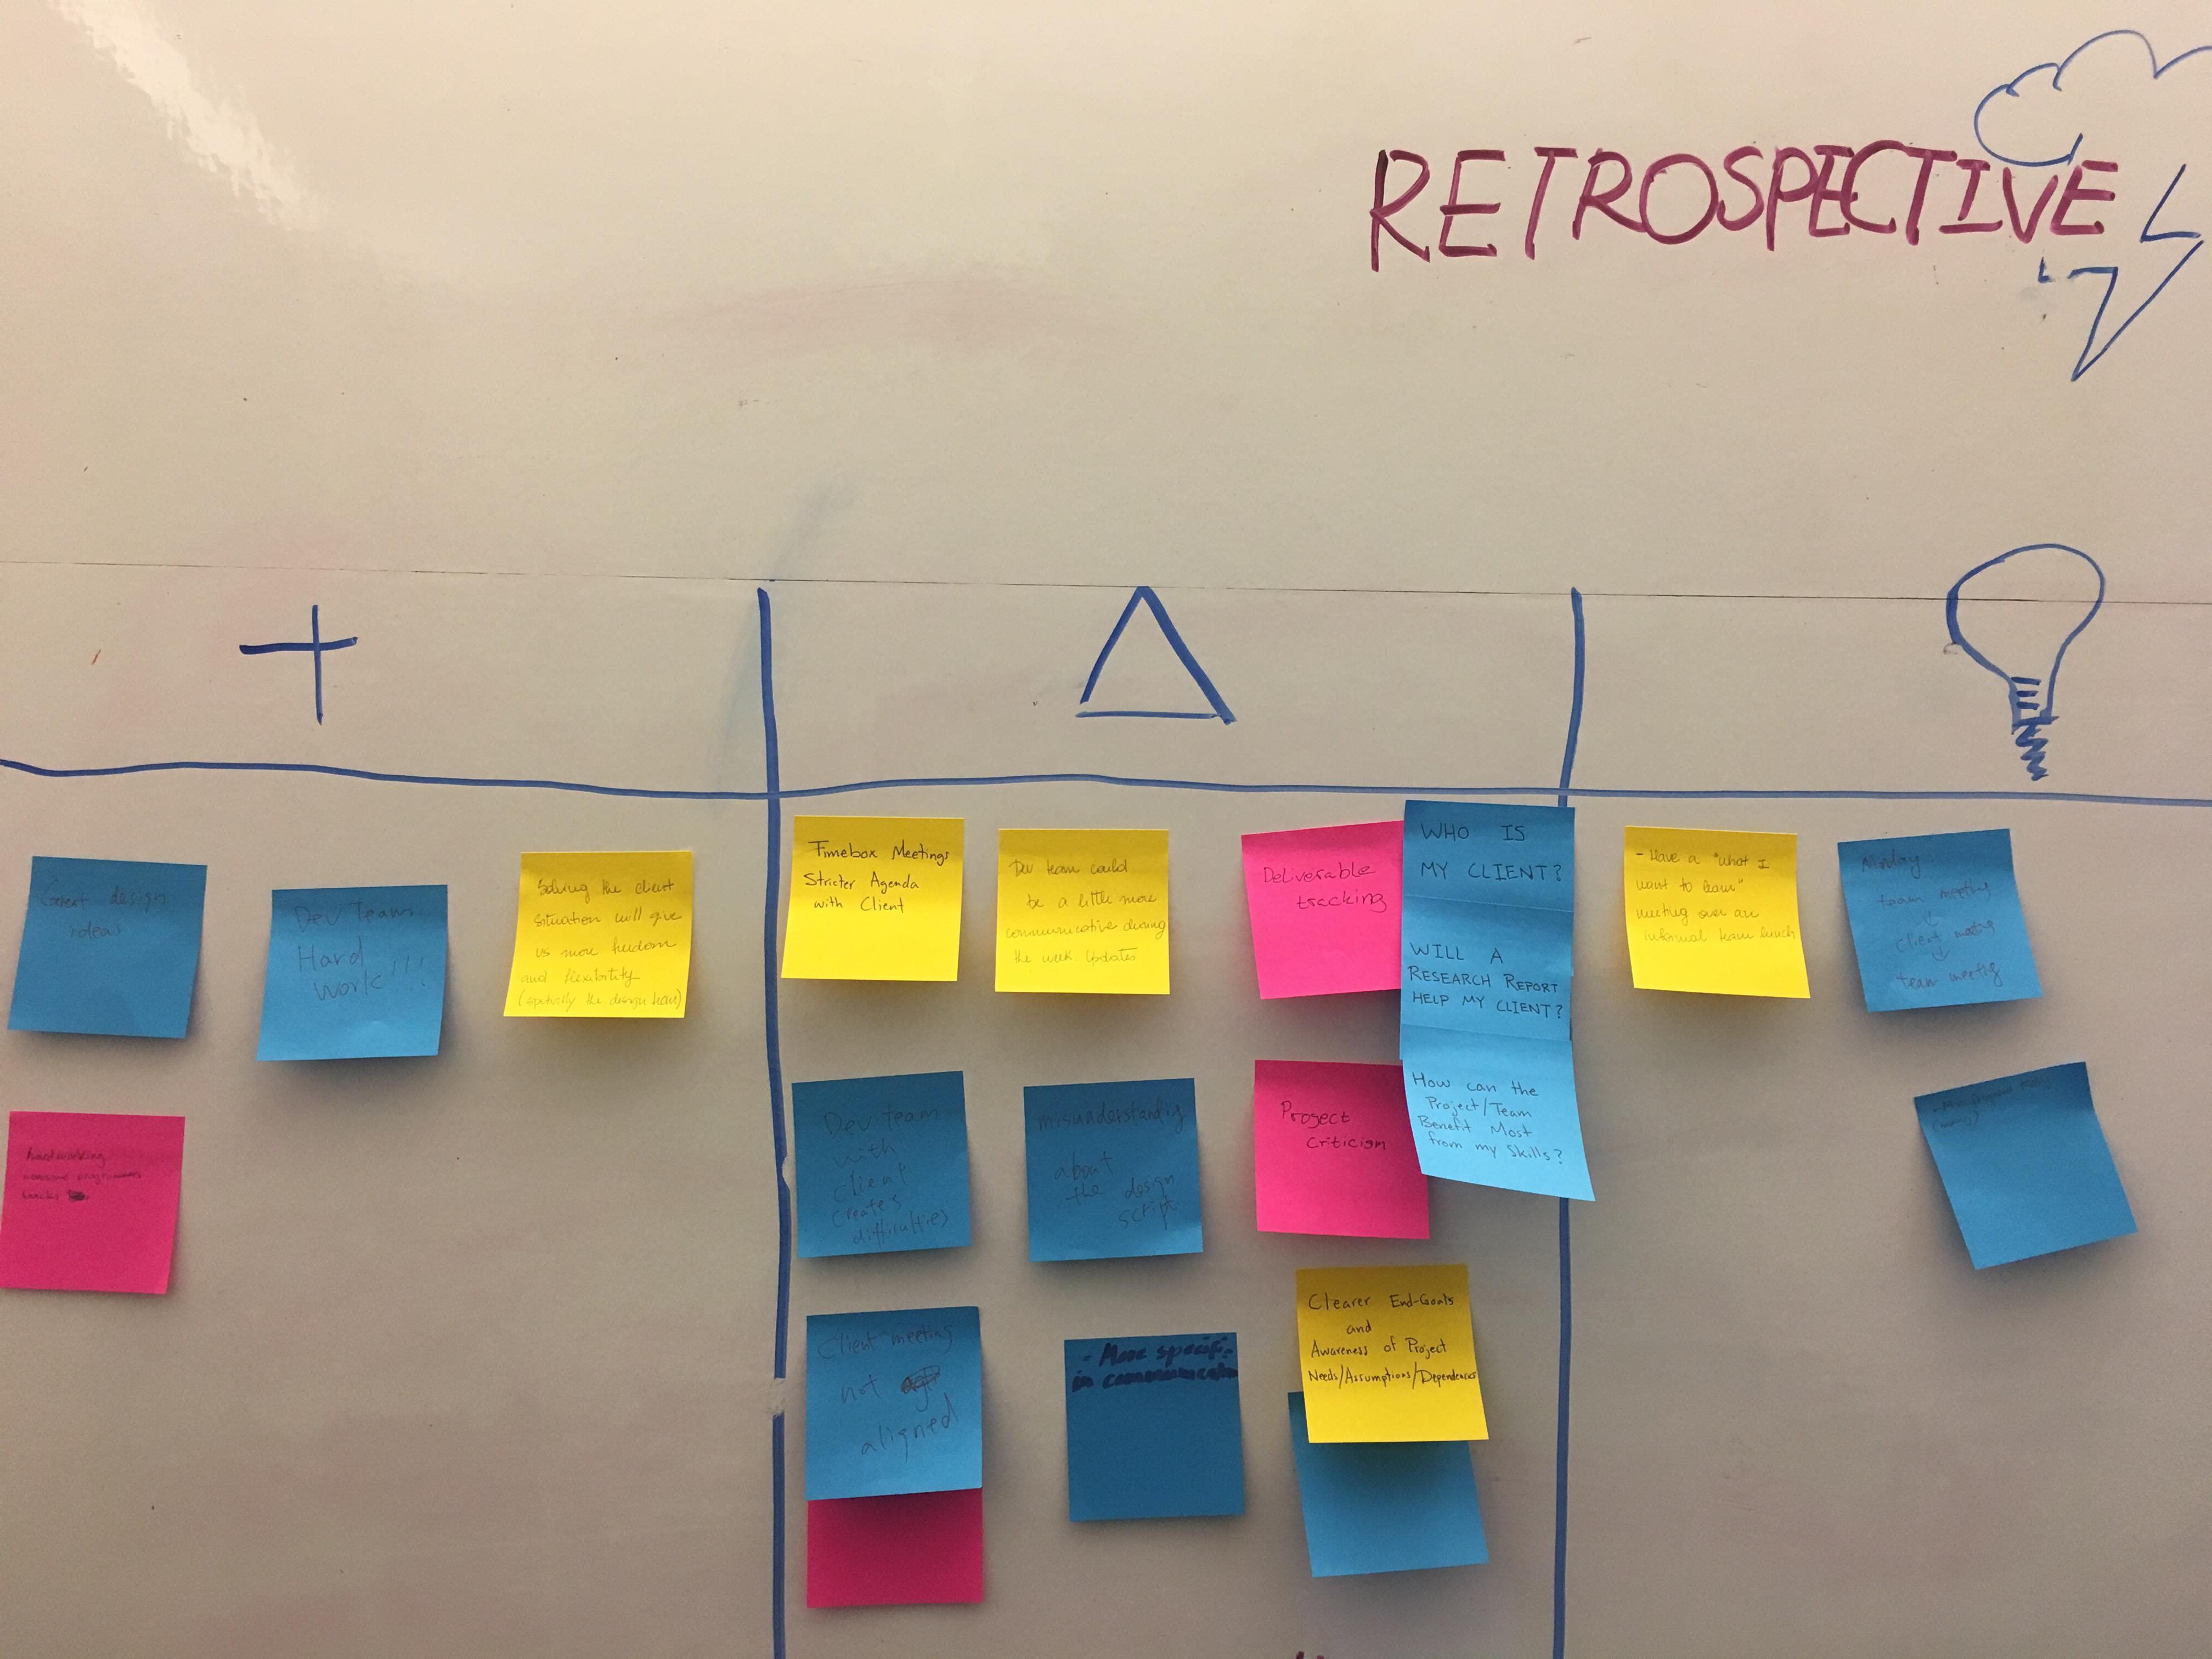
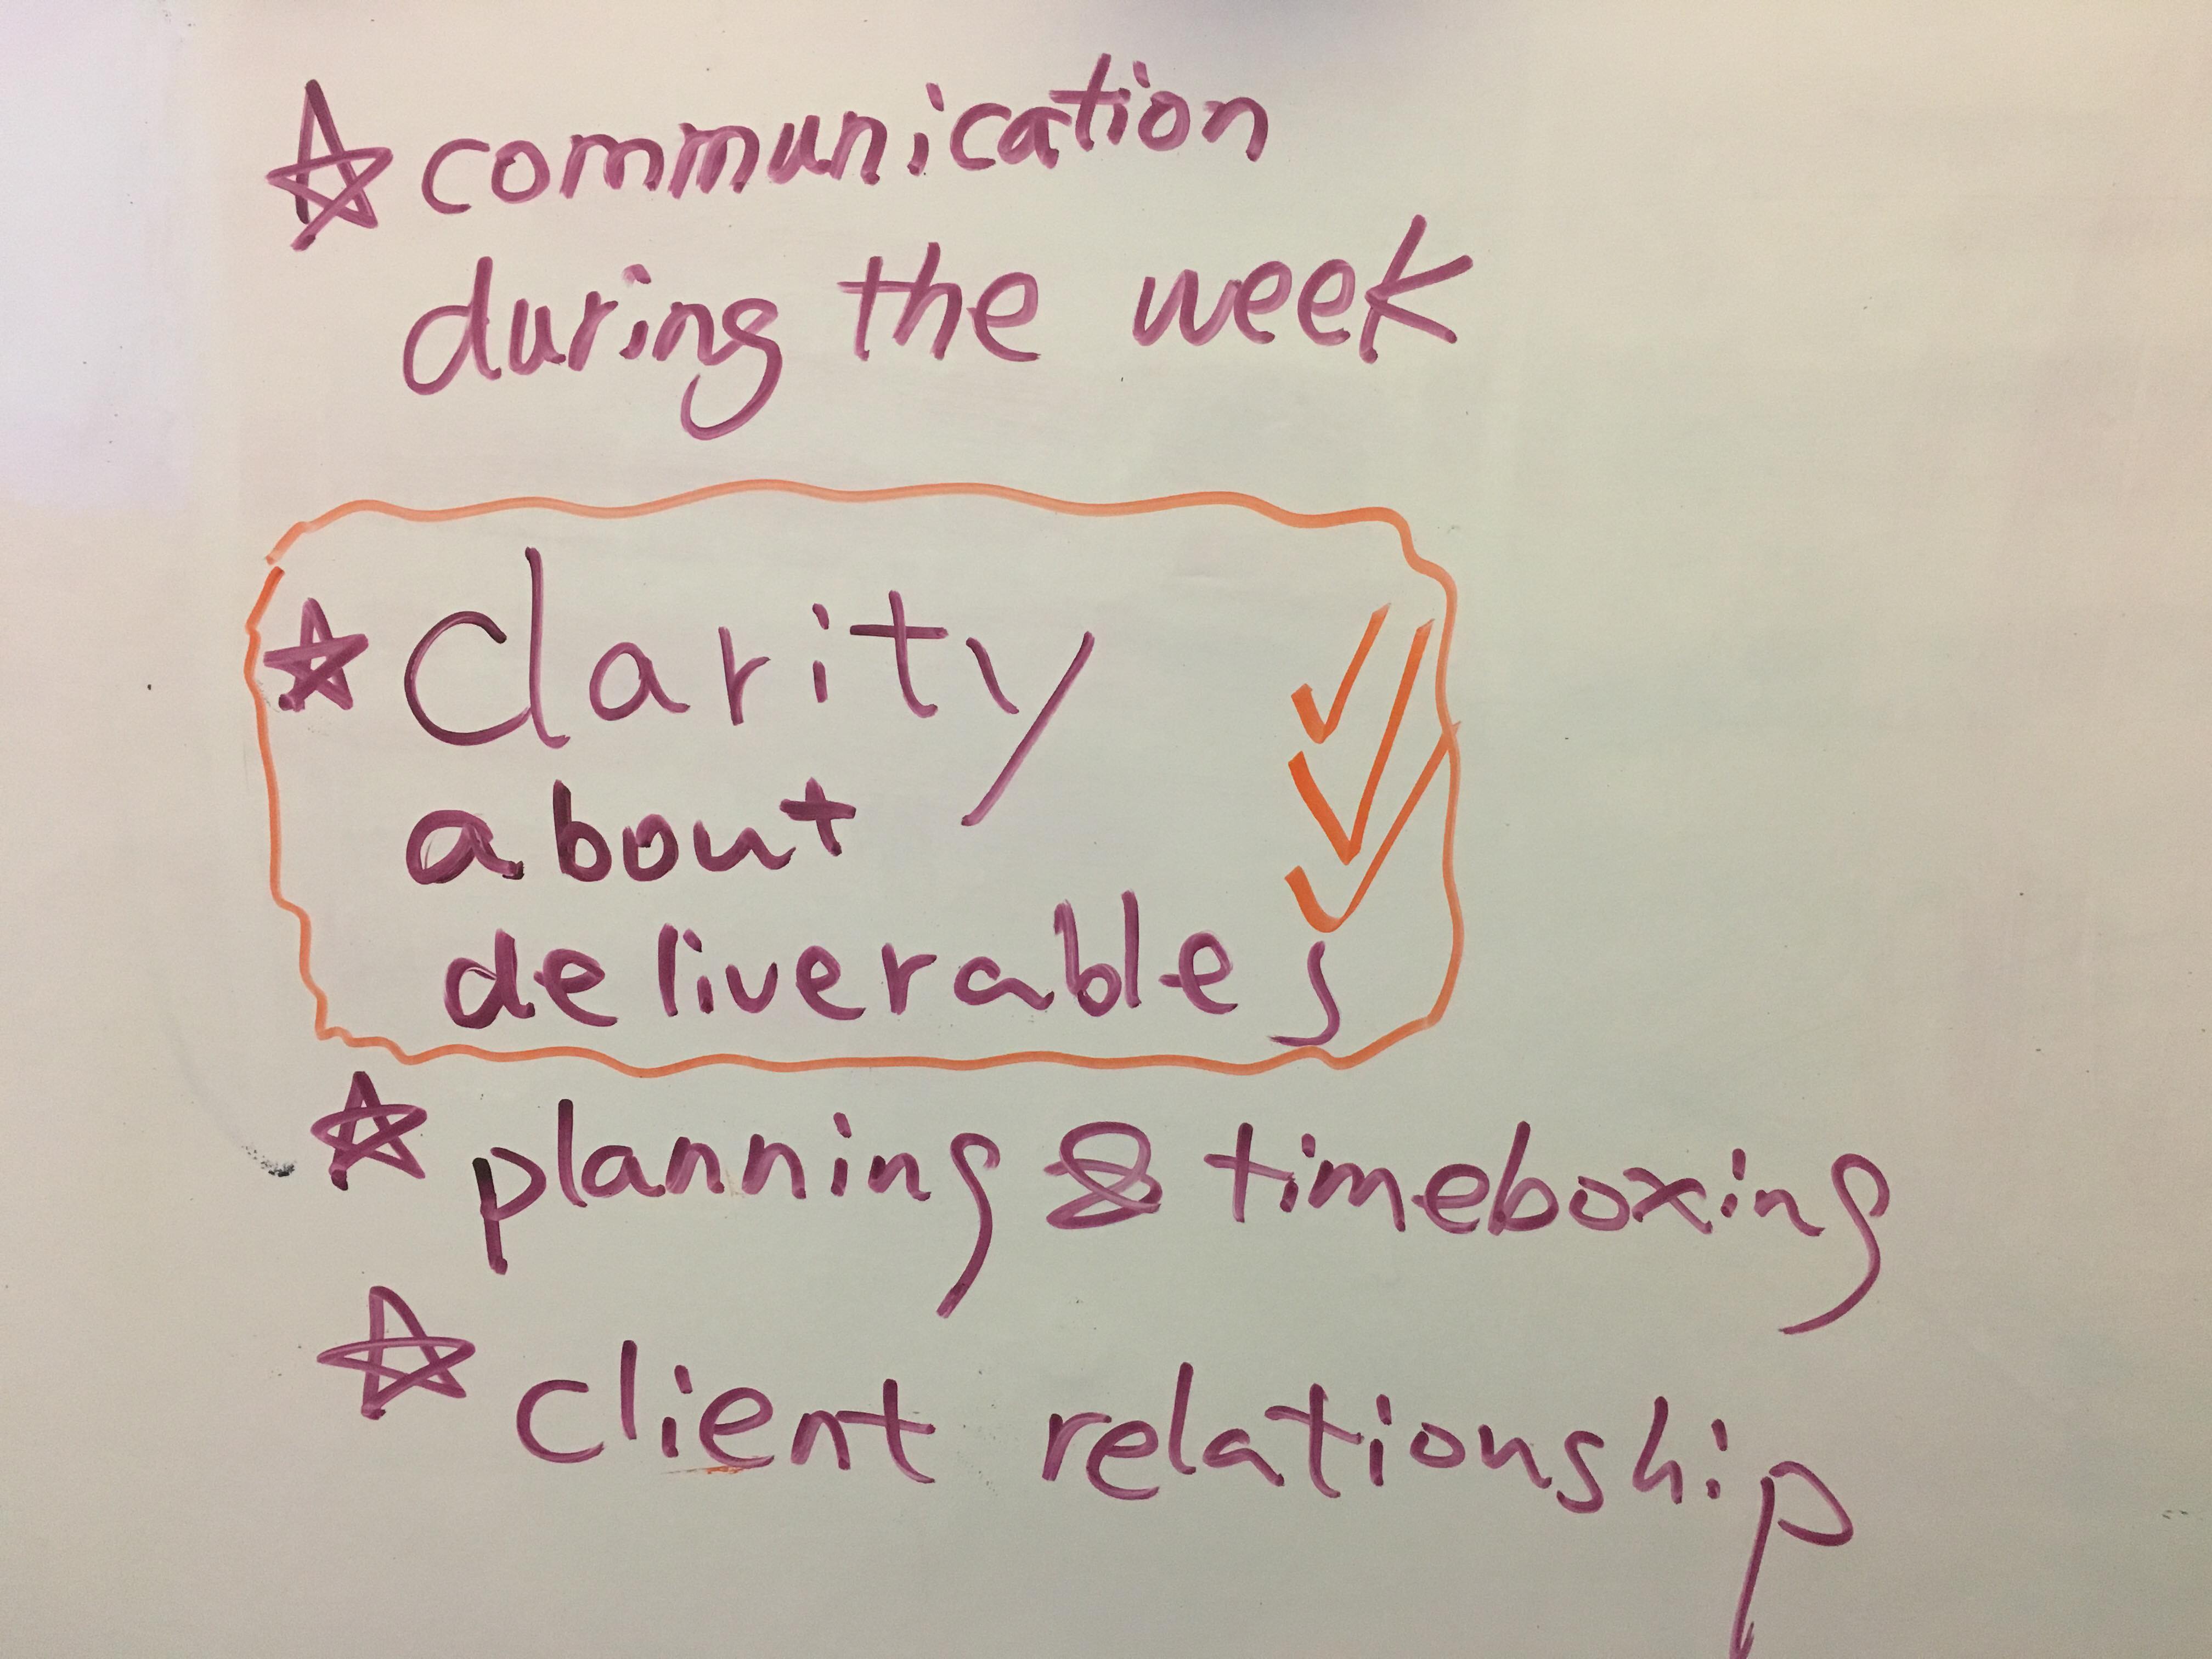
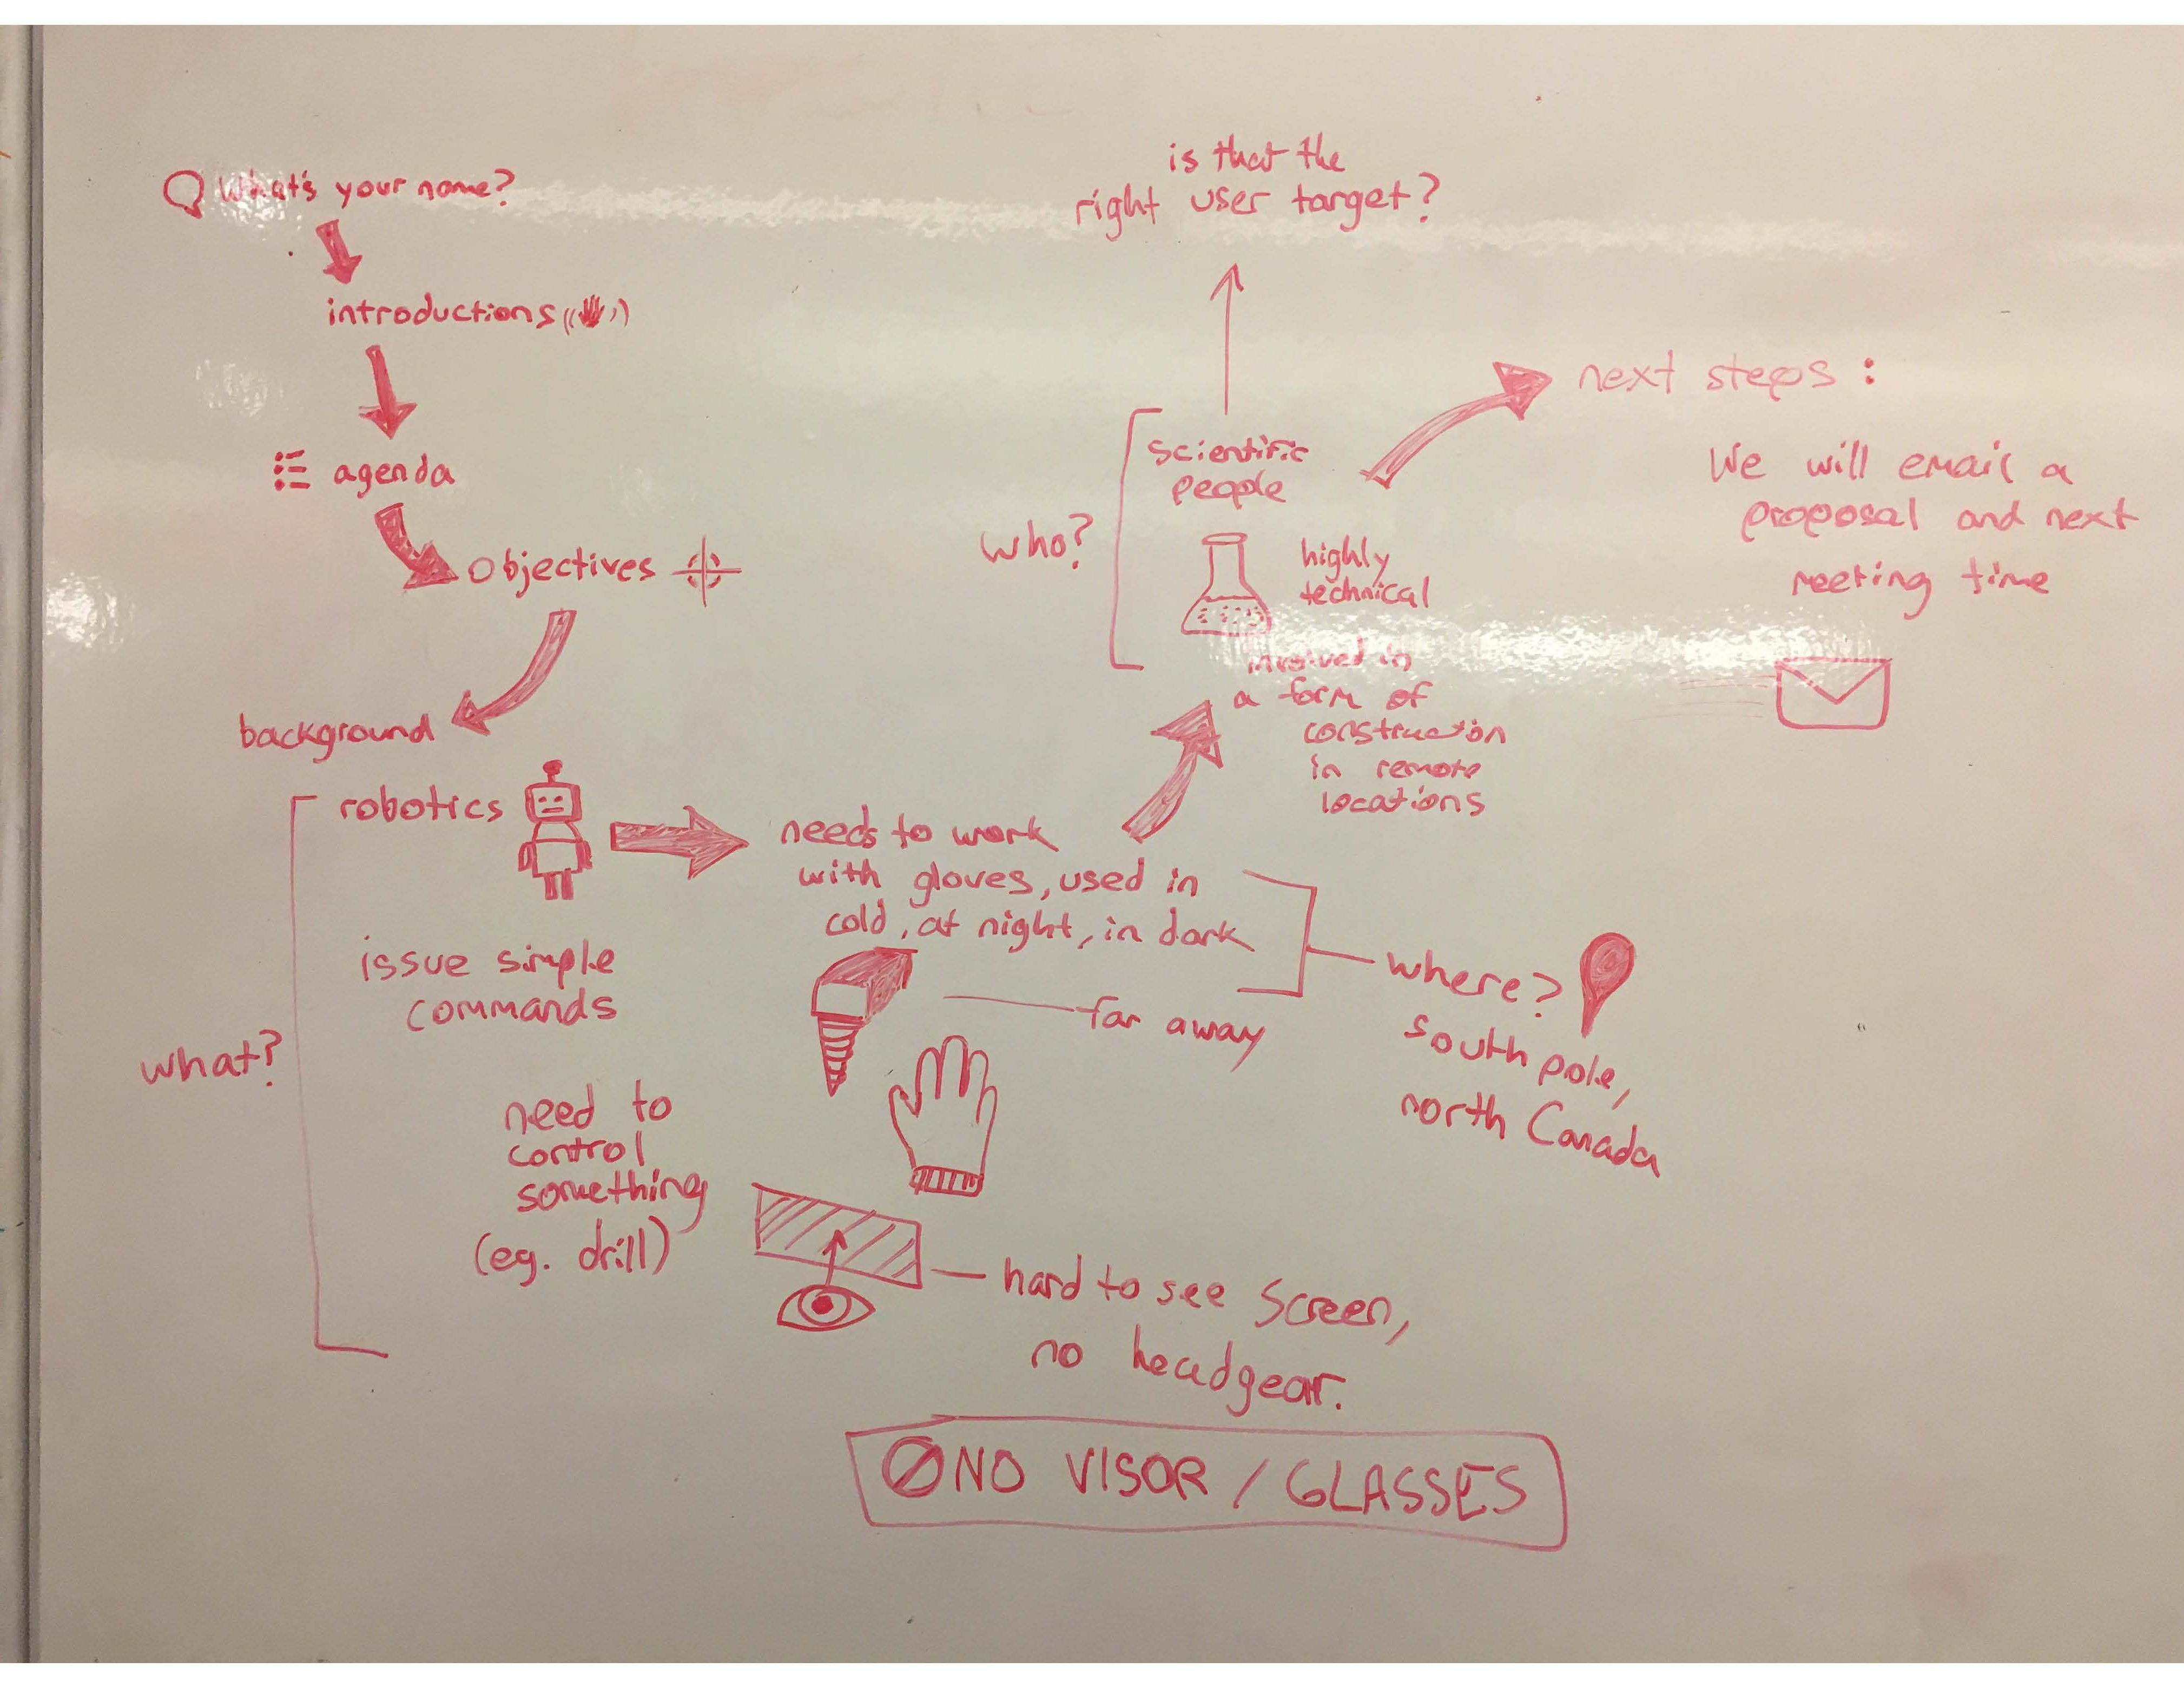
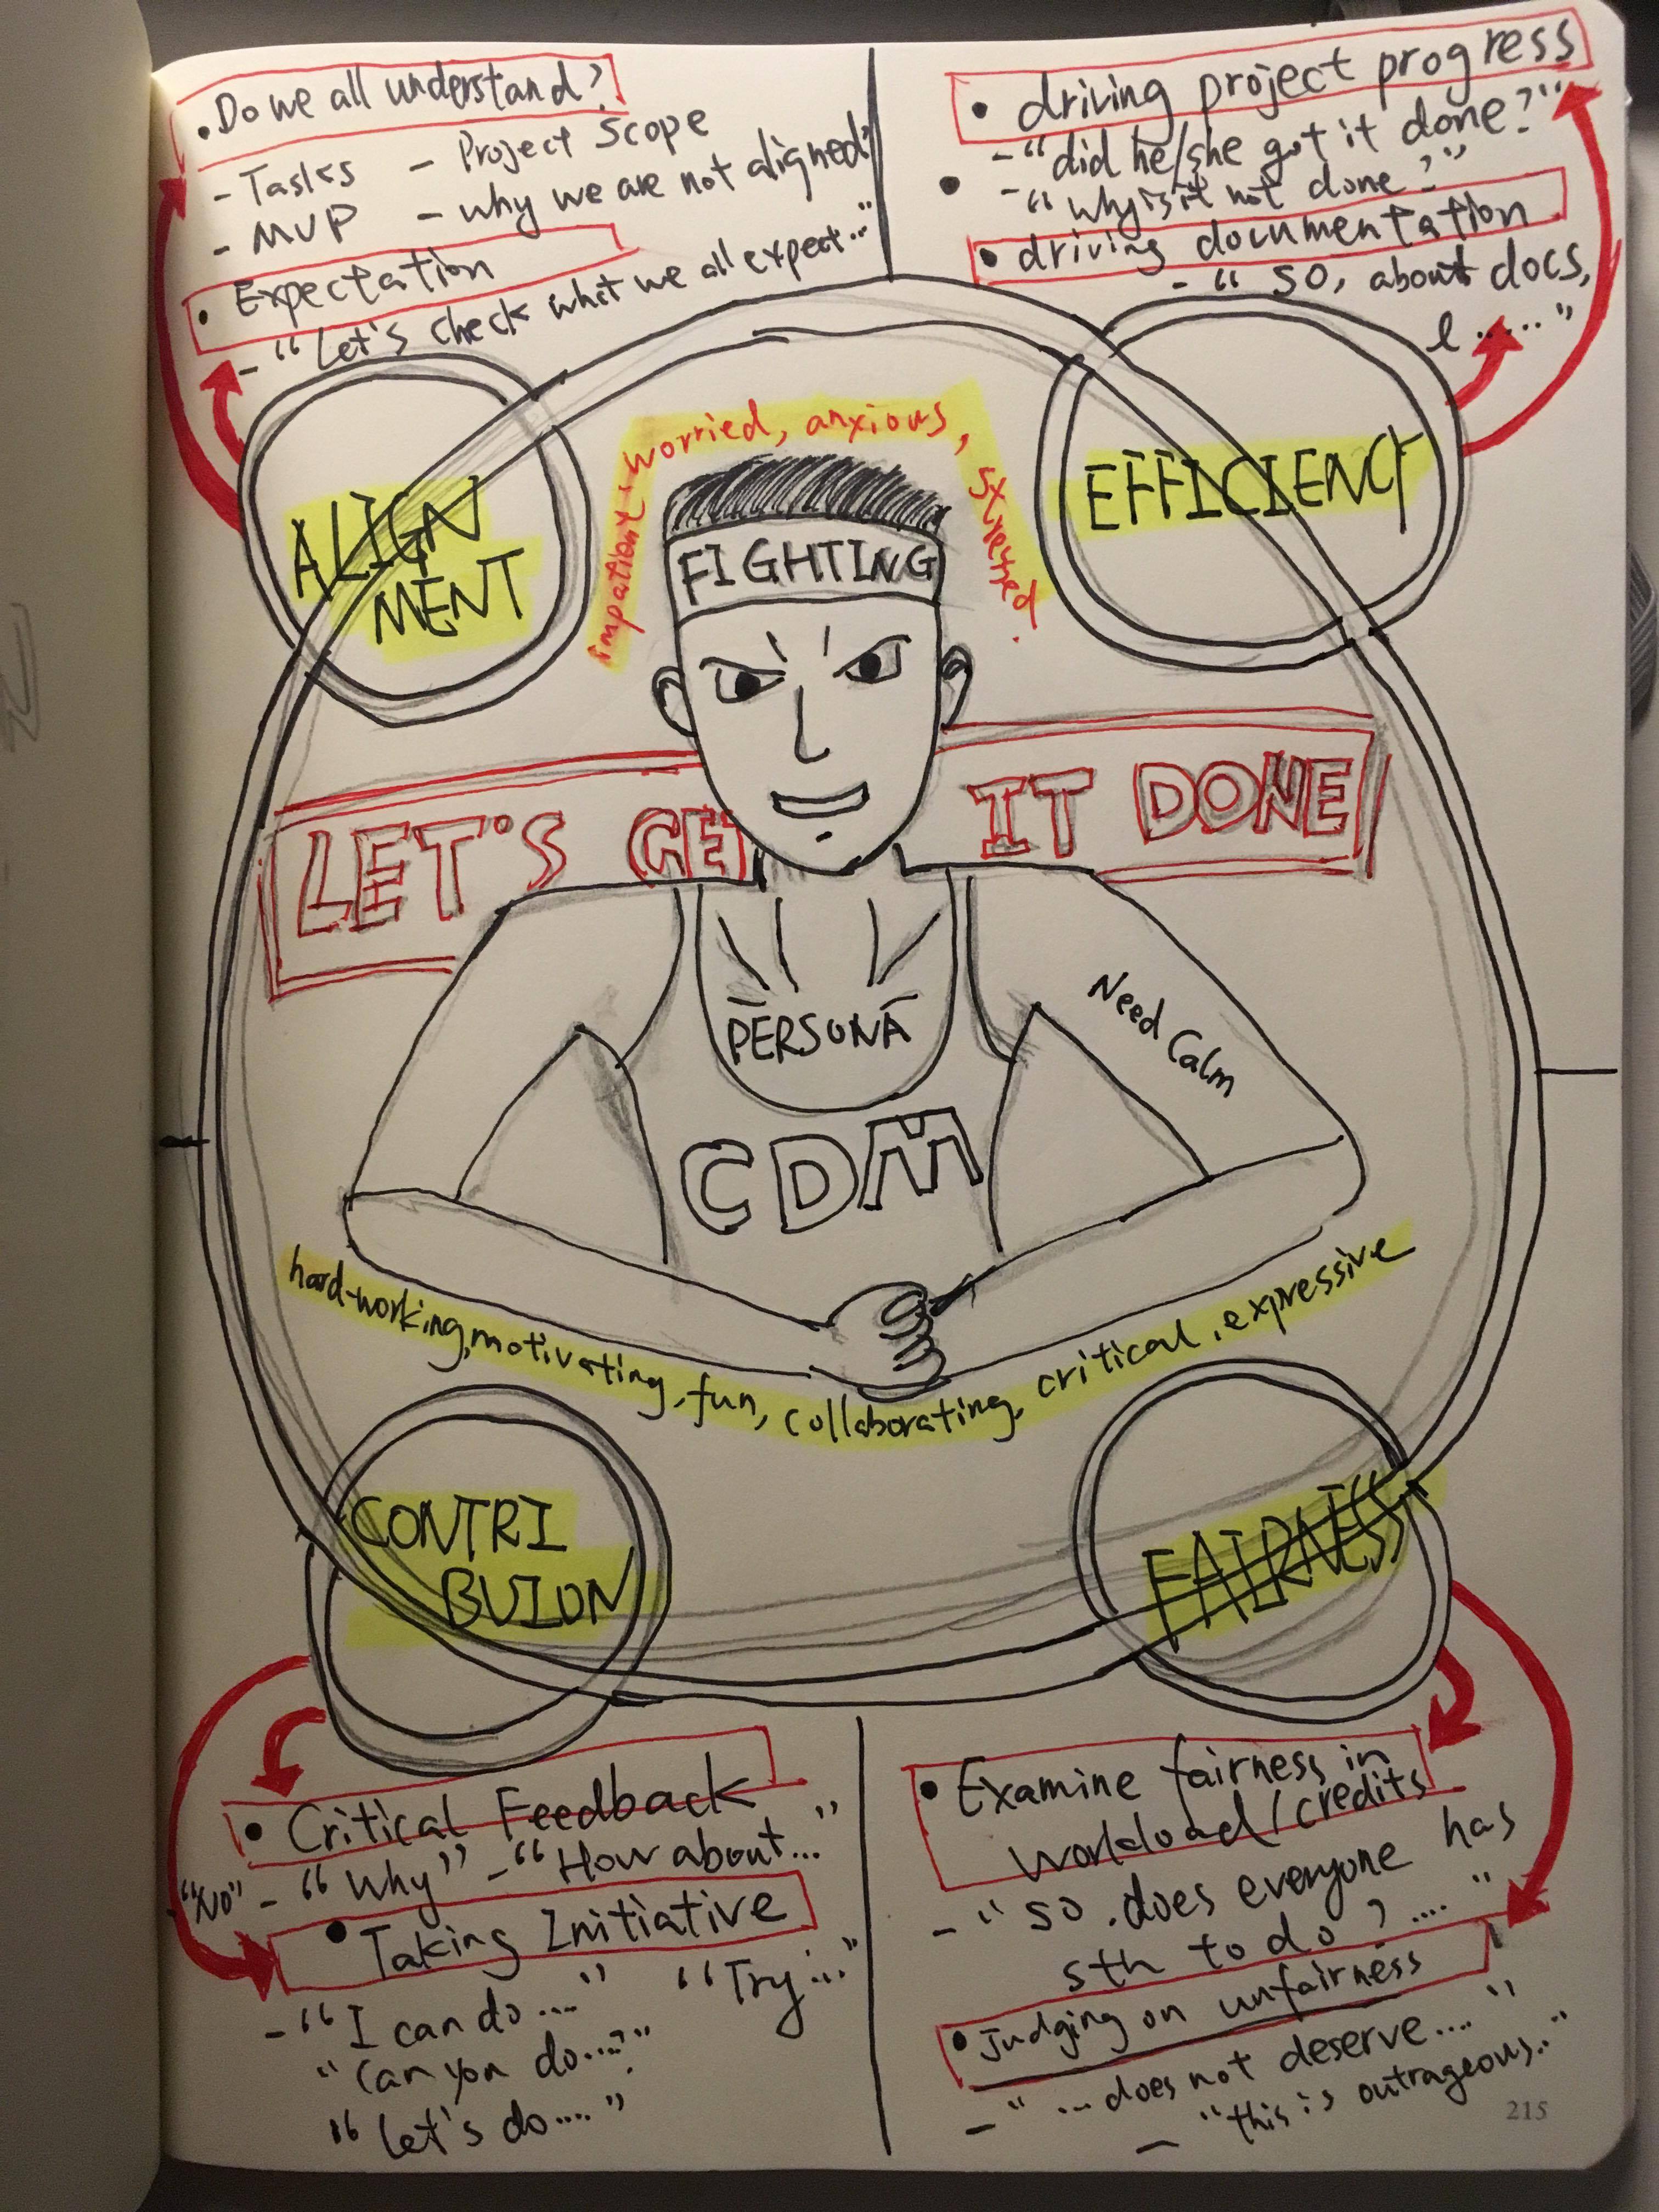
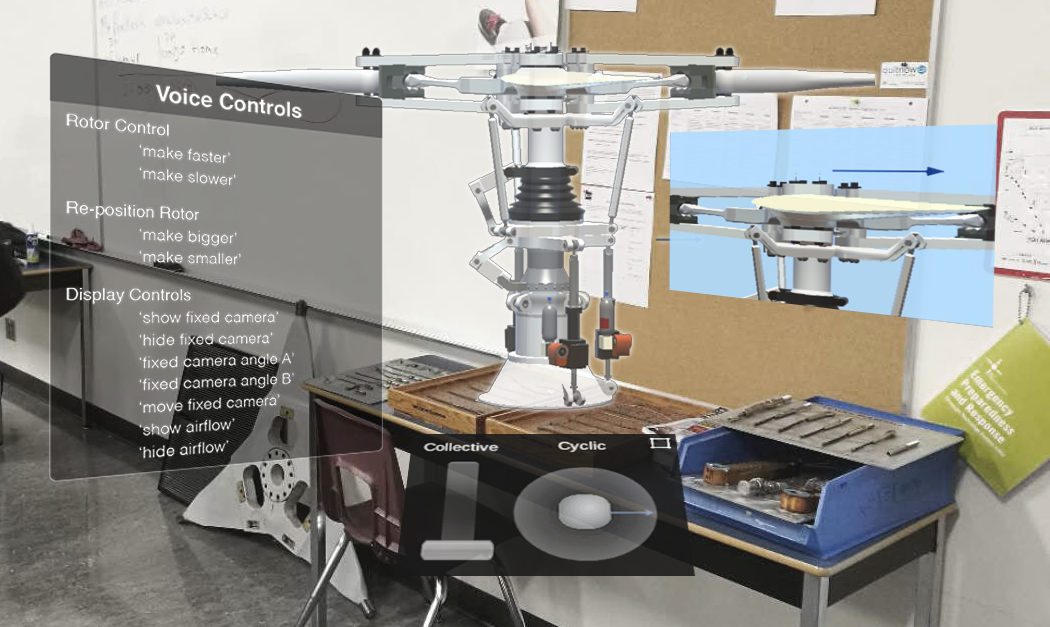
(Image Credit: John Bondoc, UX/UI Designer)

However, in Sprint #6, we tested the prototype and found that the main problems are

  • Difficulties with collective/cyclic controls.
  • Difficulties to see the effects such as airflow & swashplate movement.
  • Difficulties in looking at the rotor while moving the cyclic/collective controls.
  • Slow response with voice control.
  • Confusion about voice control menu.
  • Insensitivity of voice control in noisy environment.
  • There are no indications when “make bigger/smaller” voice controls hit the limits.
  • Not enough training/instructions with regard to how to use HoloLens.
  • Users tend to take it as a 2D object instead of 3D.

Considering scope, we decided to work on the ones that are critical to the functionality of this application:

  • Improve cyclic function
  • Resize/reposition cyclic & collective controls
  • Resize the whole field of view so users don’t need to move their heads too much at the beginning.
  • Change how the model scale up and down: keep the rotor in the background while it grows bigger or smaller instead of jumping to the front.
  • Redesign the voice control menu: instead of a command board, the new voice control menu will be interactions that give users instructions when they gaze/hover over the buttons.

(Credit: the entire team)

Based on that, we came up with a new sketch that reflects that our new interface and interaction. The main changes are the positioning of controls and voice control menu, as well as how the interactions work. We’ll have to prototype and test it. 

(Image Credit: John Bondoc, UX Designer)

From this week on, we will spend more time developing a multiple user network. The idea is to enable instructors to broadcast their views and modifications in the application to students in real-time.

Sketching User Experience with Our Clients

After the initial meetings about the problem we need to solve and the requirements, we finally entered into the brainstorming phase in which we are expected to come up with viable solutions.

But, a more important question for our team is how to come up with a solution that build trust and alignment with our client and also move on to prototyping as soon as possible.

In order to align with both our team members and our client, we decided to involve our client in the sketching process so we could better understand the client’s vision and incorporate it into our design.

The First Step

  • Get Ready: everyone, including your clients, gets an A4 paper and pens/pencils! Remember to set a time limit!

The Second Step

  • Sketch: everyone sketches silently for 15 mins! So… we have 7 people in the room. Does that means 105 mins? No, it’s still 15 mins! 😉

The Third Step

  • Roundtable: each individual could spend up to 5 mins to explain their sketches! You would be surprised how people see and explain things differently! I was definitely surprised when our programmers explained the design from a very technical perspective which helped us to understand what may not be possible…

The Fourth Step

  • Discussion: just give some time for people to talk about what they like and dislike, or what is possible or not…

The Fifth Step

  • Recreation: do a new sketch all together to decide what the design or flow looks like! I like it the best when we and the client do it together as a team, because then everyone is automatically aligned and have a clearer understanding about what our product may look like. There are things that will still remain vague though, but it is definitely a good start!

The Sixth Step:

  • Document and Share: always document it somewhere for communication and future reference. Here is the final sketch we have for the first design meeting with our client:

Our clients left with excitement because not only they contributed a large portion to the potential solution but also learned so much about our design process. They expressed that they would use the design process for their internal meetings and discussions too!

Why retrospective is so important in Agile project management? Example From My Project Team

If you ask me what are the most important things I learned from this whole Agile project management method, I would say it is probably how it helps my project teams to build a shared culture that allows everyone to provide critical feedback and solve problems in a safe and creative environment through sprint planning, sprint review, stand up and particularly retrospective.

No matter what team you are in, there will always be different personalities, different backgrounds and different approaches to get things done. On one hand, diversity lays a good foundation for creativity. On the other hand, it means potential conflicts and misunderstanding.

What Agile method provides is a systematic but nimble approach to align team members and resolve conflicts together. It is safe, transparent, and therefore everyone in the team is productive.

Here is an example of retrospective with my team.

In case you are not familiar with these symbols, the plus symbol means things we did well; the triangle symbol means what we need to improve; and the light bulb symbol means suggestions for improvement.You might wonder why we had so many items under “△”. On one hand, it was because we had accomplished more that week. But more importantly, it was because our team ignored the importance of retrospective in previous weeks, leaving some important issues unattended.

The fact is not everyone in my team values retrospective the same way, particularly when the team is seemingly doing a good job. There were times when retrospective was almost omitted and I had to explain why we still need retrospective. One reason is that it could be a perfect opportunity to recognize the great work the team has accomplished, if the team is indeed doing a wonderful job. But the truth is that there are always some feelings or misunderstanding that need to be addressed, and I am a big believer in creating space for every team member to speak out.

Sensing that we need a proper retrospective, I asked everyone to write down their thoughts silently on post-its in 5 mins, and then stick them on the wall when they finished writing.

The next step is simple: team members took turns to explain their post-its and occasionally we had small conversations about certain issues. I tend to let conversations flow as long as it is reasonable and relevant, and then find the right time to lead to the next topic or the next person.

Facilitating team retrospective is not just about taking a mark pen in team meetings and telling the team to have a retrospective. It’s more about observing and seeing where potential problems are, and finding the right time and place to speak about it even before the meetings. But having a formal process in which everyone is encouraged to speak up is extremely valuable.

So here are the themes of issues we had, and the circled one was identified as the most important issue we committed to improve.

Now we have an extra thing to do in the next retrospective: reviewing the commitments we made. 

Learning Design Theories and Practices for PMs, Designers and Developers

The beauty of our team is that we are a team of 6 with diverse backgrounds and skillsets. That means we are able to, and we should, create as many learning opportunities for each other as possible in various fields including but not limited to project management, strategic communication, stakeholder management, marketing, programming, 2D/3D design, UX/UI design, game design, and learning design.

In this post, I’ll put together a crash course on learning design theories and practices for my team that is about to design and prototype a functioning virtual reality training simulation in 12 weeks.

Reviewing what I learned during my master program in Education, I selected some theories, principles, and practices for the team. They are important and relevant to this project yet not difficult to understand, and some of the theories and principles could be seen as common sense for people who are naturally empathetic.

So here is the list:

  • Cognitive Load Theory
  • Principles of Multimedia Learning
  • First Principles of Instruction
  • 4C/ID Model
  • Worked-out Examples
  • Principles of Adult Learning

As we are designing a VR simulation, another important task for me throughout this project is to contextualize these theories and discover how these principles may or may not apply in VR design.


Cognitive Load Theory

Why? Cognitive load theory provides a high-level understanding regarding how human brains process information and is the foundation for multimedia learning principles. 

Key Concepts

  • Sensor Memory
  • Short-term Memory
  • Long-term Memory
  • Chunk
  • Extraneous Load
  • Intrinsic Load
  • Germane Load

Key Messages

  • Do not OVERLOAD users because our cognitive capacity is limited.
  • However, how much information is too much for users depends on individuals’ mental model (schema), which is why we need to research and differentiate the level of our users/learners.

Selected Resources


Principles of Multimedia Learning

Why? Multimedia learning principles are evidence-based guidelines and practices that aim to decrease extraneous load, manage intrinsic load and maximize germane load. 

Mayer’s 12 Multimedia Principles:

  • Coherence Principle 
  • Signaling Principle
  • Redundancy Principle 
  • Spatial Contiguity Principle
  • Temporal Contiguity Principle
  • Segmenting Principle
  • Pre-training Principle
  • Modality Principle
  • Multimedia Principle
  • Personalization Principle
  • Voice Principle
  • Image Principle

In addition, Merriënboer offers three design principles and strategies:

  • Variability principle
  • Contextual interference principle
  • Self-explanation principle

Selected Resources


First Principles of Instruction

Why? First Principles of Instruction is basically a synthesis of all major instructional theories. It is easy to understand and probably the best starting point to learn about learning design. 

Selected Resources


The 4C/ID model

Why? The 4C/ID model stands for four components instructional design model. It is a problem-based approach that is widely used in technical/medical training.

The four components in 4C/ID model are:

  • Learning tasks
  • Supportive information
  • JIT information
  • Part-task practice

Selected Resources:


Worked-Out Examples

Why? Worked-out Example is a great approach to break down learning steps and show learners what to do. Renkl points out that learners gain a deeper understanding when they receive well-designed worked-out examples at the beginning of cognitive skills acquisition.

Selected Resources:


Principles of Adult Learning

Why? Because teaching adults are fundamentally different from teaching kids or teenagers. Understanding these principles will inform the high-level learning design for adults.

Selected Resources:


Reference

Merrill, M. D. (2002). First principles of instruction. Educational Technology Research and Development, 50(3), 43-59. doi:10.1007/BF02505024

Mayer, R. E. (2002). Cognitive theory and the design of multimedia instruction: An example of the Two-Way street between cognition and instruction. New Directions for Teaching and Learning, 2002(89), 55-71. doi:10.1002/tl.47

Mayer, R. E. (2008). Applying the science of learning: Evidence-based principles for the design of multimedia instruction. The American Psychologist, 63(8), 760-769. doi:10.1037/0003-066X.63.8.760

Renkl, A. (2005). The worked-out-example principle in multimedia learning. In Mayer (Ed.) The Cambridge handbook of multimedia learning, (pp. 229-245). New York; Cambridge, U.K: Cambridge University Press.

Roy, M., & Chi, M. T. (2005). The self-explanation principle in multimedia learning. In Mayer (Ed.) The Cambridge handbook of multimedia learning, (pp. 271-286). New York; Cambridge, U.K: Cambridge University Press.

van Merriënboer, J. J. G., Clark, R. E., & de Croock, M. B. M. (2002). Blueprints for complex learning: The 4C/ID-model. Educational Technology Research and Development, 50(2), 39-64. doi:10.1007/BF02504993

van Merriënboer, J. J. G., & Sweller, J. (2010). Cognitive load theory in health professional education: Design principles and strategies. Medical Education, 44(1), 85-93. doi:10.1111/j.1365-2923.2009.03498.x

Getting Ready for a Virtual Reality Training Simulation Project

First of all, yah!! Why? Because I get to work on a Virtual Reality training simulation project. What could get better than this?

Super excited as this is totally the area I want to explore: learning design with cutting-edge technology. Having the experience working directly with doctors to design next-generation learning experience is going to be extremely valuable too.

Plus the team I am with looks awesome! We are starting to build the team and figure out who would fit what role(s) within Agile/Scrum method.

So let the learning journey commence! Here are the resources I am gathering through my team to get ready for the project:

Sprint Books

VR Learning Resources

CPR Content

American Heart Association

CPR & AED at School Part 1

CPR & AED at School Part 2

Existing VR Training Demonstration

VR – Realistic Immersive Storytelling

VR – First Aid Training with Dummy

VR – Virtual CPR Training

VR – High Voltage Switching Training

VR – Mining
https://www.youtube.com/watch?v=lVuosTgc1pk

VR – Oil and Gas Training

VR – Process, Energy, Naval

VR – Oil Platform

VR – Safety Training (Height)

VR – Orthopedics
https://www.youtube.com/watch?v=2Jk7zs3ES5k

VR – Crane Operation

Existing VR Companies

(More learning resources to be added as the project goes.)

Graphic Recording for Mock Client Meetings

“Graphic recording is the most important tool of collective thought in the continuing Age of Innovation.”

The key to using graphic recordings effectively, in my opinion, is not defined by how crafty the graphic facilitator is. Rather, the key is to engage clients or team members to explain or describe what the graphics mean to them collectively. Based on that, the graphic recorder creates and uses a consistent set of expressions and symbols that everyone in the team would share a common interpretation.

Here are two amazing examples of my classmates who recorded a 10-minute mock client meeting graphically. These two examples represent two different styles of graphic recording and amazed me with their creativity.

Storyboard Style by Pushkar Patange

Arrow Map Style by Daniel James

Project Management Lessons Learned in Project 1 at Centre for Digital Media

Through rounds of sketches and debates, our team finally agreed to prototype a functioning text-based AI chat/counseling app for young adults who are going through a hard time in their lives, in 9 weeks. 

At the beginning, our team decided that the project manager role should be rotating so that everyone could learn how to manage projects and apply agile method. However, we soon figured out that it was not effective, and I was encouraged took the project manager role because of my ability to organize projects and manage deadlines. Throughout the 9-weeks project, I have learned:

  • Using sprint planning, sprint review, stand up, and retrospective to facilitate the team collaboration process.
  • Negotiating and scoping MVP but also allow some flexibilities for changes.
  • Aligning team is the key to collaboration because everyone could interpret things differently.
  • Setting reasonable expectation and communicate not only in team meetings but also through 1 on 1 check-in.

In retrospective, there are many things that I could have done better as a project manager and as a team member:

  • I underestimated the power of my non-verbal language. Sometimes my body language shows what I dislike and I am not aware of it.
  • I underestimated the depth of my frustration when things didn’t work or when things were not proceeding as deadline approaches. I shall be more cognizant and find a better way to speak about it and address the issue.
  • I didn’t build mechanisms for critical feedback and conflict resolution into our team culture. It seems to me that our team tends to avoid conflicts which accumulate problems or take critical feedback personal which aggravates team dynamics. In the future projects, I will lead the team to better deal with critical feedback and conflicts, and put more effort in facilitating better collaboration and identifying potential conflicts.

Throughout the project, I intended to facilitate more peer learning as we are a team of diverse background and skill sets.  However, the team basically ignored the peer learning aspect of the project as we were all busy finishing our work. In the future, I should find a better way to facilitate learning and actively implement plans to share knowledge with each other.

Here is a self-portray that illustrates what the project turned me into: