Potatoes
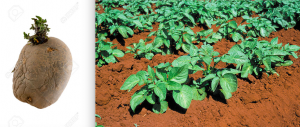
Potatoes are easy to grow and produce a large harvest. This cool season vegetable grows well in zones 4 and up in full sun with a soil pH between 5.8 and 6.5. If you’re fancy, an acidic low nitrogen high phosphorous fertilizer (or just composted manure) worked into the soil will help them grow. Potatoes can be grown in containers, but will require frequent watering and will produce smaller harvests. Outside in the Earth is best, but if you do opt for containers 1 part peat moss, 1 part organic potting soil and 1 part cow manure works well. Buy organic, certified disease free seed potatoes from a catalogue or farm store. Grocery store potatoes won’t do as they have been treated with a sprout retardant. Lay the potatoes on your counter and wait for sprouts to appear. Some people prefer to skip this step and allow the potatoes to sprout on their own once underground; it’s up to you. Then, cut the potatoes into thirds or fourths so that each piece has two or three eyes (the bumps that the shoots emerge from). Only golf ball sized potatoes should be planted whole. Set the cut pieces into the sun or somewhere warm and dry (about 21°C) for 3 to 5 days until the surface becomes leathery and calloused. This will help prevent rotting when the potatoes are planted in the ground. 3 to 4 weeks prior to the last frost date (or as soon as the ground is workable and no longer frozen), direct sow your seed potatoes 15cm (6”) deep about 30cm (12”) apart with eyes pointing upward. When the sprouts are 20cm (8”) tall, create a hill of mulch or soil to bury the shoot up to the tip. Repeat this again when the sprout grows another 20cm, and continue until the plant flowers. Hilling will help ensure a prolific harvest, and it’s also important that the growing potatoes are kept away from the sunlight to prevent them from turning green. Two weeks after the vine has flowered, you can reach into the dirt under the plant and retrieve baby potatoes. For full potatoes, wait until the vine dies back. Use a shovel and your hands to pull the tubers out of the ground. To store potatoes, leave them out in the sun to dry for a few hours, then place in paper bags and keep somewhere dark and cool. They can easily be stored to eat throughout the winter, and any left overs come spring can easily be sprouted, separated, and replanted for a new crop. Potatoes will do well planted alongside carrots, celery, corn, onions, marigolds, peas, bush beans and brussel sprouts. Avoid planting them with asparagus, cucumber, melons, squash, or turnips.
Tomatoes
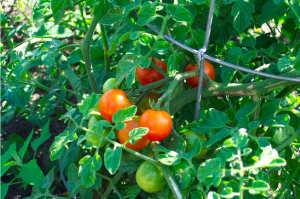
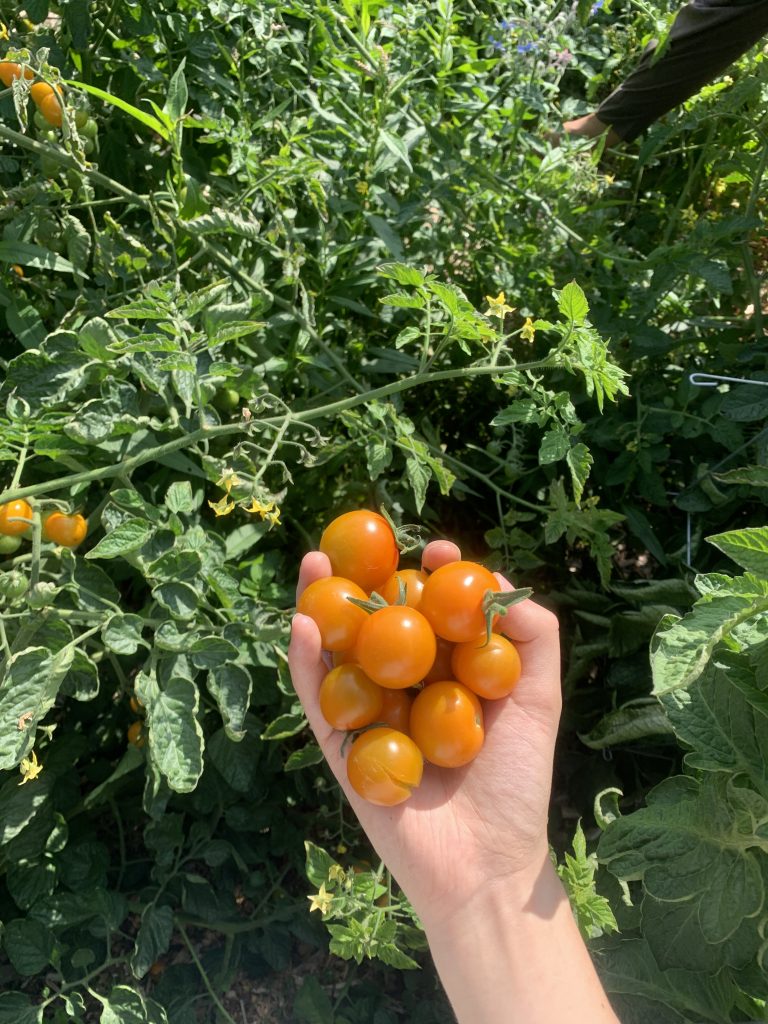
This warm season vegetable will produce after 60 to 100 days of full sun. Tomatoes will not tolerate frost, and therefor are typically planted in the late spring or early summer, depending on the climate zone. Because of the long growing season and late start date, the best strategy is to buy seedlings from a nursery, or at least sprout seeds indoors and transplant them as soon as the soil is warm enough. You can also sow seeds directly into your garden when the soil reaches 21°C (70°F) and expect germination in 5 days. But first compare your fall frost date to the days to maturity listed on the seed packet to make sure you’ll have a long enough growing season to see fruit. For indoor germination, sow seeds 1cm (1/2”) deep in small trays 6 to 8 weeks before the last spring frost. Harden off you seedlings for a week (expose them to outdoor conditions for longer and longer each day), then transplant .5m (1′) apart after all danger of frost has passed and the soil is at least 16°C (60°F). For the best growth, add a handful of high phosphorous low nitrogen fertilizer to the planting hole when transplanting. Make sure to plant the seedlings deep enough so that the first set of leaves is just above the surface. Roots will develop along the buried portion of the stem and make the plant stronger. After transplanting, water the plants well to minimize shock to the root. There are two types of tomato plant to choose from: determinate and indeterminate. Determinate plants will grow into .5 to 1m (2-3′) tall bushes and will not require staking. They fruit earlier than vining plants and are better for containers or small spaces. To grow in a container, choose a 51cm (20”) diameter planter at least 12 inches deep. Indeterminate tomatoes will produce large, slicing tomatoes (determinate tomatoes are typically used for sauces or canning) throughout the summer up until the first frost. They will grow into vines that require staking. When transplanting the seedlings, place cages around them or stakes nearby. As they grow, secure the stems to the stakes with twine to hold the plants upright. Some taller bush plants may also benefit from staking if their fruit is on the ground. Indeterminate tomatoes need to be pruned to increase yield and improve flavor. Remove access fruit when they are small and green; varieties that grow large, heavy tomatoes, like beefsteak tomatoes, should only have three tomatoes per branch. Also remove all the leaves below the lowest fruiting branch to increase air circulation and concentrate the plant’s energy on ripening the fruit. And lastly, remove any side shoots sprouting from the juncture between the main vine and a branch. If you want, you can place these shoots in a glass of water, where it will grow roots and become a new plant. Once the soil warms up and summer is underway, consider mulching the plants to retain moisture and fight soilborne disease. If temperatures rise above 32°C (90°F), use row covers to shade the plants. The easiest way to grow tomatoes is to buy seedlings or seeds, but if you’re an ambitious gardener you can also harvest your own seeds. Just make sure your plants are heirloom and not some variety that won’t produce true seeds. Cut open the ripe tomato, scoop out the pulp, then use a colander to rinse away the pulp and separate the seeds. Spread the seeds on a paper towel and let them dry somewhere warm and dry. Lastly, store them in an airtight jar in a cool, dark place until spring comes again.
Eggplant
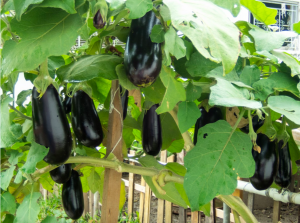
Eggplant are also warm season vegetables that need full sun. They need 100 to 150 days to mature, so buying seedlings from a nursery is the way to go. It is possible though to sow seeds 5mm-1cm (¼-½”) deep indoors 8 to 9 weeks before the last frost date. Make sure to keep them warm and the seeds should germinate in 7 to 12 days. Once the nighttime temperatures are reliably above 10°C (50°F), transplant the seedlings into the garden leaving 45-60cm (18-24″) between each plant. It’s a good idea to add compost to the soil before planting to feed the plants and to bring the pH into the range of 5.5 to 6.0. Place stakes around the plants immediately after transplanting to avoid disturbing the soil later. If the plants get heavy as they grow, simply secure them to the stakes to keep them upright. Adding a layer of mulch will help retain moisture while suppressing weeds, and covering the young plants with a row cover up until they flower will keep the pests at bay.
Harvest the eggplants when they first turn purple and are young. This will prevent them from getting too seedy and encourage the plant to grow more fruit. Cut the fruit off with a knife or scissors rather than pulling it from the plant. You can expect one plant to produce 4 to 6 fruit. Eggplant grows well with beans, marigolds, peppers, spinach, and thyme. It will not grow well next to fennel. For container growing, choose a 3 to 5 gallon planter.
Collecting seeds from eggplant is not very popular because you need to wait until the fruit is hard, shriveled, and no longer edible. Cut open the eggplant and separate the seeds from the flesh. Strain the seeds and lay them out to dry, which may take 2 to 4 weeks. Then, place them in a jar and store somewhere cool and dark, with a humidity between 20 and 40%. Just make sure you don’t try to save seeds from a hybrid eggplant; they will revert back to the parent varieties which may not have the best qualities.
Peppers
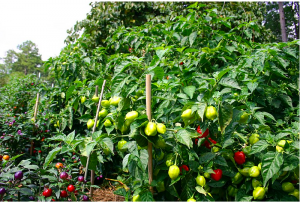
Peppers need 60 to 90 days of warm temperatures and full sun, which can be met in zones 4 to 11. This warm season vegetable is another that’s typically bought as a starter from the nursery, but you can also start seeds indoors 5 to 8 weeks before that last frost. Sow the seeds 1 cm deep (½’’) and keep them at keep seedlings at 18-24°C (64-75°F) during the day and 16-18°C (61-64°F) at night. Pepper seeds take up to 3 weeks to germinate, so be patient. Transplant the seedlings when nighttime temperatures are above 13°C (55°F) at night after bringing them outside for increasing amounts of time for the 10 days leading up to transplanting to harden them off. For the best growth, amend the soil with lime and compost, aiming for a pH around 6.5. Plant them 45cm (18”) apart so that the bottom leaves are just above the soil. Like tomatoes, peppers can grow roots from their stems. If growing a taller variety, set stakes or cages around the transplants so that later in the season if they get heavy they can easily be secured upright. Pinch off the first flowers to increase yield later in the season. Expect 5 to 10 large bell peppers plant, and 20 to 50 hot peppers per plant. Hot pepper plants can be pulled up before the first Fall frost and hung upside down to ripen any remaining fruit. Peppers grow well with asparagus, basil, carrots, cucumbers, eggplant, oregano, parsley, rosemary, squash, and tomatoes. They will not grow well with beans, brussel sprouts, broccoli, cauliflower, or fennel. They can also grow well in containers at least 30cm (12”) in diameter, especially if you pick a smaller variety. Don’t save seeds from hybrids and only plant one variety of pepper in the area if you intend to save seeds to avoid cross pollination. Wait until the pepper is overripe and wrinkled, then cut it open and remove the seeds. Lay them on a paper towel to dry somewhere warm and out of direct sunlight. In a couple days, turn the seeds to make sure the bottom side dries as well. After a week or so, put the seeds in an airtight jar and store in a cool, dark, dry place until spring.
