
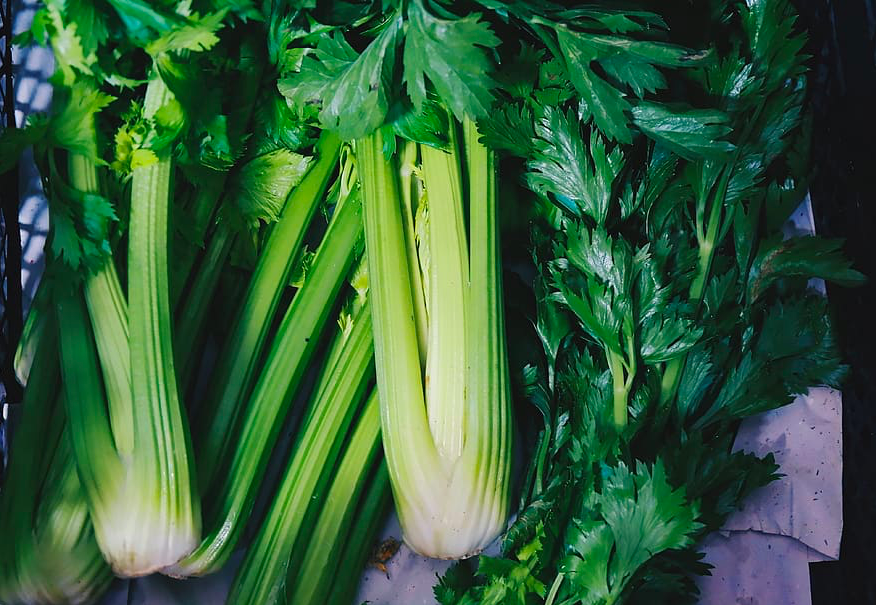
Celery
Celery is a cool season crop that needs full sun and a soil pH between 5.8 and 6.8. It is grown as a spring crop, although may be better suited for the fall in warmer regions. You can grow trenching celery, which needs to have soil hilled around the stems, or simply choose a self blanching variety that won’t require this extra step. Germinating from seed can be a bit tricky, so most gardeners prefer to simply buy seedlings from the nursery.
Start seeds indoors 6 to 8 weeks before the last spring frost. Soak them in warm water overnight before planting to speed up germination, then sprinkle them onto loose soil, ideally about an inch apart. Firm them into place with your finger, but do not cover them with soil. Germination should occur in a week, but may take up to 3 weeks. Covering the pots with plastic can help retain moisture and encourage the seeds to sprout. Maintain an ambient temperature of 21 to 24°C (70°-75°F) during the day and 16°C to 18°C (60°-65°F) at night and mist regularly. When the spouts are 5cm (2”) tall, transplant them into individual peat pots and harden them off (take them outside for increasingly long amounts of time each day) two weeks before transplanting.
Plant celery 15cm (6”) apart outdoors when soil temperature reaches 10°C (50°F) and nighttime temperatures do not dip below 4°C (40°F). Work compost 30 to 42cm (12-16”) deep into the soil prior to planting this hungry vegetable. Cover the young plants with a row cover for the first 4 to 6 weeks to keep the slugs at bay. Celery needs consistent moisture, so make sure to water if it doesn’t rain. In the wild, celery grows in boggy areas. If the stalks start sprawling as they grow, tie them loosely together with twine in a bunch. Harvest the stalks from the outside in as soon as they are about 8 inches tall, which will take about 16 weeks.
Celery can also be propagated from kitchen scraps. Save the bottom of a head of celery, place it in water with the severed stalk ends just above the surface, and watch it regrow. After about a week when new shoots appear, transplant it to soil covering everything but the new leaves. Companion plants for celery include carrots, turnips, corn, and parsnips.
Asparagus
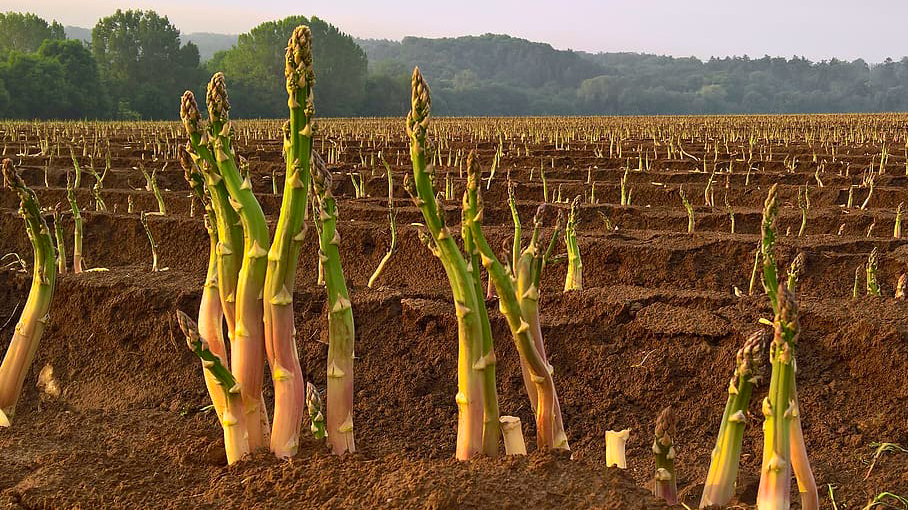
Asparagus is a perennial that likes cool regions with long winters. It takes some time to establish an asparagus patch, but once you do it will be productive for 10 to 30 years. The edible part of the asparagus is the young shoot, which emerges as soil temperatures rise above 10°C (50°F) in the spring. You can plant asparagus from seed, but this is a long and tedious process, so most people opt for planting crowns.
Buy your asparagus crowns (a knot of roots) preferably 2 years old and plant them in the early spring as soon as the soil can be worked. Before planting, remove all the weeds from an area that receives at least 8 hours of full sun a day and has a soil pH between 6.5 and 7.5. Dig a trench 15 to 30cm (6-12”) deep and a 30cm wide. If you’re planting multiple rows, keep them 1.2m (4′) apart. Shovel compost, an all organic fertilizer, and rock phosphate into the trench at 30cm intervals, forming mounds. Lay the crowns on the mounds so that the roots drape over the sides, and cover the crowns with 6-9cm (2-3”) of soil. As the sprouts begin to emerge, cover them with another layer of soil. Allow them to emerge again, and then cover them again. Eventually, the trench should be level with the surrounding ground. At this point you should allow the shoots to grow to their full size. They will grow tall, feathery stalks. Throughout this process, make sure to keep the bed free of weeds. Asparagus will not tolerate competition.
These tall stalks will die back at the end of the summer. In warmer climates they can be cut back in the fall if they prove to be an eyesore, but for colder climates it’s best to wait until spring after snow melts but before fresh shoots appear. With clean shears, cut the dead asparagus stalks to ground level, working from the outside in. Afterward, you can also apply an all purpose fertilizer to be thorough.
You can lightly harvest the second year, but it’s best not to tax the plants too much. If you can, wait until the third year. At this point, harvest the asparagus spears when they are 15 to 21cm (6-8) inches tall. Stop harvesting in early summer when their regrowth slows, and allow the last set of spears to grow to their full size. Make sure to keep the bed weeded and well watered throughout the summer. If you keep your fronds healthy you’ll have a more robust harvest the next spring.
Fennel
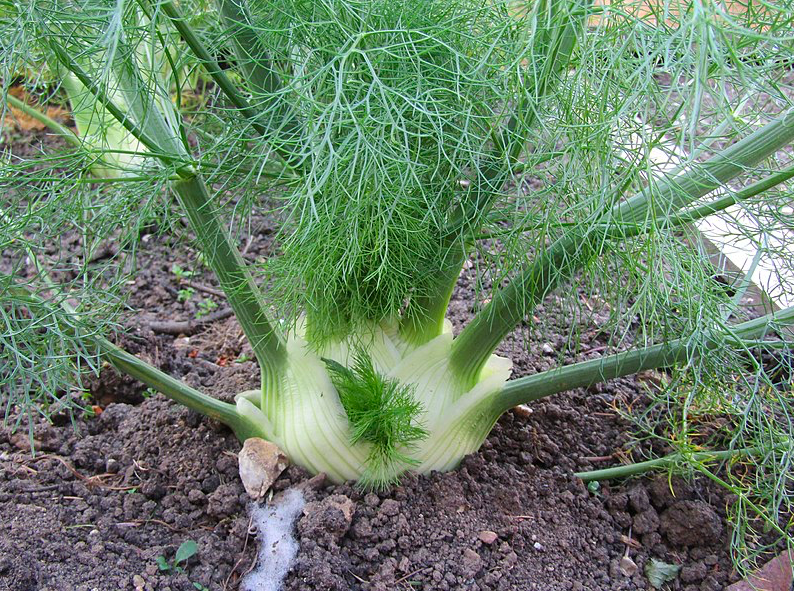
Fennel is a perennial, but will need to be grown as an annual if temperatures fall below -9°C (15°F). Choose an area that receives full sun and has a soil pH of 5.5 to 6.8, and direct sow seeds 1cm (½‘’) deep after the last spring frost when soil temperatures reach 15 to 21°C (60-70°F). Allow 8 to 12 days for germination. Once the sprouts get established, thin them to 15 to 30cm (6-12”). Do not plant fennel with dill or coriander, because they might cross pollinate. Fennel in not a companion to any plants, but will inhibit the growth of beans and tomatoes, so don’t plant them together. For this reason, fennel is often grown a little ways from the rest of the garden, or even in containers, for which it’s very well suited. Aim for a planter that’s 25cm (10”) deep.
Choose an herb fennel variety of you only plan on harvesting the leaves and seeds. If you want the whole bulb, make sure to choose a bulb variety. For bulb fennel, harvest by pulling up the plant when the base of the stem becomes swollen. If you want to collect seeds, allow the plant to flower and set seeds, then collect the seed heads. Lay them out to dry for a few days, and then store them under dry conditions for the following spring.
Rhubarb
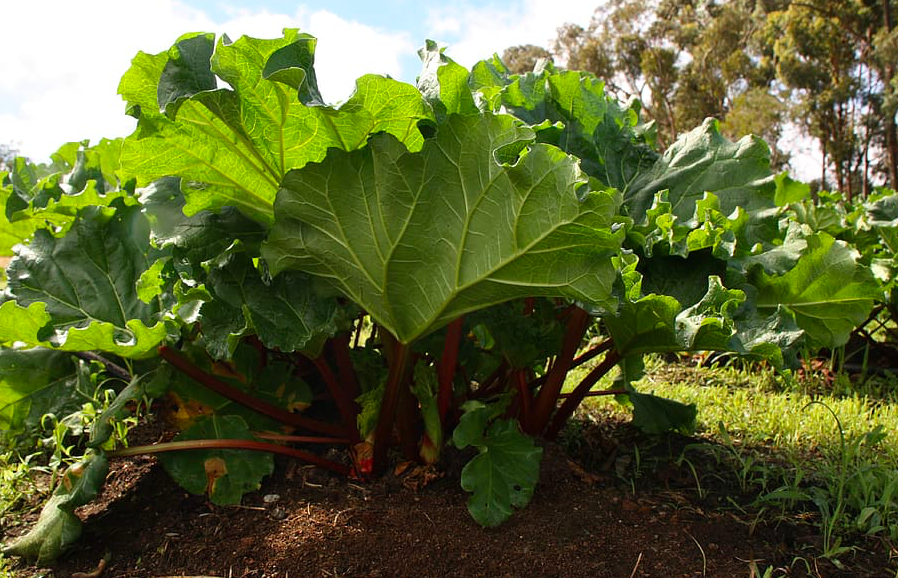
Rhubarb is a perennial that should live over a decade. In a place with full sun, work plenty of compost into the soil to support this heavy feeder. You can either direct sow seeds 2cm (1″) deep 8 weeks after the last spring frost, or plant rhubarb crowns 8cm (3’’) below the ground in wide holes as soon as the ground is workable. The crowns will establish themselves more quickly than the seeds. One plant will typically be enough for one household, but if you want multiple plants for some reason space them 120 (48″) apart.
Do not harvest the first year, as the plant is too young. Harvest sparingly the second year, if at all. Make sure to remove flower stalks as they appear the second year. The third year, harvest the tart red stalks by gently twisting them off the base of the plant. Always leave behind at least 2 stalks, and stop harvesting after midsummer to allow the plant to prepare for winter. The leaves are toxic, so don’t eat them. They aren’t dangerous; you would need to consume about 11lbs to die, but they may make you feel sick.
Swiss chard
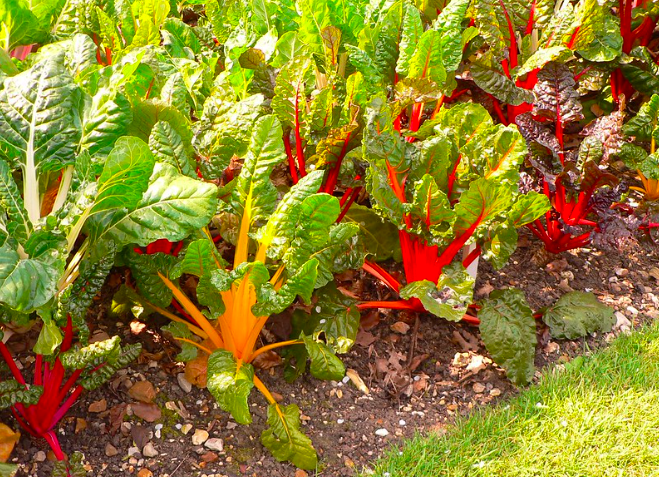
Both the stems and leaves of chard can be eaten raw or cooked. Work compost into the soil the fall before, or 2 weeks before planting. 2 to 3 weeks before the last spring frost, direct sow seeds into the garden 2.5cm (1’’) deep, spacing them 23cm (9’’) apart. Soak the seeds for 24 hours prior to planting to speed up germination. You will likely end up with multiple seeds emerging from the same hole, since chard seeds often come in clusters. When the seedlings reach 8cm (3’’) in height, thin them to the strongest sprout. Continue planting seeds every 10 days for the next month for a rolling harvest. Chard is a cool season vegetable, but it can tolerate the heat of the summer, so expect production up until late summer. For a fall crop, plant seeds 40 days before the first fall frost. Harvest the older leaves as they mature, and leave behind the younger ones to feed the plant. Chard is a good choice for container growing.
Corn
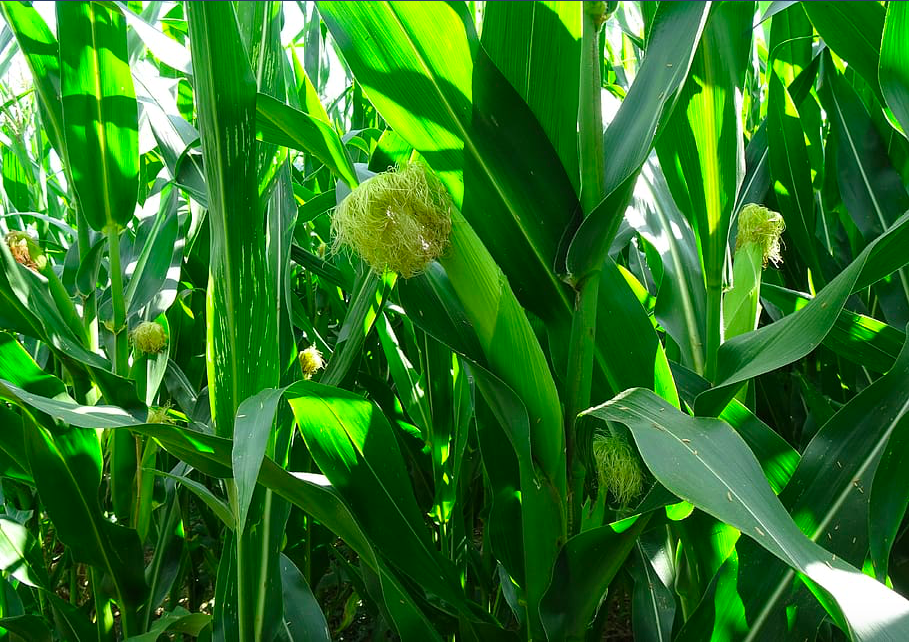
Amend the soil with plenty of compost and sow seeds in the late spring after the soil has warmed up above 18°C (65°F). Plant 2-5cm (1-2″) deep leaving 7.5cm (3″) between each plant, in rows that are 60-90cm (24-36″) apart from each other. Because corn is wind pollinated, plant them in a dense block of at least 4 rows (even if each row only has 3 plants) rather than in a long, single row. It’s best to only grow one variety of corn in these blocks, otherwise when they plants cross pollinate they may produce an unexpected, subpar fruit. You can also grow corn in hills spaced 30cm (12”) apart, with 3 to 4 plants per hill. If you’re planning on using the stalks to support pole beans or cucumbers, this is the planting method to use. Make sure to keep the plants consistently watered, especially while flowering and growing ears.
Harvest when ears are plump and the silk at the end turns brown. Pull the ears down and twist them off the stalk. For an extended harvest, plant several corn varieties with different days to maturity. You’ll need enough space to keep these different varieties 76m (250′) apart though. Plant corn with beans, beats, cucumbers, dill, melons, parsley, peas, potato, soy beans, and squash, but not with tomatoes or celery.