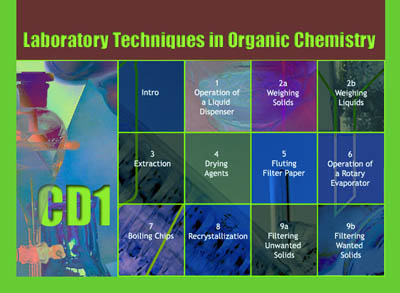
Laboratory Techniques in Organic Chemistry CDs

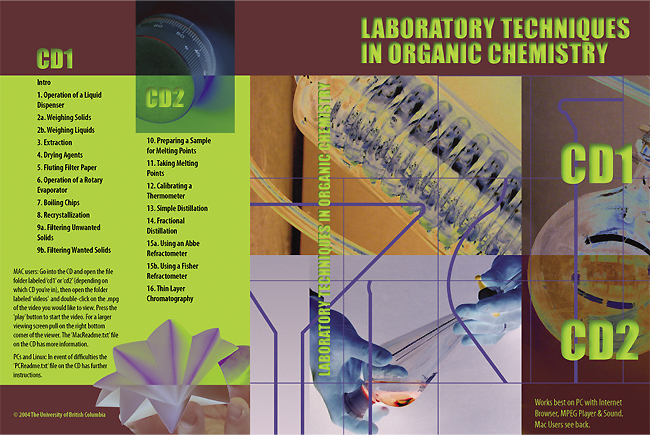
This series of 16 videos demonstrate the various techniques used in an Organic Laboratory. Originally done in 2004, I acted as art director working with an outside video company. New equipment has resulted in my reshooting and editing certain videos.

Video: conceptualizing, filming, editing. (Premiere, After Effects)  Operation of a Rotary Evaporator

CD Case: designing, photography (Indesign, Photoshop)

Web Interface: designing, photography, html (Photoshop, Dreamweaver)

Posted in ePortfolio, Media, Video | Comments Off on Laboratory Techniques in Organic Chemistry CDs

Mainstreaming Disabled Students at the Post-Secondary Level

1981: (13 slide-tape programs – Camosun College and the Provincial Gov’t)

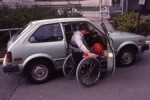
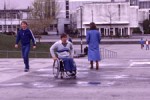
As director of 13 programs on mainstreaming disabled students at the post-secondary level, I oversaw a team consisting of a photographer, scriptwriter, medical illustrator, graphic artist, narrators and sound engineers. at the time many main-streamed students were entering into post-secondary institutions , and this series was intended to raise the awareness of College and University instructors of the issues that these students might be facing. The series included such topics as ‘Definition of Disabled’, ‘Common Misconceptions about the Disabled’, ‘Transportation Issues’, ‘Architectural Issues’, ‘What to Do in an Emergency Situation’, and ‘Advocacy for the Disabled’. The clips below are from the Transportation Issues program.

Posted in ePortfolio, Media, Slide-tape | Tagged , | Comments Off on Mainstreaming Disabled Students at the Post-Secondary Level

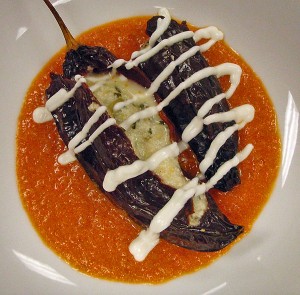
Chiles capones, an appetizer from the Central region of Mexico

Chiles capones served on a creamy tomato salsa and drizzled with cream. I have never had anything quite like them before, and they were my favourite dish of this Mexican cooking class featuring the cuisine of the central region of Mexico.

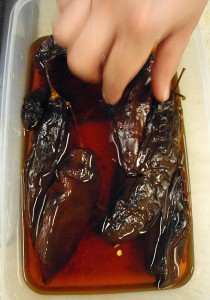
Pasilla chiles are deveined, deseeded and slit, then soaked overnight in white vinegar.

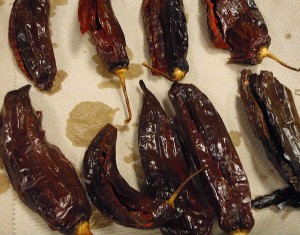
The chiles are laid out on paper towel to drain off excess vinegar.

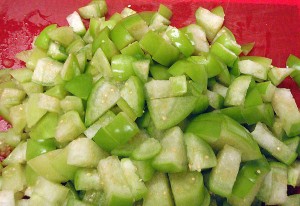
In the meantime the filling is prepared.  The papery husks are removed from the tomatillos and then the tomatillos are chopped.

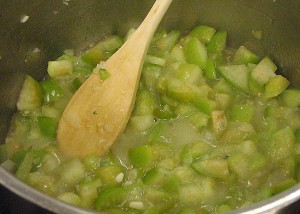
The chopped tomatillos are ‘sweated’ with onion and garlic.

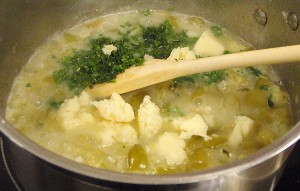
When the salsa appeared ‘cooked’, we added ‘queso asadero’ and minced cilantro.

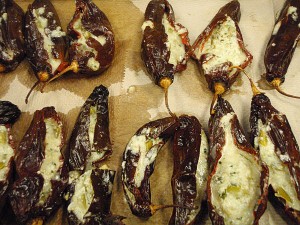
Fill the chiles with the cheese and tomatillo mixture.

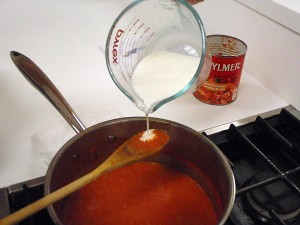
Then we prepared a creamy tomato salsa and SERVED! ¡Qué rico!

Posted in Food around the world | Tagged , , , , , , , , , | 1 Comment

A menu from the Aquitaine region of France (Bordeaux)

We started with a Basque-influenced fisherman’s soup of cod, fresh corn, tomato and chorizo.
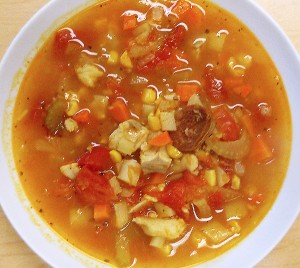
Spanish-influenced soup from the Bordeaux region of France

This was served along with a leek & goat cheese tart topped with warm fennel salad and accompanied by the local white wine from the Bordeaux region, a Sauvignon Blanc, in this case 2007 Dourthe No. 1.
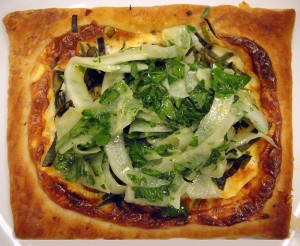
the starter course was fennel salad on a goat cheese tart from the Bordeaux region of France

The main course was grilled steak Bordelaise in a wine sauce and pear-shaped potato croquettes; the wine Chateau Puy-Blanquet St. Emilion Grand Cru 2007. Going with the concept that wine from the region pairs perfectly with food from the region, especially in the ‘Old World’, you can pair any of the Bordeaux reds with the grilled steak. So try a Cabernet Sauvignon, Cabernet Franc, Malbec, Merlot or  Petit Verdot, and to make it even more perfect add a bottle of cheaper bordeaux to the wine sauce.
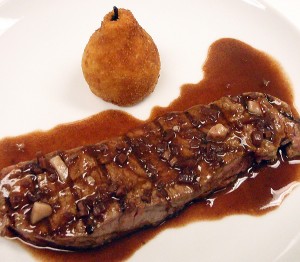
the main course was steak, bathed in a wine sauce that contains a bottle of one of the less expensive Bordeaux wines, and served with pear-shaped potato croquettes from the Bordeaux region of France
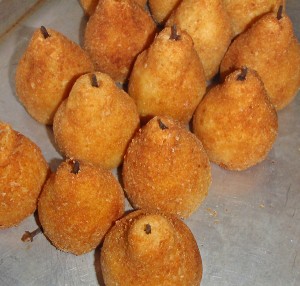
pear-shaped potato croquettes from the Bordeaux region of France

Finally, the dessert, cannelés, delectable rum and almond cakes.
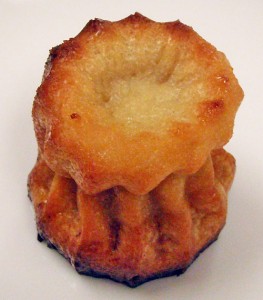
the desert was a cannel, from the Bordeaux region of France

Posted in European | Tagged , , , , , , , , , , | Comments Off on A menu from the Aquitaine region of France (Bordeaux)

Glazing your mixed-media painting

The second half of our mixed media class was about painting over the plaster/spackle texture.

First apply acrylic medium over the texture and let dry, unless you want the colours to immediately be sucked into the plaster. Then mix up colours with either acrylic medium or ‘glazing’ medium, and run the colours over the spackle texture. Here I used a coloured glaze, a mix of medium and paint (ultramarine blue and reddish purple), and applied it with a fairly soft brush.

glazing holyman painting

glazing holyman painting

It is important to cover every single last bit of the white plaster, to keep the white edges of it from distracting the eye.

Once the glaze has dried you can then go over the textured areas with a ‘dry brush’, using a contrasting colour paint that is applied lightly to one side of the brush only, and then brushed over the surface to bring out the texture.

Posted in Creative Process | Tagged , , , , , , , , , | Comments Off on Glazing your mixed-media painting

During the Week: Mixing it up on my own

Working on my own after my Mixed-Media Class I tried using some ‘Patching Plaster’ that was lying around for my acrylic/spackle mix. That mix turned out to be a little too runny, not much thicker than gesso, but okay for a base coat. (LATER: Runny mix turned out to be a problem for several students; Jeanne suggested using gel for a thicker mix.)

Then I needed to get some fine grain sand, and because I’m running through money like you wouldn’t believe, was forced to stop at Safeway just because they have a bank machine there. Ended up buying almost a hundred dollars worth of bloody groceries although I did manage to purchase some paper towel for glazing – 2 rolls for $2. Food vs. art? Hmmm…

Jeanne had recommended pet/aquarium stores for pebbles, sand, etc but the nearest shop didn’t carry anything but fish food so I drove to a store near McDonald and Broadway. They had the fine sand but only a 10lb bag that was $19 with tax. Ouch… Again the thought: Food vs. art?

painting of stone using multiple textures

painting of stone using multiple textures

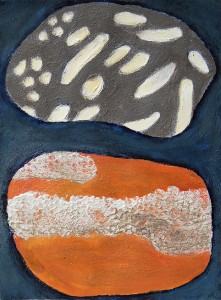
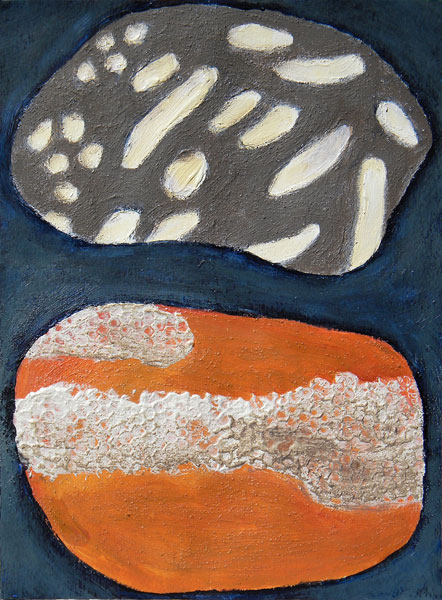
LATER: In the class one of the students made up a sheet of samples of each type of spackle mix. I thought what a great way to keep track and decided to incorporate the various things I’m learning into studies of rocks. The top rock is plain spackle (the whitish sections) and a sand/spackle mix (the gray). The bottom rock is sand/spackle mix (the rust) and very thick spackle with ex-sequin stencil pressed in (whitish bits). The originals of these rocks as photographs/concepts: https://blogs.ubc.ca/albatz /2011/05/13/expanding-on-my-studies-of-rocks/

Posted in Creative Process | Tagged , , , , , , , , | Comments Off on During the Week: Mixing it up on my own

Additions to Spackle Add Even More Texture to your Painting

The next demo in my mixed-media class was to add even more texture to the spackle mix by adding sand, pebbles, grit or other similar things. The trick is to mix it thoroughly, NOT just sprinkle it on top. Jeanne made up several samples of these for us to play with.

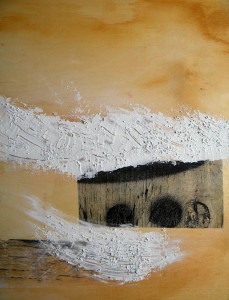
old wood painting with pebble texture applied

old wood painting with pebble texture applied

I loved the look of the pebbles in spackle and went a bit nuts scraping them with a palette knife to form streaky lines; in addition I was covered up the worst transfer, as well as the bad edges of the others. Jeanne had me smear the plaster edges into the painting, as a way of blending in the texture to the rest of the painting.

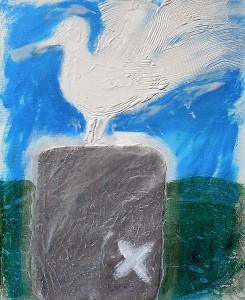
Seagull with a comb-over texture: The ‘rock’ that the seagull is standing on has had a plaster/sand mix applied, then medium, then gray paint and finally dry brush. To do ‘dry brush’ lightly apply paint to one side of the brush only, and then lightly brush over the surface to bring out the texture. As with most techniques in this class it is harder than it looks, and I haven’t yet acquired the knack.

plaster textures

plaster textures include a seagull with a comb over, plus a plaster/medium/sand mix on the rock, painted grey and dry-brushed with white

One of the students made up sheets of samples of each type of spackle mix, a great way to keep track. I decided to incorporate the various techniques I’m learning into my studies of rocks. The top rock is plain spackle (the whitish sections) and a sand/spackle mix (the gray). The bottom rock is sand/spackle mix (the rust) and very thick spackle with ex-sequin stencil pressed in (whitish bits).

studies of rocks using texture

studies of rocks using texture

The originals of these rocks as photographs/concepts: https://blogs.ubc.ca/albatz/2011/05/13/expanding-on-my-studies-of-rocks/

Our super instructor’s site: http://jeannekrabbendam.com/ On her site she has her work and offers lots of different workshops and courses.

Posted in Creative Process | Tagged , , , , , , , , | Comments Off on Additions to Spackle Add Even More Texture to your Painting

Using spackle to add texture to your paintings

Basic Acrylic/Spackle Mix and Pressed Textures

Our second mixed-media class was about using spackle to add texture to your paintings. Jeanne gave us some hints about using texture: in a realistic image the texture should go closer to the ‘front’ of a painting, mimicking life where the texture/details are at the front of your vision and the rest fades back; if you are doing a pure abstract, however, this does not apply as you are looking for rythmn and contrast of textures.

Jeanne mixed up a big batch of basic spackle/medium mix: 75% spackle (Redi-mix) to 25% medium, the type of medium used depending on the thickness you require. Once it had been laid down on the canvas (primarily with a palette knife), she did a demo of running a comb through it, and pressing various items into it such as plastic lace doilys, stencils, etc.

Then we got to play. I added the plain spackle/medium mix to my holyman painting and pressed in a plastic lace doily. Another student used a ‘stencil’ that was the leftover holes from sequin-making, resulting in a honeycomb grid that she wrapped around the side of a wood panel (how cool was that?!)

spackle/medium mix after plastic lace doily was pressed into it

spackle/medium mix after plastic lace doily was pressed into it

Our super instructor’s site: http://jeannekrabbendam.com/ On her site she has her work and offers lots of different workshops and courses.

Posted in Creative Process | Tagged , , , , , , , , , , | Comments Off on Using spackle to add texture to your paintings

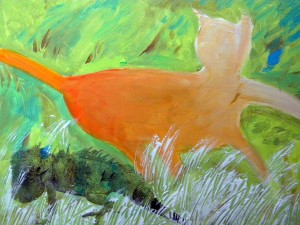
a blur of golden jaguar in the jungles of Costa Rica

My assignment from the first week of Mixed Media Painting classes was something to go with the phrase, “And all I could do was remember…

So I decided to do an image that only exists as a memory because I didn’t have a camera handy at the time: Costa Rican Gold, a blur of golden jaguar in the Guanacaste ‘jungle’ of Santa Rita (and maybe iguana prey as well?)

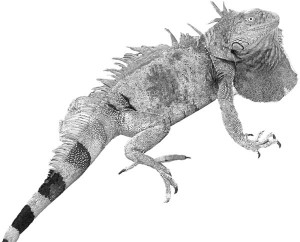
high-contrast iguana suitable for image transfer

El Jefe, the huge, ancient, and somewhat battered iguana that lived next door to us at Melvin’s in Ostional (Nicoya Peninsula)

‘An iguana leapt out of the bushes right in front of us, freaked and leapt back into the bushes.’ We are supposed to use image transfers so I took a photo of El Jefe, an ancient iguana, and turned him into the ‘prey’. I placed the high contrast laser print of him on a rough pre-painting of jaguar and jungle. Note that El Jefe is now reversed.

Jaguar & Iguana painting

Jaguar & Iguana painting

The grassy plaster texture was applied in my second class. I think I quite like the tension between the hunter and its prey, but am not sure where I am going next…

Our super instructor’s site: http://jeannekrabbendam.com/ On her site she has her work and offers lots of different workshops and courses.

Posted in Creative Process | Tagged , , , , , , , , , , , | Comments Off on a blur of golden jaguar in the jungles of Costa Rica

Method No. 2 Image Transfers for Mixed Media Painting

Mixed Media Painting Class:

Coat your laser images with six to ten layers of gel, letting it dry in between layers, or coat with ONE layer of tar gel.

I tried the six to ten layers method, a slow painful process with gel getting everywhere. The resulting images at 4 layers were fragile and tore; at 6 a little better but not great. Later Jeanne suggested doing just ONE layer of tar gel. When I objected to the extreme glossy surface of the tar gel she suggested just painting over it with matte medium. Dunh… It takes a bit longer longer to dry properly but is so much easier I’ll never go back to regular gel.

Once the gel has dried, soak the sheet for a few minutes in hot water, scrub off the paper backing, trim and play around with the placement of your images on your painting.

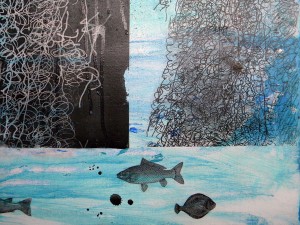
scribble painting with fish transfers

scribble painting with fish transfers

June 8: Put the fish image transfers on my scribble painting. Not so sure about them – they look a bit goofy.

Our super instructor’s site: http://jeannekrabbendam.com/ On her site she has her work and offers lots of different workshops and courses.

Posted in Creative Process | Tagged , , , , , , | Comments Off on Method No. 2 Image Transfers for Mixed Media Painting