Tag Archives: makerspace

Arduino

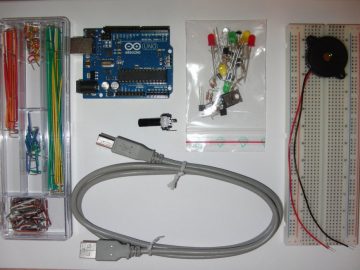
Arduino-UNO-kit


Creative Commons licensed image courtesy of redcctshirt Flickr

whatisit.png

Arduino is a small open-source electronics platform that integrates hardware and software. The Arduino board can either be purchased online or borrowed from the UBC Woodward library. The software is available for free online for Windows, Mac and Linux.

Features include:

  • Hardware is inexpensive (between $5 and $40 depending on brand and where you purchase)
  • Software can run on 3 different operating systems
  • Relatively simple programming, good for beginners
  • Open-source software and hardware

Why-is-it-relevant-360x82.png

Arduino is a very useful tool for creating various interactive projects or just exploring programming and electronics. It is an excellent application to help students develop the core competencies of critical thinking and problem solving. With Arduino hardware an instructor can create various sensing equipment for a lab activity, like a sonar sensor, light sensor or even a humidity sensor and then use the software to run the equipment and show outputs. Using this technology would be a cost efficient and novel way of running a lab where students would be able to learn even more hands on things. Students could use the hardware to create a robot that they can then control by programming commands into the software. The process of assembling the hardware teaches many things at once: circuitry,  design and troubleshooting skills. Also working with the Arduino software is fairly straight forward and therefore perfect for learning how to code. There are an endless number of projects that can be created using the Arduino hardware and software, check some of them out by clicking here.


how-to-get-started-360x80.png

1. Download and the Arduino software.

  • Choose the platform that your device runs on, Arduino is available for Windows, Mac and Linux.

  • Click on “Just Download” to download for free (or you can contribute by clicking “Contribute & Download”).

2. Then install the software.

2. Plug in your Arduino board using the USB cable.

Creative Commons image courtesy of Jens Ohlig flickr

Creative Commons image courtesy of Jens Ohlig flickr

3. Open the software and select the port to which your Arduino board is connected.

  • If you have trouble locating the port, watch a quick tutorial video here.

4. Set up an LED light following the image below.

  • For the next three steps you can find a more detailed tutorial here.

5. In the Arduino software select Tools -> Examples -> Basics -> Blink.

6. Upload the code from the software to the board and watch the LED blink.

For more information on how to use Arduino, click here to watch tutorials by Jeremy Blum.

videopng-360x61.png

Leave a Comment

Filed under Resources

Take a Break and Make!

Visit one of our ‘pop up’ mini-makerspaces in the Scarfe Digital Sandbox – Scarfe 155 (Tuesday 12:45 – 2 beginning September 29th & the last Wednesday of each month 12 – 1pm). Explore ways to bring hands-on learning to your clasquishycarssroom through activities that spark imagination through playful exploration and invention. This activity is particularly relevant to Science learning but, I believe (and research agrees with me), that making and tinkering can support cross-curricular learning! Come explore, share and learn.

“Although the practice of planning and carrying out investigations has always been a part of good science instruction, the student focus often has been more on carrying out than on planning, with teacher-structured investigations far outnumbering student opportunities to develop their own research questions. Giving students opportunities to design and plan investigations allows them to truly experience the excitement of science and better understand the nature of scientific inquiry.” (Science Teacher, an NSTA publication)

Sandbox Handout – Making and Tinkering Handout

A terrific Resource for educational applications of making, tinkering and developing a inquiry learning mindset in your students:   Invent to Learn by Sylvia Libow Martinez and Gary Stager, 2013    www.inventtolearn.com

Other links of interest:

http://nstacommunities.org/blog/2014/02/14/planning-and-carrying-out-investigations/

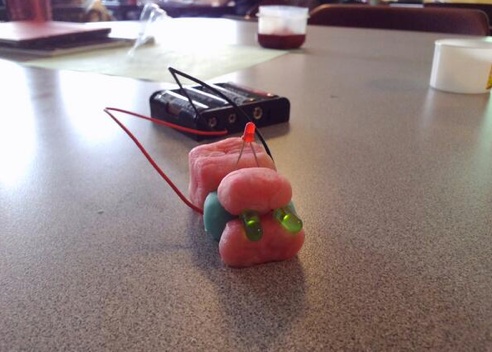
Squishy Circuits Guide – University of St. Thomas

See also MIT’s Soft Circuits Guide – FABRIC circuits!!

A sample lesson plan…

or, be a little more inquiry oriented in your exploration. See Lynda’s blog for some ideas!

Request a planning guide to support creating a MakerSpace in your school (geared to secondary ed)


Leave a Comment

by | September 1, 2015 · 1:17 pm

Create your own gif’s

A GIF (Graphics Interchange Format) is a file format for both animated and static images. Gif files are well-suited for the web due to the level of ‘compression’ (how small they are and how fast they load). Gif files can be ‘static’ images or animated. Consider how you might ‘perk up’ your presentations using these interactive images… or perhaps challenge a student to create their own (think ‘makerspace!)

The Gif file below was created by Brittney Merriweather (MY-SRL cohort) using http://makeagif.com/  You can use your own images or video to create an animated gif and embed the gif on your blog (as we’ve done here) or use it in your presentations. Brittney used a flikr image  ( _DJ_/Flickr) to create this gif.
Brain Grow on Make A Gif

make animated gifs like this at MakeAGif

Have Photoshop and want to try creating your own gif? View this tutorial: Using Photoshop to create a gif.

 or visit this site for a variety of options.

Leave a Comment

by | September 1, 2014 · 12:24 pm