Play-based, hands-on learning activities appeal to our creativity and our curiosity. When combined with specific prompts and tasks, they encourage children by providing greater success and a more rewarding experiences (McLean & Harlow, 2017) as they learn about the world around them.
Helping children to construct an understanding of scientific concepts “[equips] them to solve problems and address challenges that have a direct human impact” (Honey & Kanter, 2013, p. 2).
The approach posited in the McLean & Harlow study supports the increased emphasis on engaging girls in STEM learning. They found that when presented with an opportunity to create story or sculpture using the squishy circuits, girls were more likely to engage and learning outcomes mirrored those of boys.
Using inexpensive familiar materials, teachers can prepare simple, fun, yet challenging hands-on activities for their students that can also provide footing for learning down the road. By using the squishy circuits first, students play with concepts using materials that can be re-used multiple times. Following this play, they might then design and build a circuit using a given length of copper tape thus using design thinking skills, electrical know-how and mathematics. Turn that paper circuit into an interactive book, button or a card and you now have full on STEAM learning in action.
Make, Create, Innovate: Getting Hands-on with Learning Design
Recap of the session in the Scarfe foyer Fall 2019
Some people are frightened of electricity.
 But when you combine a 9V battery with a handful of playdough and a few strategically placed mini-LED bulbs, anyone can safely learn the basics of circuitry. Before long, those same people might just take the lead, and soon enough they’re speaking knowledgeably about current, polarity, and conductivity and asking great questions of their own! More advanced students can extend their learning by co-constructing their understandings of series and parallel circuits, switches and more. Design challenges can support students creating toys and electrical devices or imagine the learning that might happen when high school chem students are challenged to create new recipes to increase conductivity or resistence and improve the texture, colour or consistency of the dough (McLean & Harlow, p. 128).
At this week’s Make, Create, Innovate! session, held Tuesday, September 17, 2019, Teacher Candidates (TCs) had a chance to learn about the basics of electrical circuitry by making squishy circuits and paper circuits.

By trying out these simple Science activities, TCs were experimenting and predicting just like scientists while also making connections to other subject areas, such as Math and Art. They were also developing an anchor for new ideas and concepts they might encounter later on, just as we try to do with young students.
Have a look at Mind Trekkers (Michigan Tech) and Beam (UCLA) for some lesson ideas, and check out Brain Pop for an assessment activity designed as an interactive web-based game. You can also find more about circuit-making activities at The Tinkering Studio (Exploratorium), Makerspaces.com, and STEAMsational, and you can download a helpful handout on “Circuitry Basics” from Instructables.
“Facilitating STEM events [allows] teacher candidates to recognize and listen to students’ science ideas” (Dani, Hartman, & Helfrich, 2018, p. 375)
At the same time they were making circuits, the TCs were sharing and co-creating their understanding by contributing thoughts and questions to an on-line virtual wall called Padlet, a web-based space for hosting and displaying collaborative communication and feedback in real-time.
Padlet lets users see their ideas update continually on a nearby TV monitor. It also allows people to respond to each other. It’s another simple way of using classroom-based technology to provide formative assessment by consolidating and sharing immediate feedback, which also helps to promote a classroom community of learning.
Learn more about Padlet on the Scarfe Digital Sandbox.
Acknowledgement: post author, Scott Robertson; editor, Yvonne Dawydiak
Interdisciplinarity, collaboration, hands-on learning – that’s the spirit of Create, Make, Innovate! We want to promote enthusiasm for sharing and learning across age groups and across subject disciplines.
Make, Create, Innovate sessions took place during the Fall 2019 in the foyer of the Neville B. Scarfe building and were hosted by Scott Robertson, a project assistant on a small TLEF grant with Dr. Lorrie Miller, Dr. Marina-Milner Bolotin and Yvonne Dawydiak, Teacher Education.
If you have an idea or an inspiration for a resource or future session, please let us know! scarfe.sandbox@ubc.ca
Dani, D. E., Hartman, S. L., & Helfrich, S. R. (2018). Learning to teach science: Elementary teacher candidates Facilitate informal STEM events. The New Educator, 14(4), 363–380.
Honey, M. & Kanter, D. (2013). Introduction. In M. Honey & D. Kanter (Eds.), Design, make, play (pp. 1–6). New York, NY: Routledge, https://doi.org/10.4324/9780203108352.
McLean, M., & Harlow, D. (2017, June). Designing inclusive STEM activities: A comparison of playful interactive experiences across gender. In Proceedings of the 2017 Conference on Interaction Design and Children (pp. 567–574). New York, NY: ACM, https://dl.acm.org/citation.cfm?id=3084326

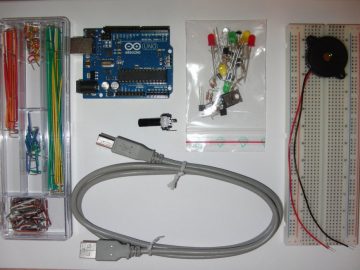
 Materials may include conductive copper tape, conductive thread, insulated wires, paper clips, bulldog clips, pencil lead, virtually anything that allows electricity to flow. Combining these with 3V lithium batteries, LED lights, buzzers, etc. creates endless possibilities of circuits. Projects include light up badges, origami, greeting cards, bookmarks, you name it! We’ve even made origami paper circuit creations!