Tag Archives: circuits

Squishy Circuits


TELL 3C TCs at ‘play’

whatisit.png

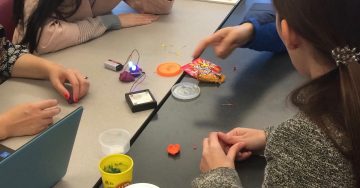
Squishy Circuits is a hands-on way for students to explore electrical circuitry using simple, readily available materials including dough (conductive and non-conductive playdough), LED lights and batteries. Students can construct their understanding of electric circuits and even design and create their own inventions. Through a play based approach students can discover simple, parallel and series circuits and important concepts including conductivity, short circuits, voltage.


Why-is-it-relevant-360x82.png

Hands-on, minds-on exploration of concepts, like electricity and circuitry, support a more inquiry-based approach to teaching and learning and are in keeping with BC Curriculum. Science content and curricular competencies can be supported through activities like Squishy Circuits. When students work together to co-construct their knowledge, they are naturally developing various core competencies including communication and critical thinking. Squishy Circuits can be used at many different grade levels depending on the curricular/learning purpose the teacher has in mind and the prompts provided for students to get started!

When provided with simple materials and perhaps a prompt or challenge, students can design, plan and carry out their own science investigations in keeping with an integrated ADST (applied design skills and technologies) approach. See this article in the National Science Teachers Association for further information about an investigative approach to science learning.

I have found that students can learn a great deal when provided with time and materials without ‘over prompting’. The teacher, as guide and facilitator, can provide “just in time” support to help students extend their learning. These prompts might include providing key vocabulary to help develop literacy within the subject/content area, they might also be to help propel or advance learning by helping students avoid ‘hitting a wall’.

For more resources, please visit:

Squishy Circuits Guide – University of St. Thomas


how-to-get-started-360x80.png

There are many ways for a teacher to get started with Squishy Circuits depending on your subject area and lesson objectives.

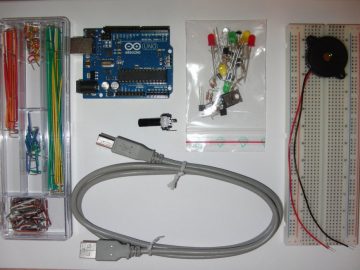
There is a Squishy Circuits kit available for borrowing from the UBC Education Library. Kits and materials can also be purchased through the Squishy Circuits website (they also have tutorials, quick start guides and dough recipes) or you can find electronics materials in bulk through electronics supply stores including RP Electronics in Burnaby or Lee’s Electronics in East Vancouver

You can make your own dough or purchase playdough (naturally conductive due to water/salt content) and plastecine or modeling clay (non-conductive) at toy stores or dollar stores.

Once you have your materials, it’s time to plan for the learning!

A sample lesson plan…

Or, be a little more inquiry-oriented in your exploration. See Lynda’s blog for some ideas!

You and your students will likely start thinking about and looking for extensions once you’ve had a chance to play:

See also MIT’s Soft Circuits Guide for information about FABRIC circuits!!

Paper Circuits (make-and-take circuits using conductive copper tape – tape also available at local electronics stores or online)


videopng-360x61.png

Leave a Comment

Filed under AppliedDesignSkillsTechnologies, Resources

Ceramics and Tech Integration: Lesson Plans and Ideas to Start Exploring

iphone-513495_1920

whatisit.png

Do you feel some subject areas have less space for tech integration than others? While some subjects tend to incorporate computers and gadgets more easily than others, all subjects can benefit from small or large-scale digital innovations in the classroom. Even within the area of Pottery and Ceramics, there’s room to explore! We have compiled a list of apps, lesson plans, and tutorials to try out with students. Some can be used as a brief introduction or hook to the lessons, while others integrate with other subjects such as science, math, and graphic design, giving Ceramics a refreshing perspective.


Why-is-it-relevant-360x82.png

Realistically speaking, while not all students will become artists, art allows students to express themselves in other media and teaches them life skills. The ability to sketch, model objects in clay, and do basic photo editing are useful skills to develop, especially in cross curricular applications. When students can create connections between subjects, new doors in learning are opened, new relationships between concepts are built, all of which make activities more appealing.


how-to-get-started-360x80.png

  • Pottery HD Lite App: With this app, anyone can try out the process of making and selling pottery without getting one’s hands dirty. This game has different levels and challenges to complete. While it’s not the real thing, the 3D designs can encourage those who don’t feel very creative to get into the world of Pottery. If enough students are interested, a digital pottery contest can be promoted after they’re familiar with the basics of gameplay.
  • Sculpture – Made Monumental Lesson Plan: You will find this lesson plan in the middle of this page. In this lesson, students will create sculptures and digitally place them as a monument in another environment. They should develop their clay modelling, photography, and digital editing skills.
  • Adding decals to glazed ware and Ink transfers on Clay: Both of these lessons use graphics programs and printers to create images to add to ceramics projects.
  • Claymation: How about trying out digital storytelling using clay? Follow this lesson plan to organize the students into different roles. The Stop Motion Studio App can be used to edit the photos and turn them into animation.
  • Making Sounds with Clay: This lesson plan teaches students about the rudiments of wind instruments such as flutes, ocarinas, and whistles. The purpose is to investigate and experiment with clay and sound properties.
  • Mocha Diffusion: This tutorial experiments with acid-base reactions to instantly create dendritic fractal patterns on clay. With this activity, students can explore chemistry, math, and bio.
  • Symbolic Self-Portrait Ceramic Lamps: With this lesson plan, students will not only learn about the internal setup of lamps and basic circuitry, but create a ceramic base that mirrors their interests and personalities.
  • Build your own ceramic 3D printer: While ordinary 3D printers have become more accessible to schools, 3D printers for ceramics is still working its way into the market. But for those tech savvy teachers out there, here’s a tutorial that will teach you to build your own printer using an Arduino as the controller. 3D ceramics allow for intricate designs that would not be possible to be done by hand.
  • Decorating USB Flash Drives with Polymer Clay Tutorial: This artsy and practical tutorial teaches how to turn that boring Flash Drive into something a little more exciting. There’s a video tutorial below with other design ideas.

videopng-360x61.png

Leave a Comment

Filed under Resources, Video & Video Tutorials

Arduino

Arduino-UNO-kit


Creative Commons licensed image courtesy of redcctshirt Flickr

whatisit.png

Arduino is a small open-source electronics platform that integrates hardware and software. The Arduino board can either be purchased online or borrowed from the UBC Woodward library. The software is available for free online for Windows, Mac and Linux.

Features include:

  • Hardware is inexpensive (between $5 and $40 depending on brand and where you purchase)
  • Software can run on 3 different operating systems
  • Relatively simple programming, good for beginners
  • Open-source software and hardware

Why-is-it-relevant-360x82.png

Arduino is a very useful tool for creating various interactive projects or just exploring programming and electronics. It is an excellent application to help students develop the core competencies of critical thinking and problem solving. With Arduino hardware an instructor can create various sensing equipment for a lab activity, like a sonar sensor, light sensor or even a humidity sensor and then use the software to run the equipment and show outputs. Using this technology would be a cost efficient and novel way of running a lab where students would be able to learn even more hands on things. Students could use the hardware to create a robot that they can then control by programming commands into the software. The process of assembling the hardware teaches many things at once: circuitry,  design and troubleshooting skills. Also working with the Arduino software is fairly straight forward and therefore perfect for learning how to code. There are an endless number of projects that can be created using the Arduino hardware and software, check some of them out by clicking here.


how-to-get-started-360x80.png

1. Download and the Arduino software.

  • Choose the platform that your device runs on, Arduino is available for Windows, Mac and Linux.

  • Click on “Just Download” to download for free (or you can contribute by clicking “Contribute & Download”).

2. Then install the software.

2. Plug in your Arduino board using the USB cable.

Creative Commons image courtesy of Jens Ohlig flickr

Creative Commons image courtesy of Jens Ohlig flickr

3. Open the software and select the port to which your Arduino board is connected.

  • If you have trouble locating the port, watch a quick tutorial video here.

4. Set up an LED light following the image below.

  • For the next three steps you can find a more detailed tutorial here.

5. In the Arduino software select Tools -> Examples -> Basics -> Blink.

6. Upload the code from the software to the board and watch the LED blink.

For more information on how to use Arduino, click here to watch tutorials by Jeremy Blum.


videopng-360x61.png

Leave a Comment

Filed under Resources