Digital Storytelling Reflection: Take 2

Having used PhotoPeach before I knew that it was a powerful tool for a visual narrative and the story that I was telling had been well documented with lots of project photos. I was also extremely familiar with PhotoPeach using it myself to tell our District’s PD story and as a student tool in my social studies classroo . I knew that that it was easy to use, with drag and drop storyboarding and simple YouTube searches for music, as I had seen students as young as grade four effectively navigate through the PhotoPeach steps. The story of my Ed Tech coordinator position also serves a dual purpose. First, to complete the necessary requirement for this assignment and second to disseminate some information at an administrators meeting next week.

Student access to PhotoPeach is simple. So long as they have a reasonable internet connection and valid email address, which we provide each student in our district, they can use this tool. Student’s love using this tool as it gives them the ultimate control over their story; images, words and music. In particular the ability to use music from YouTube is extremely motivating. In my experience much of their time is spent on this step, finding the music to set the mood for their story. When scaffolding digital storytelling for student’s and teacher’s PhotoPeach is one of the first internet based tools I introduce because of it’s ease of use.

Digital Storytelling Reflections

Digital Story

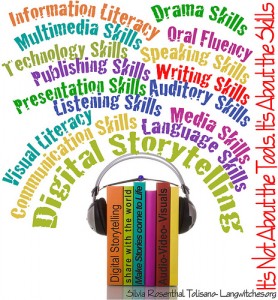
Digital Storytelling- It is not about the Tools...It's about the Skills by langwitches Creative Commons Attribution license

Why?  For this assignment I wanted to see if I could create a story using my iPhone.  All of our schools have open public wireless, most allow student handhelds, after Christmas there will be an influx of these devices and as a district we will be starting a grant project around student owned devices.  This assignment seemed like the perfect fit for trying it out what could be created.  I went looking for apps not even sure what was out there. After floundering for a bit I ran into Wes Fryer’s post on mobile digital storytelling I downloaded all 3 apps and started experimenting.  

 Storytelling is not my strong suit, I would not describe myself as a creative person so I had to find a story that I could tell.  The position of Ed Tech coordinator is a new one for our district and because we are so spread out I am trying to be transparent in this position.  The blog, Facebook page and public calendar help, but I get asked a lot what my days look like.  I was instantly drawn to StoryKit  because it would allow for multiple voices and I knew the story I wanted to tell had to include reflections from myself, teachers and students. 

 The Tools, Story and Teaching 

 The tool guided the way I told the story, which is why I have two different versions.  I really liked how StoryKit allowed for multiple voices, internal cropping of images and adding text to slides.  However I did not like how it rendered as a single static webpage with tiny little blocks to click on.  I was hoping for something more movie like.  For that reason I decided to try and tell the same story using Storyrobe.  This app renders as a YouTube video, which may be problematic for student uploads, but does not allow for text or multiple voices.  Storyrobe also limits you to three minutes worth of video recorded all in one sitting which became extremely frustrating.  Together these tools would be wonderful, separate they are lacking some features but nothing that is insurmountable.  

 Storyrobe and StoryKit both turned out to be apps worth recommending. I can see students, using StoryKit to take pictures of their math work and record their thinking process.  They then share the link with their teacher.  I can also see StoryKit used in our second language classes.  A lot of the vocabulary our French and Cree classes learn has to do with everyday items.  They can take picture, record their translations and create a webpage of oral responses.  Conversely I can see teachers doing the same thing, recording the proper pronunciation to words and then posting the link to the webpage in our Moodle. Storyrobe I can see being used in a more traditional storytelling manner of creating and narrating a story.  

 Student Access 

 Student access to technology is an issue in our schools, there is never enough to go around.  I deliberately chose free apps for this project to see if they had enough functionality .  I do not see this as an entire class solution for a storytelling project but rather an option.  By allowing students to use their own devices it will free up the limited number of school owned devices for those students that require them.  

 Student Impact 

 We love telling stories and students love using their own devices.  Together this seems like a perfect combination.  A legitimate use for iPods and iPhones that teachers could buy into.  We know that through digital storytelling “students become active creators, rather than passive consumers of multimedia” (Ohler, 2005/06) and when you are actively involved in learning you synthesize and retain it much better.  Student will engage in the writing process and develop skills to become critical consumers of the digital media they are now creators of.  I would expect to see increased student engagement and a creative outlet in some otherwise non-creative courses. 

 Ohler, Jason. (2005/2006) The World of Digital Storytelling. Educational Leadership. December 2005/Janruary 2006. Accessed online 12 November 2010. http://www.jasonohler.com/pdfs/digitalStorytellingArticle1-2006.pdf

Wiki Collaboration

Wiki wiki martphoto © 2007 Andjam79 | more info(via: Wylio)

The wiki experience in this class was very similar to my other wiki collaborations, lacking something.  As a group we got the assignment completed and I agree, for the most part, to the top five’s but I found myself wondering again if there was a better tool for the job.

 5 Strategies for using Social Media:

  • Learning Styles: Enhance a lesson by reaching students through a multitude of learning styles; for instance, visual, tactile, and auditory.
  • Students are already there: Capitalize on the way that students already communicate during their daily lives and use social media to enhance their learning.
  • Collaboration: Utilize the wisdom of the entire classroom for the group to progress collectively to a greater destination than what they could have achieved on their own.
  • Action Research Project: Research other academic uses of social media to determine the advantages of field tested classroom techniques.
  • Digital citizenship: Teach digital etiquette. Discuss public identity management and the appropriate time and use of technology, privacy, copyright, and flame wars.

 5 Key Challenges in using Social Media:

  • Digital Citizenship: Navigating through copyright, plagiarism, privacy and digital identity and how these issues apply to the read/write digital culture.
  • Access: Supporting students with limited computer and/or internet access at home or in school so that they are not marginalized.
  • Pedagogy first: Providing another platform to network while yielding sufficient educational outcomes without negatively impacting student learning
  • Terms of Use: Ensuring age limits and/or other terms of service on various social media sites are followed and kept apprise of by the learning institution and its administrators.
  • Changing relationships: Navigating the legal, social and classroom ramifications of using social media between student and teacher.

 Using the discussion board has been wonderful for discussions.  Conversations can go off on tangents as students reply at different parts of threads.    You can tell who was talking, at what time and how much.  Using the wiki was great for gathering the initial thoughts but after that it got clunky.  It was hard to determine who was editing what and when.  I found myself copying and pasting to a word document and printing, which is something I never do, to try and give myself a sense of structure when editing.  A wiki as a collaborative tool is wonderful but the real power comes from the ability to edit the document in a meaningful manner.  See revisions, communicate with other users and create a final product that is a compilation of a number of people’s ideas.  My other experience with Wiki’s has been PB Wiki, Moodle Wiki & Moodle OU Wiki .  Of the three PB wiki was by far the best tool to have multiple users on at once to create and edit a document.  I am a little wiki jaded as none of these have allowed for the edits to happen in a meaningful, collaborative setting to produce a document that reflected the work of a number of users to create something bigger and better than what they could have produced individually.  I have had far more success with a shared google doc.    

I will keep working with wiki’s as I can see them as great tool, you need only look at Wikipedia to see that they can be incredibility powerful.  If this task had been assigned to the discussion board it would have been a logistical mess.  It would have been hard to follow, to print and to gather final information.  The wiki, while clunky, served its purpose of getting 18 people to put down their many thoughts and agree on a top five.

Blogging about Boris

 Boris is trying to find some way to create a stand-alone, self-directed review tool for students learning the Periodic Table. It should allow students to review material, then test their knowledge. In a perfect world it would give students instant feedback that not only tells them if they’re right or wrong: it would give them formative feedback that helps them move towards the right answers.

 Boris needs to expand his Moodle course.  He already uses Moodle for class notes and assignments, now it’s time to explore Moodle’s other features.  Since Boris does not have a minute of class time to spare I would suggest using Moodle quizzes, but that he should also think about adding a student created glossary, wiki, forum and other interactive learning objects.  The former will required a lot of set up, creating questions and quizzes, where the later will require minimal set up.  However, Moodle quizzes once set up have the feedback loop built in, where the other suggested options will require more of Boris’s time to monitor and provide feedback.

 Moodle quizzes, when set up properly, will give students the instant and remedial feedback that Boris is looking for.  When setting up the question bank Boris will want to ensure that the appropriate feedback in place for incorrect answers to move students towards the correct answer.  He might consider adding references to page numbers, worksheets or websites.  To save a bit of time he should consider importing  already existing Moodle question banks  and then tweak these questions and feedback to meet his needs. 

 My second suggestion would be to add a glossary, wiki, forum and other interactive objects to help students memorize the entire periodic table.  These activities could be set up as peer assessed because “Peer assessment can encourage motivation, both through students looking at peers’ work and knowing their own work will be peer reviewed” (Jenkins,  2004) and it will position Boris as a guide on the side, a facilitator, giving more learning ownership to the students.  These activities may be more engaging and active than a computer assisted assessment.   Boris wants students to have a place to review material, but in order to make the material more engaging than notes and PowerPoints he should consider adding this other learning activities. 

 Simply setting up these items in his Moodle course will not be enough, Boris needs to keep the conditions for which assessment supports learning in mind.  How will this stand alone tool fit into his course.  While the conditions of sufficient, timely and constructive feedback can be met with proper Moodle quiz set up, the condition of students “orienting them (selves) to allocate appropriate amounts of time and effort to the most important aspects of the course.” (Gibbs & Simpson, 2005) is a little harder to ensure.  Will these marks count?  Is this mandatory?  How will he encourage those students who need to review this material to do so?  While I would love to think students will do this for the love of learning, Boris will probably need to position this material in his course syllabus to give it the appropriate weighting it deserves.   I would suggest setting up the quizzes with a number of attempts and recording the highest as well as creating a quick checklist type rubric for the peer assessed activities. 

 Gibbs, G. and Simpson, C. (2005).  “Conditions under which assessment supports students’ learning.” Learning and Teaching in Higher Education Accessed online 17 October 2010 http://www.open.ac.uk/fast/pdfs/Gibbs%20and%20Simpson%202004-05.pdf

 Jenkins, M. (2004).  “Unfulfilled Promise: formative assessment using computer-aided assessment.” Learning and Teaching in Higher Education , i, 67-80. Accessed online 17 October 2010 http://resources.glos.ac.uk/tli/lets/journals/lathe/issue1/index.cfm

Multimedia & Authoring: Video

Video authoring can suck the time right out of your hands.  Hours can be spent shooting, editing, finding the perfect transition and music. 

Movie Maker I have used numerous times, however since the switch to Windows Live Movie Maker I had been avoiding it because it looked different.  However after HAVING to sit down and play it is basically the same.  One issue I am having is that Live Movie Maker is not allowing imports from network drives.  I am trying to isolate this to a network problem or a new feature in Movie Maker.  It is not a bad idea, Movies tend to have large amounts of data stored and this is better done locally.  Problem is that it goes against everything we have every taught our students.

My short example, we are still doing post production on this, so I would call this my first edit.  I have figured out transitions, music, fading all over again.

On my hit list for months has been Camtasia.  Teachers have been asking for some Moodle how-tos, so I thought I would kill two birds. I downloaded the 30 day trial and I think I am hooked.  The interface will take a little getting used to and I need some practice selecting clips to apply zooming to.  So here is my first attempt, another work in progress.

Interactions to Support Learning

Learning Centered I think what Anderson argues, relationships first and differentiated instruction, is at the heart of any instructional setting. The online environment makes it particularly difficult therefore you must be purposeful in getting to know your students. My limited online experience has been learner centered but more because adult learners will make it about the learning. We will go on tangents, use prior knowledge and forge relationships we deem valuable. In my experience with young adults is that I need to employ a variety of tools (different modes of communication, pre-testing, face to face if possible) to engage learners and scaffold their construction of knowledge from their starting point.

Knowledge Centered Anderson’s idea of “grow your own knowledge” (Anderson 2008) and making connections is key to a knowledge centered environment. Informational is prolific, how do we make it our own? A skilful teacher will get students to reach out and interact with the information until it becomes a part of what they do. I do find that the E-Learning toolkit does that for me. There is a ton of knowledge there, but because I can use the tools to construct what I need for my context, I am engaged and making the connections with this material.

Assessment Centered Anderson asserts that “assessment that serves to motivate, inform and provide feedback.” (Anderson 2008) which is a tall order in any instructional context. I have found my most successful technology mediated lesson put students in the assessment drivers seats. Using forums, lightbox galleries and databases in moodle to allow students to self and peer assess/comment does more for motivation and informing learning than any multiple choice test I could give. I know that for this course I spend extra time and care preparing these responses because I know that peer assessment and feedback will follow, it is definitely a motivator!

Community Centered In my experience even 2 years ago having “students work together in an online learning context to collaboratively create new knowledge” (Anderson 2008) was difficult. Today with the Skype, google docs, elluminate, etherpade, live meeting, Facebook, Twitter and the list goes on and on, you need but only choose the right tool for the job. Today I belong to a number of online learning communities (through Twitter mostly) that I have never met in real life, I learn from everyday, we work together without giving a second thought and they are my go to group to bounce new ideas off of. They are my community of teachers and I have a deeper relationship with many of them than the ones I know in real life.

How might you use the learning technologies tools you have at your disposal to help you to create meaningful interactions?

Tools, tools, tools there are so many to choose from. The trick is to purposively pick the ones that are “cost and learner effective” (Anderson 2008) that create quality learning environment. (Although I really just want to use the shiney new one) Elluminate, since we have a license, with its video capability, polling, whiteboard, chat and desk top sharing is at the top of my list right now. When delivering instruction I make sure to build in introductions, sharing and interactivity along the way. Forums when set up properly can facilitate excellent opportunities for interactions. At the junior high level I find that I have to do a lot of modelling of interactions before there is a buy in. Blogging also has the potential, personally I know that I have made many long last relationships via a great blog post. For that to translate to k-12, I think will take more teacher modelling. Personally, twitter is also incredibly meaningful, however I am having trouble convincing and showing others. At the heart of creating meaningful interactions has to be a safe, welcoming collaborative online space. For me that has to be moodle because that is the LMS of our district. This space has a place for student images, feedback and it changes depending on what we are doing and what my students want. By giving up a some control this space it becomes our space to learn not my space to teach.

Anderson, T. (2008). Towards a Theory of Online Learning. In: T. Anderson & F. Elloumi (Eds.), Theory and Practice of Online Learning. Edmonton AB: Athabasca University. Accessed online October 10 2010 http://www.aupress.ca/books/120146/ebook/02_Anderson_2008_Anderson-Online_Learning.pdf
Multimedia and Authoring Tools: Audio

Audacity is a tool that I have had in my toolkits for a couple of years.  While I use it occasionally, I tend to set my students loose on it much more frequently.  Uses include an interview tool, oral response and most recently to have elementary aged children reading books.  The book reading is serving two purposes: a digital repository of books for “listening to reading” and a part of that child’s e-portfolio.

Where I am struggling with podcasting is finding the an appropriate moodle plugin.  Up until recently we used Podcast Activity module, but with load balancing servers this would not work.  IT also does not like this module because it is unsecure.  The suggestion found at Moodle is to use a MP3 attached to a forum post to generate the RSS required.  Has anyone tried this?  Does it work?

I find using audacity is not very labour intensive and very easy to use.  Even the most novice user is familiar with the record, stop and export interface.  The challenge for me is to now make the next leap to publicly publishing in iTunes.  Included in this is ensuring that any music loops and sounds are properly cited properly and have the correct attribution license for reuse. 

I will say that alongside Audacity I also use other web 2.0 tools for audio.  Some that I have found success with have been:

Voki
Babberize Me

Vocaroo

Multimedia and Authoring Tools: Still Images

Picnik Editing

I will admit I was not expecting much with Picasa.  I am instantly turned off by anything that requires a download and install, a result of my k-12 profession.  We tend to rely on software that is supported and installed, Microsoft Picture Manager, or tools that are free online like Pixlr .  However, I was impressed and ended up downloading it onto both my machines and looking for an app for my iPhone.  Great new tool in my arsenal.

 When I started the photo editing I was online in my Picasa album, click on edit and it took me to Picnik .  While this was not the assignment, I spent a fair amount of time playing around.  It has some basic tools to crop, resize and editing as well as some funky additions like buttons and fangs that students would appreciate.  I also liked how saving here brought the image back to your Picasa album.   As our school division explores cloud computing options, the integration of Picasa and Picnik is a definite plus. 

 After downloading Picasa and playing around for a bit three things impressed me.  First the ability to edit an image and publish it to your blogger blog or twitter.  Since I have multiple blogger blogs this will save me a lot of time.  Second was the collage feature which I have been looking for.  It is as simple as my favourite app Strip Design  for creating drag and drop collages.  Now I don’t have to do it on my phone.  The third feature, which I need to spend more time exploring was the movie creation.  Could this be a tool that is more stable than Windows Movie Maker?  I will need to add this to my to-do list. 

 Overall I was impressed with Picasa as a photo editing tool, which surprise me!  It was very intuitive and for those of us that already live in the google cloud, it adds to the seamlessness of my online life.