 Understanding the phases of the Moon is one of just a handful of concepts that you’ll find in every introductory, general-education “Astro 101” course. “Understanding”, of course, is a terrible description of learning. We have a much more specific learning goal:
After this activity, you [the student] will be able to
- use the geometry of the Sun, Earth and Moon to illustrate the phases of the Moon and to predict the Moon’s rise and set times
- illustrate the geometry of the Sun, Earth and Moon during lunar and solar eclipses, and explain why there are not eclipses every month
Everyone who teaches moon phases, from K-16, has their own favourite approach and apparatus. We get 30-40 students for a 50-minute period in our lab, a time meant targeting concepts are better learned in a hands-on environment. Our activity is built around an remarkable, 10-second experience: Students hold a styrofoam ball at arm’s length in a darkened room with one, bright, central light source. They do a pirouette, watching the pattern of light and shadow on the “Moon”. Ooohs. Aaaahs. Lightbulbs going off. Truly a golden moment.
This page contains materials for what we do for the other 49 minutes and 50 seconds of the lab.
Equipment
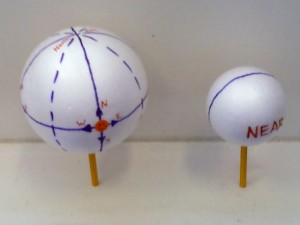
- Each group of 3 students gets 2 styrofoam balls, one Earth and one Moon.
 As the picture shows, we divide the Moon in half and write “NEAR” and “FAR” on the hemispheres. On the Earth ball, we draw the Equator, meridians at 0, 90, 180, 270 degrees longitude (which are 6 hours of daily rotation apart) and dashed meridians on the 45’s (3 hours of rotation apart.) A small sticker represents the observer and the cardinal points help students remember which way to spin the Earth to mimic the daily rotation.
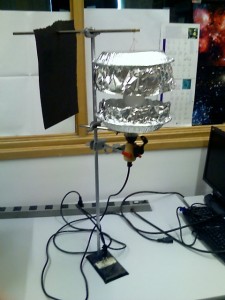
 - At the center of the lab sits “the Sun”.
 This is a really bright lightbulb (150 W or more) on an equipment stand. To prevent light from scattering off the floor and ceiling, we built aluminum foil “baffles” that sit above and below the light. They allow only thin disk of light to shine into the room. The light bulb is set to the students’ shoulder-level so when they hold the Moon at arm’s length, the styrofoam ball naturally goes into the light.
Materials
- Like all of our Astro 101 activities, students work in small groups through a sequence of worksheets Moonphases.tex Moonphases.pdf
- The Moonphases.tex file inserts many eps graphics via \includegraphics:
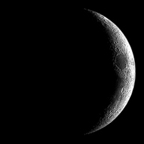
- Moon_phases_small.ps (Copyright Antonio Cidadao)
- NewMoon.ps
- WaxingCrescent.ps
- FirstQuarter.ps
- WaxingGibbous.ps
- FullMoon.ps
- WaningGibbous.ps
- ThirdQuarter.ps
- WaningCrescent.ps
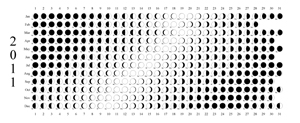
- Several questions at the end of the activity require a full-year lunar calendar
 Postscript versions like MoonPhases2011_lcal.ps are available thru 2014 at http://pcal.sourceforge.net/
Instructor’s Guide
After running this activity for several terms, we realized there is a lot for the teaching assistants to do and say to keep the activity running. Those instructions eventually found their way into this instructor’s guide, available on this password protected page. Send me a message newbury@phas.ubc.ca for a password.
Credit
Unless credit is given explicitly, all documents, graphics and images are licensed under a  Creative Commons Attribution-NonCommercial-ShareAlike 3.0 Unported License. This work is supported by the Carl Wieman Science Education Initiative.
Your feedback, comments, suggestions
If you use the materials here and find a alternate approach, tweak or extension, please share it by leaving a comment. Thanks!
