
How-To: Pack for your first overnight hiking trip.
As we jump into an unusually warm spring here in beautiful Vancouver, you might be beckoned to a weekend getaway in the great outdoors. Don’t worry, I don’t blame you. But for those who are planning an overnight hiking trip for the first time, you might be a little confused on how to organize all your seemingly camping-essentials in that tiny 50L backpack of yours. Disclaimer: you’ll have to leave your fluffy cotton pillow behind.
Preparation is essential for any outdoor adventure. How you fill your pack will determine the character of your trip. Here are some tips that may help you prep a well-organized pack for this weekend. Note that this isn’t the end all be all list, but it will help start you off along the right track.
- Put the heaviest items closest to your spine.That’s usually your food and water, plus your stove, fuel and toiletries (both for the sake of convenience and to keep everything with an odor away from the rest of your gear)
- Put low-priority items you won’t need until camp in the bottom of your pack. (Sleeping bag, sleeping pad, clothes to sleep in, etc.)
- Put high-priority items you need constant, quick access to in the top or side pockets of your pack. (Your headlamp, your first aid and emergency kit, your guidebook, your cell phone, snacks, your water bottle (if you’re not carrying a hydration pack), any extra layers you expect to need before you hit camp, and so on.)
Organizing the Inside
All right, you know where to put things in your pack — but how are you supposed to keep it all straight? Try these tips for fine-tuning your packing system:
- Pack similar items together in stuff sacks, either color-coded or labeled (write on the bag with a permanent marker, or write on a piece of duct tape and stick it to the bag).
- Divide your weight equally throughout your pack so that it’s not weighing down on one side. That might mean that you’ll have to split your tent gear (tent body and poles on one side, rainflyon the other) or pack it on one side and put something(s) of comparable size and weight on the other side.
- If you’re hiking in bear country, anything with an odor — including toothpaste, soap and your cookware – either stow it in a bear-proof canister or be prepared to hang it off a tree when you’re setting up camp. Here’s a good Youtube video that will show you all the tips and tricks to establish a good pulley system: https://www.youtube.com/watch?v=BKYBhsy3gZQ
Don’t Be That Hiker
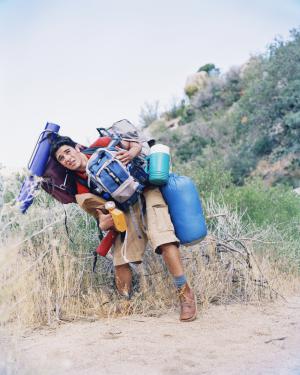
Friends don’t let friends dangle items on the outside of their packs. That’s usually a sign your pack is too small (or that you’re carrying too much stuff — try asking yourself these three questions), and it’s a great way to lose said items or get yourself hung up on trees or bushes.
The few exceptions are sleeping pads and bear canisters, which are often so bulky that they have to ride on the outside of your pack; hiking poles or snowshoes; the occasional water bottle that’s made to clip to your pack’s straps for easy access; and an extra outer layer that you might stuff into your pack’s bungee compartment, if it has one.
If you have something particularly bulky that needs a home — like a sleeping pad or bear canister — consider placing it on top of your pack’s main compartment, then fastening the pack lid over it to hold it in place. Whether or not that’s actually a workable solution depends on the size, height and balance of your pack and load. — but it usually works pretty well.
For an example of a good gear list, check this out: http://www.patc.us/volunteer/trailpatrol/Forms/BPChecklist.pdf
By: Carrie Kwok
 Follow