Starting to build an e-Portfolio as a student …

Have you ever wondered what exactly an e-Portfolio is? Do you hear about them but find that you’re lost as to what you should put in one that goes beyond your resume and examples of a few assignments you aced at school?

The first thing to know is that an e-Portfolio’s can have many elements in it. Combined, an e-Portfolio can be a powerful tool you can use to help you impress an employer or a graduate school . There is no one “right” e-Portfolio … the important thing to remember is to keep it professional, updated, and also enjoyable to browse through. (It doesn’t have to be filled with charts and composition writing that is … have fun with it!). 

Here are some of the basics to keep in mind. It’d be a good idea to include these basics and build on them ..

Image from: theother662004. (2008, February 8). Purposes of e-Portfolios (ePF).

One of the important things is to think outside the proverbial box and give the e-Portfolio more depth about your strengths and the uniqueness that a resume or cover letter can express.

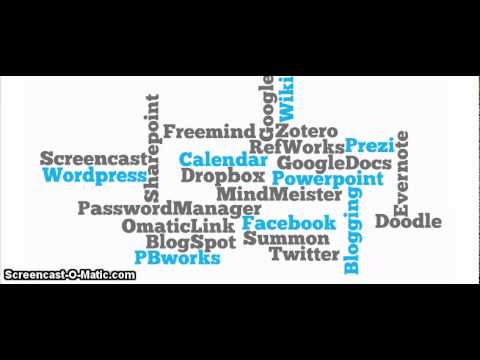
More insights on an e-Portfolio’s potential is offered in this next video. As you’re going to see, the e-Portfolio can include a range of items showing:

  • what you know
  • what you’re learning
  • how you’re growing as a person as you juggle learning, volunteering, working, and leisure (making time to have some fun makes you more attractive than being a 24/7 bookworm!)

 Welcome to e-Portfolio.org

I hope you’ve taken out a few minutes to watch the video! As I said and as this video demonstrates, you can make the e-Portfolio uniquely you. Add customized designs and colours, images, audio files, examples of relevant coursework …  the more thought you give to what you put in it, the more powerfully it can showcase your achievements, thoughts, and activities in progress. The e-Portfolio helps you go beyond your resume and cover letter, giving examples and highlights of things that would make you attractive as a candidate for work or more school. Aside from this, it also shows that you have the web-savvy required to study, work, and play in a world going more and more digital almost every day!

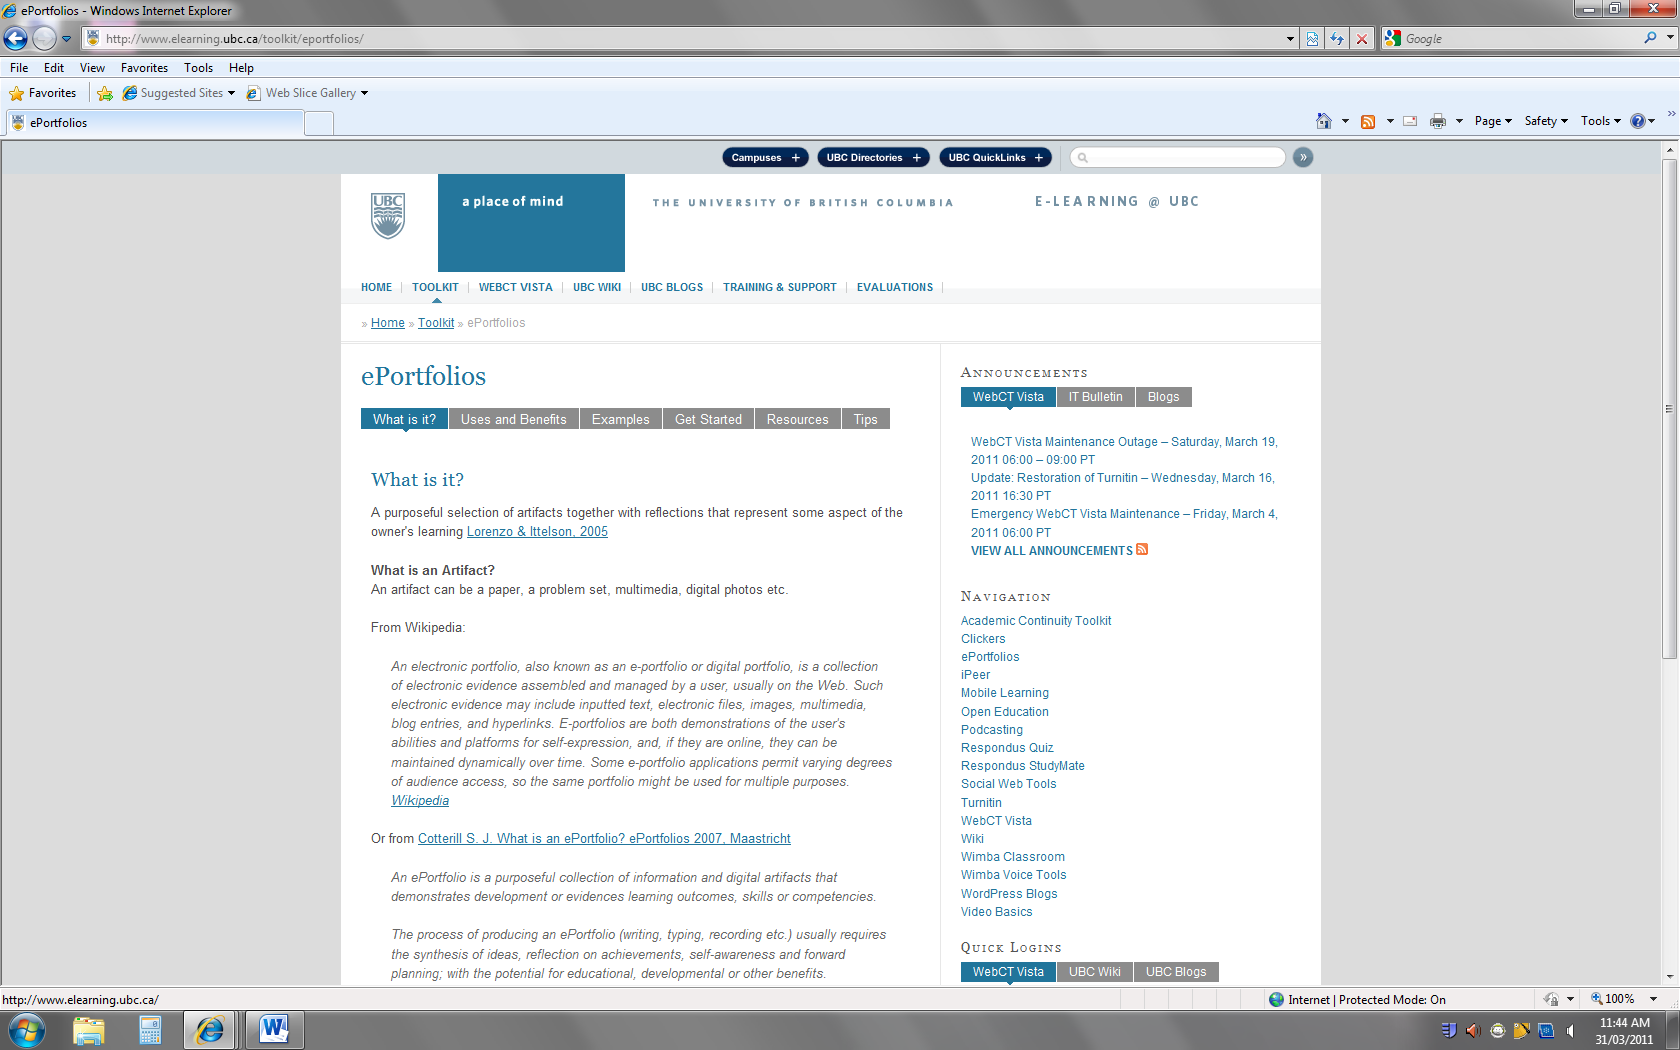
UBC has a few things of its own to say about the place e-Portfolios have today in our learning and working lives. Have a look at UBC’s e-learning site for resources, tips and examples, and more!

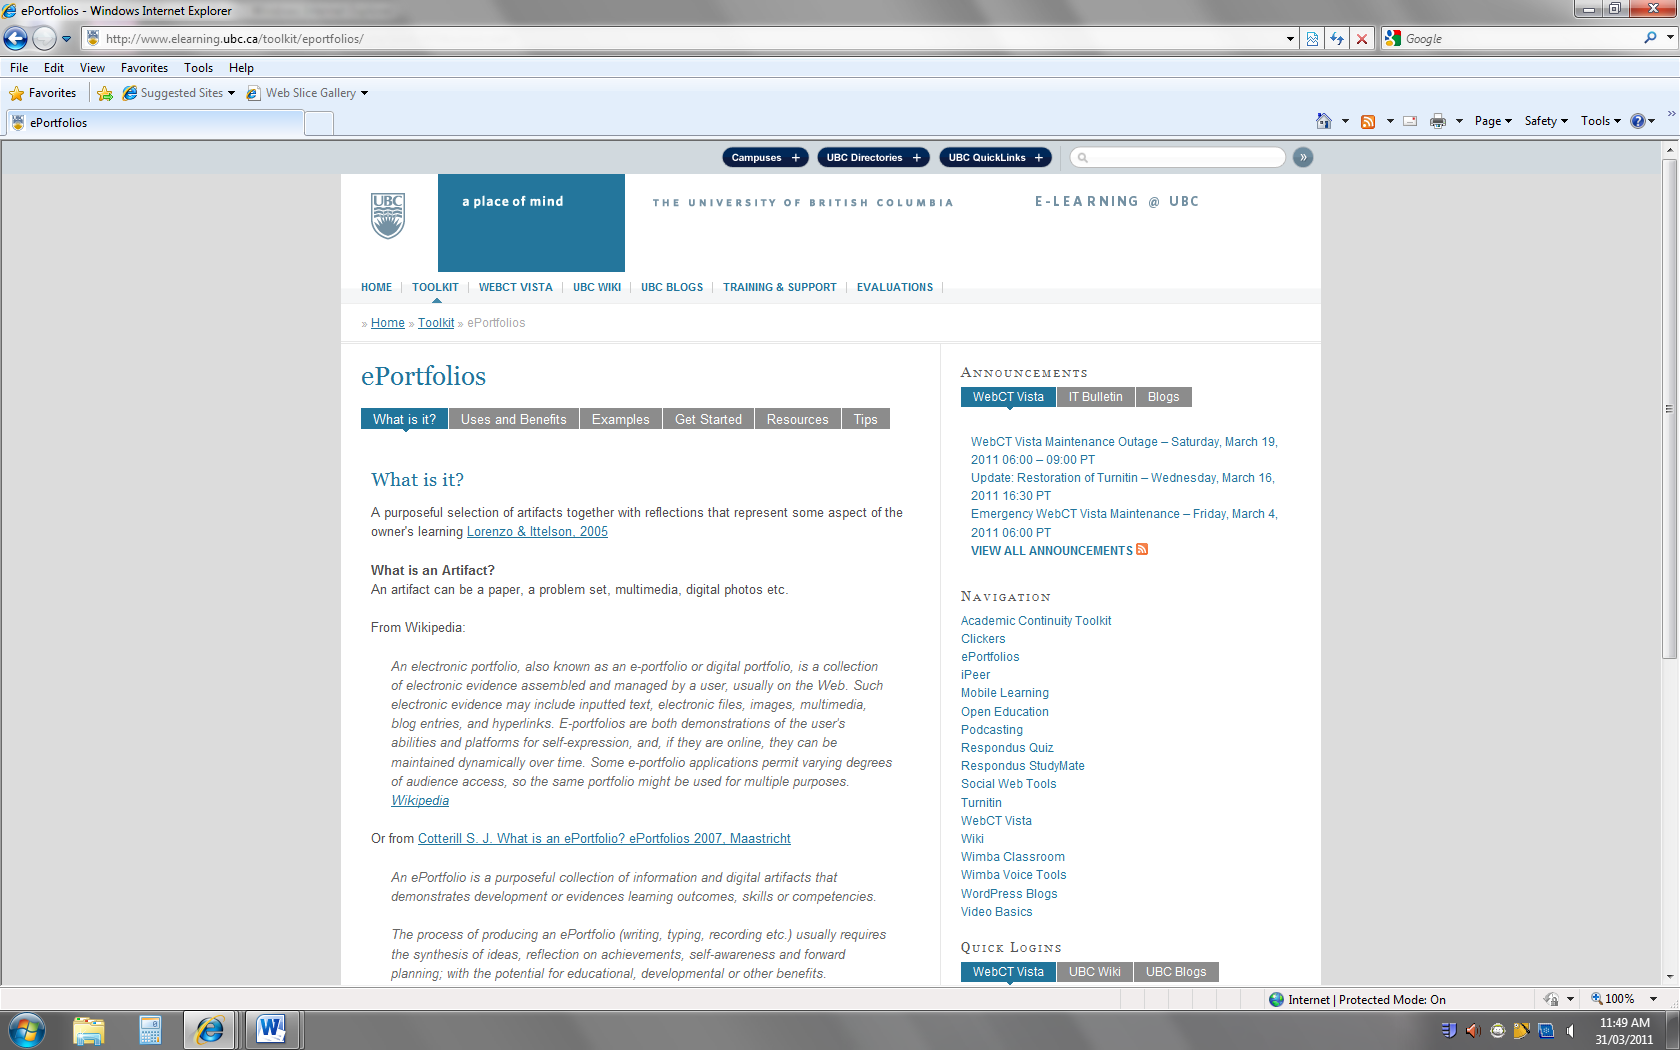
Image from: University of British Columbia. (2010, August 26). e-Portfolios.

This site has some suggestions to help with starting up an e-Portfolio. Good luck and give the e-Portfolio a go as you learn, volunteer, work, and play as a student!

Categories
Sharing Online

Banishing the Bibliography Blues

Does the prospect of organizing reference citations leave you suffering from headaches? Does compiling bibliographies for your papers give you the blues? Never fear, for there is a cure for what ails you: reference management software.

What is reference management software?

If you don’t use a reference management tool already, you will want to start as soon as you finish reading this post! These tools will make your life as a student much easier and cure those citation headaches and banish those bibliography blues. Basically reference management tools are software applications that are designed to help you write your papers with ease and style. They will help you to organize your references, format them in any style you desire (e.g. MLA, APA, Chicago) and automatically generate in-text citations and bibliographies. A guaranteed time-saver!

Lots of (smart!) people use RefWorks or Endnote reference management software to organize their citations. As a UBC student, you can create your own profile and use RefWorks for free.  Check it out! Unfortunately RefWorks can be a bit cumbersome to use and Endnote is expensive to buy, but never fear there are many other useful options like Zotero. You may ask “why bother using Zotero?” Well, there are lots of great reasons:

  • Zotero is free! You don’t have to pay a cent for it.
  • It resides right on your Firefox browser and captures information from the Web.
  • The interface is designed with you – the Web surfer – in mind. You can surf the Web and save items at the same time.
  • Zotero allows you to tagwrite notes and attach files to your items, drag and dropmark up pdfs and web pages AND MORE….

The more you know about it, the more you’ll love using it.

What exactly is Zotero?

Zotero is an open source Firefox Add-on which can be easily installed on both your private computers and those in university labs. It enables users to collect, manage and cite research from all types of sources. The citations captured by Zotero can be books from AmazonGoogle Books, and online library catalogs (e.g.WorldCat). It also captures papers from Google Scholar and online subscription databases (e.g. Web of Science or ABI/Inform). It can generate in-text citations and bibliographies automatically in wikis, blogs, Microsoft Word and OpenOffice Writer.

To see what Zotero can do, check out these screencasts.

Don’t use Firefox as your browser?

No worries, there are other free reference management tools out there that work great with Google Chrome and Internet Explorer! Mendeley is a free application that has many of the same features as Zotero and features a downloadable desktop application so you can store and manage your references both online and off. You can also import your library from CiteULike directly into your online Mendeley library with ease.

There are also many other up and coming reference tools that are also worth checking out like Citavi and Qiqqa. You can see a comparison of available reference tools here.

So stop wasting time fretting over your bibliographies and let these great applications get busy and take care of them for you!

This post was originally created for the Digital Media Project, a joint project of UBC School of Library, Archival and Information Studies and the Irving K Barber Learning Centre. It has been modified from its original form.

Categories
Sharing Online

Screencasts: It’s not Hollywood, but it’s useful

Screencasting is the art of turning what you see on your computer screen into a video. This technology allows you to stop explaining things in text (which is sometimes appropriate and sometimes static and boring.) They’re easy to make and can be used to create YouTube videos, tutorials, and class presentations.

Here’s one that NetworkEd UBC made about…NetworkEd UBC (we’re into self-promotion)

YouTube Preview Image

There are lots of different free screencast programs, below are just some of them:

  • Jing is one of the most ubiquitous programs out there. People love it because they walk you through the process and it’s easy to add graphics like text bubbles and arrows to your screencast. Sharing your screencast is really easy too! Screencasts five minutes or less are free.
  • CamStudio has a lot of features for free software including recording with audio and adding captions
  • Screencast-O-Matic gives your up to 15 minutes free recording time. It’s one of the easiest technologies for beginners. You don’t have to download anything; instead you just click a button to start recording.

These technologies make screencasting easy, but here are some tips for making your screencast stand out from the rest:

  • Create a storyboard: whether your video is long or short, you should know what you’re going to do and when. Taking some pen and paper and sketching out the basic outline of your presentation can be really helpful
  • Think about who you intend to see the video and what you want them to get from it. This should help narrow your focus and keep you on track.
  • Make a script for recording your audio: you won’t forget important details and you won’t have every fifth word be an ummmmmmmmm or a weeeeeeeeeeelllllllll. Also, use a microphone and speak slowly and clearly
  • Intentional background music is much nicer than accidental background noises (like the phone ringing or the dog barking!)

So go forth and create!

Categories
Sharing Online

Map Your Thoughts!

Do you struggle with organizing your class notes or research papers? Does the thought of writing an outline make your palms sweat? Are you a visual or non-linear learner and want to see the big picture? Then mind mapping may be the answer!

What is Mind Mapping?

Mind mapping is a creative way of brainstorming and creating a visual picture of information in a manner that’s easy to digest. A mind map allows you to create a diagram of ideas that can be arranged to show relationships around a central key term. So what does a mind map look like?

FreeMind Map

Mind Mapping Software

Okay, so mind mapping looks cool, but you’re not sure if you can make one yourself? Never fear! There are some great mind mapping tools available on the internet that are free and easy-to-use. A good place to start for a newbie is with FreeMind. This downloadable, open source software allows you to create and save mind maps right on your computer. FreeMind software lets you create as many maps as you want and has many cool features. You can export your maps into multiple formats including PDF, JPEG and HTML and you can even insert hyperlinks into your maps! If you need some inspiration, check out

FreeMind’s Mind Map Gallery to see examples of maps others have made!

Maybe you’d rather create maps that you can save online and share or collaborate with your friends. Maybe you want to see what kind of interesting maps other people have made. No problem!

If you use Google Chrome to surf the web, check out the Connected Mind web app from the Chrome Web store. You can import maps from FreeMind, insert images and create super colourful maps online that you can save directly to your Google account! Don’t have a Google account? No worries, there are many other online mind mapping tools available online such as MindMeister and bubbl.us. Not all of these tools are free, but many of them offer free accounts with limited features.

Media Moment

Keep in mind when using online software from the U.S. that your information is being saved to an American server and is subject to U.S. privacy laws which differ from Canadian laws. Always remember this when saving personal information online.

NetworkEducation

  • Go to the bubbl.us site.
  • If you want to save your map, click ‘allow’. If not, click ‘deny’.
  • Now you can start making a map on this site without even registering!
  • Click on ‘Start Brainstorming’.
  • Click on ‘Start Here’. Choose a topic for your map and type it into the bubble (e.g. Living Beings) This is your parent node.
  • Click on the arrow pointing down from your parent node to create a child node and type a subtopic into the bubble (e.g. Plants)
  • Click on the arrow pointing down from your child node to create another child node and type in another subtopic (e.g. Grass).
  • Click on the arrow pointing next to your last child node to create a sibling node and type in another subtopic (e.g. Oaks).
  • Let’s try moving some of the nodes around. Click and drag one of your child nodes to the other side of the map. See how easy it is!

Map of Mind Mapping Software

Mind Mapping Tools

Links

Comparison Chart of Mind Mapping Software

Mind Mapping Software Blog

Categories
Sharing Online

Dropbox 101

Computers, computers, everywhere so where’s my darn file?

Excuse the language.

Dropbox is a free service that allows you, so long as your computer is logged on to the internet, to access your files from any computer. There’s three main things that make Dropbox a fantastic tool:

  1. Access your files anywhere with internet
  2. Invite friends to share and edit documents – updates automatically with no old versions floating aroun
  3. Back up your files

So how does Dropbox work?

  • Download Dropbox and install it on your computer
  • Any documents that you store in the Dropbox folder will be automatically synced
  • You can create online Dropbox folders, store your documents there, and invite friends to share a folder (group project anyone?)

Automatically synced???

When you’re using Dropbox your file exists in two places. It exists on the hard drive of your computer and it exists in ‘the cloud’ (i.e. on the internet.) So now you have a choice to make. You create a document called ‘Most delicious foods’ and store it in your Dropbox folder. This means that when the file gets edited, it changes in both places – online and in your folder. So if I want to add oatmeal to the ‘Most delicious foods’ list – what, some of us are of Scottish heritage – I would only have to edit the file in my Dropbox folder and the version stored on the cloud would be automatically changed. If I had invited someone else to have access to the folder in which I was storing my delicious food list, the version they had in the Dropbox folder on their computer would also have changed.

This is great if you are doing lots of editing and don’t want tons of multiple versions of a document floating around. Dropbox will keep old saved versions of your document for 30 days. If you want to be incredibly sure that older versions of your document stay around, you can keep them stored outside your Dropbox folder (just on a regualr folder on your computer.) You can still upload it and let other people see and edit it, but the version on your computer and the version on the internet will not automatically synch up.

So that’s how dropbox works. Back to those big advantages:

  • Access your files from anywhere: since you’ve got the documents on the internet, you can just log onto your account and look at them
  • You can invite friends to a folder: They can edit and add mushrooms as a delicious food (because your friends are gross that way) and it will automatically appear on your version of the document
  • Back up your files: Has your computer ever crashed and you’ve lost all your files? Well, I guess you don’t use Dropbox. Because the files that are stored online can just be re-downloaded once you’re able to get your computer to boot up again.

Student Budgeting Tools

Ever find yourself wondering how you’re going to pay your rent and save enough for next semester’s tuition? Feel like you’re destined to eat Kraft dinners all your student days? If you ever feel you don’t know where your money goes or that you’re only scraping by, looking into a budgeting tool could help.

Load budgeting tools are online (let alone the many budgeting guidebooks lining library bookshelves). Choosing the right one for you is often a matter of skimming over them to see which one suit you, your preferred layout styles, and even your lifestyle the best. A layout that’s most intuitive and easy to use is probably going to help keep you on track and motivate you to enter in the information required on a spreadsheet. Trying one or two out for a few days also gives you an indication of which one you’re most likely to stick with.

Some people like print copies but it could be easier to simply keep a running online budget which automatically calculates your incoming and outgoing $s (as an Excel spreadsheet does). It’s all a matter of which format suits you best.    

To get an idea of the Tuition and likely Living Expenses you’re going to need you may want to check out 2 resources from UBC to get started.  

Youbc: Calculate your financial plan

It gives you a rough idea of how much you’ll need according to your program and your living arrangements.

Youbc: What does it cost?

Includes a timeline indicating when tuition is due and information on meal plans and residence fees.

Here are a few FREE(!) online budget tools to explore.  The first one is particularly for students.

1) Student Budget Calculator

Thorough break down of expense items. For example, in “Food and Groceries” there’s a break down  for   “Meal  Plan”, “Grocerites”, “Eating Out”, “Snacks”, “Other”. This way you can see exactly where you’re spending your money and where you may want to stop spending as much.

2) Spending Diary  

This is a free tool which you have to sign up for. It includes a demo and includes a weekly illustration on your expenses by each day of the week.       

3) Xpenser

Allows you to record your expenses over the Internet, tag them, and search them by keywords.

4) Plan2Spend beta

 Another free tool not geared to students particularly but worth a look. You have to sign up for it but it includes a demo and a helpful visual to show you how much of your allocated $ amount you’ve already spent.

5) My College Budget (Available in Excel 2010 version)

    College Student Budget (Available in Excel 2010 version)

More general Money Saving Tips to check out are

    Money Saving Tips for College Students

    118 Ways to Save Money in College

    Money Saving Tips (more general money saving tips)

If you look around online and at your local library you’ll quickly see there’s loads of reading you can dive into. The best thing to do is browse what you see, think of which type of budget and tool layout suits you and your particular lifestyle. Are you the sort of person who’s started a budget and then stopped almost as quickly? Part of the reason could be the actual tool you’re using. If you like the tool, it’s easy to use, and it instantly gives you the information you need as you budget, you may be more likely to use it (and hence actually budget!).

Categories
Sharing Online

Demystifying Delicious

What’s Delicious?

Delicious makes it easy for you to have a single set of portable bookmarks which can be accessed elsewhere through the internet. More than that, it’s a social bookmarking service so you can tag, save, organize, search and share bookmarks through the web. Like what so-and-so is posting on the art of bread? You can view more of so-and-so’s links and learn as much as you want on bread as your heart desires.

The main strengths of this bookmarking? It greatly improves how people discover, remember and share information on topics that they are most interested in.

For a basic understanding of its capacities, have a look at this clip.

Delicious

My links are nicely organized in my folders. I know what they’re about. Why tag them?

I asked this question myself, not warming up to the concept at first. Then I thought of the tagging feature more. Think of it. You have a load of links to helpful / favourite websites in your folder called, oh I don’t know … let’s say “Pastries”. You like pastries … making them, eating them, and talking about them to get more ideas for making them and good places to buy them. You soon have 20 links in the folder. As you put them in you know what they’re all about and are confident you can jog your memory quickly as to what you’d find if you went with the first link, or perhaps even the 12th, or the 20th. A few weeks go by in which you’re immersed in a mind-bending physics report and have got a new job leaving you with little sleep let alone enough time to study … it’s Sunday today and you can’t remember which link had the info on the place with the good deals on éclairs only over the weekend .

With delicious tagging, you give that link the tag “éclair discounts” and “weekends” and voila. Bon appétit.

Point being, with tagging a bookmark you can save time and drama over pastries in your life by seeing the website and corresponding tags describing its contents right away. No rummaging through all 20 links to find some particular obscure information you really need for a paper. Or for a hunger craving.

Getting A Delicious Account and Using its Basics

1.       Getting an Account

Go to delicious.com to apply a delicious account by clicking the upper right Join Now!

Step 1: Enter Details

Step 2: Add Buttons

Step 3: Import Existing Bookmarks

Step 1 is mandatory for the registration, Step 2 and 3 can be skipped and completed later. However, in order to save and tag bookmarks delicious bookmark buttons are necessary.

If you want to add links to Delicious directly on a browser (rather than copying and pasting the a site’s URL into your Delicious account), don’t forget to select the “Add on ” feature.

a. To install Firefox Add-on, go to http://delicious.com/help/quicktour/firefox

b. To install Internet Explorer Add-on, go to http://delicious.com/help/quicktour/ie

c. To install Bookmarklet to browsers, go to http://delicious.com/help/bookmarklets, Bookmarklet Buttons can be installed to Firefox, Safari, and Internet Explorer 6 and 7, Chrome      and Opera bookmark toolbar by drag and drop links.

2. Tagging and saving

a. Select to tag, add Notes, send the bookmark to your network user/users and share the bookmark in public or keep it private. Then click the Save button to save the bookmark to your account.

b. Users with Bookmarklet Buttons, click Bookmark on Delicious and do the same as above.

3. Adding users to your network

a. Click People menu, and then click in the upper right corner to add a user to your network.

b. Users can also click Settings in the upper right corner and then click Edit Network to add or remove users from their networks.

4. Subscribing to tags that interest you

a. Under Tags which you’d seen in the submenu 

click from the upper right corner to add your favorite tags.

b. Users can also click Settings in the upper right corner and then click Edit Subscriptions to add/edit subscriptions.

5. Mashup with other tools

  • Linkrolls to display a list of your recent Delicious bookmarks as part of your website.
  • Tagrolls to display a cloud or list of your Delicious tags as part of your website.
  • Network Badges to show your readers that you are a member of Delicious and give them an easy way to add you to their network.
  • Blog Posting to Experimental feature that can automatically post entries to your blog every day containing your latest links.
  • Facebook Application to enhance your Facebook account with content and notifications from your bookmarks

These are the basics … once you get going you’ll discover quite a few nifty features. That said, you may also want to check out Pinboard, another similar tool. It’s less busy and text heavy but at the moment, the thought of paying for it isn’t convincing me to make the leap. 


Categories
Sharing Online

Here Bloggy: Technorati Scavenger Hunt

Over 1 million blogs can’t be wrong.

No doubt you’ve heard of blogging and maybe you subscribe to a few great/informative/thoughtful/entertaining blogs or maybe you’re a hardcore blogger yourself, posting a half-dozen times a day (TMI!). With everyone from university profs to modern moms blogging these days, how is one little web surfer supposed to navigate the great big blogosphere? The answer is Technorati.

What exactly is Technorati?

A massive blog search engine that has amazingly comprehensive tagging and ranking features, “Technorati was founded to help bloggers to succeed by collecting, highlighting, and distributing the online global conversation” (About Technorati).

And boy does it succeed. Through the Technorati website you can access over 1 million blogs on the web covering virtually any topic imaginable — from A-list celebs to Zen and everything in between!

You say you’re not interested in blogs?

You may want to rethink that one. The e-heads at Technorati also publish the annual “State of the Blogosphere” report that features some pretty amazing stats and insights from the world of blogging. They report that while consumer trust in mainstream media is dropping, more and more people are relying on blogs to stay informed. Blogs are becoming an important and respected form of online media – it’s up to you to keep up!

Blogs also offer a personalized approach to any topic you can think of – something that you’re studying right now in class, something that you’re thinking of getting into for a career or anything that you’re just plain interested in. Plus, they’re so dang convenient. Just sign up for RSS and you get notification of new postings to your reader or portal, making them easy to enjoy at your leisure.

NetworkEducation

  • Go to Technorati.
  • Look around the home page.
    • Check out the current headlines and featured blogs.
    • Check out the blog categories on the main menu.
    • Check out the Top blogs. Which blog is the top riser today?
    • Check out the Top tags tag cloud for the buzz words of the day.
  • Take a quick peek at the State of the Blogosphere Report. It’s long and involved, but even just a quick glimpse at the information here paints a pretty vivid picture of the blogging world. Does anything reported here surprise you? If you are interested in marketing and the relationship between brands and blogging, be sure to check out WHO: Bloggers, Brands and Consumers – Day 1 SOTB 2010.

Media Moment

Remember, this is a for-profit site. We’re not saying that Technorati is spinning yarns, but as you browse this site, realize that (sometime) self-promotion = exaggeration.

The Technorati Scavenger Hunt

Time to make this personal! Your challenge, should you choose to accept it, is to find five blogs in your areas of interest. Check out the Blog Directory and look for:

  1. A blog about something you’re studying. (1 point each)
  2. A blog to help you learn about a career you’re considering. (1 point each)
  3. A blog about improving your health or keeping up with current events. (1 point each)
  4. A blog about a topic you love. (1 point each)
  5. A wildcard blog – maybe a ranter, maybe a raver, maybe one that gets you all riled up! Find the craziest blog you can. (3 points)
  6. A blog that you think is full of crap! (5 points)

Post some of your favourite blogs in the comments below.

Links

Technorati on Twitter

Twittorati

Blogs Canada

Canoe.ca Blogs

This post was originally created for the Digital Media Project, a joint project of UBC School of Library, Archival and Information Studies and the Irving K Barber Learning Centre. It has been modified from its original form.

Categories
Working

Calling all entrepreneurs!

Are you planning to start your own business someday? Maybe your management professor expects you to know all about Gantt charts, and you haven’t a clue. Perhaps you see many job postings in your field that ask for “project management skills.” Eventually you’ll be applying to those jobs. What does project management mean in the context of your workplace someday, or even now in the context of your life as a digital, networked student?

Have no fear. Project management (PM) can seem to be a big, scary topic, and it’s true that some of the tools out there come with a big pricetag and a scary learning curve. But at its heart, PM is really just a logical way to approach a big project by breaking it down into many smaller projects, each with its own deadline and resources allocated to it. The good news is that you probably already do this, maybe without realizing it, any time you have a big class project to complete! The challenge comes when you have such a big project that even the task of breaking it down into steps seems overwhelming and even paralyzing. Especially in the world of business – where clients must be billed exactly, scarce resources allocated fairly, deadlines met, and employees’ time delegated without being micromanaged – being able to manage a big project effectively can be vital. No wonder employers ask for it in job postings! What better place to learn about it but now, when there’s no pressure from the boss looking over your shoulder? Try one of these for your next multi-step and/or group project for a class.

There are dozens of project management software options – click here for a quick overview and comparison of each one’s capabilities. I’m not going to try to review them all, but I tried a few, and here are some comments on a couple of good introductory ones.

Zotero: weird name … easy bibliographies

Lots of (smart!) people use RefWorks or EndNote to help them manage their citations and create bibliographies for assignments. You may have even attended an instructional session with your prof or at a library on how to use one of those. Thus, you may ask, “why bother using Zotero?” There are lots of great reasons:

  • Zotero is free! You don’t have to pay a cent for it, and that also means you can keep using it once you leave UBC or whatever university has a subscription to one of the paid citation managers.
  • It resides right on your Firefox browser and captures information from the Web.
  • The interface is designed with you – the Web surfer – in mind. You can surf the Web and save items at the same time, without having to do complicated logins.
  • Zotero allows you to tag, write notes and attach files to your items, drag and drop, mark up PDFs and web pages, and more.
  • Finally, in my personal opinion, I find the user interface far easier and intuitive to use than some other citation managers!

The more you know about it, the more you’ll love using it.

What exactly is Zotero?

The name is loosely derived from an Albanian verb meaning “to master”. It was developed by some very smart people at George Mason University.

Zotero is an open source Firefox Add-on which can be easily installed on both your private computers and those in university labs. It works on Windows, Mac, and Linux platforms. It allows you to collect, manage, and cite research from all types of sources. Zotero can “sense” the bibliographic information stored in webpages such as Amazon, Google Books, and Library catalogs (e.g. WorldCat or the UBC Library Catalogue). It also captures papers from Google Scholar or from subscription-based online databases, such as Web of Science or ABI/Inform. When you have all your sources collected, you can easily add notes, link to PDFs or full-text of resources, and generate bibliographies automatically in wikis, blogs, Microsoft Word and OpenOffice Writer.

Convinced? Read on to get started!

Spam prevention powered by Akismet