
Ultimate goal: to create a dance that your classmates could learn, perform, to be showcased in our virtual dance performance in mid-June “Hands Down, We Did It!”
Ms. Isabelle will review all the solos created by April 24 and decide how to best proceed:
- Decide which dances are appropriate & ready for others to learn.
- Decide which dances should be learnt in the next few weeks, based on the number of strong submissions. If there are many options, the other dances will be offered in the next round for the dancers to learn.
- You can do this choreographic project even if:
- you DO NOT want your classmates to learn and perform your dance, but you want the experience choreographing. If so, make sure to tell me that this is your intention.
- you are not receiving a choreography credit. This is meant for both the dancers & the choreographers. The expectations are greater for students receiving a choreography credit.
A sequence of steps to help you with the process of choreographing a solo (based on the choreography blueprint, but altered for this project)
- Get a notebook or write on your computer all your ideas and process. ALL your work needs to be in one place.
- Have the dancers you will be choreographing for in mind from this point onwards. You are choreographing this piece for them.
- Pick a dance style.
- Decide on a theme/storyline/idea/concept to drive your dance.
- Additional requirements for students receiving a choreography credit ONLY:
- Choreography 11-12 Students: Justification of Choreographic Choices
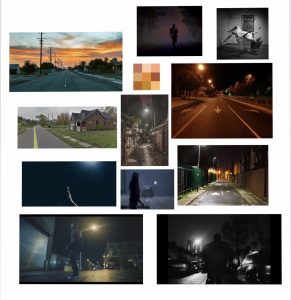
- Create a mood board similar to the one below to give you ideas of the mood, intention, costumes, movements, etc.
- Additional requirements for students receiving a choreography credit ONLY:
- Do you want this piece to be performed outside, inside, or it does not matter? Take into consideration the different environments and flooring when you choreograph.
- Pick a piece of music that inspires you and goes with the theme & dance style you picked.
-
- It must be appropriate: no swear words, no derogatory terms, no inappropriate subject matters such as sex and drugs, no promotion of violence or hatred towards one self or others. Make a smart choice.
- Remember who is dancing your piece, their age & maturity level.
- Don’t be afraid to use different types of music such as instrumental, electronic, classical, etc.
7. If there are any lyrics to your song, email Mrs. Isabelle to ask for approval.
8. Edit your piece of music now, before starting to choreograph following the given length guideline I gave your class.
-
- If this is new to you, the best place to start would be by watching YouTube instructional videos on how to use GarageBand.
- If you need help editing your piece, please email me what you would like and I will try to help you do it. I will need a 48-hour turn-over.
9. Email Ms. Isabelle your first completed edit of your music for approval.
10. Map out your entire piece of music outlining the following on a separate page of your notebook:
-
- Each music section with # of counts for each and its tempo and/or feeling.
11. Map out a general idea of what you would like happening in each section above.
12. Watch videos of dances you love for inspiration regarding movements or formations. Take notes of anything and everything you love!
13. Improvise to your music to see what movements come to you naturally to this music.Take notes or film movement sequences that you love! Take into consideration that you have a limited amount of space if this is danced indoors.
14. Choreograph your solo – for best results, follow this sequence:
-
- The ending.
- The beginning.
- The middle.
- Make sure you have a beginning pose and an end pose.
- Safety first! Remember that the dancers will not dance this in a dance studio. Turns and leaps are not encouraged.
15. Visualize what you have created and see if it will work before filming yourself doing it to give to the dancers.