This post is for you if you’re a globetrotting student that is crazy enough to bring their own specialized equipment across the world. Whether it’s instruments, bikes, or other gear, your education has provided the skills to get your life across the pond at minimal cost.
Here’s my personal example of “Things I didn’t need to bring but wanted to”. Most of these are items I figured would have high mark-ups in Zurich if I were to buy them locally (spoiler – turns out that includes pretty much everything):
- Full road bike with touring accessories and tools
- Touring panniers, helmet, shoes, cycling clothes
- Soccer and Futsal boots
- Fly fishing rod, reel, and tackle
- Trekking essentials – boots, cooking kit, knife + field sharpener (invaluable, as it turned out),
I bought my itinerary through a travel site that I cannot recommend to anyone, despite being an absurdly low cost (~$350 CAD one way to Zurich). The journey was three separate flights with separate security checks at each airport, totalling 25 hours to get here. I had to call each of my three airlines to confirm maximum luggage sizes. On the plus side, I was somehow afforded a free checked bag on top of the one I purchased, so my limits were as follows:
1 checked bag at 20kg,
1 checked bag at 15kg,
1 carry-on and 1 personal item totalling 10kg for both
I’m guessing most people will be weight limited rather than volume limited unless you want to bring a sleeping bag or gigantic teddy bear. This posed a problem for me, as most commercial bike boxes were 10-15kg by themselves and priced at $500-$800.
Protip: As cycling season rolls in, some shops can provide double-corrugated cardboard shipping boxes for bicycles when needed. These boxes are within the dimensional limits of checked luggages for most major airlines, so you just need to figure out how to pack them effectively. They weigh in at ~4kg and are priced at $0 + numerous thank-yous.
My next problem was transportation through all my security gates. I didn’t want to drag the thing or be limited to those airport carts. The next idea was to install a set of lightweight wheels. UBC is a treasure trove of useful spare/scrap materials, from which I found a set of rubber cart wheels, structural PVC foam, and PVC pipe. The MECH machine shop had scrap rod stock and hardware to bolt it all together. Here’s the first mockup:
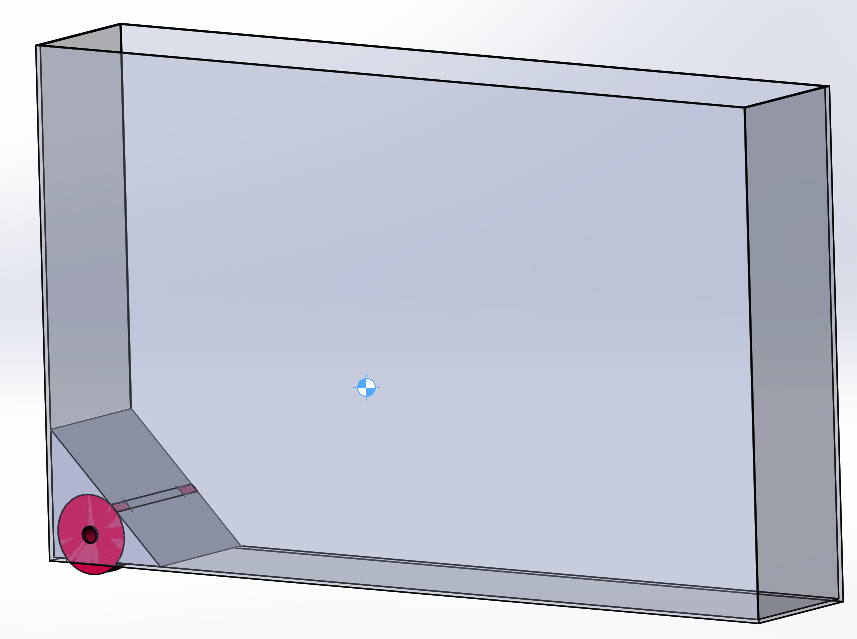
First box mockup for dimensioning and cutting templates, approx. center of gravity marked
I wanted the box handles to sit naturally at my hand when I walked, creating just enough tilt to get the wheels rolling. Placing the wheels on the corner allowed for less-squirrely control and more adhesive surface area to bond to the box walls. To minimize the risk of catching edges or creating problems for luggage personnel, I hid the whole assembly within the box (improved aerodynamics too, ya know).
My main concern was smooth load transfer between the axle and cardboard walls. Cardboard is fairly good for abrasion resistance but I’d be putting the structure under bending . The PVC foam was a good material for high bonding surface area, stiffness, and low density. It took a while to find an adhesive that could confidently bond PVC to cardboard. A larger-diameter PVC pipe was used to house the thin aluminum axle to reduce stress concentration from foam to wheels, with aluminum bushings bridging the space between the axle and pipe.
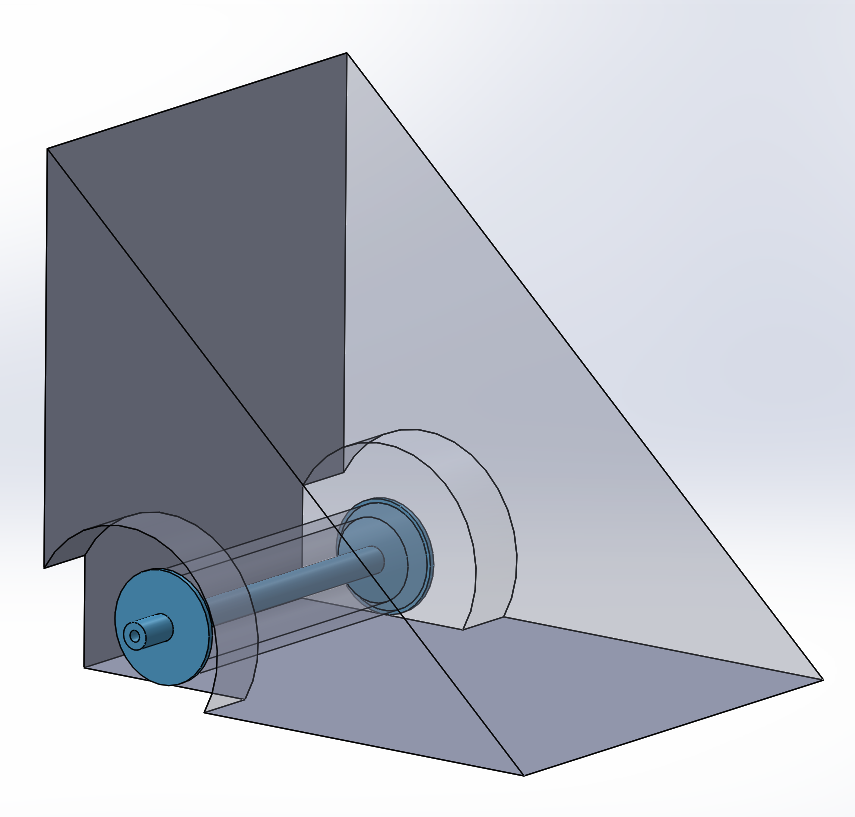

Foam insert with wheel axle; CAD versus quick-&-dirty assembly. I realized it’d be impossible to install the solid foam chunk so I split it.

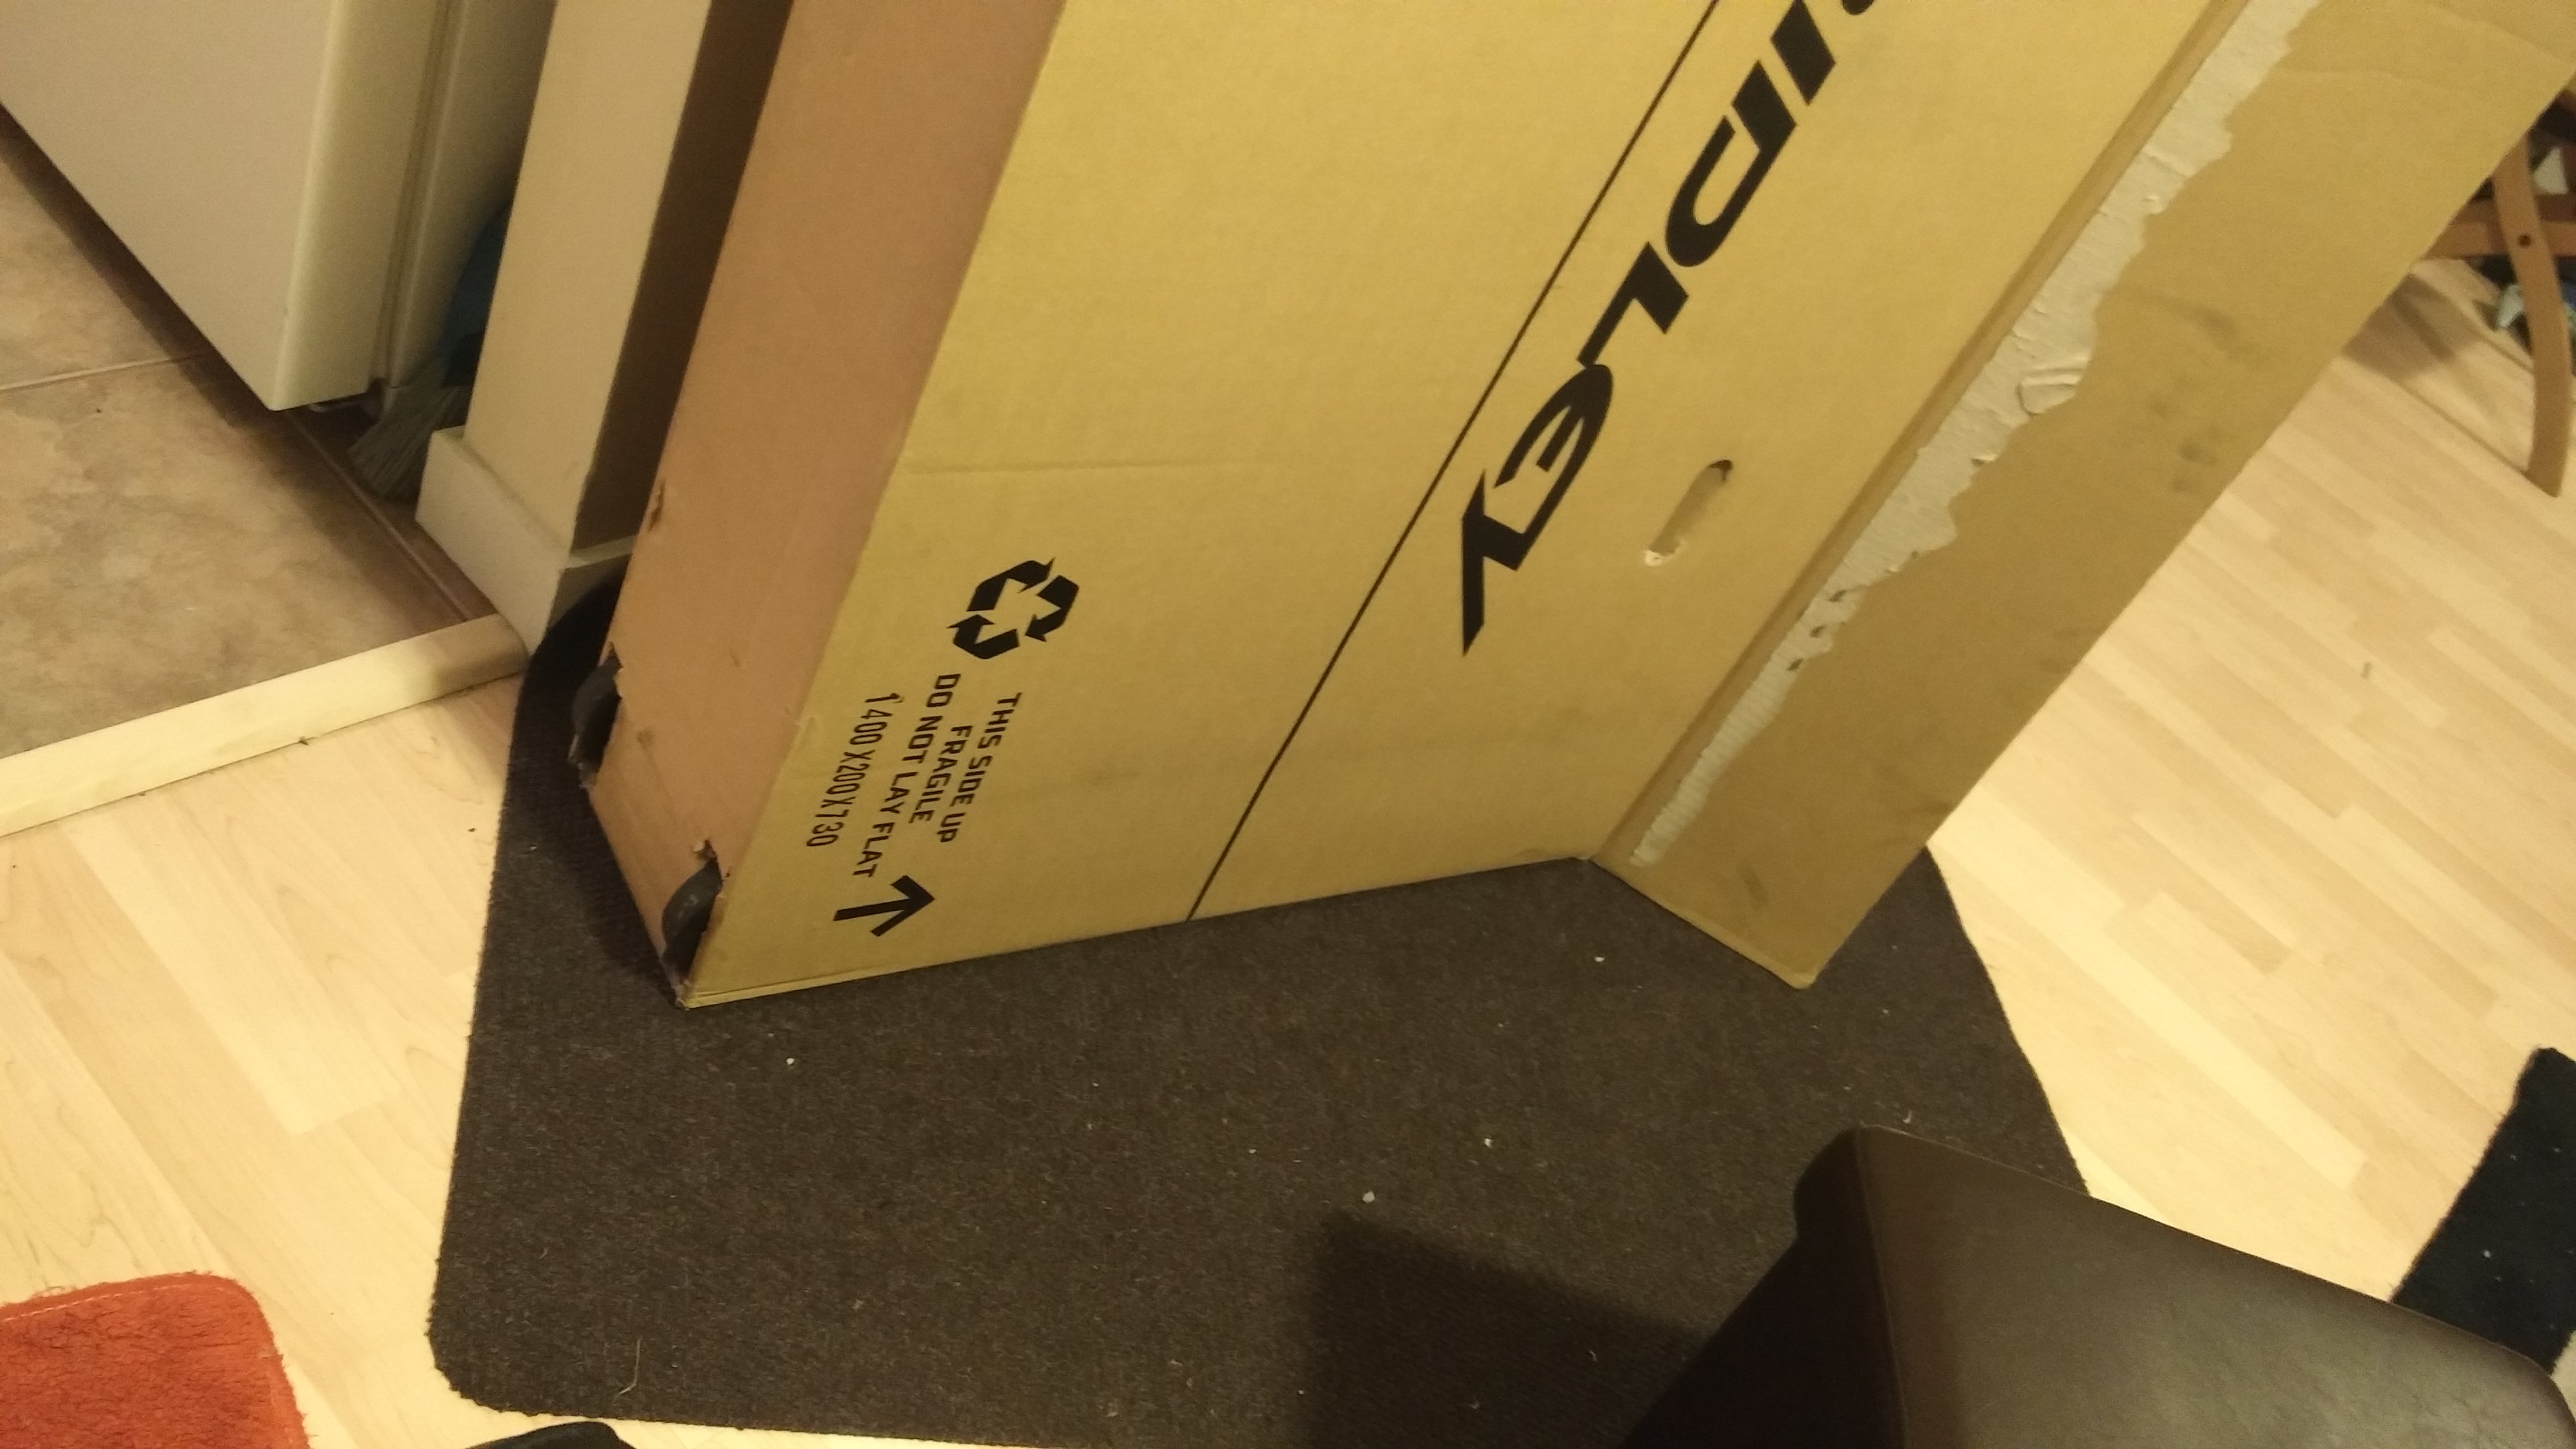

Packing night, wheels installed, and obligatory decals
Wheels were screwed into the ends of the axle loosely, so they could rotate independently for better steering. I loaded the box with weight over the axle as much as possible to minimize bending loads. Spare hardware was brought along in case the whole thing fell apart but the journey went smoothly. Unfortunately and despite my extensive (read: sparse) napkin calculations, some yielding occurred by the end of the journey between the PVC pipe and foam. I never considered bump/impact loading through the foam and should have added adhesive to the PVC tube for full bonding with the foam, rather than just press-fitting it.
The box survived the various layovers and multiple TSA inspections. The idea is to keep it around and get other exchange students to leave notes and stupid comments on it for the trip home.
Now that Spring’s arrived, I’ve taken the bike a few hundred kilometres around Switzerland and Germany thus far. It really is one of the best ways to explore this country, so whether you bring your own or rent one here, I’d highly recommend cycling for any European exchange.
Classes, cultures, and travels for the next post. Ciao for now!
Jason