Tag Archives: STEM

Squishy Circuits


TELL 3C TCs at ‘play’

whatisit.png

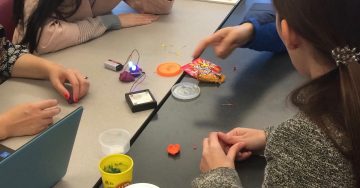
Squishy Circuits is a hands-on way for students to explore electrical circuitry using simple, readily available materials including dough (conductive and non-conductive playdough), LED lights and batteries. Students can construct their understanding of electric circuits and even design and create their own inventions. Through a play based approach students can discover simple, parallel and series circuits and important concepts including conductivity, short circuits, voltage.


Why-is-it-relevant-360x82.png

Hands-on, minds-on exploration of concepts, like electricity and circuitry, support a more inquiry-based approach to teaching and learning and are in keeping with BC Curriculum. Science content and curricular competencies can be supported through activities like Squishy Circuits. When students work together to co-construct their knowledge, they are naturally developing various core competencies including communication and critical thinking. Squishy Circuits can be used at many different grade levels depending on the curricular/learning purpose the teacher has in mind and the prompts provided for students to get started!

When provided with simple materials and perhaps a prompt or challenge, students can design, plan and carry out their own science investigations in keeping with an integrated ADST (applied design skills and technologies) approach. See this article in the National Science Teachers Association for further information about an investigative approach to science learning.

I have found that students can learn a great deal when provided with time and materials without ‘over prompting’. The teacher, as guide and facilitator, can provide “just in time” support to help students extend their learning. These prompts might include providing key vocabulary to help develop literacy within the subject/content area, they might also be to help propel or advance learning by helping students avoid ‘hitting a wall’.

For more resources, please visit:

Squishy Circuits Guide – University of St. Thomas


how-to-get-started-360x80.png

There are many ways for a teacher to get started with Squishy Circuits depending on your subject area and lesson objectives.

There is a Squishy Circuits kit available for borrowing from the UBC Education Library. Kits and materials can also be purchased through the Squishy Circuits website (they also have tutorials, quick start guides and dough recipes) or you can find electronics materials in bulk through electronics supply stores including RP Electronics in Burnaby or Lee’s Electronics in East Vancouver

You can make your own dough or purchase playdough (naturally conductive due to water/salt content) and plastecine or modeling clay (non-conductive) at toy stores or dollar stores.

Once you have your materials, it’s time to plan for the learning!

A sample lesson plan…

Or, be a little more inquiry-oriented in your exploration. See Lynda’s blog for some ideas!

You and your students will likely start thinking about and looking for extensions once you’ve had a chance to play:

See also MIT’s Soft Circuits Guide for information about FABRIC circuits!!

Paper Circuits (make-and-take circuits using conductive copper tape – tape also available at local electronics stores or online)


videopng-360x61.png

Leave a Comment

Filed under AppliedDesignSkillsTechnologies, Resources

Ozobot: Smart and social robot

Ozobot is a miniature smart robot that can follow drawn lines or roam around freely, detect colors and can also interface with all the popular programming languages (especially Python), and it has Bluetooth for downloading programs! With Ozobot students will have hands-on opportunities to learn about robotics and programming while working on STEM/STREAM (Science, Technology, Reading, Engineering, Arts and Math) applications.


Ozobot is a simple and fun way for kids to learn about basic or advanced programming and coding practices.

With Ozobot, students from kindergarten to grade 12 can begin learning about the realm of robotics. Ozobot allows students to create routes or adventures for their robot with colored markers and codes. In fact, students can begin learning about robotics using the colored markers and then advance into coding as they begin to understand the programming process. Ozobot is thus an excellent tool to use in STEM/STEAM classes to engage and inspire your students!
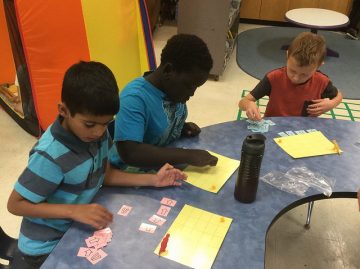

By using the mat that comes with the Ozobot Evo Education Kit, teachers and students can observe how this smart and social robot reads and interacts with different circumstances. In this case, you can use the Evo app to control and monitor your Ozobot Evo by designing custom blocks and building a sequence of events.

Check out the Teacher’s Guide to explore some ideas on how coding activities can be integrated into the classroom.


All Teacher Candidates can sign out a kit of Ozobots from the Education Library to use in their practicum classrooms. Visit this catalogue to view when the kits are available and to sign them out.

Before you look for resources, figure out the model of your Ozobot – Bit or EVO

Next, choose how you want to introduce the Ozobots to your students. 

  • Are you going to play games that don’t require the Ozobots first?
  • Are they going to practice drawing lines and following their own pathways? USE THIS CODES CHART
  • Are you using the app to have students block code instructions?

videopng-360x61.png

x=2

Reference
Ozobot teacher’s guide. (n.d.). Retrieved May 15, 2017, from http://files.ozobot.com/stem-education/ozobot-teachers-guide.pdf

Colour Codes Bot Camp (August 2018). Retrieved April 11, 2018, from https://youtu.be/uRsFoAX4rGA

Ozoblocky Bot Camp (August, 2018). Retrieved April 11, 2018, from https://youtu.be/mHAJgIFlfGM


Images obtained from https://ozobot.com/press-kit 

Leave a Comment

Filed under AppliedDesignSkillsTechnologies, Not Subject Specific, Resources

Unplugged Coding : integrating coding activities in your classroom


cc Kathy Cassidy

whatisit.png

Unplugged Coding is a collection of learning activities that introduce coding and programming through engaging games that only use cards, crayons, markers, etc. For younger students, teachers can skip the detailed concepts of computer coding and give them a better understanding of basic computer science knowledge and inspire them for future exploration. For all learners, unplugged activities can help build computational thinking without the need for digital devices. For more in this blog about coding (both plugged and unplugged) and links to BC curriculum, please visit the ‘Coding in your Classrooms’ post.


Why-is-it-relevant-360x82.png

Through Unplugged Coding activities, students will be able to develop computational thinking through concepts such as binary numbers and algorithms without using computers or other devices.

Unplugged coding meets Plugged coding: Scratch is a visual programming language. For a brief introduction to Scratch, have a look at Drag and Drop Programming: Scratch. In There are also some unplugged scratch coding cards you can use in the classroom for an analog approach. You can find a teacher’s guide for using Scratch cards in your classroom on 8 ways to use Scratch Coding Cards in Your Classroom.


how-to-get-started-360x80.png

Interested in integrating Unplugged Coding into your classroom? Interested in moving from unplugged to plugged (via visual programming)? Here are two websites that might be useful in developing your lesson plans:

https://code.org/curriculum/unplugged

https://www.csunplugged.org/en/topics/

http://scratched.gse.harvard.edu/stories 

You might also try these printable ‘scratch’/visual block coding cards. They can be used to introduce visual programming and build algorithmic and computational thinking skills during morning messages, transition or sponge activities or when introducing a lesson. English from ‘ScratchEd‘ or French from Code BC

Or this kinesthetic activity, The Thirsty Robot, where students act as robots and programmers, give and receive commands, encode and decode programs (can be adapted to multiple levels).

For grades 6-9 learners, this series of resources (student and teacher resources) from the Victoria School District helps to build computational thinking and computer programming through unplugged activities.


videopng-360x61.png

Leave a Comment

Filed under AppliedDesignSkillsTechnologies, Resources

Sphero: a coding, ADST & STEM learning robot

whatisit.png

Sphero – a programmable robotic sphere that is not only fun to play with but also an excellent access point for students of any age to explore coding. Sphero can be paired with a smartphone, ipad or tablet and coded using ‘visual programming blocks’. While the apps that help power Sphero are free, the Sphero itself is not inexpensive. I’ve also been experimenting with ozobots that offer some of the same functionality at a lower price and can be coded with visual blocks, java script and python allowing for differentiated coding opportunities!


Why-is-it-relevant-360x82.png

“Sphero engages students in a hands-on learning experience that can challenge them at different levels. The remote robot provides an interactive platform to develop competencies in planning, problem solving, testing, and making. Students have the opportunity to collaborate to programme Sphero to follow certain paths. By using Sphero students can become familiar with using block coding, angles, measurement, time, distance, and speed.

With a variety of control methods, Sphero can be used for a variety of ages and classes. Sphero can enhance student learning in physics, math, computer and technology, and robotics classes. It is a great introduction to coding where students can see the results of their work right away as they take on different challenges.” ~ Bryce Kicia, Secondary TC BEd 2017 (who used Sphero on practicum)

Consider creating a ‘design challenge’ using Sphero as the motor (The Sphero website has an example of a chariot challenge.. Consider: How can you/your students take this to the next level? Perhaps open up the challenge to include any type of vehicle (yes, the sphere is also waterproof!). Students can work together to use the iterative design process to design and create their own land or water vehicles using various found materials and then use  the Sphero as the motor to test their prototypes.  Once satisfied with the vehicle, they can then program a path using drag and drop programming (use of such programming language is included in Grades 6 – 9 of the BC ADST curriculum and can be incorporated even in the early primary years). A group of grade 4 students in Langley recently created their own games using sphero.


how-to-get-started-360x80.png

Once you’ve purchased a Sphero, download one of the free apps (itunes or google play). I recommend ‘draw and drive’ as a good starting place – to get used to how sphero moves. From there, I like ‘lightning lab’ to begin coding!

Be sure to visit the Sphero Edu website for access to a wealth of resources you can use to plan, prepare and teach.

Video Tutorial (Vimeo has several tutorials for Sphero):


videopng-360x61.png

Leave a Comment

Filed under AppliedDesignSkillsTechnologies, Resources

W3C Schools: online web tutorials

W3Schools (The World Wide Web Consortium)

is a website for web developers, with tutorials and references on web development languages such as HTML, CSS, JavaScript, PHP, SQL, W3.CSS, and Bootstrap, covering most aspects of web programming. Click here to get to the homepage.

It’s one of the best way to learn how to develop a website, since w3c:

  • Is and will be a  completely free developer source.
  • Offers thousands of code examples.
  • Focuses on simplicity and straightforward learning.

As a teacher, it’s important to know about the technologies. W3c schools acts as a convenient, free source to learn various web development languages to improve your digital competencies.

From W3c, you can get certifications for what you’ve learned (sometimes a tuition fee is required for obtaining a certification) . In addition, you can use the W3c Schools Forum to communicate with other people who are more familiar with what you’ve been learning and could help you with your questions.

Click here to see some templates.

Here is a video of interviews with W3C staff members and consortium members at the Third W3C Web and Television Workshop,which will help you better understand how W3c works:

1 Comment

Filed under AppliedDesignSkillsTechnologies, Not Subject Specific, Open Educational Resources, Resources, Video & Video Tutorials

Drag and Drop Programming: Scratch

whatisit.png
scratch


Scratch Logo by MIT Media Lab, modified (CC BY-SA)

Scratch is a simple drag and drop programming language for kids of all ages to learn the basics of coding. It is free and available both as a web and desktop application. ScratchJr for ages 5-7 is available on Android and iOS tablets. With Scratch you can create anything: animations, stories, narratives and games to which hardware such as the MakeyMakey can then be connected.

Features of the latest 2.0 Scratch version:

  • Student and teacher accounts
  • Cloud data
  • Drag and drop coding blocks
  • Upload files from computer
  • Draw your own elements
  • Custom blocks
  • Video sensing
  • Vector, Bitmap and Paint editors
  • Sound editor
  • Record project video
  • Project sharing

Why-is-it-relevant-360x82.png

Scratch is a simple and fun way for kids to learn about the basics of programming/coding and to practice computational participation. Using custom blocks that one can drag and drop, you can build a sequence of events and essentially code the actions to be performed by a certain element. You can add elements from the Scratch library, upload from your computer or draw your own. With ScratchJr kids even as young as 5 years old can learn to code! Visual programming, like that used in Scratch is relevant to the BC revised curriculum, in particular, the ADST curriculum.

ScratchEd provides teachers with an online space where they can view teaching resources for Scratch, engage with other educators and share their own stories. There, teachers can find examples of how they can apply Scratch to engage students in their subject matter and get inspired.

Check out this Co-Creative Activities for the 21st Century Kids guide to explore some ideas on how coding activities, both unplugged and plugged (using Scratch) can be integrated into the classroom.

Also take a look at the Creative Computing guide created by member of the ScratchEd research team at Harvard.


how-to-get-started-360x80.png

1. Go to the Scratch website or download the desktop program.

  • If you go to the website, you can either just try it out  (which won’t save any of your work) or first join Scratch and then create (this way you can save and share your work).

To join, click on the blue “Join Scratch” button and fill out all the required information. You will also have to confirm your email.

After signing in, from the toolbar on the top of the page click “Create” start a new project or “Explore” if you first want to look for some inspiration.

  • If you decide to download the software to your computer, click here and then choose for which platform you are downloading.

Open the file that you downloaded and install it.

2. The interface of the web based and desktop application are the same.

  • Drag and drop code blocks from the “Scripts” menu (outlined red) to the building space on the right. Connect blocks to define a series of actions.
  • Add a stage backdrop and new characters/objects called sprites (outlined orange) from the Scratch library, upload from computer or draw your own.
  • As you create new sprites click on them to program their actions.
  • View you final project on the project display screen (outlined blue). Click on the green flag to activate your project and the red stop sign to stop it.


videopng-360x61.png

Curious about creating a simple animation from scratch (no pun intended)? Below is a video demonstration using Scratch to build a solar system. The “remix” template is provided by the UBC Physics and Astronomy Outreach team. For detailed instructions, please check out their physics-at-home activity, with new challenges introduced throughout the summer. From adding comets to altering the Sun’s mass, there are many opportunities to unleash your creativity and make the project customized.

Leave a Comment

Filed under AppliedDesignSkillsTechnologies, Resources

Arduino

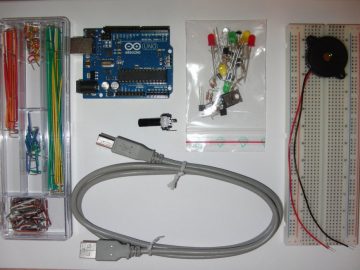
Arduino-UNO-kit


Creative Commons licensed image courtesy of redcctshirt Flickr

whatisit.png

Arduino is a small open-source electronics platform that integrates hardware and software. The Arduino board can either be purchased online or borrowed from the UBC Woodward library. The software is available for free online for Windows, Mac and Linux.

Features include:

  • Hardware is inexpensive (between $5 and $40 depending on brand and where you purchase)
  • Software can run on 3 different operating systems
  • Relatively simple programming, good for beginners
  • Open-source software and hardware

Why-is-it-relevant-360x82.png

Arduino is a very useful tool for creating various interactive projects or just exploring programming and electronics. It is an excellent application to help students develop the core competencies of critical thinking and problem solving. With Arduino hardware an instructor can create various sensing equipment for a lab activity, like a sonar sensor, light sensor or even a humidity sensor and then use the software to run the equipment and show outputs. Using this technology would be a cost efficient and novel way of running a lab where students would be able to learn even more hands on things. Students could use the hardware to create a robot that they can then control by programming commands into the software. The process of assembling the hardware teaches many things at once: circuitry,  design and troubleshooting skills. Also working with the Arduino software is fairly straight forward and therefore perfect for learning how to code. There are an endless number of projects that can be created using the Arduino hardware and software, check some of them out by clicking here.


how-to-get-started-360x80.png

1. Download and the Arduino software.

  • Choose the platform that your device runs on, Arduino is available for Windows, Mac and Linux.

  • Click on “Just Download” to download for free (or you can contribute by clicking “Contribute & Download”).

2. Then install the software.

2. Plug in your Arduino board using the USB cable.

Creative Commons image courtesy of Jens Ohlig flickr

Creative Commons image courtesy of Jens Ohlig flickr

3. Open the software and select the port to which your Arduino board is connected.

  • If you have trouble locating the port, watch a quick tutorial video here.

4. Set up an LED light following the image below.

  • For the next three steps you can find a more detailed tutorial here.

5. In the Arduino software select Tools -> Examples -> Basics -> Blink.

6. Upload the code from the software to the board and watch the LED blink.

For more information on how to use Arduino, click here to watch tutorials by Jeremy Blum.


videopng-360x61.png

Leave a Comment

Filed under Resources