Categories
Canvas Feedback Grading Learning Technology Teaching Activity

Feedback

on this page

Feedback

Providing effective and rapid feedback is imperative to student success. This section outlines best practices for communicating constructive feedback to students.

Why provide feedback?

Facilitating detailed and timely feedback can help students get more out of their learning.

Be specific so students know what actions to take moving forward.

Be prompt so that the content is still relatively fresh and relevant in their minds.

Be sensitive, and focus on how students can improve rather than just listing what they did wrong.

Formative

One approach to feedback is using formative assessments — smaller but more frequent activities throughout the course.

Design lower-stakes opportunities for students to demonstrate knowledge. The more data points generated, the more guidance instructors can provide.

Summative

Summative assessments can be useful in evaluating each student’s overall progress. When creating exams or final projects, ensure that they align with course objectives and content.

Canvas

Feedback can be delivered through Canvas in many ways.
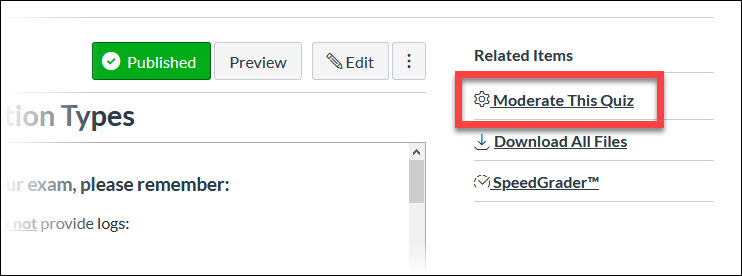
SpeedGrader

Input marks and comments in SpeedGrader.

Annotate and markup student work.

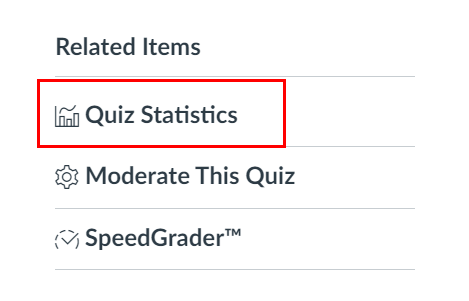
Automatic Quiz Comments

Configure automatic comments which will show based on how students responded to a quiz question — i.e. why is Answer B incorrect?

See an example of how to use quiz comments on this page: https://community.canvaslms.com/t5/Instructor-Guide/How-do-I-create-a-Multiple-Choice-quiz-question/ta-p/682

Announcement

Send out a course-wide announcement to debrief an assignment / exam / quiz.

Inbox

Send students a private message with Canvas Inbox.

Through the gradebook, instructors have the option of quickly messaging students who:

  1. haven’t submitted
  2. scored lower than x
  3. scored higher than x

OnTask

OnTask helps instructors deliver personalized feedback.

Using a single message template, instructors can set conditions to show / hide certain pieces of text accordingly.

OnTask can also pull data from a spreadsheet like a mail merge.

Peer Review

Students can provide feedback to one another as well.

Canvas Peer Review

Enable peer review in an assignment to let students read and comment on each other’s work.

iPeer

iPeer allows group members to evaluate and give feedback to each other.

Instructors can create their own questions and forms for students to fill out. Results can be exported to a CSV.

ComPAIR

ComPAIR lets students review pairs of their classmates’ assignments, side by side.

Scores for participation and performance can be synced to Canvas.

PeerScholar

PeerScholar is another peer review platform.

There is a “reflection” stage built into the workflow for students to edit and resubmit their work after receiving feedback.

Categories
Canvas Feedback Grading Learning Technology Teaching Activity

Grading

Grading

This section describes best practices for grading student work.


Setting up assessments in Canvas

Use the built-in Canvas features to make marking and calculating grades easier.

Assignments

The following can be configured in every Canvas assignment:

  1. the number of points
  2. how the grade is displayed (i.e. points, percentage, complete / incomplete)
  3. whether the assignment counts towards the student’s final grade

Quizzes

Every Classic Quiz created is set as a “Graded Quiz” by default. This means that instructors must indicate a correct answer for each question.

Alternatively, a “Graded Survey” can be used to collect responses which do not need to be marked — anyone who submits will get full credit.

Group Weights

Instructors can create different “groups” within Assignments to organize student tasks.

A weight can be configured for each group. For example, there can be a “Midterm” group worth 25% of the student’s grade.

Canvas will follow these values to calculate each student’s final mark accordingly.

For instructions on how to add group weights, please see here: https://community.canvaslms.com/t5/Instructor-Guide/How-do-I-weight-the-final-course-grade-based-on-assignment/ta-p/746

SpeedGrader

SpeedGrader allows instructors to view and grade assignment submissions in one place. It makes evaluating assignments quick and easy. NOTE: multiple people should not grade assignments at the same time, because SpeedGrader does not automatically update with the latest information for each submission.

Interface

Using SpeedGrader, instructors can quickly:

  1. See how many assignments have been graded so far
  2. See the average score for the class
  3. Cycle through each student’s work
  4. Annotate student work
  5. Add comments and feedback

More information on Speedgrader can be found here: https://blogs.ubc.ca/sauderteachingplaybook/canvas-grading/

Rubrics

For more structured grading, instructors can create rubrics and attach them to assignments.

In SpeedGrader, simply click on the rubric cells and Canvas will automatically sum up the points.

Note — rubrics cannot sum up points for quizzes, only assignments.

The Rubric page can be accessed from the left-hand course navigation menu.

More information on Rubrics can be found here: https://blogs.ubc.ca/sauderteachingplaybook/rubrics/

Canvas Gradebook

The Canvas Gradebook is a page that allows instructors to see all students, assignments, and grades in one place. Instructors can access it by clicking on “Grades” in the left-hand course navigation menu. It has three additional viewing modes, which can be changed by clicking on the currently selected mode and choosing a different one from the drop-down list. Not all settings are available in each mode. The modes are:

  • “Gradebook” – the main viewing page
  • “Learning Mastery” – assessment based on Outcomes
  • “Individual View” – assessment of individual students on separate assignments
  • “Gradebook History” – a log of grade changes

The rest of this section is focused on the “Gradebook” mode.

Columns

Each column corresponds to an assignment or quiz in the Canvas course.

The order of these columns corresponds to the order seen in “Assignments”.

Search / Filter

Use the search bar to search for specific students.

To filter students by section, select View –> Filters.

Grade Directly

Click into a student’s cell to input a grade directly.

Click the arrow to expand more options, including (1) the ability to leave comments, (2) mark an assignment as “Excused”, and (3) launch SpeedGrader.

Manual Grade Posting Policy

By default, instructors are encouraged to to use the “Manual” grade posting policy.

This means that any marks / comments input will not be visible to students UNTIL instructors select “Post Grades” in the column.

To set this policy for the entire course, click the Settings cog —> Grade Posting Policy.

To toggle this policy for specific assignments, hover over the column header and click the 3 dots —> Grade Posting Policy.

Import and Export Grades

If needed, grades can be exported into a CSV.

Bulk changes can be made in the spreadsheet and re-imported back into Canvas.

Use case — making a new column to provide students with a scaled midterm / final score, without needing to release the raw marks.

Posting Final Grades

Final grades must be uploaded to the Faculty Service Centre in order to be deemed official.

Grading Best Practices

If a student has been excused from an assignment and approved by the program office

Best practice in this case is to mark the student assignment as ‘excused’ in the Canvas Gradebook. Canvas will average the student’s other grades and not include the excused graded activity.

Categories
Assignment Experiential Learning Learning Technology Riipen Teaching Activity

Experiential Learning – Riipen

Riipen

Hear from our Riipen Community Video

Interested in using real-life examples in class, and giving student industry-relevant experiences?
Riipen is a collaboration platform for project-based experiential learning between post-secondary institutions, educators, industry partners, and students. The platform allows all parties in the ecosystem to collaborate to co-create, manage, and assess meaningful experiential learning opportunities at scale.

The Riipen team will support educators through every step – from outlining the experience and matchmaking, to project management and feedback.

Testimonials

“Over the past 3 years, Riipen has provided me an opportunity to expand my network of clients in order to give students a broader range of companies and industries to work with. Students have been able to get exposure to a variety of different industries and partners all over Canada that we would not have been able to access in the past. As an educator, it has been incredibly helpful to have the support and expertise of the Riipen team to help source clients based on the specific learning objectives of the course”.Jenny Dickson, B2C Strategic Marketing Plan (F20)

“When posting a class project on Riipen, I’ve always received timely responses from interested industry partners.” David Hardisty, Marketing Outreach Consultancy (F19)

“I have used Riipen for my strategic management course for several years. It has provided students with valuable industry exposure and experiential learning which will no doubt benefit them as they start they careers. The platform is user friendly and support is readily available for staff needing assistance. I recommend it for courses looking for live business problems and cases.”Adam Pankratz, Strategic Management Consulting Project – W21

Learn More

Access

Categories
Academic Integrity Assignment Canvas Essay Exam Learning Technology Respondus LockDown Browser Teaching Activity Zoom

Academic Integrity

Academic Integrity

A culture of academic integrity at UBC Sauder is everyone’s responsibility – we all play a part. Here you will find information, resources, and links for faculty to learn more about academic integrity, understand its role, and learn what happens when it is breached. Included are strategies and tools that will help ensure student performance is authentic and reflects their own thoughts and work.

When we speak of academic integrity in relation to faculty, we are referring to strategies and tools that ensure student performance is accurate and reflective of their own work. Sound processes contribute to upholding the integrity of students, faculty, Sauder School of Business and its credentials, UBC, and the industries we serve.

Getting Started with Academic Integrity

This is your starting point for academic integrity: frequently asked questions and essential links for faculty members and students.

For Faculty

For Students

Academic Integrity in Teaching & Learning

Learning with integrity requires knowing the expectations for academic integrity in your courses and ethically collaborating with your classmates when appropriate.

Learn more

Academic Misconduct Regulation and Process

Understanding how the academic misconduct process works is vital for faculty and for students who may be impacted by an allegation or an investigation.

Learn more

Resources for an Educative Approach

Further proactive strategies and resources to help you with academic integrity may be found here.

Categories
Academic Integrity Canvas Essay Exam Learning Technology Respondus LockDown Browser Teaching Activity Turnitin Zoom

Midterm and Final Exams

Publication Status:

  • Draft
  • Ready for Approval
  • Approved

Midterm and Final Exams

Exams are used as high-stakes summative assessments. There are a number of strategies and tools that are used for exams.

Canvas Exam Integrity Measures

  • Randomization: Randomizing the order of questions can prevent students from collaborating.
  • Single Question Display: Displaying questions one at a time can discourage students from taking screenshots, downloading, and printing entire exams for sharing elsewhere. 
  • Question Banks: The use of question bank groupings of question types, where Canvas then selects individual questions for individual students, can prevent collaborations on exams. 
  • Timer: Timed exams can ensure that students have enough time to recall responses, but enough time to look up answers or collaborate with each other.
  • Exam Design: Various exam designs can help prevent academic integrity issues in individual circumstances. 
  • Question Types: Create the exam with question types designed for integrity. Instructors should be familiar with what kind of question types are available. Review the question types and how to answer them.

Lockdown Browser

Lockdown Browser is a web browser that “locks down” what students can do during a quiz in Canvas. When students use LockDown Browser to take a quiz, they will be unable to print or copy questions, visit other websites, access other applications, or close the quiz until it is submitted. Quizzes created for use with LockDown Browser cannot be accessed with standard browsers.

You can use LockDown Browser to help preserve academic integrity in Canvas quizzes and exams:

  • Restricting what students can do in their main browser (e.g., no printing, copying, accessing other websites)
  • Locking down in-person assessments, along with in-person invigilation
  • Locking down online assessments, along with web-conferencing invigilation
  • Sharing exam results and feedback with students in a locked-down environment

We do not recommend using LockDown Browser with Zoom. The tools were not designed to be used in coordination, and combining them can trigger challenging technical issues for a significant number of students. You can read more about our recommendation against using Zoom with LockDown Browser for invigilation for additional information.

Lockdown Browser does not work well with assessments that:

  • are open book
  • require students to upload file(s) or photo(s)
  • contain a lot of images – if an image breaks, there is no way for students to right-click to open the image in a new tab
  • require Excel and the use of formulas – Lockdown Browser’s version of Excel has limited capabilities

(source: https://lthub.ubc.ca/guides/lockdown-browser-instructor-guide/)

Turnitin

Turnitin is a plagiarism prevention tool that helps you check the originality of student writing. Turnitin generates a similarity score for each student, which can be used to assess how original their work is. You can also use Turnitin to provide marks and detailed feedback for each student and re-use common feedback across multiple student submissions. Students may use it to check their work to avoid accidental plagiarism before submission.

Sauder Learning Services has modified Turnitin software that turns each student’s response into a PDF. A folder containing all students’ PDFs will be provided to the instructor for uploading to Turnitin. In this way, instructors may use such a folder to check for submission similarities between students.

Integrity Pledge

Learning Services will copy an Integrity Pledge into a course several days before the actual exam date (if not earlier). There is also a Tech Check course available for students to self-enroll. This tech check course is intended to:

  • Familiarize students with the “exam experience”
  • Help students identify any technical issues that may arise during their actual exam
  • Ask students to agree to the following integrity pledge:

Learning Services also adds a shorter integrity pledge to the beginning of each exam:

Instructors can use this Canvas announcement template to encourage students to self-enroll in the tech check course prior to the exam.

Before the Exam

Exam Preparation, Build, Configuration, and Access

To assist instructors in preparing for an exam, here are some resources to show them how to:

1. Prepare for an online exam

Technical Checks — Instructors and students can self-enroll in the “UBC Sauder Exam Tech Check Course” to identify any technical problems prior to the exam. This course informs students on what to expect when writing a Canvas-based exam and includes an “Integrity Pledge and Tech Check” quiz that will mimic an exam’s settings and question types, ensuring that students become familiar with the experience.

Exam Rooms — The Undergraduate Office will be facilitating the booking of exam rooms and hiring of Invigilators. Please email ugooperations@sauder.ubc.ca to begin the process.

2. Build the exam

Learning Services requires 10 business days of lead time to help an instructor build an exam. Requests may be made by emailing help@sauder.ubc.ca

If they would like to self-serve, here are some resources:

Even if the instructor is building their own exam, Learning Services will add an integrity pledge to the exam. Exam-saving reminders will also be added that guide students on how to check if their answers are saving in real time during the exam. In order for Learning Services to know when to add these components, contact help@sauder.ubc.ca to let us know that your exam is ready for them.

3. Configure the settings

The following Canvas quiz settings are recommended — Learning Services will review every exam and configure accordingly. If an instructor is taking care of their own exam, these might be helpful guidelines as well. 

  • Include the term and date in the exam title (e.g. 2021W2 COMM 333 Final Exam – April 2, 2022).
  • Clarify in the instructions what students are and aren’t allowed to use in their exams.
  • Set the time limit as the exact exam time (i.e. a two-hour exam will be 120 minutes) 
  • Do not check the boxes:
    • “Allow Multiple Attempts”
    • “Let Students See Their Quiz Responses (Incorrect Questions Will Be Marked in Student Feedback)”
  • Once the exam is published, ensure that its column in “Grades” is set to manual —  this will ensure that students do not see their marks immediately upon submitting the exam.

4. Give students access to the exam

Upon publishing, a Canvas quiz is assigned to “Everyone” in the course by default.

Instructors can configure the exam to be assigned to different students at different times/dates — i.e. one section in the morning, the other section in the afternoon.

To set up exam times and dates:

  • Leave the due date blank.
  • Set the “Available from” to be the exact time/date when the exam is scheduled to start.
  • Set the “Available until” time to be 1 hour after the exam is supposed to end. This gives Learning Services a “cushion” to extend student timers in case they run into any technical difficulties — please note that students will still be restricted to the time limit. 
  • Use the +Add button to configure other sittings.

Once again, Learning Services is happy to review all of these settings as well!

Adjusting student attempts and time during an exam

Besides configuring the availability, instructors may also need to extend the time allowed per exam attempt or add an extra attempt.

Centre for Accessibility Student Access

The steps above must be done for CFA students as well, since they are allowed extra time. In addition, if you are using Lockdown Browser on your exam, the CFA have requested instructors to log into their account on the CFA Website and under additional information space for the CFA students, input the Proctor Exit code for the exam season. This is the code that the invigilators use to exit Lockdown Browser during an exam to troubleshoot technical issues. A member of the Learning Services team will reach out to disclose this proctor exit code for you to enter in the CFA website. Please include in the instructions that the code is for invigilator-use only. This extra step is only applicable for Lock-Down browser exams.

Best Practices for Delivering Online Tests and Quizzes

Tips for Instructors

  • Offer a Practice Test:
    • Include the same question types that will be asked on a real exam.
    • Use similar settings to those that will be used on a real exam, e.g., timed tests vs. un-timed tests, multiple vs. single attempts, use of Lockdown Browser
    • Ensure the students complete the practice test as close to the exam date as possible so they have the most up-to-date software for the exam.
    • Send a follow-up email to all students who have not completed the practice test a day before the exam (this can be done through the Canvas Gradebook).
    • Use similar settings in quizzes that will be used in the midterm(s) or final so students are familiar and comfortable with the online exams and settings.
  • Request a review of the settings before the exam is published (help@sauder.ubc.ca).

Tips for Students

  • Before the exam, remind students to:
    • Verify they have a stable network connection before starting the exam. Get students to connect to UBCSecure (or UBCVisitor if UBCSecure is not working)
    • Set their phones and other WiFi-enabled devices to airplane mode to minimize load on the wireless network.
    • Use only supported browsers: https://community.canvaslms.com/t5/Canvas-Basics-Guide/What-are-the-browser-and-computer-requirements-for-Canvas/ta-p/66
    • Shut down all other applications & activities on their computer.
    • Disable third-party browser security add-ons or applications.
    • Don’t use the browser’s Back or Forward buttons to navigate an online exam.
    • Preferably don’t use mobile devices to take the exam.
    • Keep checking whether their answers are saving.
    • Read all instructions and questions carefully.
    • Don’t forget to submit the exam when finished!

Adapted from:

UBC Resources on Online Assessments

Other Recommended Resources

Online Assessment in Higher Education guide from the University of Calgary


“This guide aims to provide an evidence-based background on the prevalence, benefits, challenges and importance of online student assessment in higher education. Outline strategies and recommendations from research and practice that can be used to mitigate challenges of assessing students online. Encourage instructors to thoughtfully design student assessments for use in online courses.”

Designing Online Assessments module from the University of Calgary.

“This online module provides useful information about how to implement different types of assessments that are aligned to course learning outcomes.”


Alternatives to Traditional Testing  from the Center for Teaching & Learning at UC Berkeley

Alternatives to Traditional Exams and Papers from the Center for Innovative Teaching and Learning at Indiana University Bloomington

Designing Effective Online Assessments from the National University Singapore

Encouraging academic integrity in remote, online, and in-person learning contexts from the Centre for Teaching Excellence, University of Waterloo.

Respondus – Quiz Authoring Software

Respondus Quiz is an assessment software for quickly creating quizzes that can be imported to a Canvas course.

Instructors can use Respondus to create Canvas quizzes by uploading Word/text documents as well as publisher questions from the Test Bank Network.

1. Download and install Respondus

Instructors who have not used Respondus Quiz can download it using the following steps:

  1. Go to the: Software Distribution site, and sign in with their CWL.
  2. Select “Respondus Quiz” from the Faculty tab.
  3. Click “Add to Cart”, then “Check Out.”
  4. Follow the prompts until they reach an Order Summary screen with a download link.

Instructors should take note of the following when they appear during the download process – this information will be needed during installation:

  • Institution Name: University of British Columbia
  • Local Support Contact(s): lt.hub@ubc.ca
  • Installation Password

Note that the authoring software currently only works on the Windows platform.

2. Create quiz banks and Canvas quizzes

If the instructor encounters any issues with Respondus, please email help@sauder.ubc.ca.

During the Exam

Once the exam is built and the logistics are prepared, students will be assigned to a classroom and required to bring their own device, usually their laptop, to write the exam. The instructor is expected to be on-site during the exam.

This video summarizes what instructors can expect during an exam.

In-Person Canvas Exam Support

Instructors must be in attendance during exams. Learning Services will provide live technical support.

Please note that Learning Services does not currently have the capacity to provide live support for take-home exams, assignments, or Centre for Accessibility students who are writing outside of the main exam sitting. Support for alternate exams is available if:
Exam is no longer than 3.5 hours
10 or more students are writing the same exam
Exam is scheduled to begin and end between 8am and 10pm PST
Instructor is on-site

Please note that only 1 alternate exam per course will be supported.

1. What to Expect

30 minutes prior to the exam, all the invigilators and instructors will meet to go over the requirements of the invigilators, room assignments, how the exam is set up and the specifics of the in-person exam. Invigilators will then go to their assigned rooms. Approximately 15 mins prior to the exam, students will be let into the room to set up their devices and troubleshoot any technical issues prior to the exam start time. When the exam begins, the instructor or invigilator will release the password to the students in their classroom. Students will enter the password and begin to write. Invigilators will monitor the student screens.

At least one day before your exam, Learning Services will create an MS Teams chat with instructors and invigilators. This chat will be used as a communications back-channel to resolve any technical issues that arise during the exam as well as to clarify any exam policies. Instructors are expected to be available on MS Teams chat during the exam to make any high-level decisions.

Invigilators are responsible for monitoring academic integrity as well as performing basic technical troubleshooting for students, per their training. Any issues that invigilators are not able to resolve will be escalated to the Learning Services team.

If a technical issue is unresolvable, a floater invigilator will escort students to the backup computer lab booked for each exam.

More information on MS Teams is available HERE.


2. Exam Bulletins Page


An “Exam Bulletins” page will be set up in each Canvas course — this will be linked within the exam’s instructions for students to see.

If any exam-wide issues are detected — including typos, broken links, images not showing up, and more — Learning Services will be able to update this page in real-time to provide information to students. 

This bulletins page opens in a new tab and works with Lockdown Browser-enabled exams as well. It is okay for students to have it open during the exam, and a pop-up banner will inform them if any changes are made. 

If Learning Services is supporting an exam, the following text will be added into the instructions box of the exam.

Moderating an Exam

Learning Services will assist with moderation during supported lived exams, but the following information will be useful for instructors self-serving their exam as well.

Canvas features various tools in regards to moderating exams — these can be found in the “Moderate This Quiz” link on the quiz page.

Moderate this Quiz

Once a Canvas quiz is published, a “Moderate This Quiz” link will appear in the sidebar on the top-right of the quiz page. This page displays information about student submissions and exam progress — it is also where extra time and extra attempts can be added, as well as where student activity can be monitored.

Using the “Moderate This Quiz” page

Adding Time

Time can be added to any exam attempt in progress. If a student loses time troubleshooting a technical issue for example, this time can be given back — however, Learning Services does not typically do so unless 5 minutes or more is lost.

Adding extra time for a student

Adding Attempts

Once a Canvas quiz is submitted, it cannot be re-opened. With permission from the instructor, students can be given an extra attempt in scenarios involving accidental submissions, timers running out during troubleshooting, and more. 

Student work from their first attempt will not be overwritten — however, their answers will not show up when they begin their second attempt. Usually, students are advised to simply continue where they left off. All attempts will be available to view and grade in SpeedGrader.

Adding extra attempts for students

Monitoring Student Activity

Student activity can be monitored through Canvas Quiz logs, which provide live time-stamped information regarding a student’s progress on the exam, including which questions they have read and answered. It’s important to note that while the logs provide a good overview of the student’s activity, they don’t show a perfect play-by-play of activity. Accurate logs are not available for Fill-in-Multiple-Blanks, Matching, Multiple Answers, and Multiple Dropdown questions.

The logs are also helpful in determining how much time a student actually lost while troubleshooting, since every instance of exiting and resuming the exam on Canvas is recorded as well. 

Viewing student logs

After the Exam

How to review exam submissions and begin the grading process.

Reviewing and Grading

Student exams can be reviewed and graded immediately once submitted.

Student Logs

As mentioned previously, student exam activity can actually be monitored in real-time with student logs — even if they haven’t submitted yet!

Grading Exams

SpeedGrader allows instructors to mark exams and enter grades directly within Canvas. However, it’s important to note that there can only be one person using SpeedGrader at a time — if multiple TA’s or instructors are marking simultaneously, grades and comments will not save properly. 

Grades can also be entered manually into the gradebook, as well as through a CSV.

If an exam question was configured incorrectly (i.e. wrong answer defined), Canvas is only able to regrade multiple choice, true / false, and multiple answer question types. Please email help@sauder.ubc.ca for assistance with regrading these question types. 

By default, all exam grades should have been set to manual posting so students won’t be able to see any grades or comments until the instructor posts them in the Canvas gradebook.

Exam Statistics

A statistics dashboard is generated for every quiz on Canvas — once an exam is submitted, a “Quiz Statistics” link will appear in the sidebar on the top-right of the quiz page.

By clicking on the “Student Analysis” button, a CSV of every student’s responses can be exported for further analysis.

Plagiarism and Turnitin

For exams with essay questions, instructors are encouraged to check student responses for plagiarism through Turnitin. Instructors can contact help@sauder.ubc.ca for assistance with this.

Student Appointment

Students often ask to see and review their exams after receiving their grades. To prevent exam questions from being too easily downloaded and distributed, Learning Services recommends that instructors set up an appointment with the student and share their screen rather than opening up the exam again. 

The Canvas Calendar can be used to quickly set up time slots for students to sign up for. 

Alternatives to In-Person Exams

Categories
Assignment Canvas Group Work Learning Technology Panopto Presentation Teaching Activity Zoom

Student Presentations

Student Presentations (Group/Individual)

Asking students to present their work to the class is a very effective, and often times authentic, way to assess students. Presentations can be conducted synchronously in class, asynchronously in the form of an assignment, or a combination (i.e. recorded presentation, synchronous question and answer period). In addition, presentations can be conducted offline or online, and individually or in groups.

Asynchronous Presentations

Photo by Matthew Henry from Burst

Asynchronous presentations are a way for students to take the time to develop and record a presentation and submit it via Canvas.

Individual Asynchronous Presentations

Asynchronous individual presentations are a way for students to take time to develop and record a presentation and submit it via Canvas. Sauder Instructors are recommended to use My Media in Canvas.

Group Asynchronous Presentations

Asynchronous group presentations are a way for students to have time to work as a group outside of class to develop and record a presentation and submit it via Canvas. Sauder Instructors are recommended to advise students to use ZOOM and submit in Canvas.

Synchronous Presentations (in Person/Online)

Photo by Matthew Henry from Burst

Synchronous presentations are a way for students to practice their presentation skills and create interaction with the rest of the class. For online, students can present using ZOOM as individuals or in groups. Hosts can allow students to share screens, videos, and audio. Students can identify one student to share their screen and navigate the slides if working in groups.

Online Individual Synchronous Presentations

Synchronous individual presentations are a way for students to take time to develop and record a presentation and submit it via Canvas. Sauder Instructors are recommended to use My Media in Canvas. Here are some instructions for this (insert link here).

Online Group Synchronous Presentations

Synchronous group presentations are a way for students to develop their presentation skills as well as gather experience working with teammates. Instructions coming soon.

  • Student Facing Instructions- ZOOM Synchronous Group Presentations: Here are student-facing instructions for student group presentations within an instructor’s ZOOM course room where student groups are sent to instructors’ breakout rooms and record their presentations.  Students are then shown how to access and upload their recorded video into the Canvas course Media Gallery.  The instructions are for 1 video of all students presenting and this video will be available to all students to see when in Media Gallery.
    • NOTE: Instructors will need to give all students co-host roles in ZOOM before sending students to breakout rooms and enable a media gallery in their course before students upload to the media gallery. 
    • Student Facing Instructions: Synchronous Group Presentations in ZOOM.  Please email help@sauder.ubc.ca so we can copy these instructions into the Canvas course for release to students.

Categories
iPeer Learning Technology Zoom

Group Work


Group work is easy to facilitate and assess in Canvas. Additionally, a Canvas setting can be enabled to allow students to create their own study groups as well. 

This

How to Facilitate Group Work

Set Up and Utilize Groups

  1. Review UBC’s guide on creating group sets in Canvas: https://keepteaching.ubc.ca/group-work/.
  2. You can then assign groups to assignments, discussion posts, etc. click here to see how to assign an assignment to a course group.
  3. You can also allow real-time group work within ZOOM breakout rooms.  This has to be done while you are hosting the meeting.
  4. If you have more than 20 groups, we recommend batch-uploading groups through iPeer, then syncing to Canvas (Step 6B in How to create a course in iPeer and create groups )

Let Students Manage Groups

Read UBC’s guide on how to allow students to create their own groups for discussion and collaboration: https://keepteaching.ubc.ca/group-work/#student-groups

Group Presentations

If you have in class group presentations planned, here is the approach we recommend:

  • Synchronous Groups Presentations:
    • Set up a meeting in ZOOM and name for each group.  Ensure that you change the role of group members presenting from ‘Participant’  to ‘Co-Host’.  This will allow them to share their screen or PowerPoint slides.  The group members can join remotely and present to just the instructor or the whole class.  The presentation can also be recorded to review later.
  • Asynchronous Groups Presentations:
    • For asynchronous group presentations involving students, we suggest using distinct Collaborate Ultra sessions for each group. Students in each group would be moderators with the ability to share slides, speak, control the room etc. When they are ready to present, they will record their session and it will become available for the instructor to access in Collaborate Ultra.  For instructions on set up click HERE.

Group Evaluation

iPeer is a group peer review application where instructors can customize and receive students’ evaluations of one another. These anonymized evaluations can then be shared with the evaluated student or kept confidential between the evaluator and instructor.

For more information about iPeer, see Peer Reviews page (STP) and iPeer Instructor Guide (LT Hub).

If you would like to use iPeer please complete the steps in Canvas Step by Step: How to Link iPeer with Canvas.  Then contact help@sauder.ubc.ca to set up the evaluation.

If you have more than 20 groups, we recommend batch-uploading groups through iPeer, then syncing to Canvas (Step 6B in document above)

Have more questions?

 Please post them to the Module 7. Discussion Forum

  Canvas Guide – Groups

Categories
Learning Technology Quiz Respondus LockDown Browser Teaching Activity

Quizzes

, , ,

Quizzes

Formative online quizzes are a very useful tool to assess student learning throughout your course. Quizzes can be delivered synchronously (everyone takes them at the same time) or asynchronously (students can take them at any time within a given availability window). Quizzes can be a very effective way to “chunk” asynchronous teaching. For example, students could watch a video recording on a relevant topic, subsequently, take a quiz to confirm their understanding, and finally contribute to an online discussion forum. This provides students with rapid feedback on their progress, and it provides instructors with an understanding of student comprehension and engagement levels (which could count as participation grades, for example). Instructors can draw on student performance in quizzes to inform future classes as well (both asynchronous and synchronous).

In this context, quizzes are generally fairly short and are low stakes (i.e. less than 10% of an assessment scheme) as they are considered a combination of a learning tool and an assessment tool (i.e. formative assessment).

Quizzes can be timed or open, but should generally have a due date. Canvas offers a number of different types of questions that you can ask in a quiz, along with a wide range of options for setting them up for your students. For information on how to set up Canvas quizzes here are some support resources:

.

This


Integrated with Canvas:

It is Canvas!


Used by UBC Sauder Instructors:

Frequent


Status Info:

Visit Status page

Guides on how to Build Quizzes

Using Respondus

Upload your quiz questions via Respondus – Respondus Quiz is an assessment software that allows you to create your questions in a word document and upload them directly into a Canvas quiz or a Canvas quiz bank.  It also allows you to import publisher quiz questions.  If you would like to import your publisher questions, please contact them directly for the file of your questions to import into Respondus.  You will find the instructions on how to do this on the Respondus page.

Formula Sheets & Long Content

Have a formula sheet or long content to embed in exams? Consider this toggle button solution (redirect to demo quiz) if you are using Lockdown Browser with a formula sheet and/or if you would like to reduce the amount of time students spend scrolling to the top of your exam to access your formula sheet.  If you have a formula sheet to embed, consider typing the formulas in LaTeX syntax.

Midterms and Finals

Note, this information is primarily for formative quizzes. For more details on midterm and final exams, which also use the Canvas quiz tool, see Module 8 – Online Midterm/Final Assessments.

Categories
Learning Technology Panopto Teaching Activity Video

Panopto

, , ,

Panopto

Panopto is our preferred video management platform for recording, organizing, embedding, and even live streaming course content, lectures, presentations, and recorded synchronous sessions.

Once filmed, Panopto-hosted videos can be embedded in Canvas courses.

Teaching Scenarios

What Is Panopto?

Panopto is a complete video management platform that provides a suite of web-based video editing tools for users. It is a tool for recording, organizing, embedding, and even live streaming course content, lectures, presentations, and recorded synchronous sessions. It can also be embedded in Canvas courses for video and audio course content, on top of being used for DIY lecture capture, instructional content, and screencasts.

Why Panopto?

Panopto has been an efficient and effective tool at Sauder for recording student presentations and faculty courses over the past few years. Panopto offers enhanced media features, such as student engagement tools and automatic captioning capabilities. Panopto also offers greater ease of use and better administrative management compared to other video management platforms. Panopto users are also able to leverage Panopto’s features outside of their Canvas courses.

Particular benefits of Panopto include:

  • Branding: Learning Services has created an automated tool for adding Sauder branding to video material. You can request branding to be added to any of your videos. Our branding service is able to add the Sauder program branding of your choice automatically.
  • Security: You have control over the privacy of your videos and whom you share them with. You can also control the availability time for individual videos, allowing you fine grained control over when a video is available to view.
  • Accessibility: Panopto offers machine-generated and searchable speech to text and automated closed captioning to improve the accessibility of your video content.
  • Searchability: Panopto makes it easy to search within your content. You can search for keywords in notes, bookmarks, captions, etc.

Getting Started

Requesting an account

How to sign up for Panopto

  1. Contact the Sauder Learning Services team with an email request to set up a Panopto account for you. To create your account, please let us know the following details:
    • Your referred name within the Panopto account
    • Email address (must be @ubc.ca or @sauder.ubc.ca domains AND should be the same as Zoom if you would like to use the Zoom cloud recording synchronization)
    • Your primary division/group affiliation
    • Whether you would like to have your Panopto account configured to automatically synchronize your cloud recordings from Zoom.
  2. An email will be sent to you with your account information, and you will be given a temporary password.
  1. Follow the link in the email to finish setting up your account with a new password. If the link in the email gives an error message, you can visit https://ubc.ca.panopto.com/Panopto/Pages/Auth/Login.aspx to connect.
  2. Once your account is set up, you will have access to your personal folder where you can record and upload videos, get their embed codes, copy them to course folders, and share them. You can find your personal folder on the menu to the left.

User Guides & Links

Panopto Documentation

Panopto has excellent documentation for all features on their support site. Also available are help videos with walk-throughs about how to use the many available features.

After you’ve signed up for a Panopto account, follow the instructions below to help you get started.

Uploading content to Panopto

  1. Click the “My Folder” tab on the left to access your collection of videos and folders. Find or create a new folder in your “My Folder” tab to upload your content to. You can also search for the folder you are trying to access in the search bar at the top of the page.
Add folder in Panopto
  1. Click the Create button and choose “Upload media” from the options.
Create options in Panopto

You can upload videos in most common file formats. You can also add PowerPoint presentations or PDF files to go with your content.

  1. To upload media, drag and drop the files you want into the box and wait for them to load.
Upload media - drag and drop box

Once uploaded, you can review your video, manage its access, and edit it (add clips, PowerPoint presentations, or cut sections of your video).

File Options after upload

Embedding videos in Canvas using embed codes

  1. Click the Share button for the video you want the embed code.
File Options after upload

Click Embed at the top of the window, and different options will appear to allow changes on how your video will be displayed in the page you embed it in.

Once you have selected your preferences, click the Copy Embed Code button.

Adjust the ‘Who has access’ option to Anyone with the link. Save changes.

Go to Canvas and the page you are going to embed your video onto. Click the Edit button at the top right corner.

Edit button

Click on the three dots to view other buttons available, then click the Embed menu item or Embed button.  

Canvas RCE Insert > Embed command
image of embed menu item in Canvas RCE.png

          On the Embed dialog, paste the embed code you just copied.

Embed code dialog Canvas RCE

Click Save.

Sharing your video

  1. Hover over the video you want to share in the list of videos in your folder, then click the Share button.
  2. You can copy the video link and send it to anyone you want.
  1. You can also manage who has access to your video and add or remove people.

If you want someone to have access to your video, you can invite anyone with a Panopto account, and they will be notified directly.

Panopto FAQ

  • Is there any Panopto training?
  • Where can I find Panopto?
  • Can I log in with a CWL username and password?
    • CWL passwords are not supported at this time. Your Panopto account will be created with your CWL username to facilitate the future integration of the CWL password logins.
  • How do I add Sauder branding to my videos?

Spam prevention powered by Akismet