Tag Archives: AR

Tinkercad

TinkerCad logo


According to its website, “Tinkercad is a free online collection of software tools” for what is known as 3D CAD (three-dimensional computer aided design) as well as coding, circuitry, and 3D printing. With a variety of target audiences, including students, parents, and teachers, as well as hobbyists and general enthusiasts, Tinkercad provides users with web-based access from any on-line device, and their designs can be published and shared thanks to a Creative Commons license.

Tinkercad was launched in 2011 and is currently owned by American software giant, Autodesk. Its objective, according to founder Kai Backman, is to help “make 3-D design in general, and the design of physical items in particular, accessible to hundreds of millions of people.” By combining creative thinking and collaboration with computer aided design, Tinkercad introduces students to such pursuits as architecture, engineering, and even animation.

Tinkercad designs can also be taken further by integrating them with Merge Cube or CoSpaces. These integrations allow for models and designs to be viewed in AR and VR spaces. Link to Merge Cube website with instructions for importing Tinkercad designs into Object Viewers.

Click above to view an example of Tinkercad project in progress


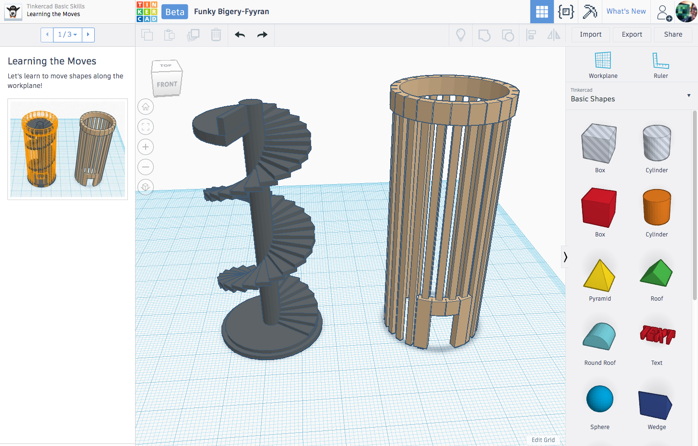
3D design software provides another medium for your students to utilize their applied design thinking skills. The beauty of Tinkercad over other 3D design tools lies in its accessibility. Catered to the beginner designer, Tinkercad makes the design process user friendly by employing drag & drop mechanisms and snapping grids. The application is also free to use and browser-based, allowing any computer to run the application without downloads. (You can even use it on your tablet!)

Objects designed in Tinkercad can also be shared with other peers, and exported to be printed on a 3D printer!

    1. Visit http://tinkercad.com/
    2. Sign up for a free account

(please keep in mind that Tinkercad data is not Canadian housed so teachers may choose to sign up for themselves but would need to confirm permissions with their schools/district before asking students to sign up. Teachers can create classes, share designs and challenges with their students. If teachers add students using a nickname, students can login using a join code and there is no need for them to provide their email or other personal information!

  1. Begin either by Creating a New Design or visiting the Gallery to browse other designs
  2. Drag and drop shapes and objects from your tool bar onto your grid – by default, objects snap to sit on the ‘surface’ of the plane.
  3. Edit your shapes and objects by selecting on the transformative modifiers located around the object
  4. Rotate your viewing angle by clicking on the left side cube and moving it around.
  5. Share or Export your creation with the buttons located in the top-right corner
  6. To go further… After you design your project in Tinkercad, you can upload the object on Merge cube! It will give an opportunity to your students evaluate, improve, and play with their work in their own hands!
  7. Visit the Thingiverse https://www.thingiverse.com/ for a variety of templates, lessons for projects across the curriculum.

A few Tips:

  • If you want to stack objects on top of each other, first place the object on the ‘plane/paper’ and then move it up using the triangle tool at the top.
  • You can view the height of each object by selecting the object.
  • Use the Cube in the top left corner of your screen to view Front, Back, Top, Bottom… Be sure you are building ON the plane (not below it!)


If want a step-by-step of some of the Tinkercard tools, the Master of Educational Technology prepared a small demonstration of what you can do:


Leave a Comment

Filed under AppliedDesignSkillsTechnologies, Engineering, Math, Resources, Science, Technology, The Arts

VR Tours & Literacy

NOTE: As of June 2021, Google Tour Creator is being discontinued (and this post and accompanying video resources will be archived/removed)

Have you considered how 360° video, images, Augmented and Virtual Reality might help spark your students’ creativity and, perhaps, engage them in the ‘place’ or setting of a novel? In the past, such technologies were out of reach for the average individual or school… today, smartphones, ipads and laptop computers afford the capacity to create!

In May 2019, I had the pleasure of collaborating, co-planning, and co-teaching with a Grade 5/6 classroom teacher in Surrey to re-imagine how information learned from novel studies could be shared using Virtual Reality. We had a common goal to push the students’ (and our!) boundaries by rethinking the traditional book report and decided to use Google Tour Creator and Google Expeditions. (For some short ‘how to videos’ and links to VR content, visit this post)

To help guide the students we selected some BIG QUESTIONS for them to consider throughout this project:

  1. How do the author’s choose settings and how does this affect the plot of a story?
  2. How can we SELECT SETTINGS and EXPLAIN how they are significant to the novel we are reading?

Here’s how we wanted students to demonstrate their learning:

    • Use Google Tour Creator to find real-world settings that are close to our imagined settings.
    • Explain the significance of the settings by describing the location we selected and why it matters to the story we/they read.
    • Add additional detail to a setting by overlaying points of interest, relevant images, appropriate sound effects or audio, and include a narration of the scene for individuals who are unable to see it (creating accessibility).

Want to try this?

To help our students get started and to help scaffold their learning process we made video tutorials, provided links to additional resources, and a launch button to always bring them back to their tours.

First, we created a website to host everything students would need for this project. It contains tutorial videos and links to creative common images, sound effects, and music to help set the scenes and make them more immersive. You are welcome to use it! NOTE: due to Tour Creator requiring google login, we set up google accounts for each group of students to use so that they were not providing their own personal information. Further, we shared with students the importance of protecting their data and privacy through ‘just in time’ lessons and information. Fore more on protecting student data privacy, visit this blog post. You may require parent consents and/or specific school admin or district permission depending on your school district’s protocols and privacy policies.

We also have shared our resources from this project so that other educators may use this process with their own students. Below are links to each resource with a brief explanation of how and why it was created.

  • Scenes from a Novel AR-VR Unit Overview
    • This overview was co-created and includes inquiry questions to guide the teachers which differ slightly from the inquiry questions for the students.
  • VR Planning Page
    • This was the planning page used by students to capture what they imagined the scenes would look like. We wanted to help students narrow their focus by selecting valuable scenes and sketching them before heading into the vast virtual world.
  • Core Competencies Predictions
    • Students used this page to predict what core competency they would use the most through this project. They then used the sheet to self-reflect at the end of the project and write comments about whether they agreed or disagreed with their prediction.
  • Single-Point-Rubric-VR Tour
    • These were co-created with the class. The teachers introduced ideas and explained the process of using the rubric so that the class could decide on what merited a “passable” project. We also discussed what moved the project into the “extending” territory.
    • We had rich discussions about considering everyone in the class and that the goal was to create an immersive project so we had to decide on objectives that were within reach of every student. Many things were decided democratically where students voted on topics. For example, we decided on what the appropriate amount of scenes should be in a tour by displaying the number on our fingers.
    • Students then used the rubric to self-assess their project a week before submission. They marked down areas that needed improvement and areas where they went beyond expectations, then used this sheet to keep track of what they needed to work on. In the end, they submitted their project with their rubric.


We presented our learning journey and that of our students’ at the Surrey Teacher Association Professional Development Day in May 2019. You can view the slides below. We also presented at UBC’s Investigating Our Practices Conference, and the BCTESOL Conference.

*parent permission and informed consent provided

*student permission granted

Leave a Comment

Filed under AR & VR, Blog Posts, Digital & Media Literacy, Planning, Resources

Star Viewing Apps

These are apps that provide an immersive and augmented viewing of the stars, planets, and sometimes even space stations or satellites!

They allow students to recognize and experience the locations of various stars in relation to themselves. It’s a powerful tool that promotes questioning, deeper understanding, and engagement because students can rotate their devices to view constellations and more. These apps are a way to help students recognize that the stars and planets never “disappear” and that their locations move throughout out the day and year!

You will find that once students are “viewing the stars”, they will come up with their own questions which is a perfect and natural inquiry opportunity and way to personalize your teaching for students.

Some questions we often hear are, What is a pulsating star? How can I tell the difference between a planet and star without this [app]? Who named the constellations and why are they important?

  1. Choose which app would work best with your students!
    • Skyview or SkyGuide
      • Uses the camera and overlays it with the Milky Way galaxy. Includes descriptions of star types, constellations, planets, the International Space Station, and the Hubble space telescope. Great for using outdoors and in the evenings.
    • Starwalk
      • Uses an evening themes background with the stars, constellations, and more over top. Features Real-time celestial bodies tracking, the ability to travel in time with “Time machine,” and anastronomical calendar with various celestial events.
  2. Download and open the app.
  3. Decide how you will engage students with the app.
    • Free exploration
    • Scavenger Hunt
    • Question generator – have students write as many questions as they can.
    • Galactic Explorer – write from the perspective as a 22nd Century Galatic Explorer. This could be compared to Explorers from history. They could also plot a course based on a chosen destination.
    • Storytelling – How do constellations tell a story? Be inspired by this app and then read various stories about the constellations before having students create their own (oral stories or written). You could also compare historical narratives from different cultures to build multiple perspectives of the stars.

Below is a scavenger hunt we use with Teacher Candidates but you can also borrow and personalize it for your own students. We use it to encourage engagement and exploration of the tool but leave room for TCs to create and record their own questions as they explore.


Leave a Comment

Filed under AR & VR, Not Subject Specific, Resources

Tech Integration: Possibilities for Secondary Chemistry

It was a pleasure to once again work with Leslie Johnstone and her Chem Methods Class to review and test some digital technology integration possibilities in a Secondary Chemistry Class. Leslie and I co-planned and facilitated a session that included a brief introductory Prezi, a Demo and some stations to allow student movement and choice.

Following our brief introduction in Prezi to the themes of technology integration we’d decided upon, Leslie provided a Titration Demonstration where we were able to view the titration curve calculated & displayed in real time. For more on titration, visit this section of LibreTexts, an open access Science Resource. I also recently found an interesting resource sharing how titration experiments could be set up using a BBC Micro:bit!

After some lively discussion, students had 15 minute opportunities to dip their toes into each theme at facilitated and self-directed stations.

Our station themes:

  1. Our station themes:
    1. Annotated Video: Being able to create their own video tutorials can aid students in retaining the understandings they’ve developed through experimentation and lab work.
      • Camtasia is powerful proprietary software (UBC Students, staff and faculty can download it free of charge through ‘Canvas’
      • You (or your students!) might use one of the available ‘whiteboard style’ apps such as ShowMe (a free mobile app for iOS and Android allowing multimodal student response) or AWW (a free browser based app/online digital whiteboard).
    2. Video and Simulations in Chemistry – as enhancements to the lab can afford the opportunity for students to try experiments that might be otherwise impossible or, perhaps, just inaccurate if done hands-on. Sims and video can also support varied learners including ELLs in pre-playing or re-playing hands-on experiments. In addition to PHET, open access sims, we worked with Annenberg Learner video and sims and ACS – the American Chem Society Virtual Chem and Sims.  All highly recommended by Leslie.
    3. Collaborative Tools – enable co-creation by your students and support knowledge co-c0nstruction. Try out one of the techniques already explored in class:
      • Padlet – a digital wall to share words, images, video, links and audio
      • Concept maps – you’ve tried ‘analogue’ CMapping in class, consider incorporating a tool like MindMup to allow your students to co-create mindmaps online (in real time and asynchronously)
    4. Emerging Technologies: Students explored how emerging technologies might increase learning through rich media experiences and ‘hands’-on access to otherwise inaccessible objects or media. We played with:
      1. Theodore Gray’s Elements – interact with the periodic tables on a handheld device (this one is a paid app but very powerful and worth chatting with your school librarian about!)
      2. Science 360 – an app and website that houses a large database of science videos and content
      3. MEL Science – AR/VR Chem Lessons that integrate with the merge cube
        • I’ve recently been experimenting with ways students and teachers can create their own chemistry drawings for AR. For example, I’ve discovered that if you can create a 3D image (say, of the molecular structure of an element), you can then upload this to be viewed in AR or VR. I think it would add an exciting element for students to be able to virtually create their models in 3D and then view, share and interact with them. I’m still ‘playing’ with this but would love to hear from you if you’re interested!
        • MolView is a free Open Source online molecular modeling tool that seems to have potential!

A word on class groupings for stations: I would advise creating groupings in advance of class. The groupings might be homogeneous or heterogeneous and based on any number of factors including ability or interest depending on the objectives of the teacher and the needs of the students. Sometimes, randomized groupings can be used and have the added benefit of introducing students to opportunities to interact with many different members of the class. There are many online options. GroupMind, a lovely little App developed by Louai Rahal an Education PHD student & instructor I met a few years ago, is free and open for you to use with no sign up required. For more on groupings, this article by Beatrice A. Ward (1987) is worth a read.

As someone who doesn’t specialize in (or even have much background in) this particular area, it’s always a pleasure working with Chemists! If you’d like to explore anything related to teaching, learning and digital technology further, please be in touch or click the ‘Ask a Question’ link in this blog. Look for Eric in the foyer on Wednesdays or visit Janis or Yvonne in a drop in or workshop sometime this winter! Schedule here.

Leave a Comment

Filed under Blog Posts, Science, Technology