Tag Archives: Simulations

Augment: designing and customizing your own augmented reality

whatisit.png

Using Augment in Education – It’s all free!

Augment is a tool to design and integrate Augmented Reality (AR) into your classroom. There are three components included: the Augment app, the Augment Manager and the Augment Desktop. The Augment app allow you to visualize 3D Models via the camera on your mobile devices. The Augment Manager is used to upload and manage various models. Lastly, Augment Desktop makes it simple to design and animate models before publishing them (click here for a tutorial to get started with your design!)


Why-is-it-relevant-360x82.png

Augment is one of the top AR apps on the market and is an effective tool that can be used to enhance your lessons and activities. Its visuals can help present your designs and captivate your students with 3D interactive experiences. In addition, it allows you to update course content without wasting paper.
In fact, Augment can specifically help you:
  • Engage students by drawing their attention with interactive presentations, posters and text book enhancement
  • Clarify complex concepts that would be hard to understand with a 2D handout. For example, educators use Augment to help students see the difference in the movement of gas molecules and liquid molecules in containers through animated 3D models
  • Empower your lessons by updating content and models for classes without printing

how-to-get-started-360x80.png

There are a few steps to get started with using Augment in your classroom:
  1. Create an account on manager.augment.com.
  2. Click on upgrade Now and choose Education Plan.
  3. Download the Augment App free on IOS or Android and log into your account.
  4. Upload 2D images of your model, or you can choose to find 3D models to use from the following sources:

videopng-360x61.png

Want to know what other educators did with Augment? check this video out !

https://youtu.be/89nvotfDCgk

Leave a Comment

Filed under AppliedDesignSkillsTechnologies, AR & VR, Not Subject Specific, Resources

Google Expeditions Pioneer Program

Google-Expeditions-08


cc Chris Betcher

whatisit.png

Imagine being able to take students on a field trip without leaving the classroom. With the Expeditions Pioneer Program, teachers lead a guided virtual reality tour of a range of places such as museums, wonders of the world, and even some otherwise inaccessible places like the deep sea or the surface of Mars!

With the following equipment, students can have an immersive learning experience with 360 video that enriches the day’s lesson. In a Google Expedition virtual tour, onscreen annotations help to provoke questions, point out details and provide further background information about the location/content.

  • Teacher tablet,
  • Google Cardboard or other VR goggles,
  • Smartphones  compatible with cardboard
  • *You may also need an inexpensive router to create a local area network within your school’s secure network so that students can connect their phones to your tablet. We’ve used the Aptus router with some success for small groups but more powerful routers may provide even better results!

Even without the formalized ‘expeditions’ provided by google, a a teacher could also easily ‘bring’ students to a relevant 360 video or  image and engage them in a tour/exploration with some guiding questions or prompts. Students can also interact with 360 videos or images using an ipad or by scrolling in their browser, although the experience is less immersive than with the goggles.


Why-is-it-relevant-360x82.png

Expeditions can be an engaging and interactive experience for students as they explore 360º space. The possibility of taking a virtual tour of faraway places in the blink of an eye can augment classroom learning in a way that wasn’t possible prior to the development of accessible digital technologies. While Virtual Reality should not replace real-life experiences, it can enhance and help uncover aspects of curricular studies through a ‘virtual’ place-based and experiential approach. Some places would be literally inaccessible without this kind of technology and, often, funding, logistical and transportation barriers can get in the way of students leaving the school grounds as frequently as we might like.

As with any digital technology, always keep in mind the value of the teacher as facilitator. Consider your purpose for exposing students to particular content and experiences. Be sure , also, that these virtual experiences don’t replace opportunities for students to engage in real world, f2f experiences by getting outdoors, in the school yard, the local community and even further afield. Such real world experiences nurture students in a way that digital tech cannot.

Further reading (articles available online in UBC Ed Lib):
Dutton, L. (2016). Google Expeditions. School Librarian, 64(3), 147.
Lamb, A. & Johnson, L. (2010).Virtual Expeditions: Google Earth, GIS, and Geovisualization Technologies in Teaching and Learning
 Teacher Librarian; Feb 2010; 37, 3; Canadian Business & Current Affairs Database

how-to-get-started-360x80.png

  • Download Google Expeditions and install the app on your student devices. Android from the Play Store or get the app on iOS from the Apple Store.   Install IPAd, IPOD, Android or IOS phone devices.
  • Sign onto the same WIFI network. Must be one that allows peer to peer networking.
    Or you can also use a router. In most schools, you will need to set up a local network since the secure wifi network will not allow you to do peer to peer networking – you can do this with an inexpensive router. We have used low cost Aptus routers successfully in our workshop sessions but there are likely other possibilities.
  • Select an expedition and download the expedition. Each expedition consists of a series of scenes.
    On the teacher device, the teacher will select Leader and the students on their devices will select Follow.
  •  When on a tour, look for the smiley face icons on your teacher device. These show you where your students are.
  • Points of Interest. Each tour has a teacher script which is not something you just want to read aloud.  Read ahead of time and pick out the things that you think would be the most relevant for your students. When you select the script an arrow will appear for your students and it will point them to this target symbol.   Be prepared for questions from the explorers about things they see that are not on your script. Have your key questions about the Expedition ready.  Take time to let the students experience the Expedition before you dive in with additional information.
  • Google Expeditions kits are available in Canada through Best Buy. They include student devices, virtual reality viewers, a rapid charger, teacher device, router, case.  They come in kits for 10, 20 or 30 students, however, Google Cardboard can be cut out and assembled as a making project and there is some excellent open access content available online.

Learn more about Expeditions here: https://www.google.com/edu/expeditions/


videopng-360x61.png

Leave a Comment

Filed under AR & VR, Not Subject Specific, Resources

Google Cardboard – DIY Guide and some VR Apps

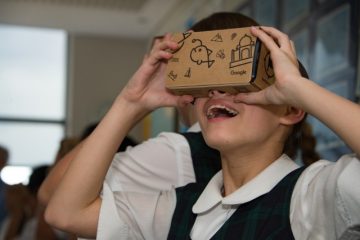
In short, Google Cardboard is an affordable piece of Virtual Reality (VR) headgear that welcomes its users to simple yet eye-opening VR experiences. Following just a few easy steps, anyone with a smartphone (and a few free VR apps, of course) can now explore the VR content shared by creators worldwide. As the name suggests, this headgear can be built from low-cost materials that are relatively easy to find, so if you are up to the challenge, you can even make one yourself!

It may not be as high quality or immersive as the more expensive VR set ups (like the HTC Vive that you can use at UBC’s Emerging Media Lab)  but it is fun to use and still brings quite a ‘wow’ factor to the table, especially considering its price.

Note: All of the apps linked below are FREE at the time of this resource posting.

Google Cardboard Glasses

Order Online

Google Cardboard
by Virtual Studio
on Sketchfab

Make Your Own

Pro tip: This video demonstration will guide you through the process quite quickly. For a brief overview of what is involved in making the glasses, see the instructions below.

What You’ll Need

Pro tip:

45mm biconvex lenses: available for purchase online. Search Amazon, eBay or other sources. They are about 70cents each lens but you can sometimes also find them in bulk. We’ve never tested the theory that you can even make your own lenses but there are instructions available online. See below for video how to.

Ring Magnet or elastic and velcro: You don’t really need the ring magnet or elastic, they are nice additions though. The magnet is used as a button because you cannot click the screen while you have the glasses on. The velcro can also be substituted with regular tape.  Magnets are about 0.75in (19mm) diameter and 0.12in (3mm) thickness, and can be bought on Amazon or at Home Depot.

Building Your Glasses

  • Step 1: Download and print the Google Cardboard Template.
  • Step 2: Cut out your template and stick your outlined pieces together placing sections with numbers in white circles on top of those with matching numbers in black circles.
  • Step 3: Trace your pieces onto your cardboard (cereal box works well).
  • Step 4: Cut out your cardboard outlines.
  • Step 5: Fold your cardboard pieces along the red lines indicated on the template.
  • Step 6: Put your cardboard pieces together as shown in the video demonstration.

6 Amazing Virtual Reality Apps

Within VR

Extraordinary stories in virtual reality.

Formerly known as Vrse, WITHIN showcases the best VR video has to offer. The content on display in this app spans a variety of genres and is collected from a number of reputable VR sources. It features documentary and news content from the likes of Vice, the New York Times, and the Huffington Post, comedy and short films from creators and animators like Saturaday Night Live, and music videos from artists like U2.

inVR

The easiest way to create and share VR experiences.

inVR is a “platform for sharing VR experiences”. Users can create content using any 3D modelling software and uploading it to the inVR cloud for other to experience. Whether you are are a 3D artist or animator, or just an avid VR explorer this is a must-try.

NYT VR

An immersive virtual-reality experience.
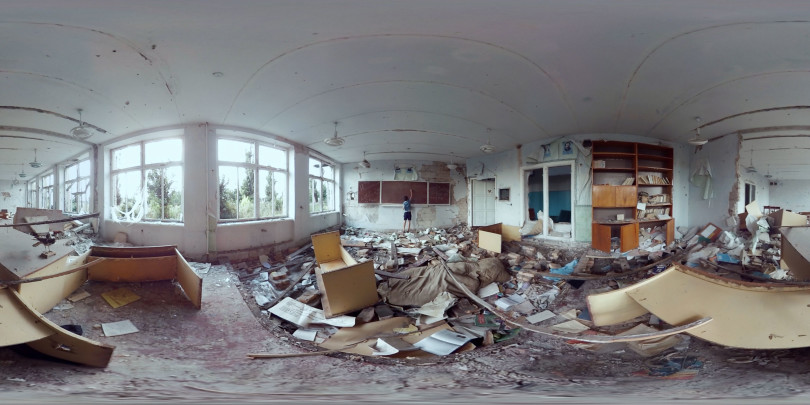
Journalism has come to VR! NYT VR offers an immersive and thrilling experience as award winning journalists capture their experinces in 360 video for the world to see. Be a Syrian refugee, an earthquake survivor or rescue worker in Nepal, or watch the burning of ivory in protest of elephant poaching in Kenya. Videos are posted on a monthly basis.

Discovery VR

A new way to see your world.

View behnid-the-scenes footage from Discovery shows among other immersive video experiences as videographers show you all our planet has to offer. From the depths of the ship wrecked oceans to survival in the rainforest this app has action and adventure to share.

RYOT

Become the story.

The Huffington post brings you RYOT, a step into a new age of reporting. Like NTY VR, RYOT journalists and videographers capture their experiences at imporant events in some of the worlds most interesting places.

Shakespeare’s Globe 360

Step inside the world of the Globe Theatre.

Explore Shakespeare’s Globe Theatre in VR. Take a look around and interact with the virutal environment to learn more about the theatre and acting in Shakespearean times.

Hack: Make your own Lenses

.

Leave a Comment

Filed under AppliedDesignSkillsTechnologies, AR & VR, Not Subject Specific, Resources

Simulations for Science and Math

mathematics-757566_1280


pixabay.com

PHET, from the University of Colorado, Boulder, is an online repository of interactive simulations and lessons for the Science and Math classroom. Teachers can create a free account and begin to use PHET after confirming their account via email.

  • free, open resources
  • teacher account required
  • requires download to play sims
  • widely used in educational institutions
  • Sims have been translated into multiple languages including French

PHET Interactive app for iPad (new in Fall 2016) is perfect for offline use and allows mobile users to view sims.

  • Compatible with iPad iOS 9.1 or later.
  • Cost: 99 cents (the developers note that this cost helps fund more HTML5 Sims)

Many science and math concepts can be explored through a variety of hands-on and virtual learning opportunities and can be scaffolded to support learners at varying levels of understanding. Many schools will have boxes and bins of various science equipment for teachers to use with their classes. Teachers can also purchase the needed equipment in bulk to keep per student costs reasonable. Free on-line Simulations can provide excellent vehicles for students to further explore and develop their understanding.

‘Physics Classroom’ is another free site – it has simulations and lesson plans with no download required to your computer.

  • frees
  • no account needed
  • no download required to play sims

Providing opportunities for students to use simulations affords them as needed access at home and at school to continue their learning without the need for equipment other than a computer, tablet or ipad. Simulations allow for a more kinesthetic approach to learning than pencil and paper exercises and can help students visualize complex problems and concepts. Some simulations allow students to engage in ‘work’ that might not otherwise be possible in a typical classroom setting by allowing students to experiment with potentially hazardous inquiries. The use of simulations can provide students with the opportunity to engage in independent inquiry and experiential learning. Teachers can utilize simulations in a number of ways from visual aids during a lecture to conceptual tests, homework and pre-lab activities. Many of the lesson plans available on PHET are inquiry-based and support student independent exploration so are in keeping with BC Ed Curriculum which emphasizes inquiry and personalized learning.

Be sure to try to engage your students in some hands-on exploration of the topic or concept (ex. Exploring electrical circuits) using activities such as ‘Squishy Circuits‘, ‘Makey Makey’ or ‘Paper Circuits’.

Read this article about the value of simulations in the science classroom and to find some interesting ways to integrate simulations into your teaching (including additional online sims).


Visit PHET to sign up for a student or teacher account. Activate your account using the email provided and then just get started exploring the simulations. Most sims require download to your computer so you may need to adjust your security settings in order to ‘play’.

‘Physics Classroom’ is another free site – it has simulations and lesson plans with no download required to your computer.

For both sites, lesson plans accompany each simulation. With PHET, teachers can even become authors by sharing the resources they create.

Take a PHET tutorial, webinar or download workshop information (or just launch a sim and play!).


videopng-360x61.png


Leave a Comment

Filed under Resources, Science

Quiver: 3D Augmented Reality Coloring Apps


Quiver

whatisit.png

QuiverVision is a web based tool which offers several IOS-based Apps that enable children to do coloring in a 3D augmented reality way. The Apps include Quiver (Free), Quiver Education ($ 10.99 CAD for one- time purchase) as well as Quiver Fashion (free).

Their free packages include: Power Rangers Movie, Color Crafters 3D, Happy Cow, Fidelisaurus Fun & Games, Color Me Capable, Leo’s Colorful World, Murphy and Friends Games, Education Starter Pack, etc.


Why-is-it-relevant-360x82.png

As an Early Childhood Educator, Quiver is an amazing way to engage your students by bringing their coloring pages to life. They can use pencils, markers or crayons as they want, and they can have their 3D scenes colored in real time!

As of now Quiver Education comes with content designed around educational topics such as biology, geometry and the solar system. In addition, with a one-time purchase, updated content will be available to you all the time.


how-to-get-started-360x80.png

  1. Download and install the Quiver app of your choosing (Quiver, Quiver Education or Quiver Fashion) onto the selected device.
  2. Select any coloring page from the Quiver app and/or website and print it out.
  3. Color in the page using pencils, crayons, markers or paint.
  4. Use the Quiver App to bring the colored page to life on your device.


videopng-360x61.png

Leave a Comment

Filed under AR & VR, Not Subject Specific, Resources

Anatomy 4D : using AR to teach human body structure

PLEASE NOTE: Anatomy 4D is no longer available, but you may still be able to use the app if you downloaded it prior to May 2018. You can explore the other AR/VR technologies in our collection of resources to see newer alternatives to Anatomy 4D.

whatisit.png

Anatomy 4D is an iOS and Android-based, Augmented Reality app to help your students explore the human body and human heart structure with the cutting edge technology. It can help you simplify the complex concepts and help your students better understand the content!


Why-is-it-relevant-360x82.png

Based on instructors’ testimonials, Anatomy 4D has developed an interactive and amazing tool to engage students with important biology concepts allowing them to learn and explore the human anatomy. In fact, the 4D images and resources available on Anatomy 4D allow users to delve into the body through augmented reality and is currently used by students, teachers and medical professionals.

“Anatomy 4D is a fantastic app. It helps to understand human body structure to great extent to a layman like me.”( Purushottam Kunte)


how-to-get-started-360x80.png

  1. Download and print out the the posters (card stock paper is recommended).
  2. Note: posters must be colored.
  3. Download the Anatomy 4D app from iTunes or Google Play.
  4. Open the app and use your camera to scan the colored poster; use the filters to change what has been presented in front of you!

videopng-360x61.png

Have a quick look at how Anatomy 4D works:
Heart Target:

Body Target:

2 Comments

Filed under AR & VR, Resources

Universe Sandbox

Universe Sandbox is a physics-based Virtual Reality (VR) platform that offers users access to various advanced simulations. Using this software, you will be able to explore what happens if two galaxies collide or an asteroid crashes into earth with great detail and accuracy and you have the option of viewing this on VR headsets.

EDUCATOR PRICE: $16.74 (Original price is $ 24.99)

FEATURES:

  • Climate simulation
  • Advanced collision simulation
  • Stellar evolution and supernovae
  • Terraforming
  • Light-warping black holes
  • Dark matter
  • Procedural surfaces and planets
  • Original soundtrack by Macoubre (available for purchase in the future)
  • VR support (currently only HTC Vive/SteamVR)

Universe Sandbox is an advanced simulator and a fascinating tool to use in your physics classes. For younger students (grades k- 7), it could be an engaging way to introduce the solar system and examine the effects of gravity. For older students (grade 8-12), Universe Sandbox could be used to explore more complicated issues such as the greenhouse phenomena and climate change.

Using Universe Sandbox, you and your students can create and destroy planets on an unimaginable scale whether on a large screen or through VR headsets.

  1. Sign up for a teacher gaming account here and wait for them to validate your account (you will receive a 33% discount).
  2. After the purchase, you can access Universe Sandbox and explore the possibilities in your physics classes!

Leave a Comment

Filed under AR & VR, Resources