Tag Archives: app

Google Street View: Explore natural wonders and world landmarks

whatisit.png

Google Street View is a fun way to create your own 360 panoramic pictures and to engage in a 360 experience of places shared by others.


Below is a live example:


Why-is-it-relevant-360x82.png

Google Street View can help students visualize and understand the world around them. By using Google Street view, students have the opportunity to explore, collaborate and share images around the world. Google Street View can be used by teachers to engage students during their geographic, historical or social science lectures. In addition, it can also be used as a unique way to tell a story.

Content is continually being added to Street View and may require some ‘sifting through’ for quality. Students can also be creators and work together to create their own 360° pictures and share them with the world. They can even add notes about their images. NOTE: as a google product, privacy and permissions are important considerations. See this blog post about FIPPA.


how-to-get-started-360x80.png

To view:

  • Download the Google Street View app on your mobile device (your mobile phone, your iPad, or your Android tablet).
  • Log in with your Google account.
  • Click on “Explore” and search for the place you’re interested in. (You can expand the “results” at the bottom of the screen to see a full list of places available.)
  • Select the place.
  • Click on the panoramic icon (compass) to go into 360° view.
  • Click on the Google Cardboard icon and use your VR headset to view the image.

To share and contribute:

  • Click on the camera at the bottom right to create your image.
  • Choose the type of device you are using. Click on the last option, “camera,” if you’re using your phone/iPad camera.
  • To line up, make sure that the orange dot is inside of the white circle.
  • Turn around to take a 360 image.
  • Click on the “check mark” to save your image.
  • To publish your image, here are the steps:
    • Under “Private,” tap Select.
    • Choose a photo to publish.
    • If you have applied blurring, choose if you want to apply the blur to your published photo. Tap More More and then Apply blurring or Remove blurring .
    • Tap Upload .
    • Tap Publish. You’ll see your photo under “Profile”.
  • Now you can view your image on your own device or with the Google Cardboard/ VR headset, and also share your 360 image with your students/friends!

Feel free to use our lesson brief to introduce Google Street View to your students (click Google Streetview Lesson to download).

Follow the steps in this video to upload your 360 images:


videopng-360x61.png

Leave a Comment

Filed under AR & VR, Not Subject Specific, Resources

Kahoot! : Free Tool for Creating Learning Games !

whatisit.png

Kahoot! is a platform for teachers to create fun, engaging learning games with little technological knowledge/skill needed.

In Kahoot, you can create a series of questions combining with images, videos, diagrams, etc. The number and type of questions fully depend on your needs, and your students can get access to your learning game by simply go to kahoot.it and input a 4-digit number comes with your game.

There are four different types of Kahoots you can create, include:

  1. Quiz: you can use quiz Kahoots to introduce a topic, review what you’ve been teaching in a class, or use the quiz results to offer rewards to some of your students.
  2. Jumble: it’s a type of brand new game that allows students to rearrange the sentences, sorting algebraic equations, or putting historic events in order, etc. To learn more about Jumble Kahoot, click here for more information.
  3. Discussion: you can create Discussion Kahoots to initiate and facilitate a debate
  4. Survey: use this kind of Kahoot to gather opinions, insights or students’ feedback on a specific subject, a special event, workshop, or a class.

Why-is-it-relevant-360x82.png

Teachers need different forms of assessing their student learning and Kahoot! offers a “gamified” version of getting student feedback. It can be used to gather student background knowledge, assess midway through a unit to see if Students are getting the “big idea,” or used as a review.

With Kahoot, students can answer questions on their own devices, while games are displayed on a shared screen. As a teacher, you can pick from the existing games that other teachers have uploaded and even contribute your own games to the community.

Teachers should think carefully about their objectives and utilize the appropriate kinds of questions to help meet those objectives, elicit student understanding and propel learning. Consider varying questions between selection and supply and access the different areas of Bloom’s Taxonomy. This graphic, shared on Flickr by Enokson helps connect Bloom’s with question frames for assessment.

CC image Enokson Flickr Stream

Students might also create their own kahoots to deepen their understanding of the class content.

Kahoot allows you to connect and play in real time with other players in other places (synchronous learning across space!)

*at the time of writing, Kahoot does not seem to allow you to track student responses. If you are interested in trackingindividual responses, consider Plickers or another student response system.


how-to-get-started-360x80.png

  1. Create a teacher account on kahoot.com
    • There are several video tutorials on the site to help you out.
  2. Create a new Kahoot by selecting the type of interactivity you want to create.
  3. Title your Kahoot, add a description, and set up the visibility, language and audience type. Feel free to add a cover image to customize your Kahoot and invite engagement.
  4. Now you can start to work on your questions.

Let’s take Quiz Kahoot as an example, first, input the question to the “Question” area (here, we recommend you to prepare with the questions in another document, that will fasten your Kahoot creation process. Then, set up the time limit for the question, and feel free to add awards points to the question if you are doing a quiz. After this, input the answers and click on the checkmark next to the correct answer(s). Remember to give credit to the resources that you have used/ referred to in your questions.

  1. Now it’s time to save and share your Kahoot!

How to get access:

  1. Go to a web browser
  2. Go to kahoot.it
  3. Enter the game pin that showed on the shared screen
  4. Enter a nickname and start to answer the questions

Kahoot Instructions One Page Handout


videopng-360x61.png


1 Comment

Filed under Not Subject Specific, Resources

Augment: designing and customizing your own augmented reality

whatisit.png

Using Augment in Education – It’s all free!

Augment is a tool to design and integrate Augmented Reality (AR) into your classroom. There are three components included: the Augment app, the Augment Manager and the Augment Desktop. The Augment app allow you to visualize 3D Models via the camera on your mobile devices. The Augment Manager is used to upload and manage various models. Lastly, Augment Desktop makes it simple to design and animate models before publishing them (click here for a tutorial to get started with your design!)


Why-is-it-relevant-360x82.png

Augment is one of the top AR apps on the market and is an effective tool that can be used to enhance your lessons and activities. Its visuals can help present your designs and captivate your students with 3D interactive experiences. In addition, it allows you to update course content without wasting paper.
In fact, Augment can specifically help you:
  • Engage students by drawing their attention with interactive presentations, posters and text book enhancement
  • Clarify complex concepts that would be hard to understand with a 2D handout. For example, educators use Augment to help students see the difference in the movement of gas molecules and liquid molecules in containers through animated 3D models
  • Empower your lessons by updating content and models for classes without printing

how-to-get-started-360x80.png

There are a few steps to get started with using Augment in your classroom:
  1. Create an account on manager.augment.com.
  2. Click on upgrade Now and choose Education Plan.
  3. Download the Augment App free on IOS or Android and log into your account.
  4. Upload 2D images of your model, or you can choose to find 3D models to use from the following sources:

videopng-360x61.png

Want to know what other educators did with Augment? check this video out !

https://youtu.be/89nvotfDCgk

Leave a Comment

Filed under AppliedDesignSkillsTechnologies, AR & VR, Not Subject Specific, Resources

Google Expeditions Pioneer Program

Google-Expeditions-08


cc Chris Betcher

whatisit.png

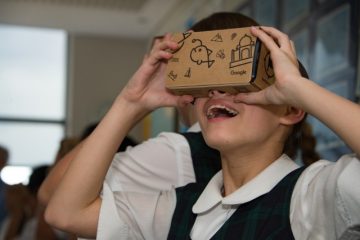
Imagine being able to take students on a field trip without leaving the classroom. With the Expeditions Pioneer Program, teachers lead a guided virtual reality tour of a range of places such as museums, wonders of the world, and even some otherwise inaccessible places like the deep sea or the surface of Mars!

With the following equipment, students can have an immersive learning experience with 360 video that enriches the day’s lesson. In a Google Expedition virtual tour, onscreen annotations help to provoke questions, point out details and provide further background information about the location/content.

  • Teacher tablet,
  • Google Cardboard or other VR goggles,
  • Smartphones  compatible with cardboard
  • *You may also need an inexpensive router to create a local area network within your school’s secure network so that students can connect their phones to your tablet. We’ve used the Aptus router with some success for small groups but more powerful routers may provide even better results!

Even without the formalized ‘expeditions’ provided by google, a a teacher could also easily ‘bring’ students to a relevant 360 video or  image and engage them in a tour/exploration with some guiding questions or prompts. Students can also interact with 360 videos or images using an ipad or by scrolling in their browser, although the experience is less immersive than with the goggles.


Why-is-it-relevant-360x82.png

Expeditions can be an engaging and interactive experience for students as they explore 360º space. The possibility of taking a virtual tour of faraway places in the blink of an eye can augment classroom learning in a way that wasn’t possible prior to the development of accessible digital technologies. While Virtual Reality should not replace real-life experiences, it can enhance and help uncover aspects of curricular studies through a ‘virtual’ place-based and experiential approach. Some places would be literally inaccessible without this kind of technology and, often, funding, logistical and transportation barriers can get in the way of students leaving the school grounds as frequently as we might like.

As with any digital technology, always keep in mind the value of the teacher as facilitator. Consider your purpose for exposing students to particular content and experiences. Be sure , also, that these virtual experiences don’t replace opportunities for students to engage in real world, f2f experiences by getting outdoors, in the school yard, the local community and even further afield. Such real world experiences nurture students in a way that digital tech cannot.

Further reading (articles available online in UBC Ed Lib):
Dutton, L. (2016). Google Expeditions. School Librarian, 64(3), 147.
Lamb, A. & Johnson, L. (2010).Virtual Expeditions: Google Earth, GIS, and Geovisualization Technologies in Teaching and Learning
 Teacher Librarian; Feb 2010; 37, 3; Canadian Business & Current Affairs Database

how-to-get-started-360x80.png

  • Download Google Expeditions and install the app on your student devices. Android from the Play Store or get the app on iOS from the Apple Store.   Install IPAd, IPOD, Android or IOS phone devices.
  • Sign onto the same WIFI network. Must be one that allows peer to peer networking.
    Or you can also use a router. In most schools, you will need to set up a local network since the secure wifi network will not allow you to do peer to peer networking – you can do this with an inexpensive router. We have used low cost Aptus routers successfully in our workshop sessions but there are likely other possibilities.
  • Select an expedition and download the expedition. Each expedition consists of a series of scenes.
    On the teacher device, the teacher will select Leader and the students on their devices will select Follow.
  •  When on a tour, look for the smiley face icons on your teacher device. These show you where your students are.
  • Points of Interest. Each tour has a teacher script which is not something you just want to read aloud.  Read ahead of time and pick out the things that you think would be the most relevant for your students. When you select the script an arrow will appear for your students and it will point them to this target symbol.   Be prepared for questions from the explorers about things they see that are not on your script. Have your key questions about the Expedition ready.  Take time to let the students experience the Expedition before you dive in with additional information.

  • Google Expeditions kits are available in Canada through Best Buy. They include student devices, virtual reality viewers, a rapid charger, teacher device, router, case.  They come in kits for 10, 20 or 30 students, however, Google Cardboard can be cut out and assembled as a making project and there is some excellent open access content available online.

Learn more about Expeditions here: https://www.google.com/edu/expeditions/


videopng-360x61.png

Leave a Comment

Filed under AR & VR, Not Subject Specific, Resources

Poll Everywhere: engage your class in real time

whatisit.png

Poll Everywhere is a web-based and mobile app that you can use to engage your audience and to support classroom assessment. You can use your mobile device or log in with a web-based version to start a question and your audience can respond to your question with their own device by scanning your QR code, texting or finding you via the shared URL. Once students respond, you can see their real-time responses and present the results in your PowerPoint, Google slides, keynote, or on your website.

Depending on your needs, you can choose from a free educator plan or various paid plans. The K-12 Basic plan is Free (teacher account/sign-up needed; no student account or login required) and you get:

  • Responses per poll: 40 (explain)
  • Allows to present via Powerpoint, Full-screen web presentations, Many question types, Live word clouds, Text walls, Customize look & styles
  • Support: FAQ online

Why-is-it-relevant-360x82.png

Using Poll Everywhere in your classroom, you will be able to collect students’ answers and feedback in the moment. It can also be used as a great tool to engage your students and probe their understanding in a certain concept as an activity strategy or closure. This formative feedback can support teachers in planning and scaffolding instruction.


how-to-get-started-360x80.png

To get started with Poll Everywhere, there are a few steps:

1. Teacher signs up/Login to Poll Everywhere

2. Create your questions on your laptop/desktop in the browser.

Using Poll Everywhere, you can choose from a large variety of poll activities, including multiple choice, open response, live word clouds, clickable images, up- and down-voting for Q&A, and rank order. Plus, you can write your questions in different languages as well!

3. Invite your students to respond.

They can go to a customizable web address on their mobile devices or computers (by scanning your QR code or inputting the address into their browsers ) or send a text message to participate. As a teacher, you’re encouraged to use a premium moderation feature, that will allow you to filter the response before they are presented on the shared screen.

3. Collect the results and share with your students.

You can simply use a live chart to present the results, and also change the color, font or images as you want. To display it, you can use a web browser or embed your results in your Powerpoint or Google Slides as well.


videopng-360x61.png

3 Comments

Filed under Not Subject Specific, Resources

Drag and Drop Programming: Scratch

whatisit.png
scratch


Scratch Logo by MIT Media Lab, modified (CC BY-SA)

Scratch is a simple drag and drop programming language for kids of all ages to learn the basics of coding. It is free and available both as a web and desktop application. ScratchJr for ages 5-7 is available on Android and iOS tablets. With Scratch you can create anything: animations, stories, narratives and games to which hardware such as the MakeyMakey can then be connected.

Features of the latest 2.0 Scratch version:

  • Student and teacher accounts
  • Cloud data
  • Drag and drop coding blocks
  • Upload files from computer
  • Draw your own elements
  • Custom blocks
  • Video sensing
  • Vector, Bitmap and Paint editors
  • Sound editor
  • Record project video
  • Project sharing

Why-is-it-relevant-360x82.png

Scratch is a simple and fun way for kids to learn about the basics of programming/coding and to practice computational participation. Using custom blocks that one can drag and drop, you can build a sequence of events and essentially code the actions to be performed by a certain element. You can add elements from the Scratch library, upload from your computer or draw your own. With ScratchJr kids even as young as 5 years old can learn to code! Visual programming, like that used in Scratch is relevant to the BC revised curriculum, in particular, the ADST curriculum.

ScratchEd provides teachers with an online space where they can view teaching resources for Scratch, engage with other educators and share their own stories. There, teachers can find examples of how they can apply Scratch to engage students in their subject matter and get inspired.

Check out this Co-Creative Activities for the 21st Century Kids guide to explore some ideas on how coding activities, both unplugged and plugged (using Scratch) can be integrated into the classroom.

Also take a look at the Creative Computing guide created by member of the ScratchEd research team at Harvard.


how-to-get-started-360x80.png

1. Go to the Scratch website or download the desktop program.

  • If you go to the website, you can either just try it out  (which won’t save any of your work) or first join Scratch and then create (this way you can save and share your work).

To join, click on the blue “Join Scratch” button and fill out all the required information. You will also have to confirm your email.

After signing in, from the toolbar on the top of the page click “Create” start a new project or “Explore” if you first want to look for some inspiration.

  • If you decide to download the software to your computer, click here and then choose for which platform you are downloading.

Open the file that you downloaded and install it.

2. The interface of the web based and desktop application are the same.

  • Drag and drop code blocks from the “Scripts” menu (outlined red) to the building space on the right. Connect blocks to define a series of actions.
  • Add a stage backdrop and new characters/objects called sprites (outlined orange) from the Scratch library, upload from computer or draw your own.
  • As you create new sprites click on them to program their actions.
  • View you final project on the project display screen (outlined blue). Click on the green flag to activate your project and the red stop sign to stop it.


videopng-360x61.png

Curious about creating a simple animation from scratch (no pun intended)? Below is a video demonstration using Scratch to build a solar system. The “remix” template is provided by the UBC Physics and Astronomy Outreach team. For detailed instructions, please check out their physics-at-home activity, with new challenges introduced throughout the summer. From adding comets to altering the Sun’s mass, there are many opportunities to unleash your creativity and make the project customized.

Leave a Comment

Filed under AppliedDesignSkillsTechnologies, Resources

Quiver: 3D Augmented Reality Coloring Apps


Quiver

whatisit.png

QuiverVision is a web based tool which offers several IOS-based Apps that enable children to do coloring in a 3D augmented reality way. The Apps include Quiver (Free), Quiver Education ($ 10.99 CAD for one- time purchase) as well as Quiver Fashion (free).

Their free packages include: Power Rangers Movie, Color Crafters 3D, Happy Cow, Fidelisaurus Fun & Games, Color Me Capable, Leo’s Colorful World, Murphy and Friends Games, Education Starter Pack, etc.


Why-is-it-relevant-360x82.png

As an Early Childhood Educator, Quiver is an amazing way to engage your students by bringing their coloring pages to life. They can use pencils, markers or crayons as they want, and they can have their 3D scenes colored in real time!

As of now Quiver Education comes with content designed around educational topics such as biology, geometry and the solar system. In addition, with a one-time purchase, updated content will be available to you all the time.


how-to-get-started-360x80.png

  1. Download and install the Quiver app of your choosing (Quiver, Quiver Education or Quiver Fashion) onto the selected device.
  2. Select any coloring page from the Quiver app and/or website and print it out.
  3. Color in the page using pencils, crayons, markers or paint.
  4. Use the Quiver App to bring the colored page to life on your device.


videopng-360x61.png

Leave a Comment

Filed under AR & VR, Not Subject Specific, Resources